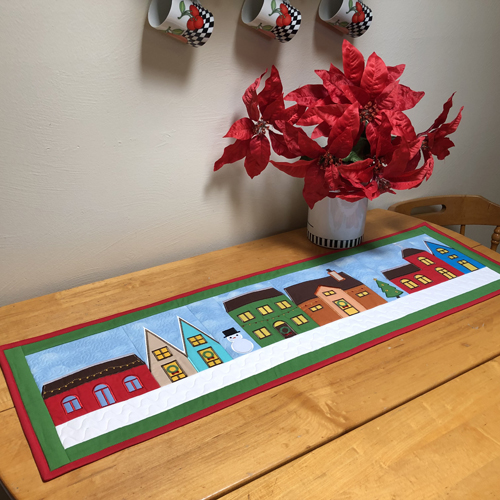
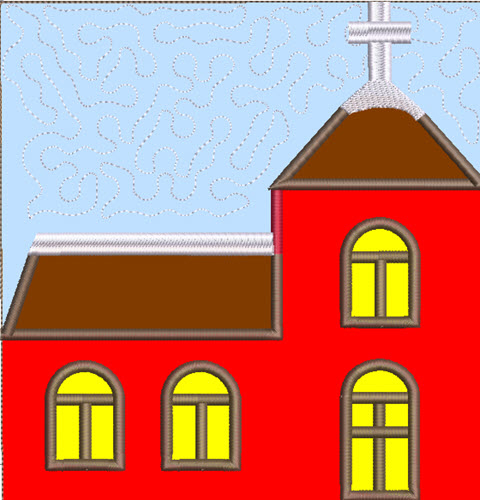
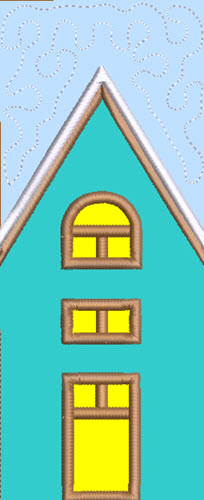
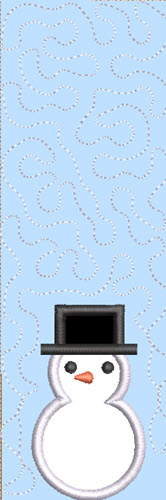
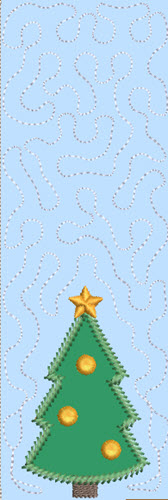
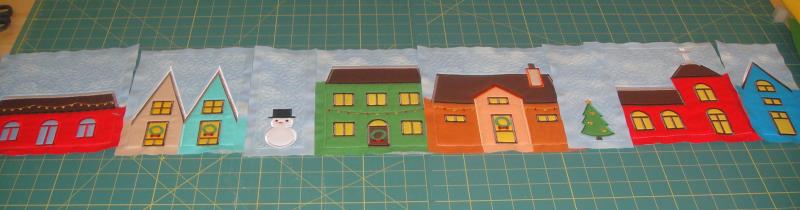
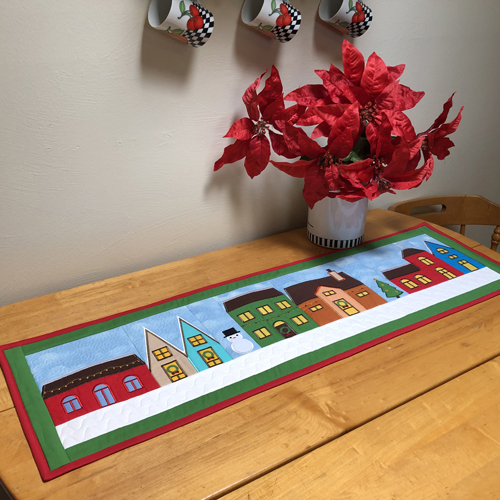
Create a family heirloom with this Christmas Village Table Runner. All the blocks are made and quilted in the hoop. The borders and binding are applied at your sewing machine.
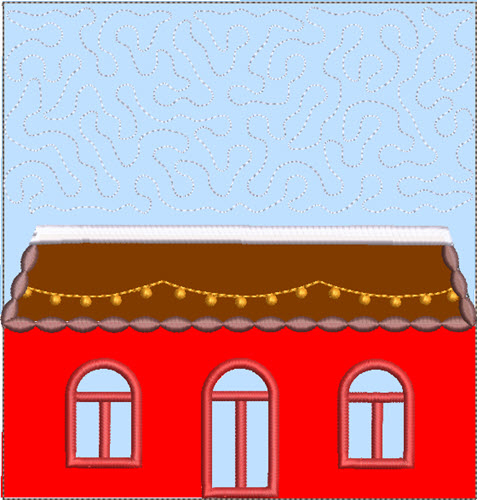
The sizes of the blocks vary in width to accommodate the size of the houses. You can easily change the length of the table runner by adding or deleting blocks. General instructions for appliqueing and quilting the block are given step by step. The other blocks are all made in the same fashion. Print out the color charts for each design to follow when making the blocks.
Step 1:
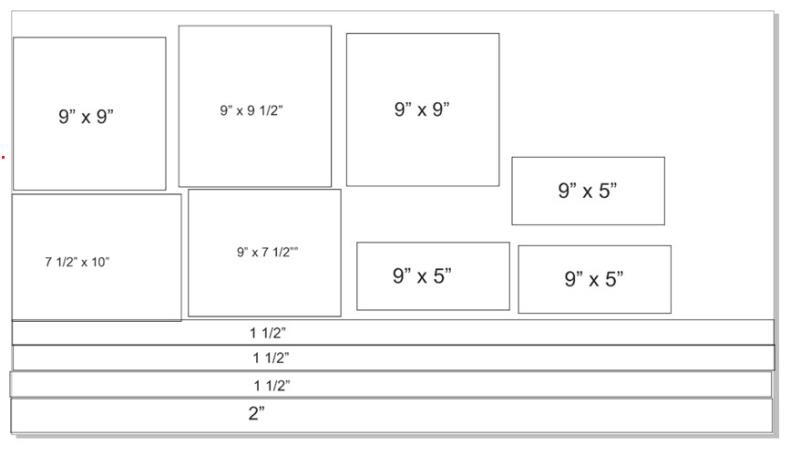
Before you start cutting the squares of Battilizer® for the blocks cut 1 2strip” strip and 3 1 ½” strips from the 45” length of the batting. This will insure that you have the lengths of Battilizer® needed for the snow and border pieces.
(Click Image to Enlarge)
Step 2:
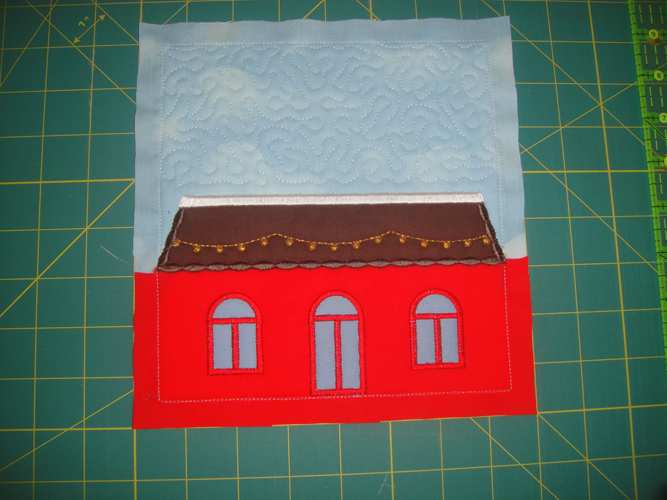
For CVQ01 cut: a. Battilizer® 9” x 9” b. Sky fabric 6” x 9.5” c. Red fabric 5” x 9” d. Brown fabric 3” x 9” e. Lt Blue fabric 2 2 ½” x 2 ½” and 1 3 ½” x 2 ½” f. Heat N Bond Lite® the same sizes as listed in “e” g. Stabilizer to fit your hoop
Iron the small applique pieces in “e” and fuse the corresponding Heat N Bond Lite® to those pieces.
Step 3:
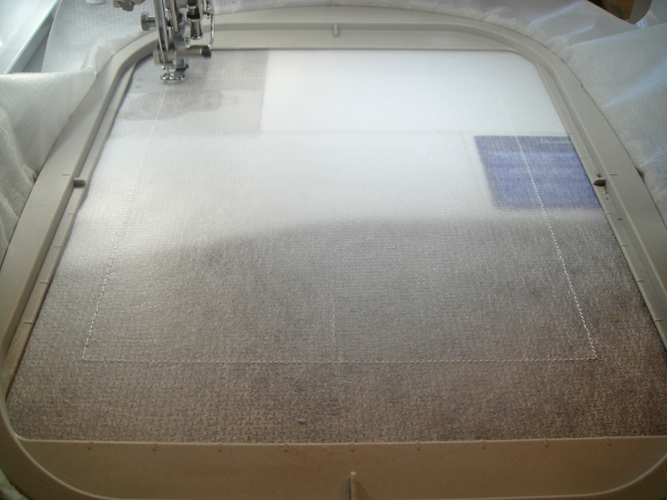
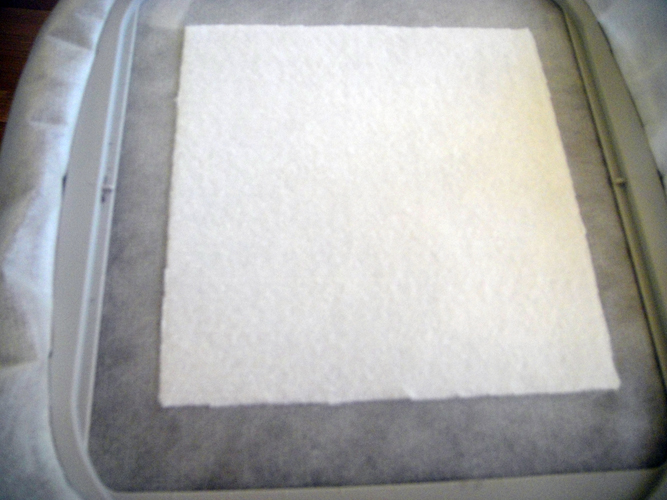
Tautly hoop the stabilizer and run the first color stop (CS) in white as a placement line for the Battilizer®.
(Click Image to Enlarge)
Step 4:
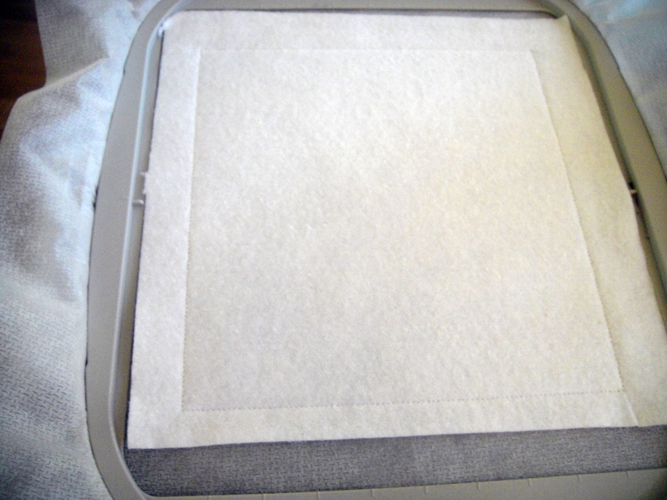
Spray adhesive on the back of the Battilizer® and position over the placement line so that the Battilizer® exceeds the placement line by ½” on all sides. Run CS 2 in white to tack down the Battilizer®.
(Click Image to Enlarge)
Step 5:
Trim the Battilizer right up next to the tack down stitches. This will reduce the bulk in the seams when joining the blocks together.
(Click Image to Enlarge)
Step 6:
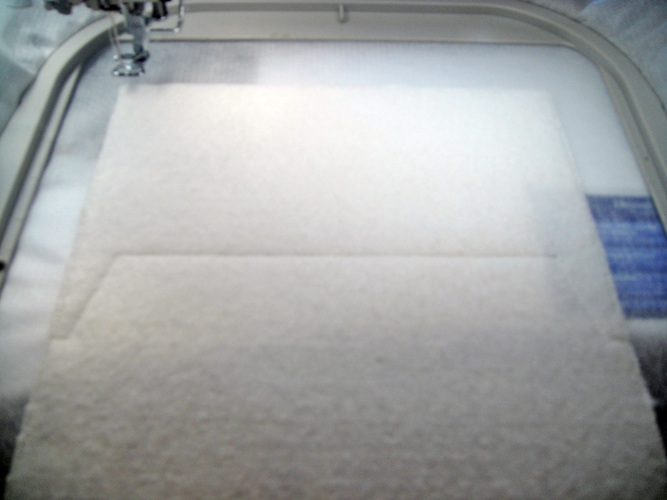
Run CS 3 in white thread as a placement line for the sky.
(Click Image to Enlarge)
Step 7:
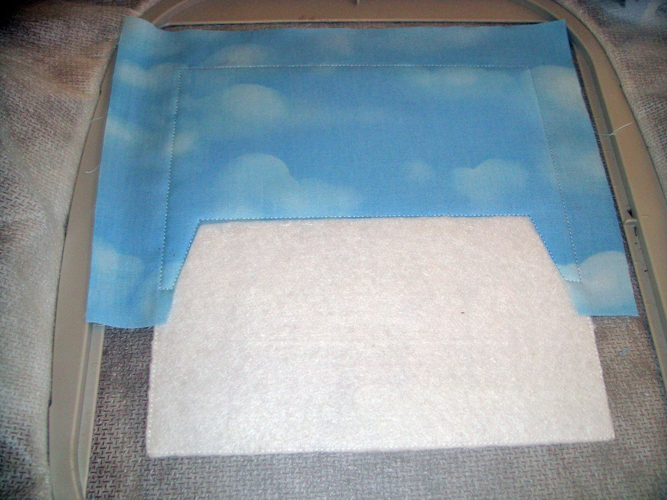
Switch to water soluble thread in the top of your machine. It will be used for the placement lines and the tack down stitches for the next few color changes. We use water soluble thread on an applique that will be situated on the outer edges of the block. We do this so that if these stitches show after the blocks are joined together we can easily remove these stitches with a little water. Spray adhesive on the back of the sky blue fabric and position over the placement lines so that the fabric exceeds the placement stitches by at least ½” on the sides and top of the block. Run the next CS to tack down the fabric. Trim the fabric right next to the tack down stitches on the inside of the block. Leave all the fabric on the sides and the top of the block in place.
(Click Image to Enlarge)
Step 8:
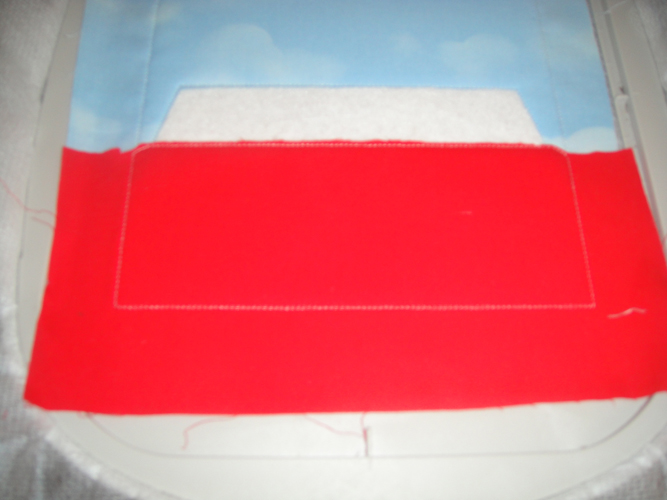
Run the next CS as a placement line for the red house fabric. Spray adhesive on the back of the fabric and position over the placement lines so that the fabric exceeds the sides and bottom of the block by at least ½”. Run the next CS as a tack down stitch. Trim the top of the house only. Let the red fabric overlap the sky blue fabric in the seam allowances.
(Click Image to Enlarge)
Step 9:
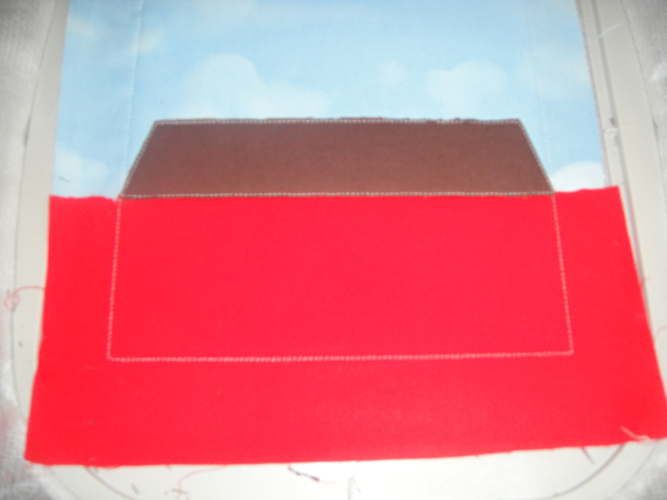
Run the next CS as the placement line for the roof fabric. Spray adhesive on the brown roof fabric and position over the placement lines. Run the next CS to tack down the fabric. Trim right next to the tack down stitches all the way around the roof.
(Click Image to Enlarge)
Step 10:
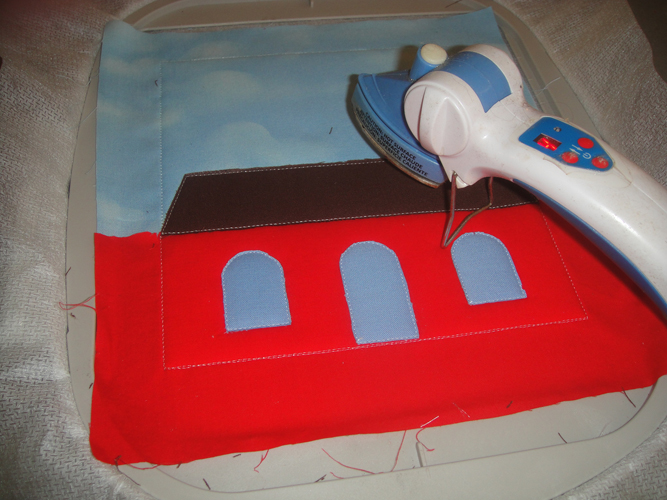
You can switch to regular embroidery thread for the next 6 CSs to applique the windows and door to the block. Heat N Bond Lite has been used on these small pieces to make them easier to handle and to be able to trim them right up next to the tack down lines with a minimum of fraying. After the windows and doors are trimmed press with an applique iron.
(Click Image to Enlarge)
Step 11:
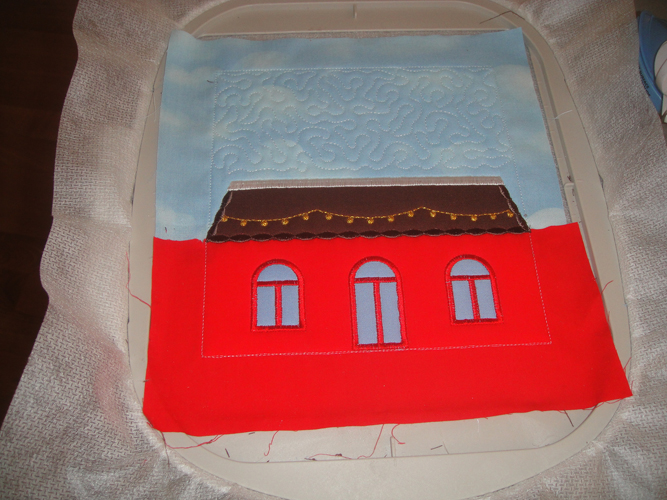
Follow the color chart to complete the block. You can use metallic thread for the Christmas lights if desired. Note, no back fabric was put on this block before the quilting was stitched. The back fabric will be applied to the back of the table runner after the blocks are joined together.
(Click Image to Enlarge)
Step 12:
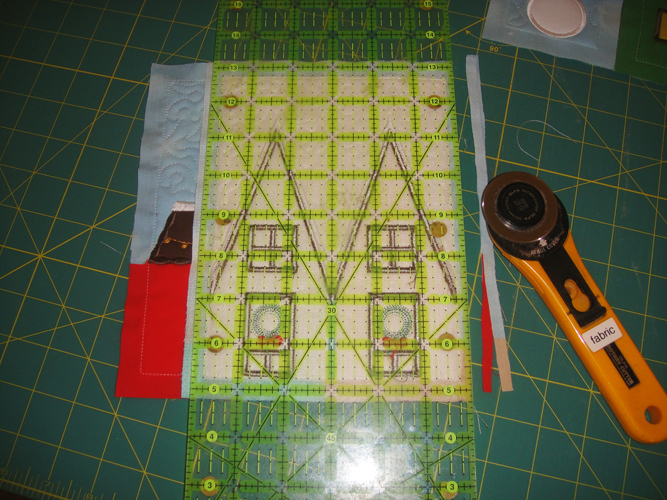
Trim all seam allowances of the block to ½”.
(Click Image to Enlarge)
Step 13:
(Click Image to Enlarge)
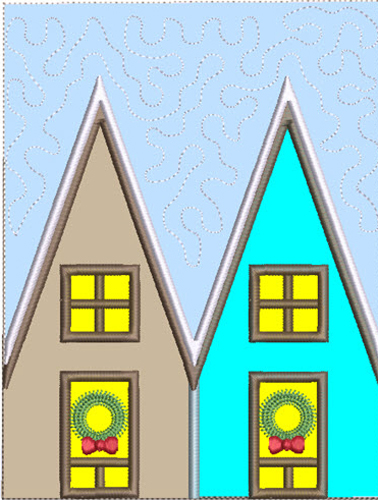
For CVQ02 cut: a. Battilizer® 7 ½” x 10” b. Sky blue 7 ½” x 7 ½” c. Tan fabric 7 ½” x 5” d. Aqua fabric 7 ½” x 5” e. Yellow/gold fabric 2 2 ¼” x 2 ¼” f. Yellow/gold fabric 1 3 1/2” x 2 ¼” g. Heat N Bond Lite® to correspond to small appliques in e and f. h. Stabilizer to fit your hoop Assemble using the same techniques as described above.
Step 14:
(Click Image to Enlarge)
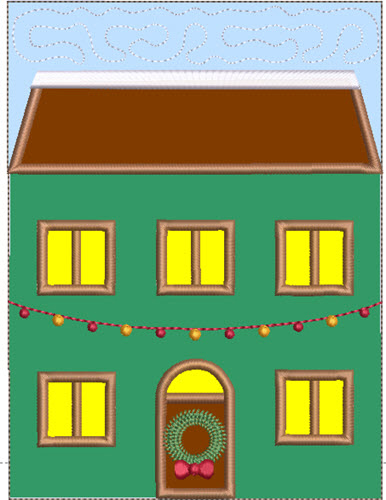
For CVQ03 cut: a. Battilizer® 9” x 7 1/2” b. Sky fabric 4.5” x 7 1/2” c. Green fabric 7” x 7 1/2” d. Brown fabric 7” x 2 1/2” e. Yellow/gold fabric 6 2” x 2” f. Brown fabric 3 ½” x 2” g. Heat N Bond Lite® the same sizes as listed in “e” and “f” h. Stabilizer to fit your hoop Assemble using the same techniques as described above.
Step 15:
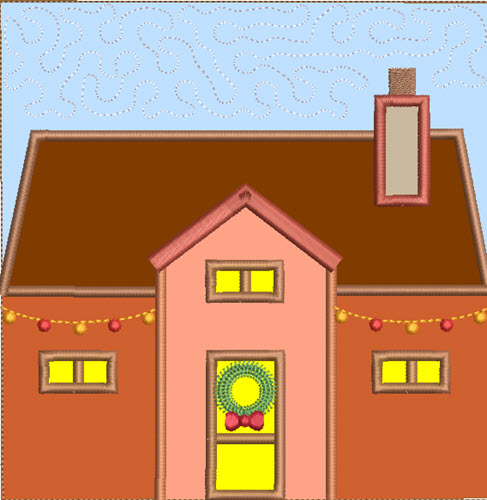
For CVQ04 cut: a. Battilizer® 9” x 9” b. Sky fabric 9 ¼” x 6” c. Terra Cotta 2 5” x 4” d. Peach 6” x 3 ½” e. Tan 2 ½” x 1 ½” f. Yellow/gold 3 2 ½” x 1 ½” and 1 2 ½” x 3 ½” g. Heat N Bond Lite® the same sizes as listed in “e” and “f” h. Stabilizer to fit your hoop Assemble using the same techniques as described above.
Step 16:
For CVQ05 cut: a. Battilizer® 9” x 9 ½” b. Sky fabric 7” x 9” c. Red fabric 6 ½” x 9” d. Brown fabric 2 ½” by 5 ½” and 2 ½” x 4 ½” e. Yellow/gold fabric 3 2 ½” x 2” and 1 3” x 2” f. Heat N Bond Lite® for the same sizes as listed in “e” g. Stabilizer to fit your hoop Assemble using the same techniques as described above.
Step 17:
(Click Image to Enlarge)
For CVQ06 cut: a. Battilizer® 9” x 5” b. Sky fabric 6” x 5” c. Turquoise fabric 8 ¼” x 5” d. Yellow/gold fabric 2 at 2” x 2” and 1 at 3” x 2” e. Heat and Bond Lite® the same sizes as listed in “d” f. Stabilizer to fit your hoop Assemble using the same techniques as described above.
Step 18:
(Click Image to Enlarge)
For CVQ07 cut: a. Battilizer® 9” x 4” b. Sky fabric 9” x 4” c. White fabric 3 ½” x 3” d. Black fabric 2” x 2” e. Heat N Bond Lite® same sizes as “c” and “d” f. Stabilizer to fit your hoop Assemble using the same techniques as described above.
Step 19:
(Click Image to Enlarge)
For CVQ08 cut: a. Battilizer® 9” x 4” b. Sky fabric 9” x 4” c. Green fabric 4” x 3” d. Heat N Bond Lite® same size as “c” e. Stabilizer to fit your hoop Assemble using the same techniques as described above.
Step 20:
Lay out your completed blocks in the order in which you would like to sew them together.
(Click Image to Enlarge)
Step 21:
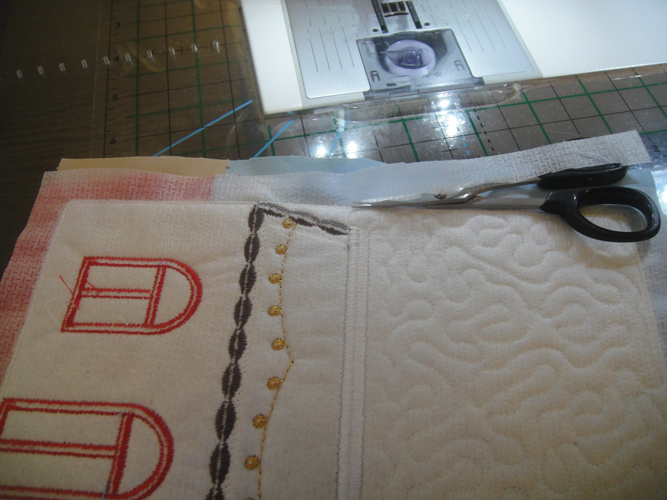
If desired, before stitching your blocks together remove the stabilizer from the sides of the blocks to reduce bulk.
(Click Image to Enlarge)
Step 22:
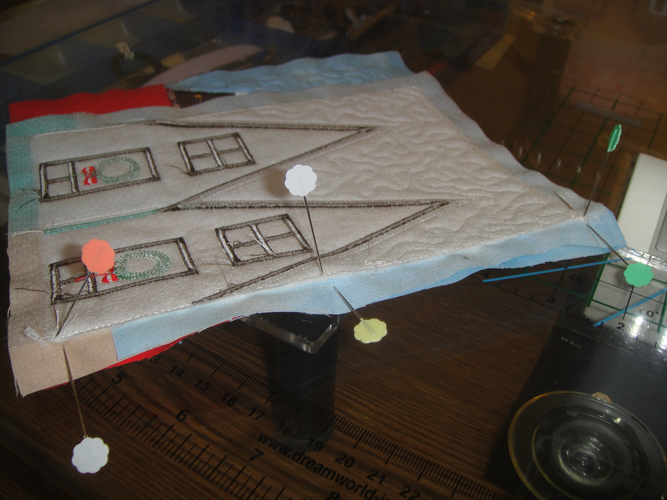
We are now going to stitch the sides of the blocks together along the water soluble thread stitching lines. To achieve accurate placement place two blocks right sides together. Push a pin horizontally through the corner of top block and straight through the top corner of the stitching on the lower block. Place a vertical pin through both blocks close to the horizontal pin. Repeat in the lower corner of the stitching on the blocks. Place additional horizontal and vertical pins lining up the stitching on the top and lower blocks at the center of the block.
(Click Image to Enlarge)
Step 23:
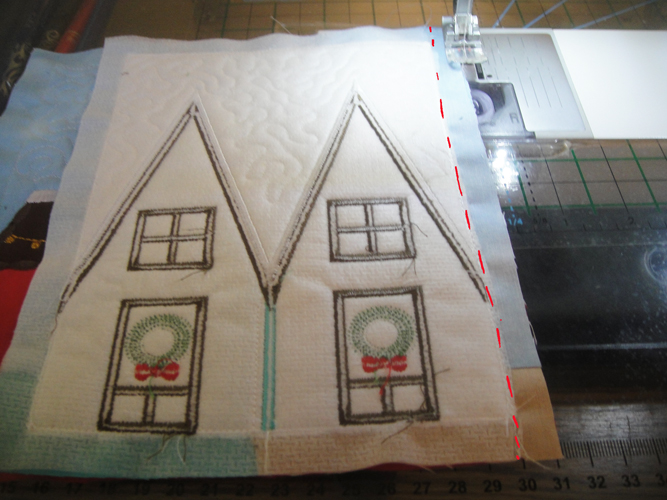
Remove the horizontal pins and stitch the two blocks together. A stitch length of 3mm is suggested.
(Click Image to Enlarge)
Step 24:
Trim the seam allowance to ¼”.
(Click Image to Enlarge)
Step 25:
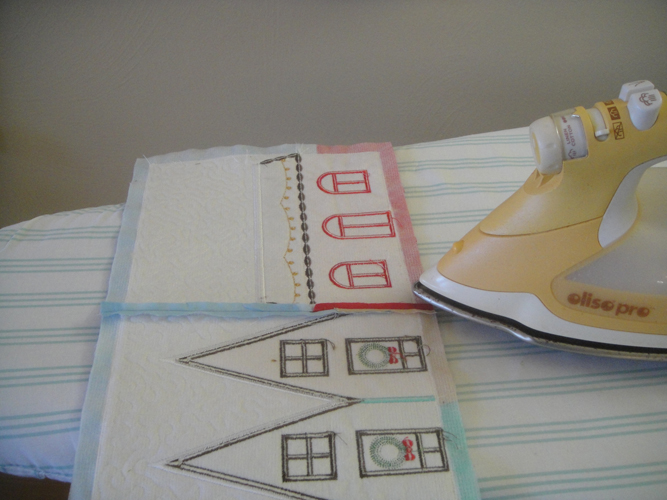
Press the seam flat and then press it open. Repeat Steps 21 through 25 to join all the blocks together.
(Click Image to Enlarge)
Step 26:
(Click Image to Enlarge)
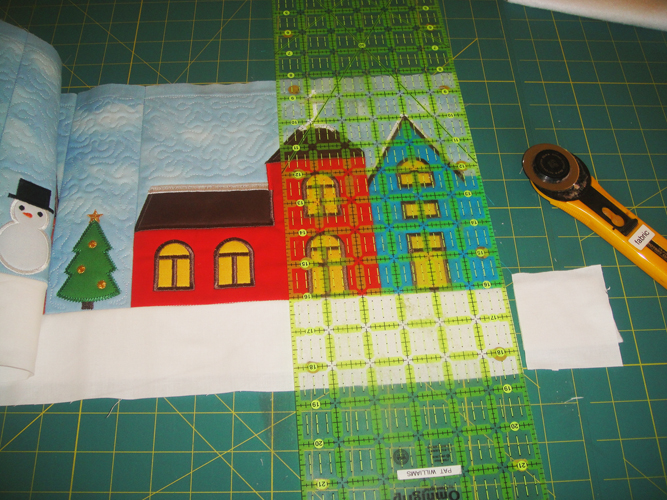
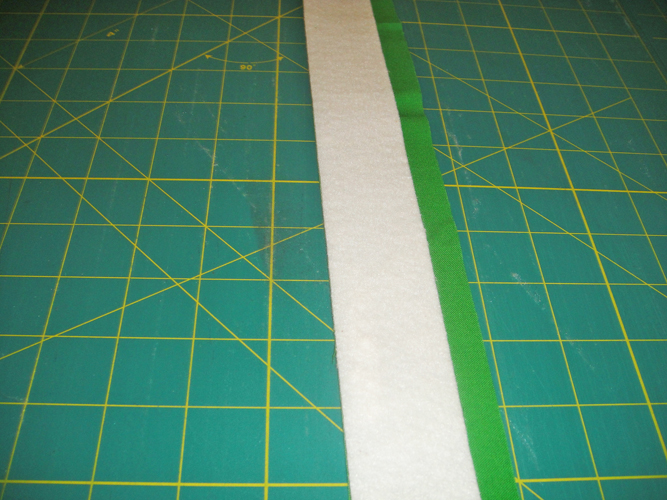
For the snow under the houses cut a 3” wide strip of fabric the width of the material, take the 2” strip of Battilizer® cut in Step 1, spray it with adhesive and position it down the middle of 3” strip of white fabric. This will leave you a ½” seam allowance down each long side of the strip.
Step 27:
Pin or clip the white strip across the bottom of the houses right sides together. Have the ends pf the snow strip exceed the ends of the quilt blocks by a couple of inches at each end. Stitch along the water soluble thread seams at the bottom of the blocks to join the snow to the block. Trim the seam allowance to ¼” and press towards the house blocks.
(Click Image to Enlarge)
Step 28:
Trim the ends of the snow strip even with the house blocks.
(Click Image to Enlarge)
Step 29:
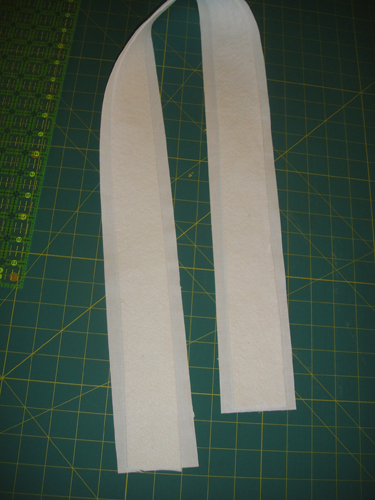
Cut 3 strips of green fabric 2” wide for the borders. Spray the 3 ½” wide strips of Battilizer® cut in Step 1 with spray adhesive. Align one edge on the Battilizer® with one long edge of a green strip to make the border strip with a single ½” seam allowance. Repeat for the other two border strips.
(Click Image to Enlarge)
Step 30:
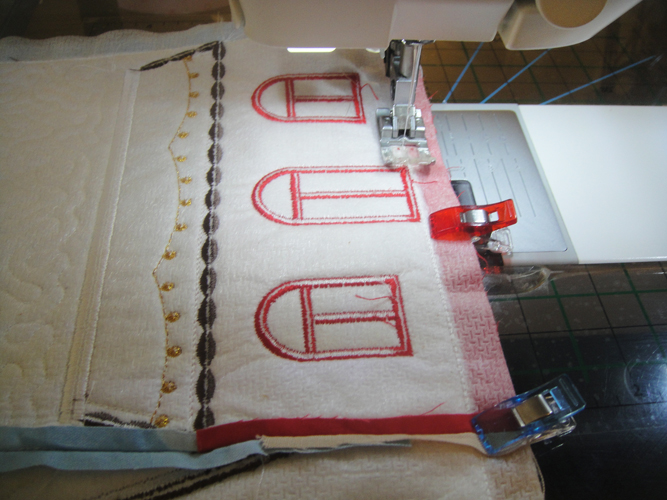
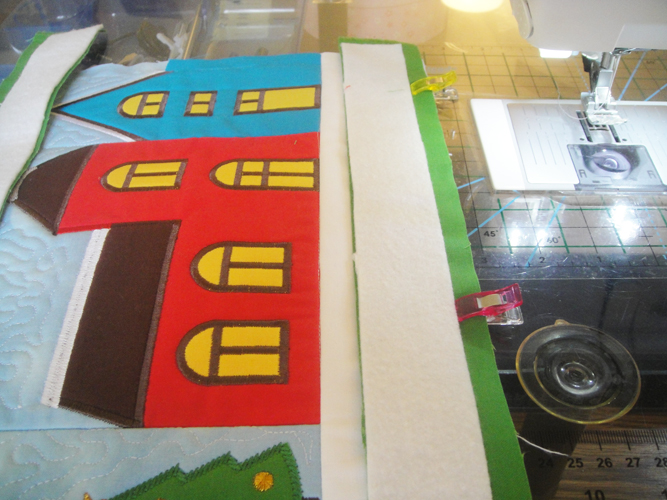
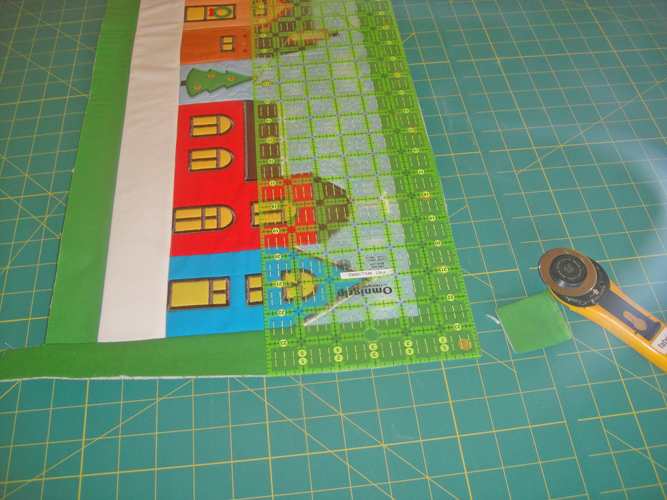
Due to the length of the table runner it is important to attach the green border strips to the top and bottom of the table runner before attaching the side strips. Sew the top and bottom strips to the table runner with a ½” seam allowance. Trim the seam allowance to ¼” and press towards the border strips.
(Click Image to Enlarge)
Step 31:
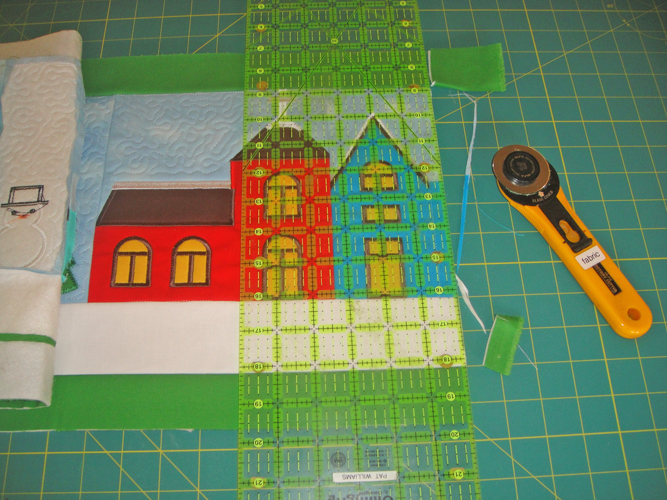
Trim off the excess of the border strips on both ends of the table runner.
(Click Image to Enlarge)
Step 32:
Attach the side border strips as in Step 30 and 31.
(Click Image to Enlarge)
Step 33:
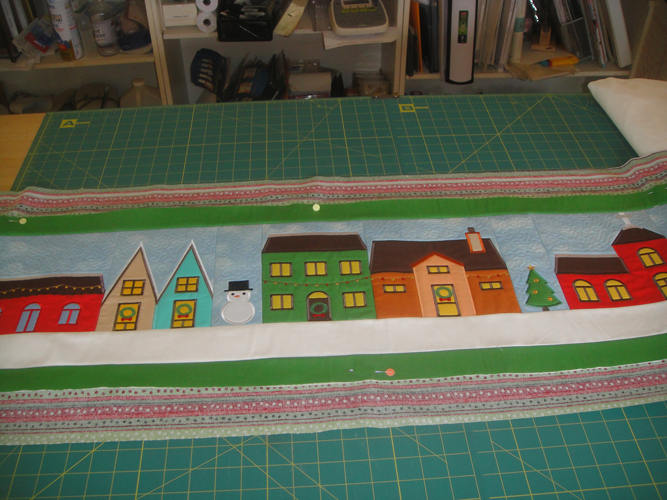
Cut a rectangle of the Christmas print back fabric 45” x 16 ½”. Place this fabric right side down on your work surface and center the table runner right side up on top. Pin it around the border to hold it in place.
(Click Image to Enlarge)
Step 34:
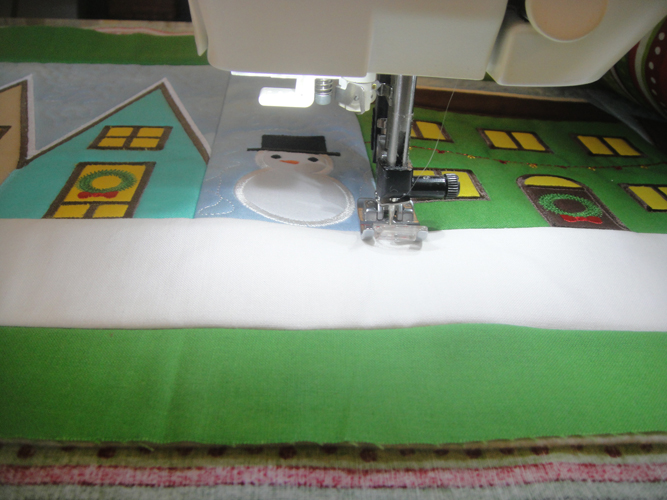
With invisible thread in the top of your sewing machine stitch in the ditch between and around all blocks of the table runner. You can also stitch some wavy lines in the snow or use a programed Serpentine stitch across the snow if desired. Stitch a basting stitch around the outside edges of the table runner to tack the borders into place. Too keep the back of the table runner neat, bring the bobbin thread to the top of the work before you start stitching each quilting section. Trim the background fabric to the size of the table runner.
(Click Image to Enlarge)
Step 35:
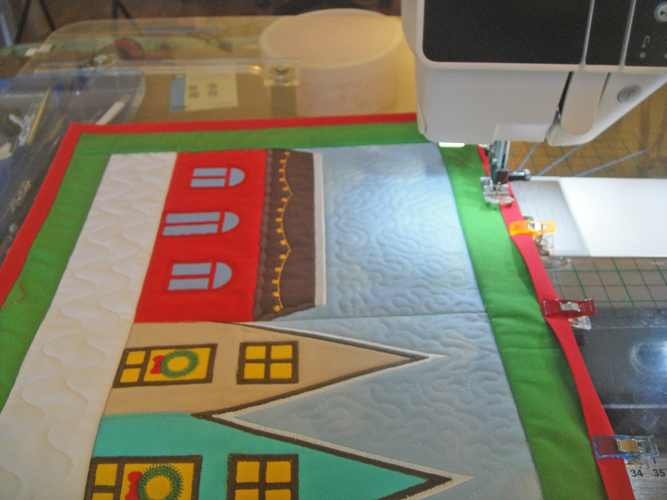
Cut 3 2 1/14” strips of red fabric the width of the fabric for binding. Join the red strips together with a diagonal ¼” seam. Press the seams open. Fold the binding strips in half lengthwise and press. Apply the binding with your desired method.
(Click Image to Enlarge)
Step 36:
Congratulations your Christmas Village Table Runner is complete!
Award winning Digitizer, Embroidery Educator, Author and a Consultant to the Industry, Pat Williams has 30 years of experience in the embroidery industry. Pat has won multiple awards for her digitizing expertise including the 2007 Impressions Awards Grand Championship, Best of Show as well as the 1st and 2nd Place Awards. Pat’s love of digitizing has afforded her the opportunity to write numerous articles for Impressions magazine in the United States and Images Magazine in Europe. In 2001 Pat was named “Embroidery Educator of the Year.” For many years Pat taught digitizing seminars at the ISS Shows in Long Beach, CA and for Compucon software. She now resides in Tucson, AZ.