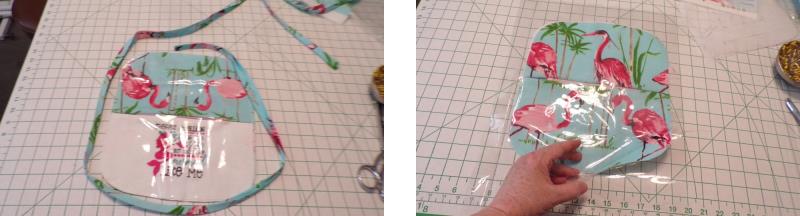
If you have never sewn with vinyl, this is a great first project. There will be a tip shared for sewing with this product. Vinyl is available on a roll and usually sold near the upholstery section of the fabric store. Use a fun beach-themed fabric that will form the background of the clear vinyl pockets. The outer pockets are accessed through a slit in the vinyl over the zipper, and the inside pocket is accessed through the zipper area. Vinyl is not water-proof, but water-resistant and will help keep your valuables at the beach protected yet visible for easy access.
Step 1:
If you have never sewn with vinyl, this is a great first project. There will be a tip shared for sewing with this product. Vinyl is available on a roll and usually sold near the upholstery section of the fabric store. Use a fun beach-themed fabric that will form the background of the clear vinyl pockets. The outer pockets are accessed through a slit in the vinyl over the zipper, and the inside pocket is accessed through the zipper area. Vinyl is not water-proof, but water-resistant and will help keep your valuables at the beach protected yet visible for easy access.
(Click Image to Enlarge)
Step 2:
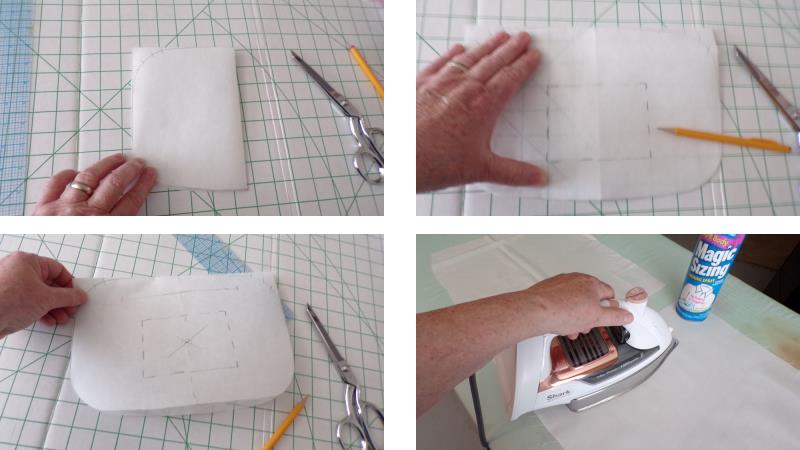
Use the pencil and paper to create the pattern. Actually, what worked out very well was using the hoop for the machine! It was the size needed and the corners were already rounded, so the inside of the hoop was traced and the top edge was made straight. An additional ½” seam allowance was added to the top edge to create the seam allowance to insert the zipper.
(Click Image to Enlarge)
Step 3:
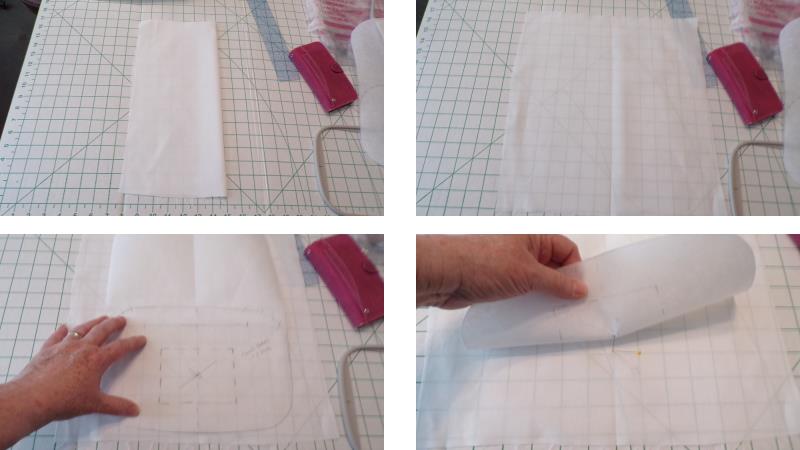
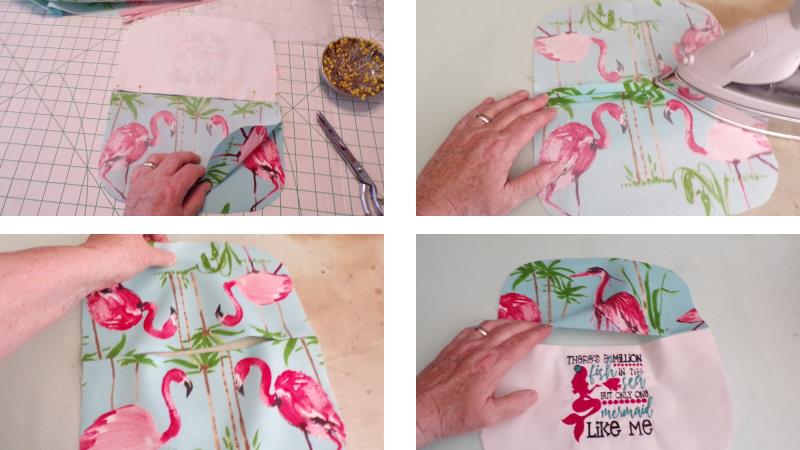
To find the center mark to center the embroidery for stitching, Quarter fold the paper pattern and make a mark. Press the white fabric well.
(Click Image to Enlarge)
Step 4:
Fold the fabric to find the center and transfer the center mark on the pattern to the fabric.
(Click Image to Enlarge)
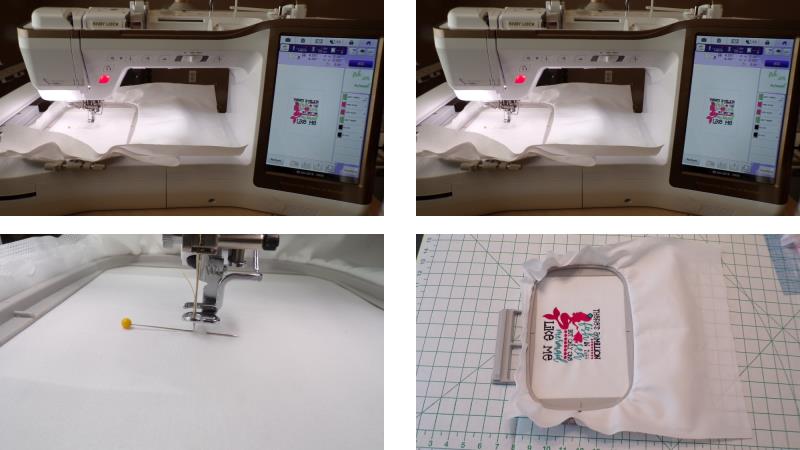
Step 5:
Hoop the fabric with the appropriate stabilizer. Load the embroidery design (gmd00199) on the machine. Rotate the design if needed. Align the needle to the center mark and stitch the design.
(Click Image to Enlarge)
Step 6:
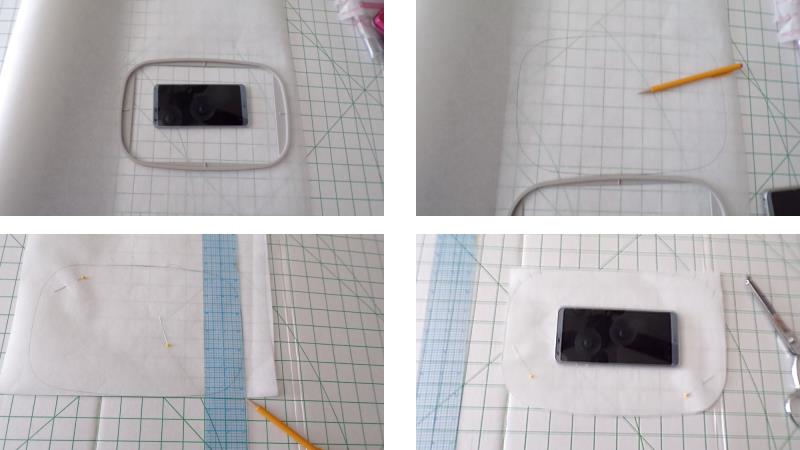
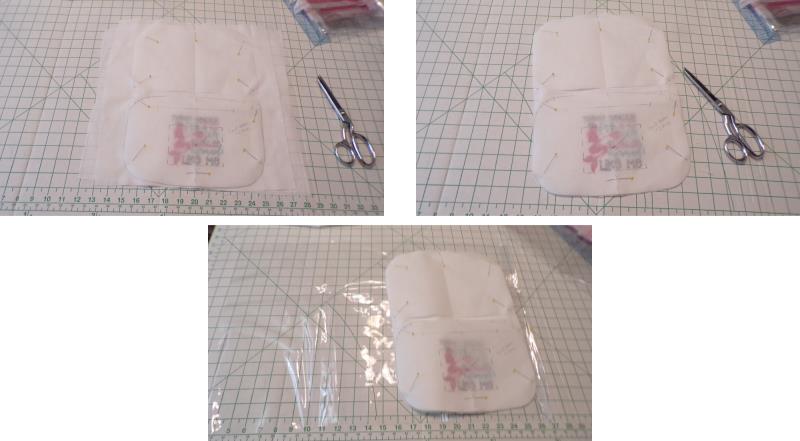
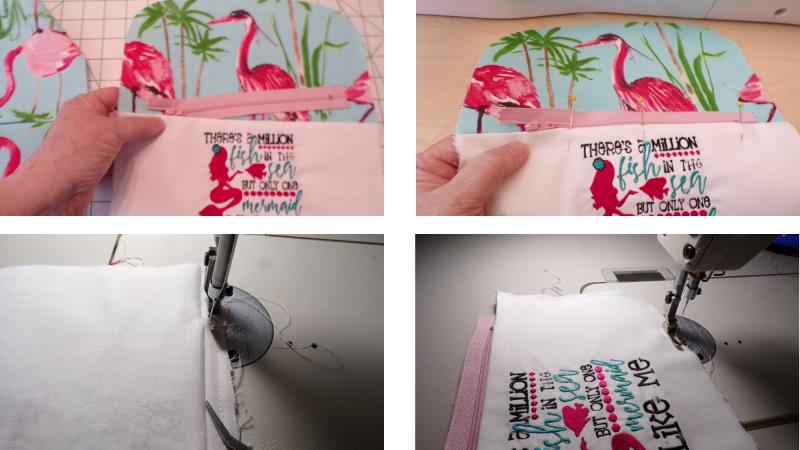
For the project design, polymesh stabilizer was used and left in the whole front piece instead of trimming it away. Cut out the pattern piece—don’t forget to add the ½” seam allowance at the top (if you wish, cut a second pattern piece to make cutting the vinyl easier. Center the pattern piece over the embroidery and cut out the embroidered piece. Also, cut two pieces of vinyl.
(Click Image to Enlarge)
Step 7:
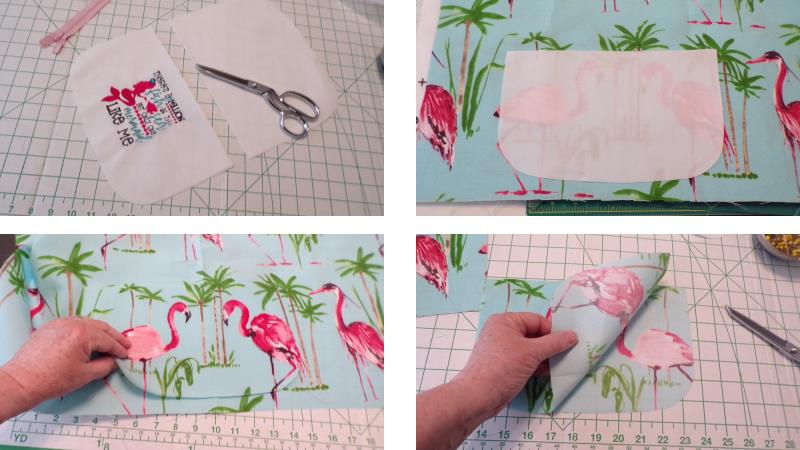
Use the pattern piece to fussy cut three pieces of the print fabric.
(Click Image to Enlarge)
Step 8:
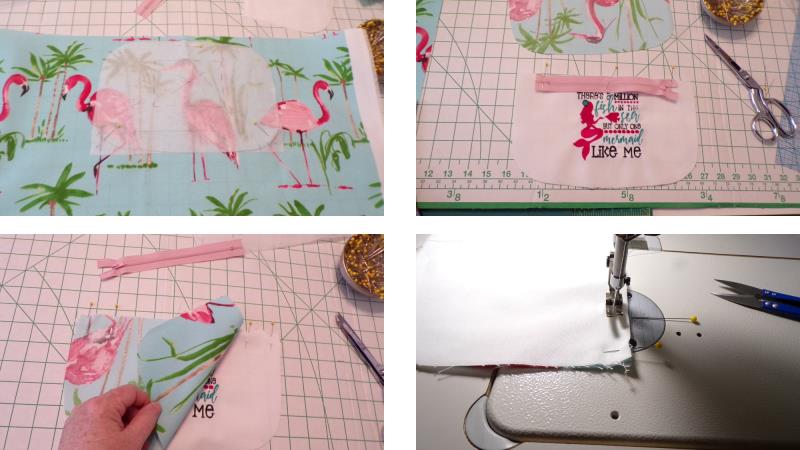
Next will be to insert the zipper after stitching the ends of the top edge closed and leaving and opening for the zipper. Center the zipper over the top edge of the embroidered piece; mark the beginning and end of the zipper. Remove the zipper. With right sides together, place one print piece on top of the embroidered piece, matching cut edges and pin them together. Now stitch each end of the top area from the zipper end mark to the cut edge of the fabric; repeat for the other side.
(Click Image to Enlarge)
Step 9:
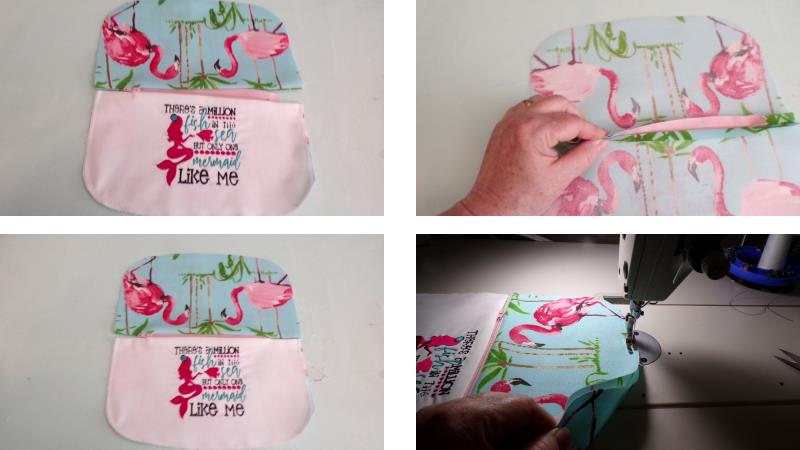
Repeat the steps of marking, placing fabric pieces together and stitching the ends for the remaining two print fabric pieces. Press the seams open. There will be an open area to insert the zipper.
(Click Image to Enlarge)
Step 10:
Insert one edge of the zipper tape as shown into the embroidered section seam allowance. Expose the seam allowances by placing the fabrics right sides together and use a zipper foot to stitch the zipper in place—the tape is sandwiched between the seam allowances. Bring the wrong sides of the fabric together and baste the remaining cut edges together.
(Click Image to Enlarge)
Step 11:
Repeat the steps for the remaining fabric pieces, sandwiching the other edge of the zipper into the seam allowance, stitching the zipper, and basting the remaining edges.
(Click Image to Enlarge)
Step 12:
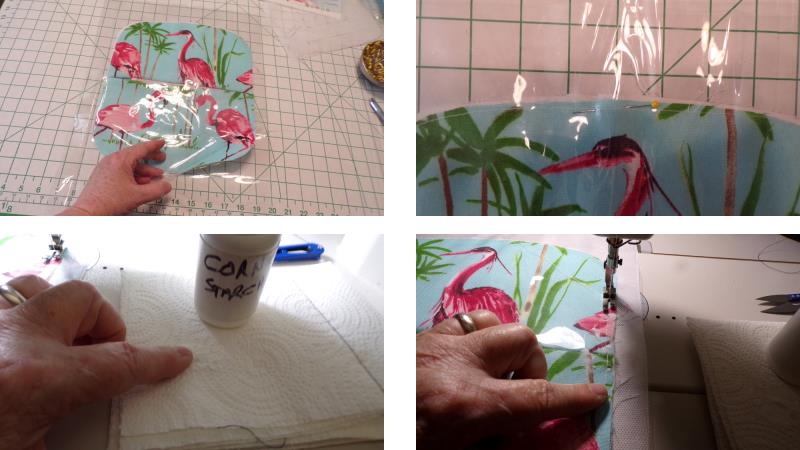
Lay the piece flat and place one piece of vinyl over the back. It is possible to pin the vinyl to the fabric—just be sure to pin within the seam allowance only. Here’s a hint: use a Teflon presser foot to stitch the vinyl easily. If you don’t have a Teflon foot for your machine, sprinkle a tiny amount of either baby powder or corn starch on a paper towel. Dip your finger in the powder and then spread that very tiny amount over the vinyl where the stitching will be. The powder prevents the metal presser foot from sticking to the vinyl while stitching! Baste the vinyl to the back fabric.
(Click Image to Enlarge)
Step 13:
Flip the piece over and repeat basting the remaining piece of vinyl to the front. At this point the zipper is covered by the vinyl. Use a seam ripper and very carefully cut the vinyl open just over the zipper area; a single slit will do it.
(Click Image to Enlarge)
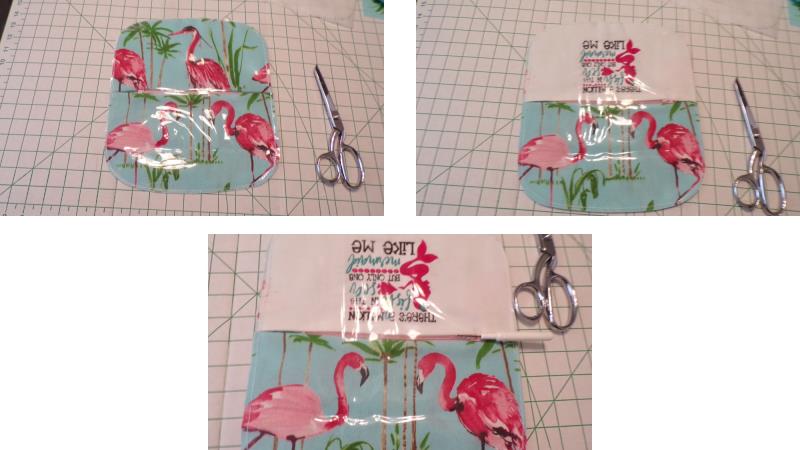
Step 14:
Now the area is open and you can store things under the vinyl from the front. Open up the zipper, and the entire back is encased and you can slip things in through the zipper, too. To reinforce the zipper ends, keep the case flat and top stitch on each side of the end seams through all layers.
(Click Image to Enlarge)
Step 15:
Use pre-purchase or handmade binding to finish the outer edge of the pouch.
(Click Image to Enlarge)
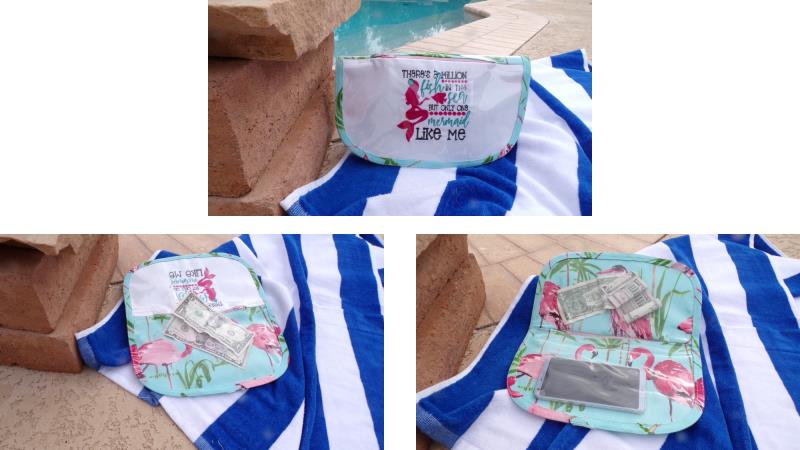
Step 16:
The slit at the top allows easy access to anything put in the back area, or open the zipper, and valuables can be safely tucked away yet in clear view.
(Click Image to Enlarge)
Step 17:
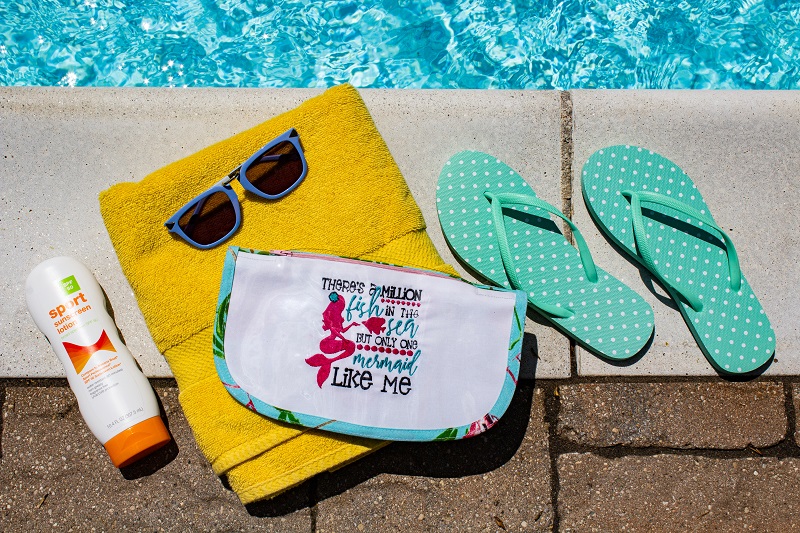
Congratulations! You have a cute case for the pool or beach. Make one for each member of your family using their favorite embroidery design and beach or pool themed fabric.
Ramona Baird has been in the embroidery industry for over 23 years. She and her husband owned a commercial and retail embroidery store in Arizona for many years. She is an experienced digitizer having been mentored by award-winners Pat Williams and Lindee Goodall. Ramona is a contributor to “Creative Machine Embroidery” magazine having 5 covers to her credit. Ramona has worked for Wilcom America and served many years as Education Director for the American Sewing Guild. With a degree in fashion design, she is able to design and execute patterns which Pat Williams says are “out of the box” in creativity and application. Ramona likes to challenge the boundaries of embroidery and bring new and exciting designs, ideas, and projects to EmbroideryDesigns.com. She wants embroiderers of all levels to increase their skills and enjoyment in using their embroidery machine for gift-making and personal pleasure.