Because all chairs or couches are different, general directions will be given. Measurements will be given for the project shown. You’ll have to do measurements and determine yardage and adjust for the pockets and length of the caddy for your piece of furniture.
This caddy used two designs and were stitched in the same color. The pockets are embroidered, stitched down to the top layer of fabric and then the back is stitched on, and in the final step, the bottom portion is flipped to the back and stitched in place to form a pocket to hold magazines or a newspaper.
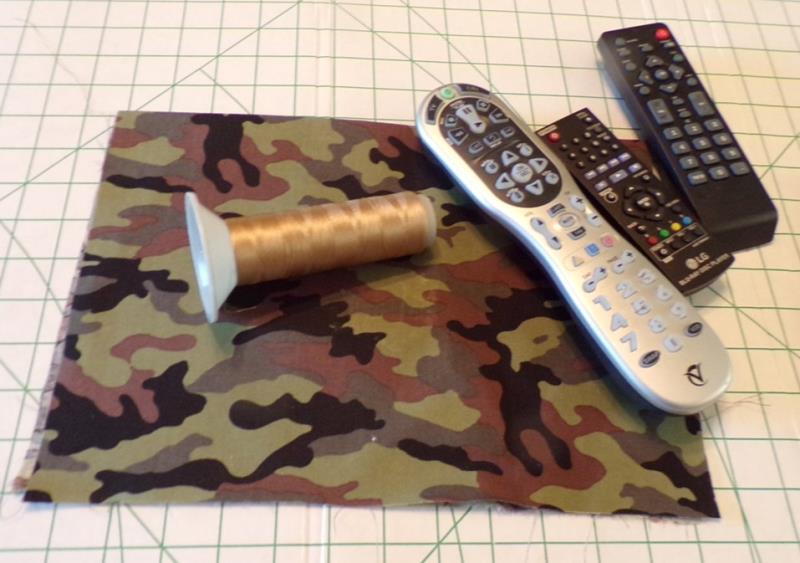
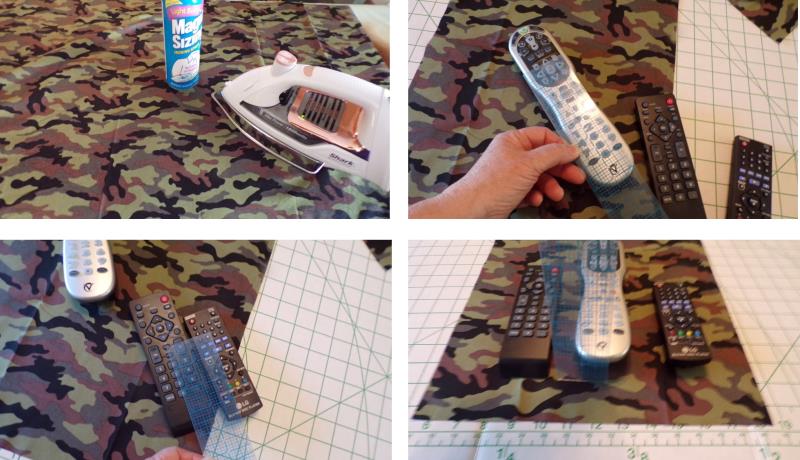
Step 1:
Gather the materials and read through the instructions before beginning. Print out a paper template of the designs. Gather the remotes you want in the caddy. They will be measured to determine the pocket depth and height.
(Click Image to Enlarge)
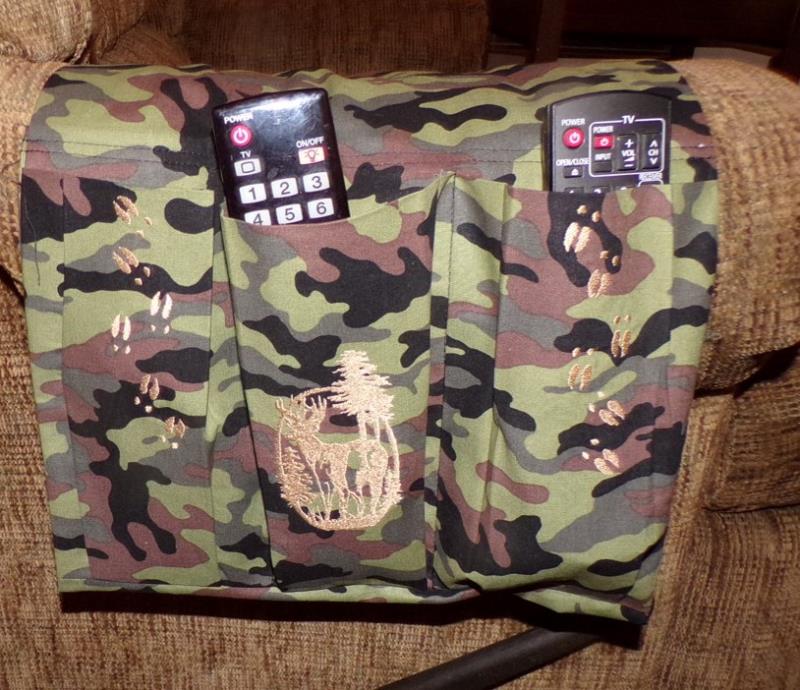
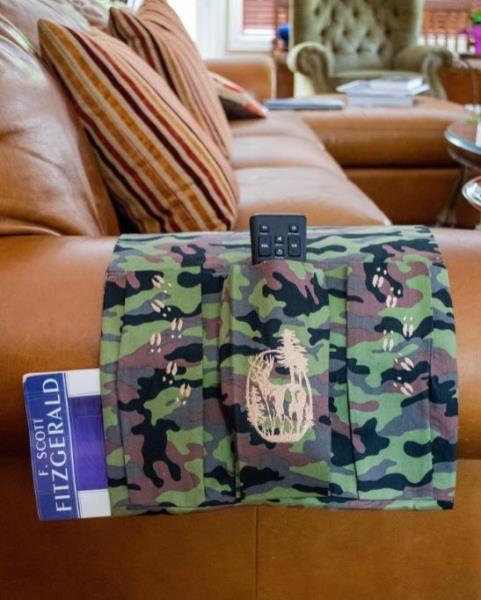
Step 2:
This is how the project caddy looks. Dimensions and directions are given for this caddy. If you want to vary the size and length of the one you are making, don’t forget to adjust the measurements when purchasing and cutting fabric.
(Click Image to Enlarge)
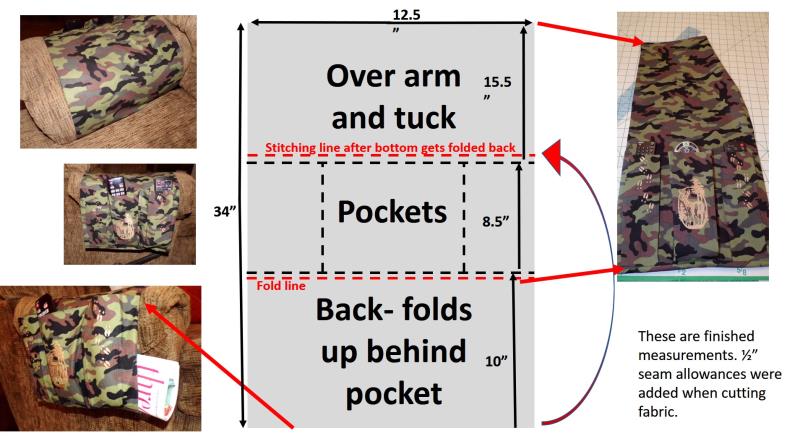
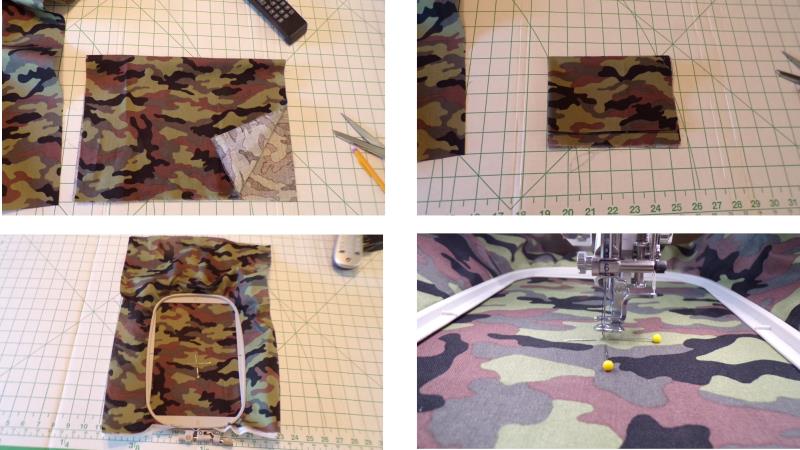
Step 3:
Here are the final dimensions of the project caddy. Two large pieces of fabric are needed for the front and back. For the project, the pocket pieces were cut larger than needed so the fabric totally fit in the embroidery hoop for stitching, then they were cut down after stitching. The three pocket pieces are long pieces that are folded in half after embroidery and then stitched on to the front fabric piece.
(Click Image to Enlarge)
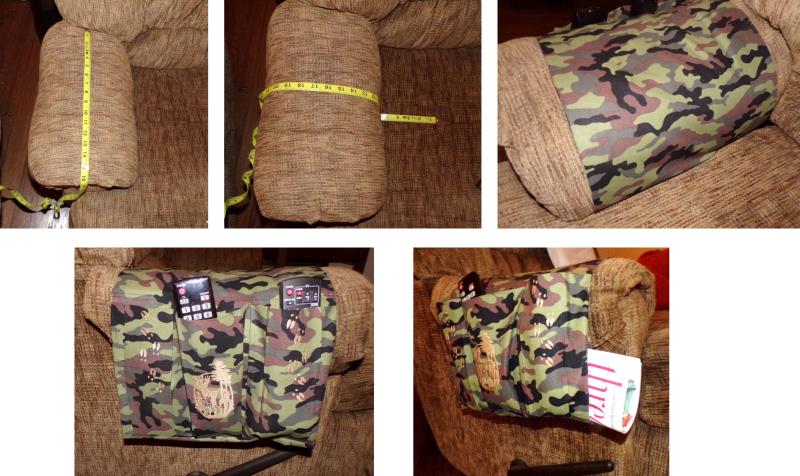
Step 4:
To begin, measure the length of the arm of the chair or sofa and determine how wide you’d like the caddy to be. Next, determine the length needed to go over the arm and down each side, plus how much you’d like tucked into the seat. Remotes will be measured in length and depth for cutting the pocket fabric. The bottom portion folds back behind the pockets as the last step in construction to hold a magazine or newspaper.
(Click Image to Enlarge)
Step 5:
Press the fabric well. Determine the pocket sizes needed. For the project, three pockets were done. Measure the length of each remote and the depth of the remote. Of course, you’ll want the pockets larger than the remotes because inevitably they’ll hold other things as well. The pockets are created with tucks on the bottom.
(Click Image to Enlarge)
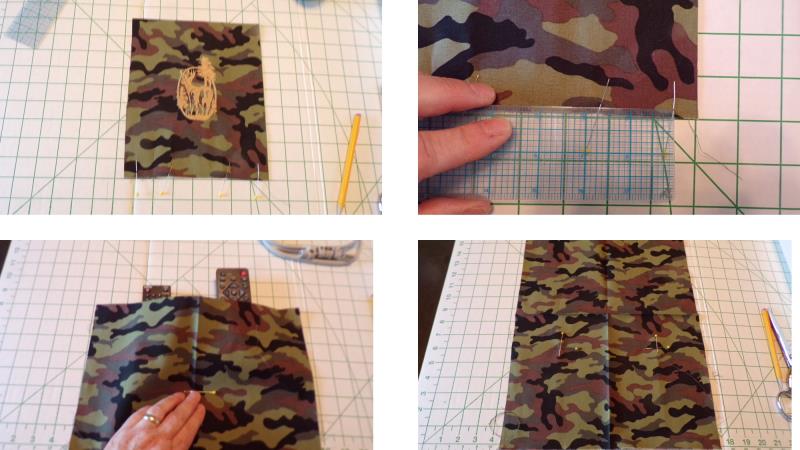
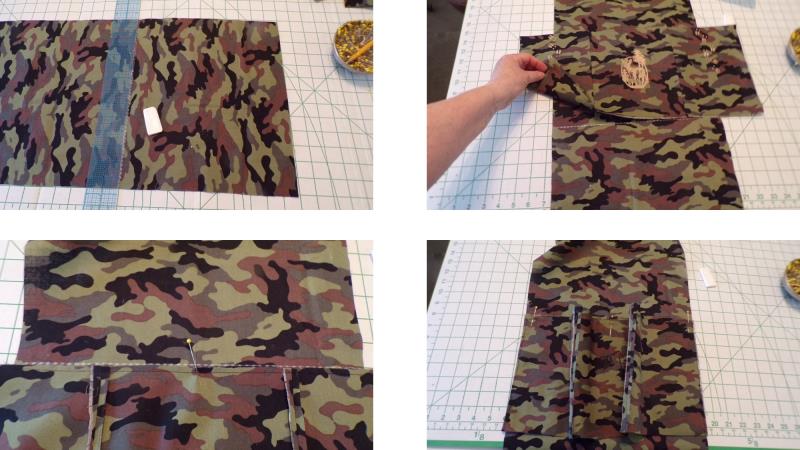
Step 6:
This is how the yard of camo fabric was cut for the project (includes seam allowances) The pocket is cut double the length needed so that after embroidery it is folded in half, with the fold being at the top of the pocket.
(Click Image to Enlarge)
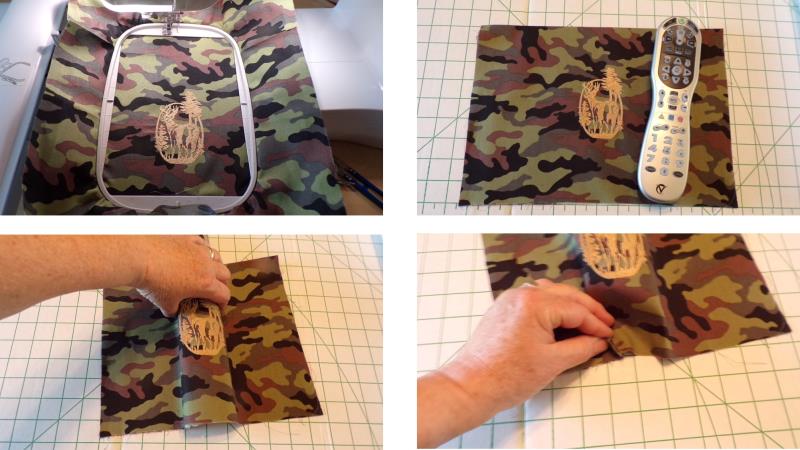
Step 7:
Begin with the center pocket. Measure and cut the amount needed. Pockets for the project were cut larger than needed and then cut down to size before being sewn to the top piece. Decide on the design placement and mark. Hoop the fabric and load the deer design (ed0583) on the machine. Place the hoop on the machine and align the needle to the mark.
(Click Image to Enlarge)
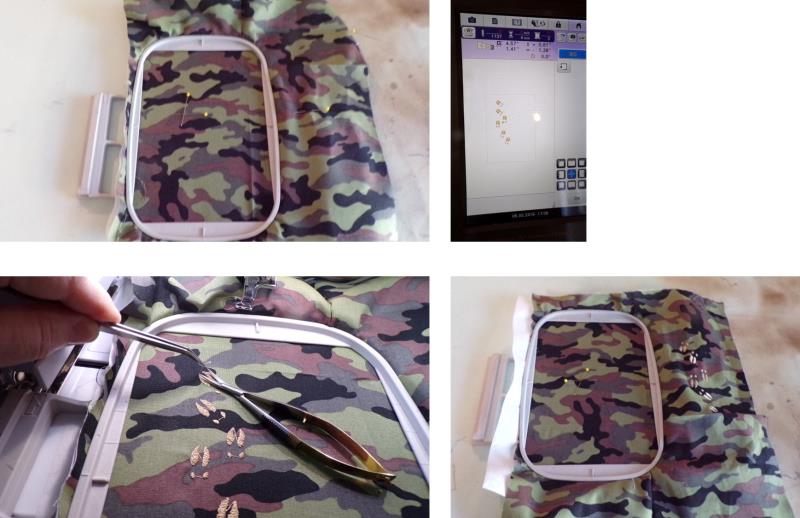
Step 8:
Stitch the design. Fold the pocket, wrong sides together in half. Determine the depth of the pleats for the bottom of the pocket.
(Click Image to Enlarge)
Step 9:
Measure the depth of the pleats for each side, plus the seam allowance. Cut off the excess fabric.
(Click Image to Enlarge)
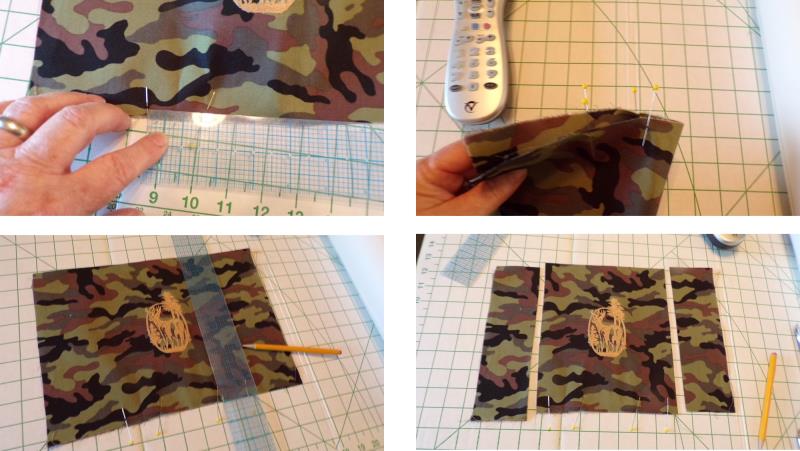
Step 10:
Re-measure the pleats and pin them into the bottom of the fabric. Next measure fabric for the pockets on each side.
(Click Image to Enlarge)
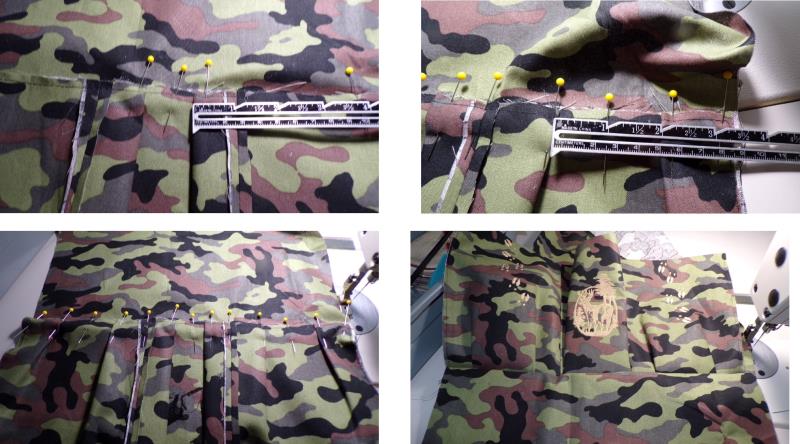
Step 11:
Mark the placement of the deer tracks (design mh0191bl). Hoop the fabric with stabilizer and stitch the design. For this project the tracks were run up one pocket, and down the other.
(Click Image to Enlarge)
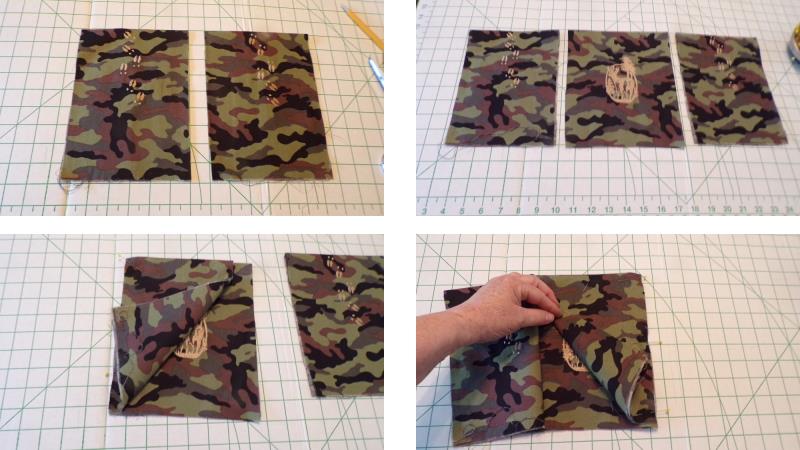
Step 12:
Fold the fabric to create pockets. Lay the pockets with the deer in the center, and tracks on each side. Place the outer pockets over the center and pin along each seam.
(Click Image to Enlarge)
Step 13:
Stitch the seam and press open. Baste along the sides and bottom.
(Click Image to Enlarge)
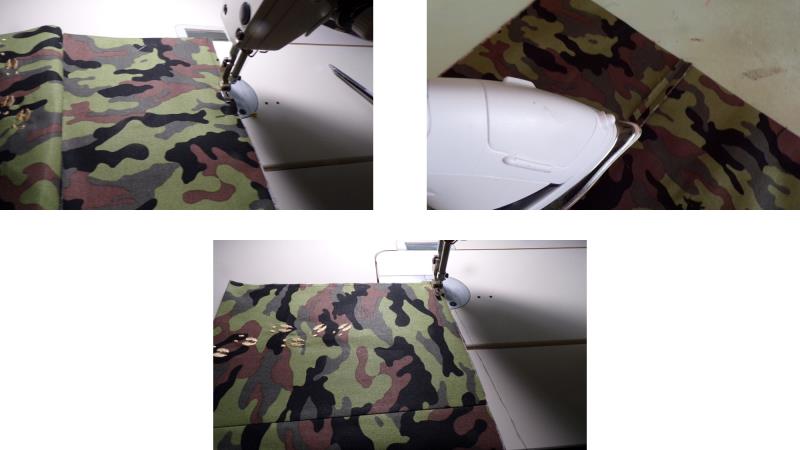
Step 14:
On the front piece of fabric, square a placement line for the bottom of the pocket about 11” up from the bottom cut edge of the fabric. Lay the bottom of the pocket along the line, with right sides together. Pin the center of the middle pocket to the center of the line. Form the pleats in the pockets.
(Click Image to Enlarge)
Step 15:
Measure to be sure the pleats are equal distance from the center of each pocket as shown. Pin the pocket/pleats in place along the line and then stitch the seam allowance. Flip the pocket up and baste the sides of the pockets to the sides of the top fabric.
(Click Image to Enlarge)
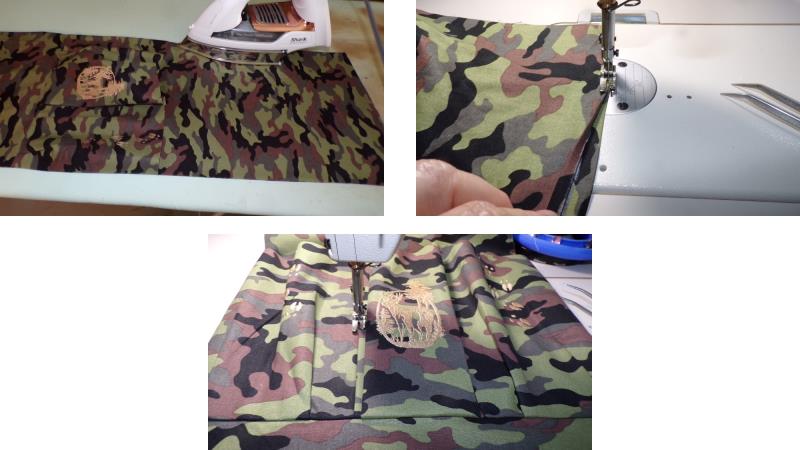
Step 16:
Press the fabric well. With right sides together, place the back fabric over the front and stitch along all sides, leaving an opening at the bottom. Turn the fabric right side out through the opening.
(Click Image to Enlarge)
Step 17:
Press the seam edges well then turn the bottom open edges in and stitch the opening closed. Stitch the pockets in place by pinning the pocket seam straight on the fabric and then stitching through all layers.
(Click Image to Enlarge)
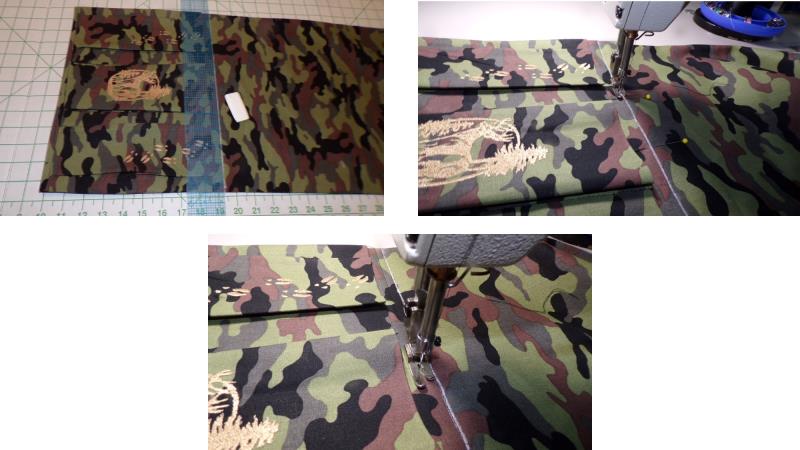
Step 18:
The last step is to fold the portion of the fabric below the pockets to the back of the pocket area. Mark a straight line above the pockets. Fold the bottom fabric to the back so the bottom edge of the fabric is about ¼” above the line on the front. Stitch the bottom back edge to the back along the line drawn.
(Click Image to Enlarge)
Step 19:
Congratulations on completing the pocket organizer. The pockets are roomy for remotes and other items, and the fabric that was folded back is handy to hold a newspaper or favorite magazine.
Ramona Baird has been in the embroidery industry for over 23 years. She and her husband owned a commercial and retail embroidery store in Arizona for many years. She is an experienced digitizer having been mentored by award-winners Pat Williams and Lindee Goodall. Ramona is a contributor to “Creative Machine Embroidery” magazine having 5 covers to her credit. Ramona has worked for Wilcom America and served many years as Education Director for the American Sewing Guild. With a degree in fashion design, she is able to design and execute patterns which Pat Williams says are “out of the box” in creativity and application. Ramona likes to challenge the boundaries of embroidery and bring new and exciting designs, ideas, and projects to EmbroideryDesigns.com. She wants embroiderers of all levels to increase their skills and enjoyment in using their embroidery machine for gift-making and personal pleasure.