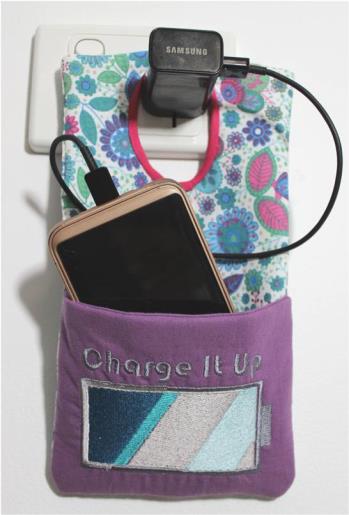
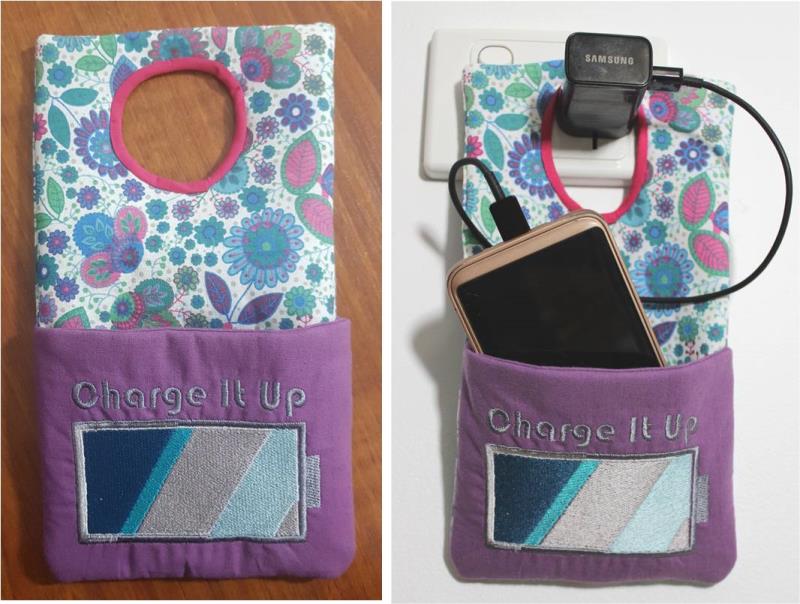
Charging cords not long enough to reach the bench? Sick of cords all over the floor? Create this brilliant charging pouch to hold your phone and cord whilst you re-charge your phone.
Be cautious when using this pouch not to leave it hanging for too long to avoid too much pressure on the charger plugged into the wall.
Step 1:
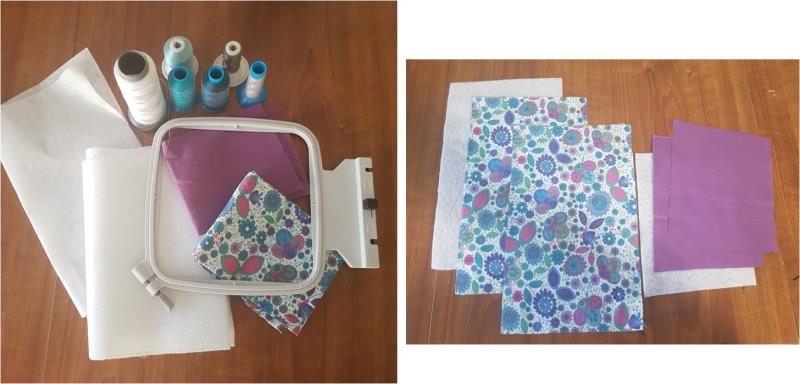
Gather the materials and read through the instructions before beginning and have a copy of the color sequence on hand to refer to. From the patterned fabric, cut 2 rectangles 10” x 6”. From the plain fabric cut 2 pieces 5” high x 6” wide at the base x 7” wide at the top. Then from the fusible fleece, cut 1 of each piece.
(Click Image to Enlarge)
Step 2:
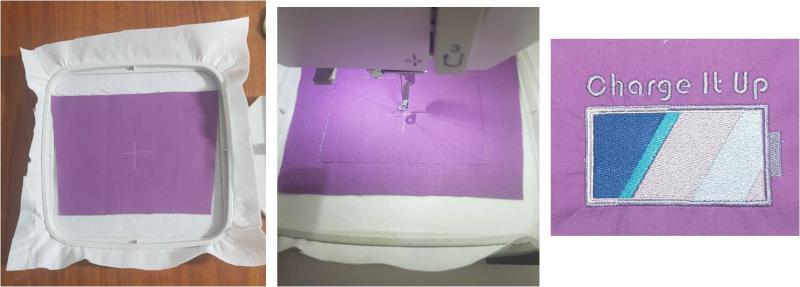
Mark the center of the trapeze shape, this will be the center of the embroidery design. Hoop the cutaway stabilizer then place the trapeze onto the stabilizer and ensure it is centered and that the wider edge of the trapeze is at the top. I have used a tackdown stitch to hold the fabric in place, you could also use spray adhesive. Stitch out the design, remove the design from the hoop and cutaway the excess stabilizer
(Click Image to Enlarge)
Step 3:
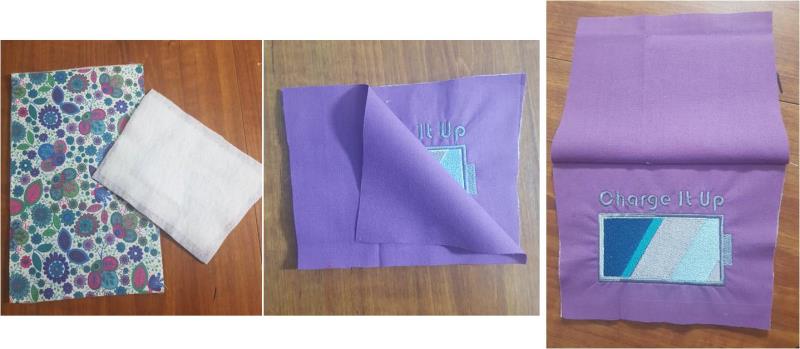
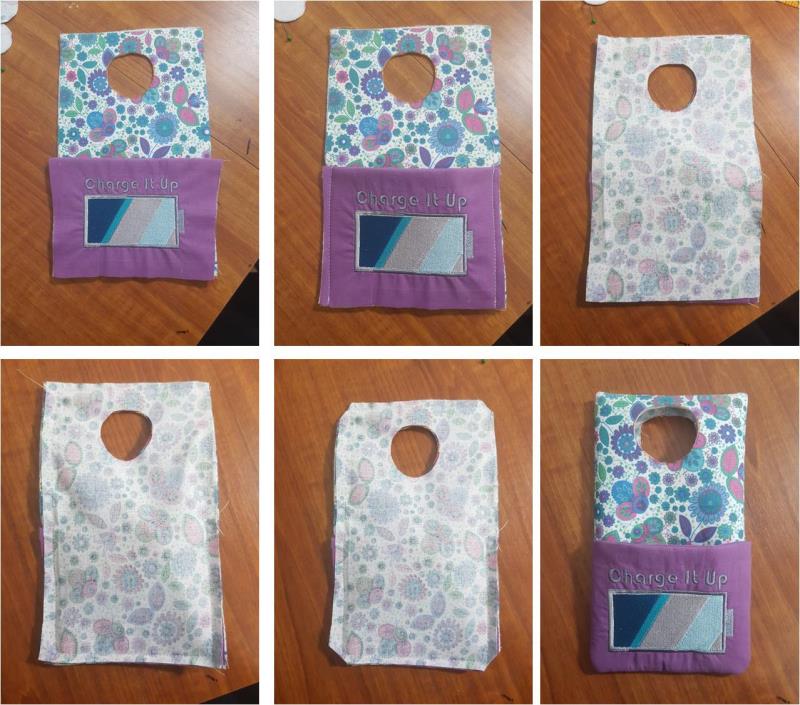
Fuse the fleece to the back of the embroidered panel and to the back of one of the patterned rectangles. Place the 2 trapeze shapes together, right sides facing and stitch along the top (widest) edge using a ¼” seam. Press the seam.
(Click Image to Enlarge)
Step 4:
On the patterned panel, measure across the width to find and mark the center. From the top (short edge), measure down and mark at 1” and 3”. Draw a 2” diameter circle and cut it out from both patterned panels.
(Click Image to Enlarge)
Step 5:
Using the patterned panel which has the fleece affixed to the back, place the pouch on the bottom of the patterned panel. You will find the top of the pouch is wider, this is correct. Match up the side seams and stitch the pouch down using a ¼” seam. Place the other patterned panel on top, right sides facing, and stitch through all layers all the way around using a ½” seam. Trim the corners then turn it right side out and push the corners out.
(Click Image to Enlarge)
Step 6:
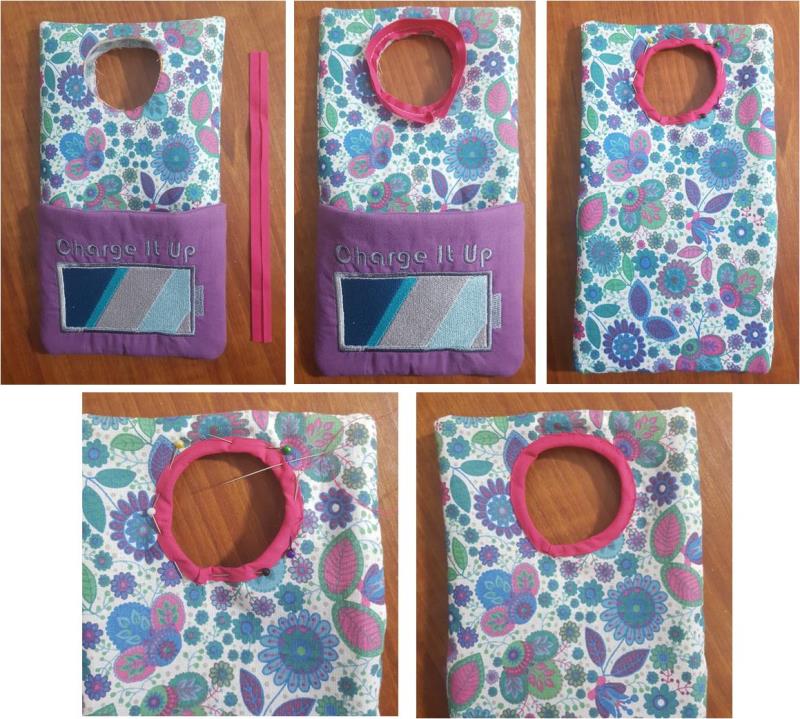
Cut an 8” piece of pre-made binding to use to bind the circle. Unfold the binding and attach it to the raw edge of the circle on the front panel, stitch on the crease line all the way around the circle. Turn the binding through to the back and pin in place then hand stitch it down. Press the binding.
(Click Image to Enlarge)
Step 7:
Get charging! Your phone charging pouch is complete, well done.