{{superHeaderAds.title}}
Live Chat
Embroidery Designs
Welcome, Embroiderer
Login
Kitchen Wet Bag
{{mainImageAlt || (productInfo._source && productInfo._source.name) || ''}}

Kitchen Wet Bag Embroidery Project

By   Kylie Burke   on   April 29, 2019

PROJECT DETAILS

SKILL LEVEL
Intermediate
TIME REQUIRED
01:45
Description

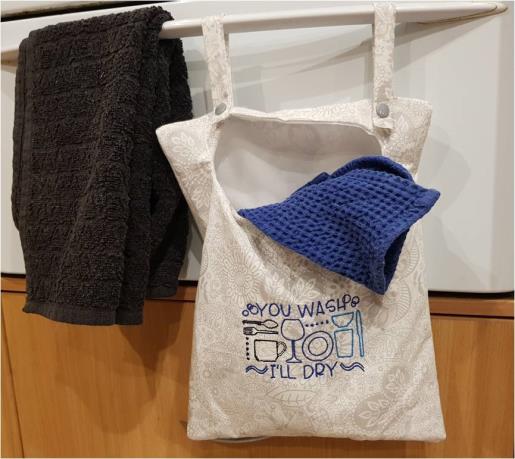
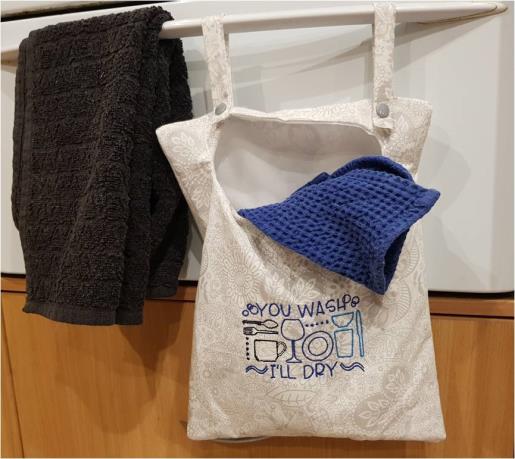
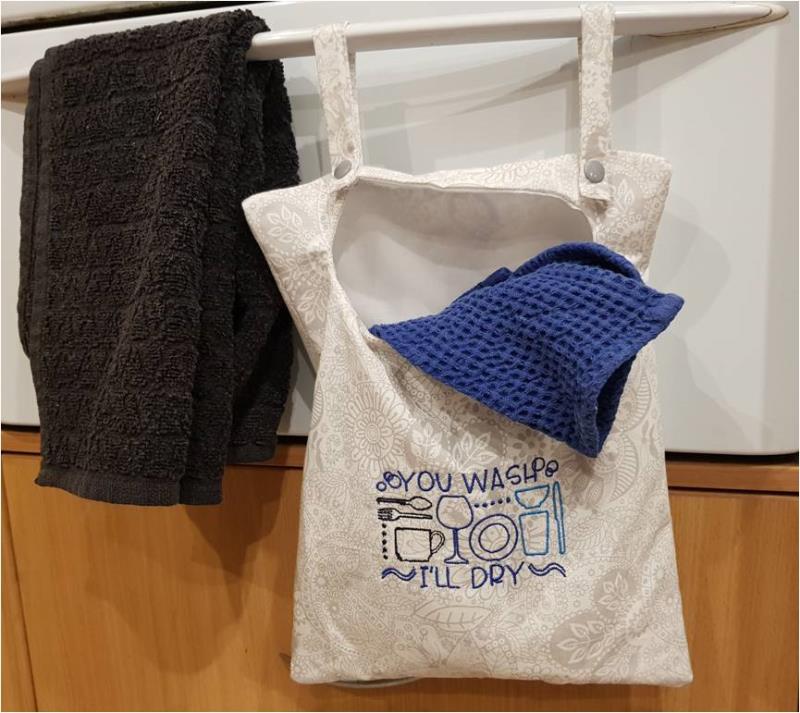
A handy bag for your kitchen to keep your used tea towels in whilst cooking up a storm. The bag is lined and there is no zipper to allow the towels to breath.

Project Preview Video

Materials
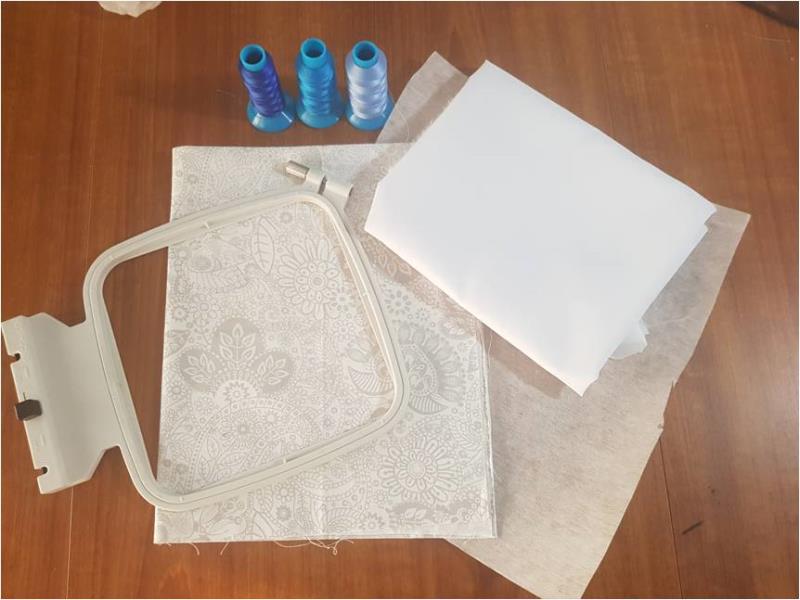
  • 1 fat quarter of cotton fabric
  • ½ meter of lining fabric (PUL, clear vinyl or any water resistant/proof type fabric)
  • 3 thread colors of your choice
  • Tearaway stabilizer
  • 4” hoop
  • Matching sewing thread
  • Snap closures

  • Designs used in this project

    Final Product: What You Will Create


    Step 1:
    Gather the materials and read through the instructions before beginning. Have a copy of the color sequence on hand to refer to.

    (Click Image to Enlarge)


    Step 2:
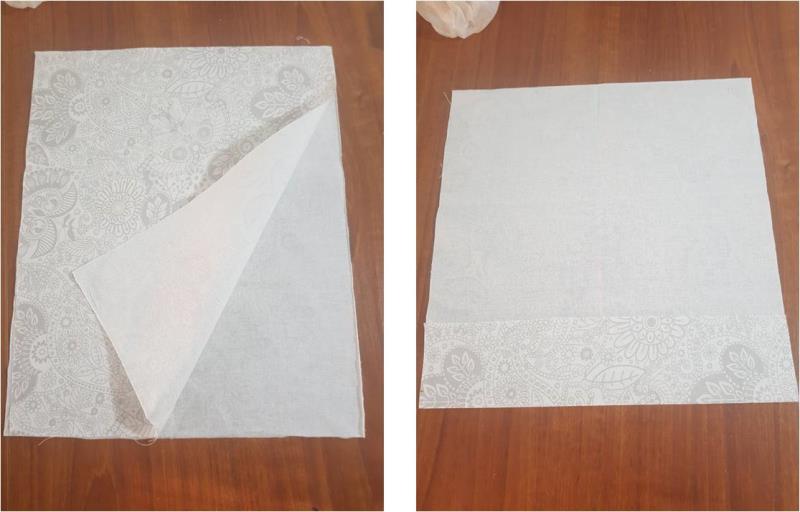
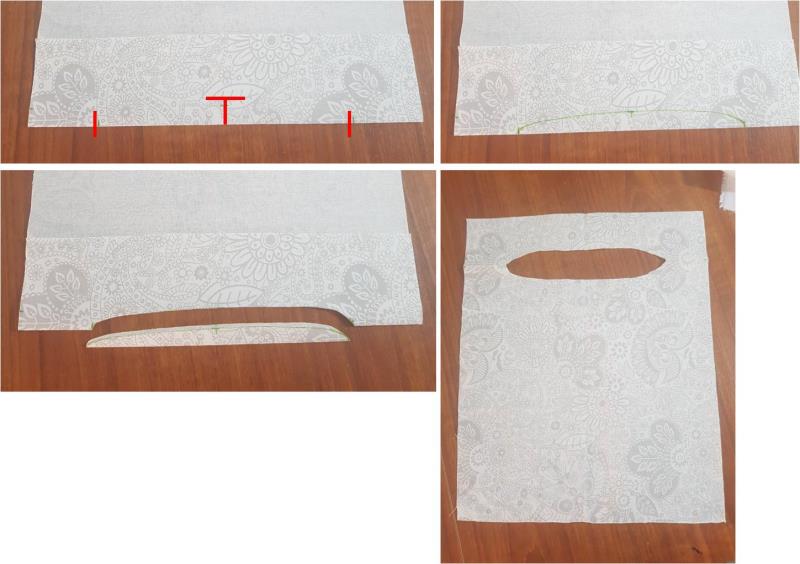
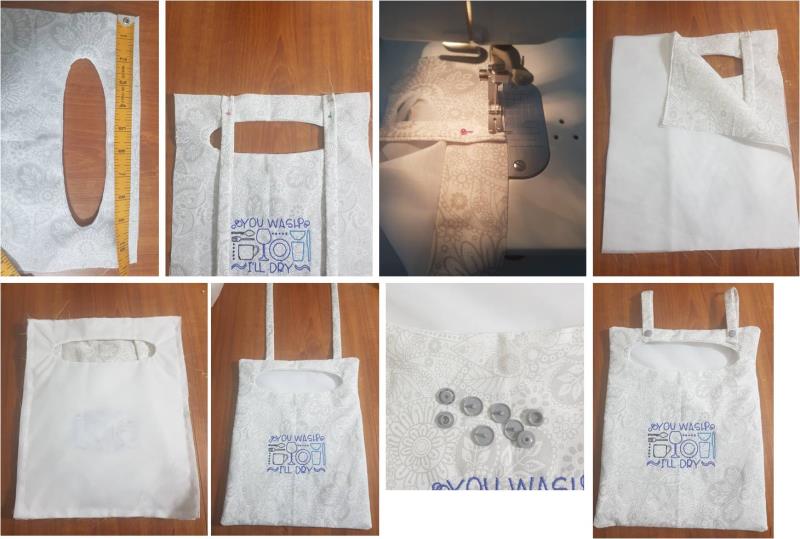
    From the cotton fabric, cut 2 squares 13” x 11”. On one of the pieces, turn back 2 ½” and press.

    (Click Image to Enlarge)


    Step 3:
    Along the fold line of the turnback, mark the center point then mark in 2” from each side of the fabric. At the centre, mark up from the fold line ¾” then hand draw an arc line to connect the marks and cut along that line to form a hole.

    (Click Image to Enlarge)


    Step 4:
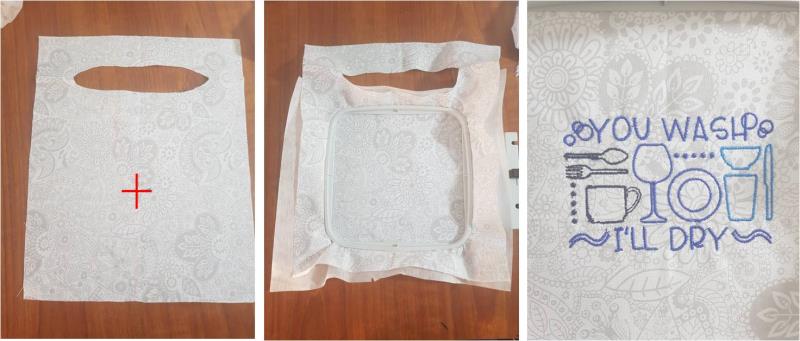
    Now below that hole, mark the center of the fabric, this will be the center of the embroidery design. Hoop the stabilizer and fabric together and stitch out the design.

    (Click Image to Enlarge)


    Step 5:
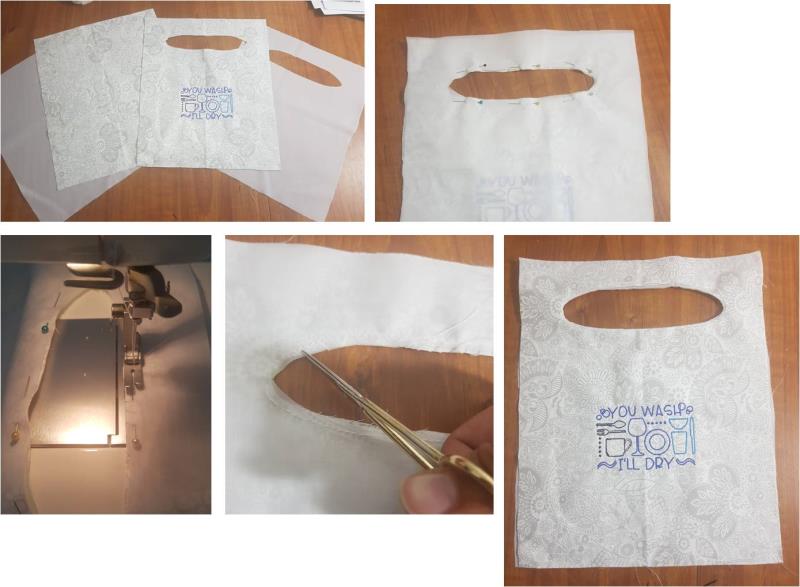
    From your lining fabric, cut out the same size squares, also cut the hole from the front panel. Lay the embroidered panel and lining together, main sides facing, and pin and stitch around the hole using a ¼” seam. Make small snips along the curve lines to help when it turns through. Turn right side out.

    (Click Image to Enlarge)


    Step 6:
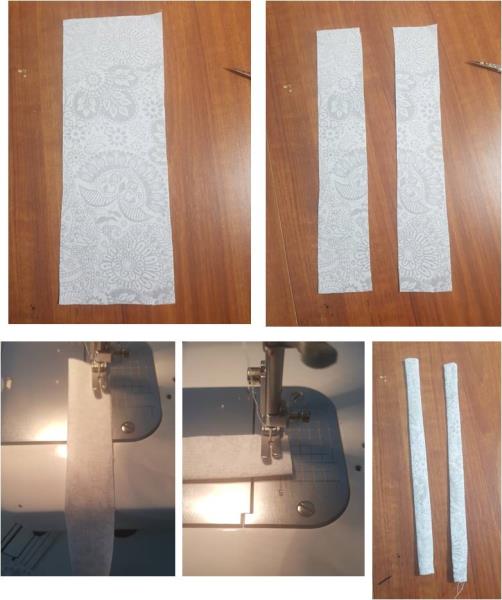
    From the left over cotton, cut 2 strips 8” long x 2” wide. These will form the straps. Fold them in half, right sides together and stitch down the long edge and across one end. turn the loops right side out and press.

    (Click Image to Enlarge)


    Step 7:
    On the front panel across the top make a mark at 3” and 9” for the strap position. Pin the straps to the marks and stitch in place. Now lay the back cotton fabric on top of the embroidered panel, right sides facing, then place the lining fabric on the top of that so you have 4 layers, with the cotton pieces in the middle. Stitch around all 4 edges, ensuring you don’t catch the straps in the side seams. Turn your bag right side out. Attach your snap closures to the straps and the top of the bag.

    (Click Image to Enlarge)


    Step 8:
    Your kitchen wet bag is now ready to hang and use!

    (Click Image to Enlarge)

    Meet the Author: Kylie Burke
    Kylie Burke
    Kylie is based in Australia and loves creating and sharing her unique pieces.
    More From This Author
    Link is Broken, Please check the URL
    Exclusive Embroidery Offers!
    Copyright © {{ currentDate | date:'yyyy'}} - EmbroideryDesigns.com
    GET 50% OFF! ×