


PROJECT INSTRUCTIONS


PROJECT INSTRUCTIONS

FSL Spring Door Hanging Embroidery Project
By
Kylie Burke
on
February 21, 2023
PROJECT DETAILS
SKILL LEVEL
Intermediate
TIME REQUIRED
04:00
Description
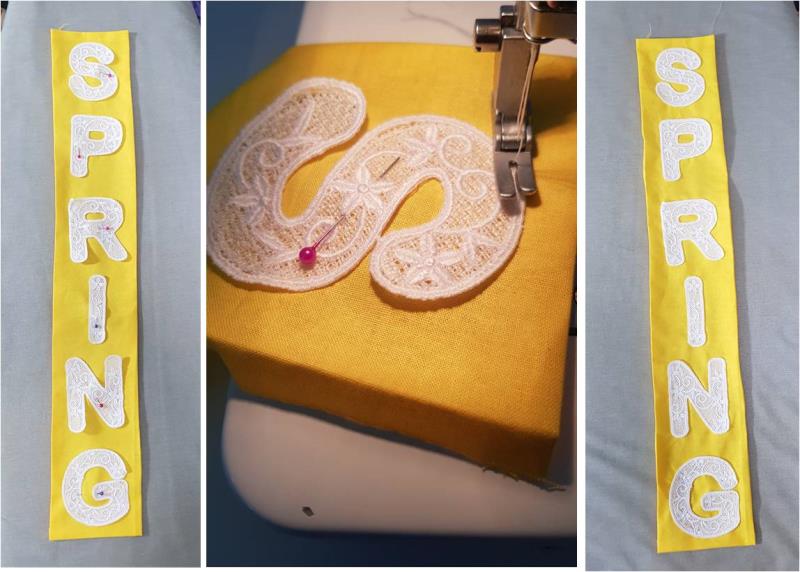
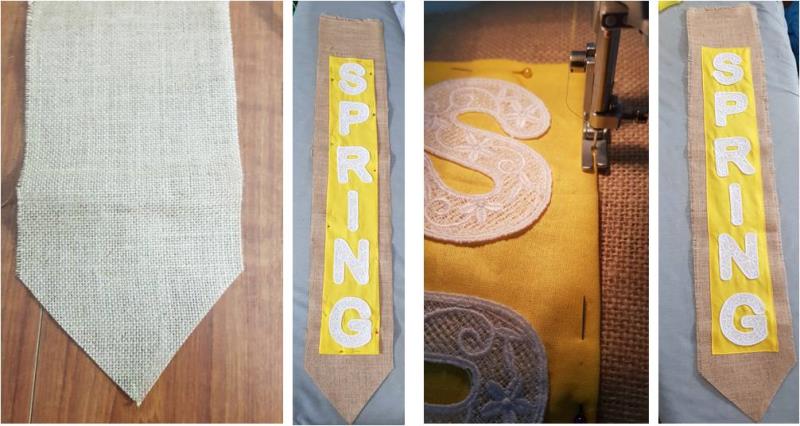
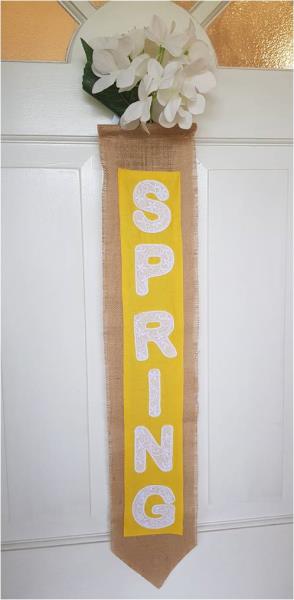
Free Standing Lace is always a beautiful addition to your home decor. Use these floral FSL letters to create a welcoming spring door hanging.
Project Preview Video

QUICK VIEW
FSL Floral Alphabet
$40.00
$24.00
Circle Price: $24.00

Water Soluble Stabilizer - 12" x 25 Yds
$32.46
Circle Price: $29.21


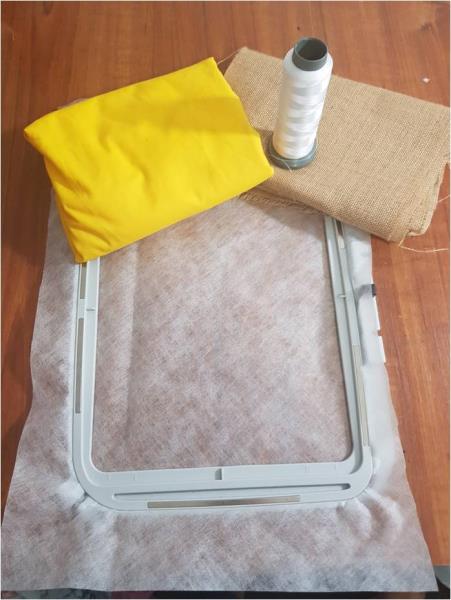
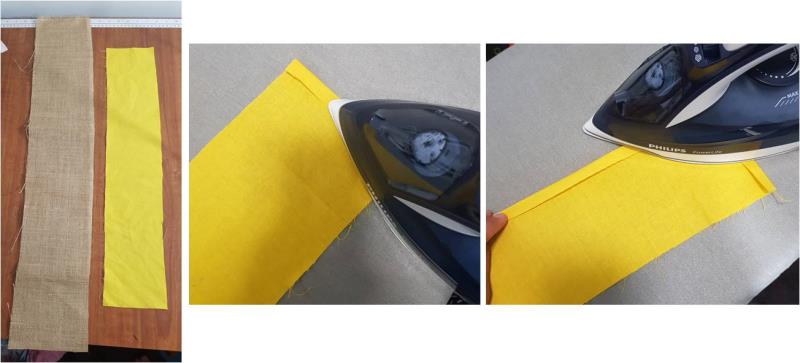
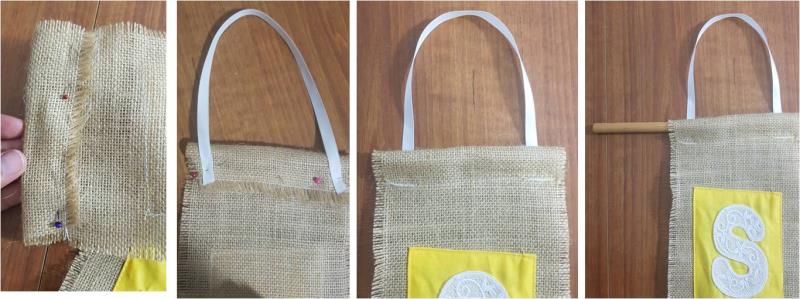
| Materials Water dissolvable backing White embroidery thread with matching bobbin thread Burlap Yellow cotton fabric 30cm of white ribbon 15cm piece of 10mm wooden dowel (optional, this is used to give the hanging some stability at the top) |
| Designs used in this project |
|

Projects You May Like
Meet the Author:
Kylie Burke

Kylie is based in Australia and loves creating and sharing her unique pieces.
Feedback
Characters Remaining
Please Login to Submit a Feedback
Invalid Characters, Please enter a valid Comment
Please enter a valid Comment
Reviewed On
Link is Broken, Please check the URL