{{superHeaderAds.title}}
Live Chat
Embroidery Designs
Welcome, Embroiderer
Login
Easter Goodie Bag
{{mainImageAlt || (productInfo._source && productInfo._source.name) || ''}}

Easter Goodie Bag Embroidery Project

By   Kylie Burke   on   February 01, 2019

PROJECT DETAILS

SKILL LEVEL
Experienced
TIME REQUIRED
01:30
Description

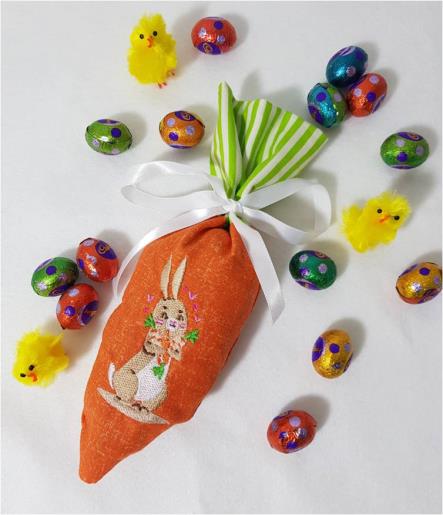
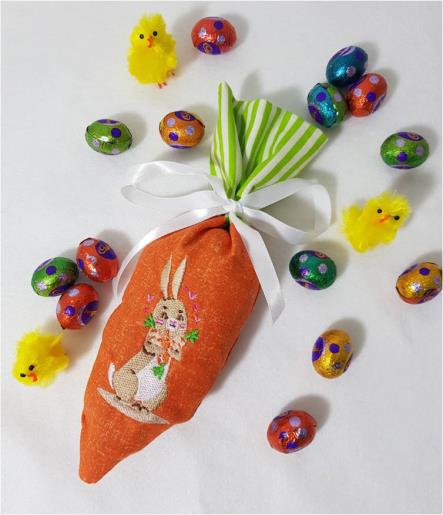
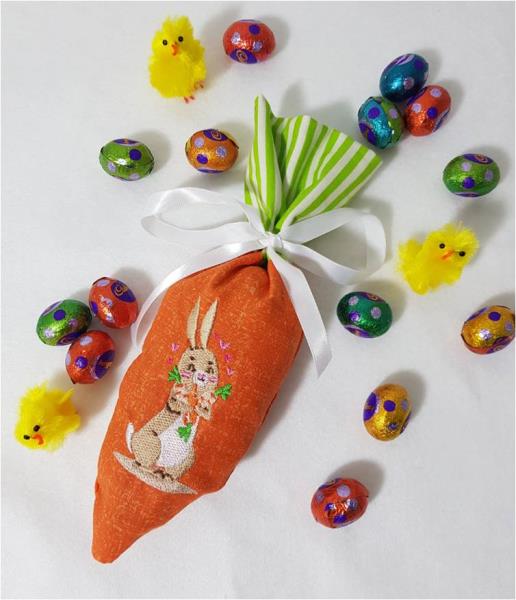
Ditch the store bought easter bags and use this Bunny and Carrots design to create a fun Easter goodie bag and fill it with yummy chocolate eggs for a special handmade gift.

Project Preview Video

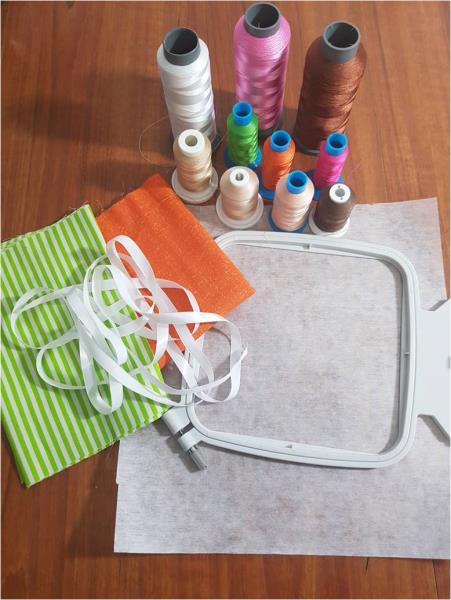
Materials
  • print off of the template
  • 7” square of green and white stripe cotton fabric
  • 8” x 7” piece of orange cotton fabric
  • 10 thread colors
  • Tearaway stabilizer
  • 4” hoop
  • 22” of white satin ribbon
  • Sewing machine with machine thread

  • Designs used in this project

    Final Product: What You Will Create

    Preface:
    The instructions and time noted for this project is to complete 1 bag only. Allow extra time and materials if you wish to make more. 


    Step 1:
    Gather the materials and read through the instructions before beginning. Have a copy of the color sequence on hand to refer to.

    (Click Image to Enlarge)


    Step 2:
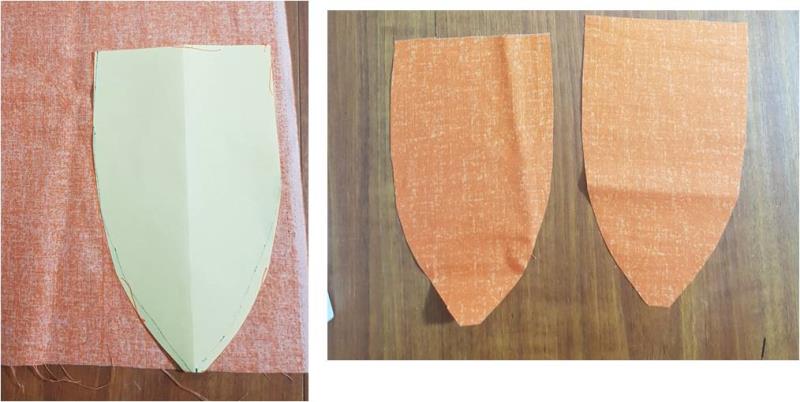
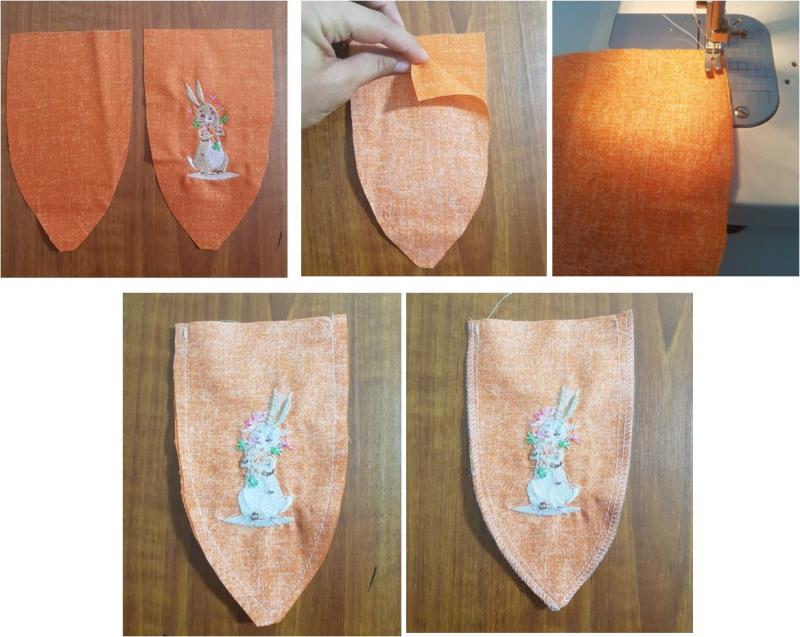
    Using the template available in this project, print a copy and cut it out. Use the template to cut 2 pieces of the orange fabric. 

    (Click Image to Enlarge)


    Step 3:
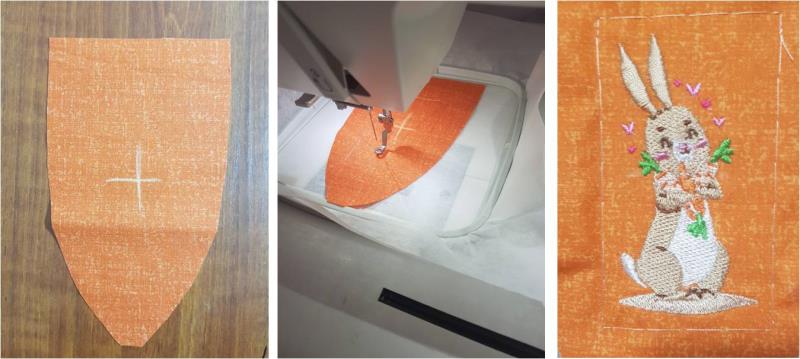
    Mark the center of one piece of the orange fabric. Hoop the stabilizer and attach the hoop to your machine. Float the orange fabric, position in place ensuring it is centered and use a tack down stitch to hold it in place. Stitch out the bunny design. 

    (Click Image to Enlarge)


    Step 4:
    Put the orange fabric together, right sides facing, and stitch around the sides of the carrot shape, leaving the top open. If you have a serger, you could serge the raw edges. 

    (Click Image to Enlarge)


    Step 5:
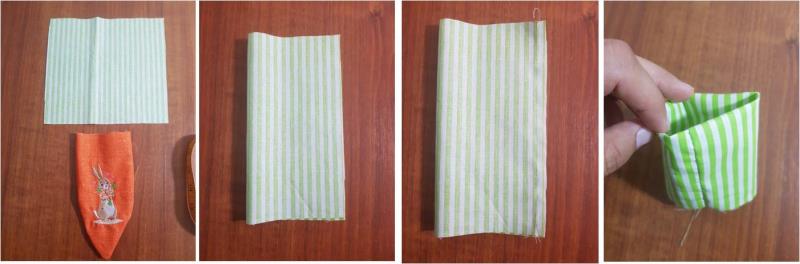
    With the green stripe fabric, fold it in half widthwise, ensuring the strips are vertical and stitch down the side to form a tube. Then fold the fabric over in half so wrong sides are facing.

    (Click Image to Enlarge)


    Step 6:
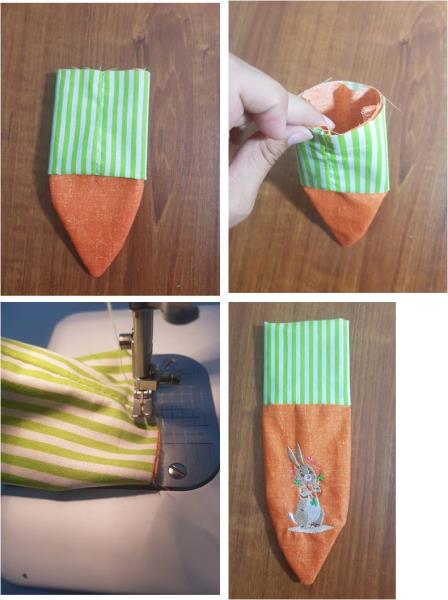
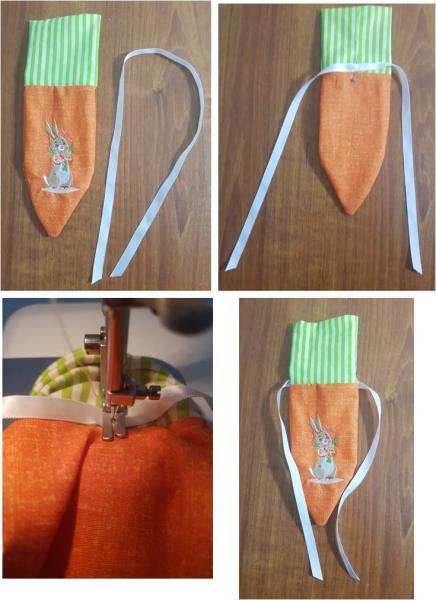
    Slide the green stripe tube over the carrot shape, matching raw edges at the top and positioning the seam of the green stripe at the back. Now stitch around the top edge. 

    (Click Image to Enlarge)


    Step 7:
    With the white ribbon, find the center and pin it to the green stripe fabric centering it at the back. Stitch it in place. 

    (Click Image to Enlarge)


    Step 8:
    Now fill your bag with goodies and share your handmade creation. 

    (Click Image to Enlarge)

    Meet the Author: Kylie Burke
    Kylie Burke
    Kylie is based in Australia and loves creating and sharing her unique pieces.
    More From This Author
    Link is Broken, Please check the URL
    Exclusive Embroidery Offers!
    Copyright © {{ currentDate | date:'yyyy'}} - EmbroideryDesigns.com
    GET 50% OFF! ×