Begin with a purchased bread cloth or you can make your own. Instructions will be given for the basket used in the project. Adjust the instructions as needed to fit the basket you’ll be customizing with the Bread Basket Cozy.
Step 1:
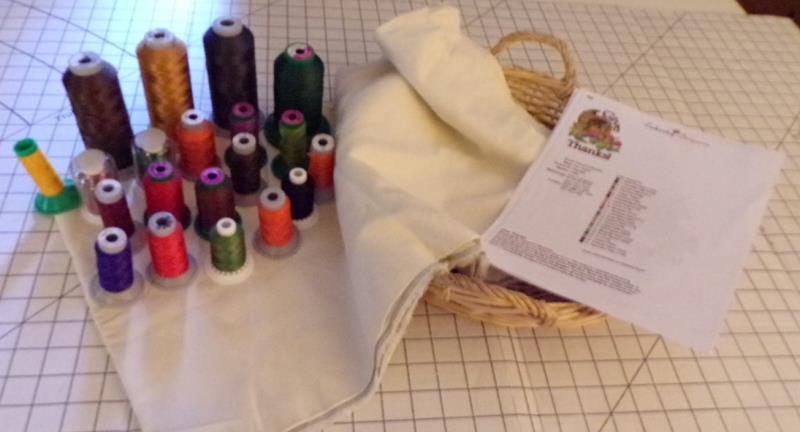
Gather the materials and read through the instructions before beginning. Print out a paper template of the design.
(Click Image to Enlarge)
Step 2:
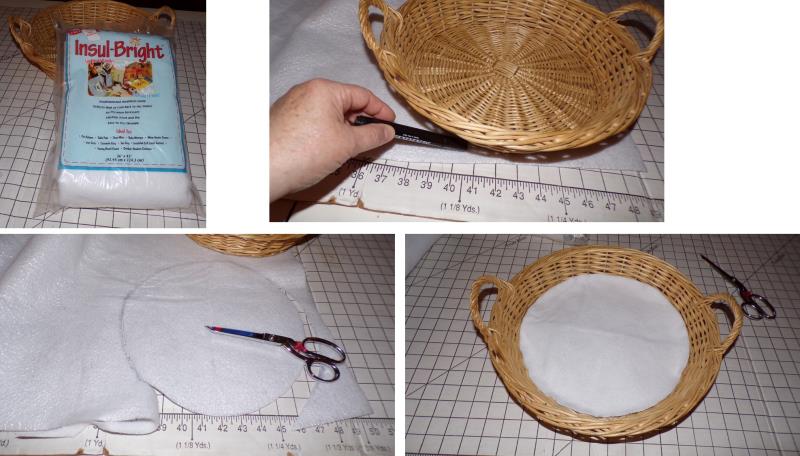
Insul-Bright is used in the bottom of the basket to help keep the bread warm. Open the package and lay out a single layer of the product. Use a marker to draw around the bottom of the basket; cut out along the line and place in the bottom of the basket.
(Click Image to Enlarge)
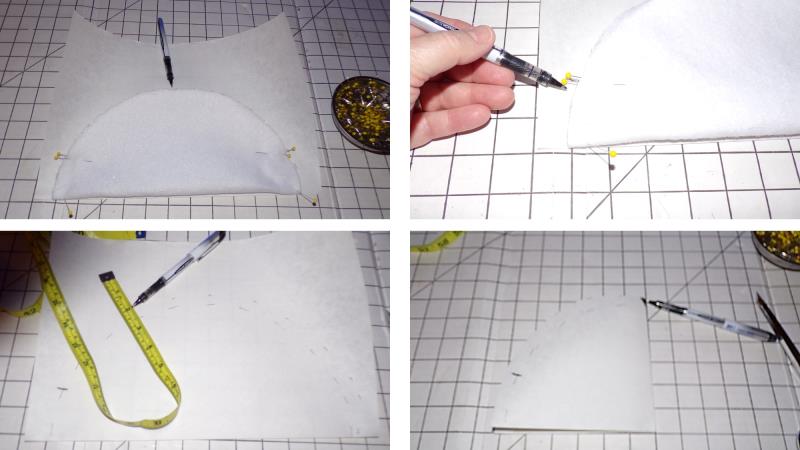
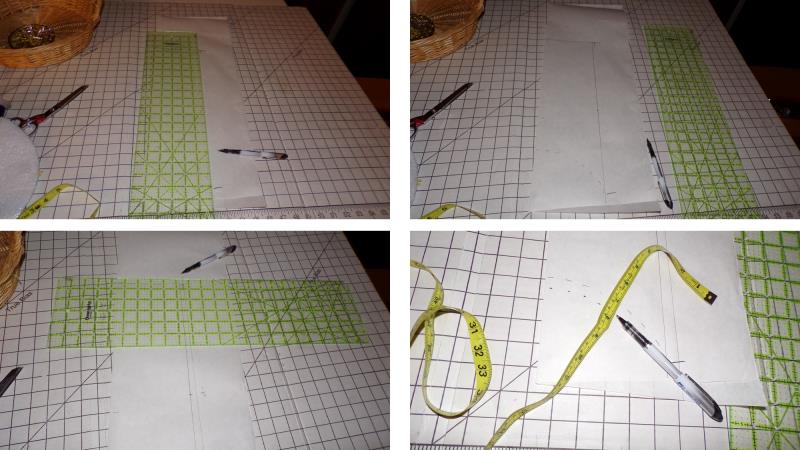
Step 3:
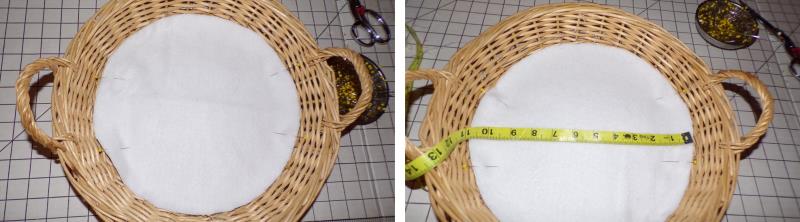
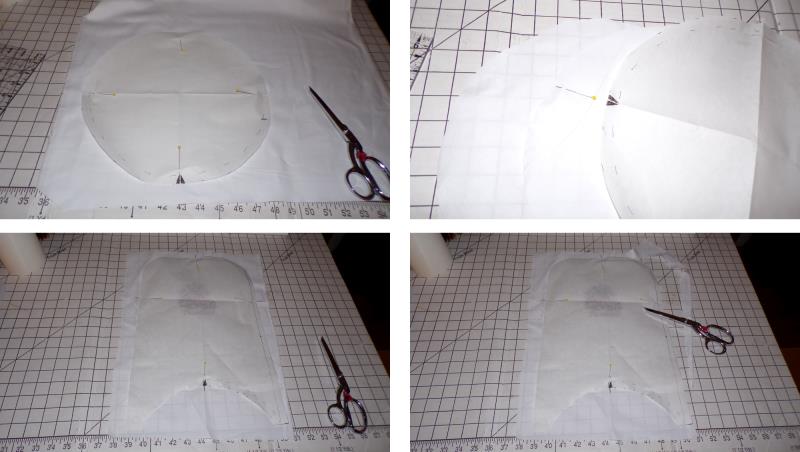
Now will be to use the Insul-Bright to create a pattern for the bottom of the basket. Place pins in the Insul-Bright marking the handle areas as shown. Measure the diameter of the basket; this measurement will be used for the width of the flaps.
(Click Image to Enlarge)
Step 4:
Cut a sheet of pattern paper. Fold the Insul-Bright in half matching the pins and lay the fold on a straight edge of the pattern paper. Draw around the Insul-Bright, marking the pin area. Add a ½” seam allowance and cut out the pattern. Mark the center of the half-circle.
(Click Image to Enlarge)
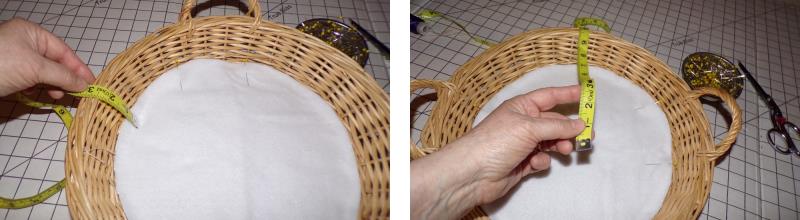
Step 5:
To create the two flaps, loosely measure from the bottom of the basket and up the side. For this basket that is 3”. Now measure just over half way across the basket as if rolls are underneath; this is the flap measurement; there will be two flaps that overlap. For this basket 10” is the measurement used.
(Click Image to Enlarge)
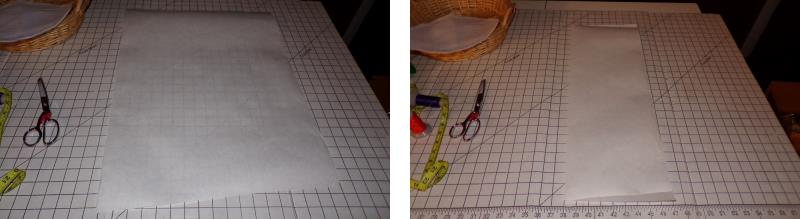
Step 6:
Cut a piece of pattern paper the length of the total measurement plus some (3”+10”=13”)—this paper was cut about 18” long x 22” wide (the measurement from step 3 plus a little bit more). Fold the paper in half lengthwise to work with half the pattern.
(Click Image to Enlarge)
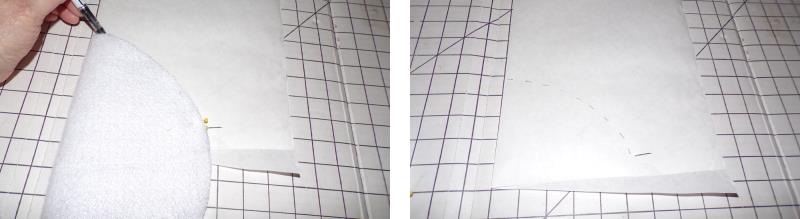
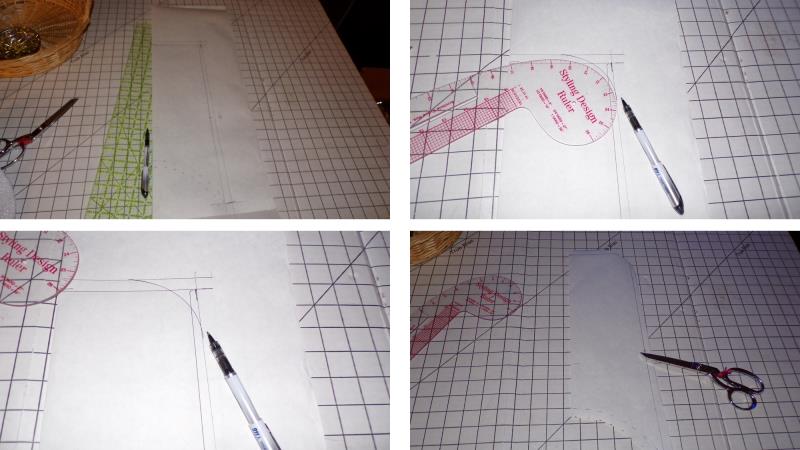
Step 7:
Begin by creating the arc at the bottom of the flap. Place the folded edge of the Insul-Bright pattern along the fold line of the long pattern piece, also aligning the half way mark to the bottom of the paper. Mark a line on the long pattern piece around the quarter circle, and place a mark at the pin for the handle.
(Click Image to Enlarge)
Step 8:
From the line just drawn at the fold, place a mark the length of the flap (10”) and from the fold measure out one-half the distance of the width needed for the flap (5”).
(Click Image to Enlarge)
Step 9:
Square a line from the fold ½ the width of the flap at the top (13” mark). Draw a line the connecting the marks. Add ½” seam allowance to the outside of the drawn lines all around.
(Click Image to Enlarge)
Step 10:
Use a French curve or plate to round the top edge of the flap, truing into the top and side lines. Cut out the pattern along the lines.
(Click Image to Enlarge)
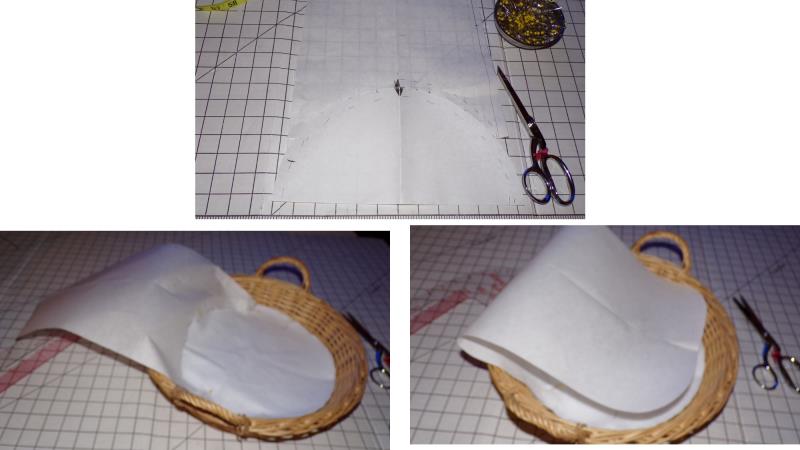
Step 11:
Test the paper pattern. Place the circle in the bottom of the basket, open up and place the flap in the basket. Flip the flap over and make sure when rolls or bread are in the basket they will be covered.
(Click Image to Enlarge)
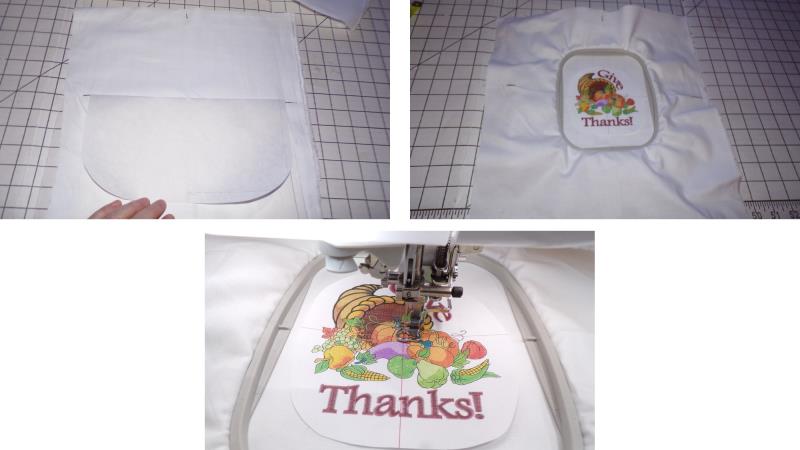
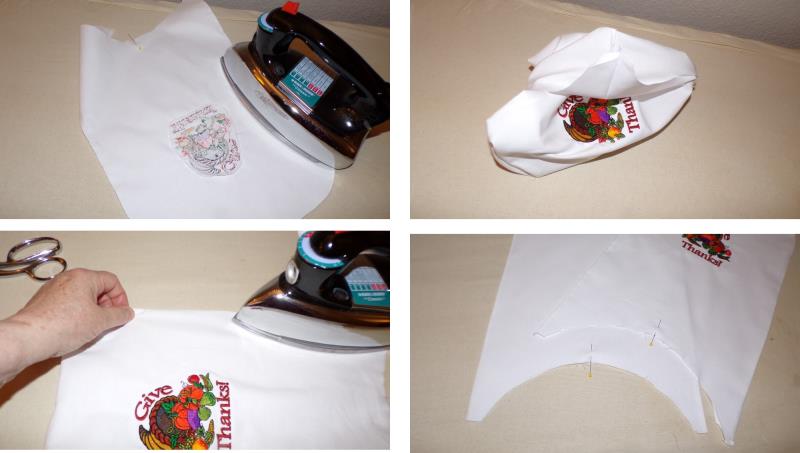
Step 12:
Cut out and place the template of the design in the center portion of the flap like it will be placed when the piece is finished and rolls are in it; use the smallest hoop possible to fit the design. Prepare to cut the fabric.
(Click Image to Enlarge)
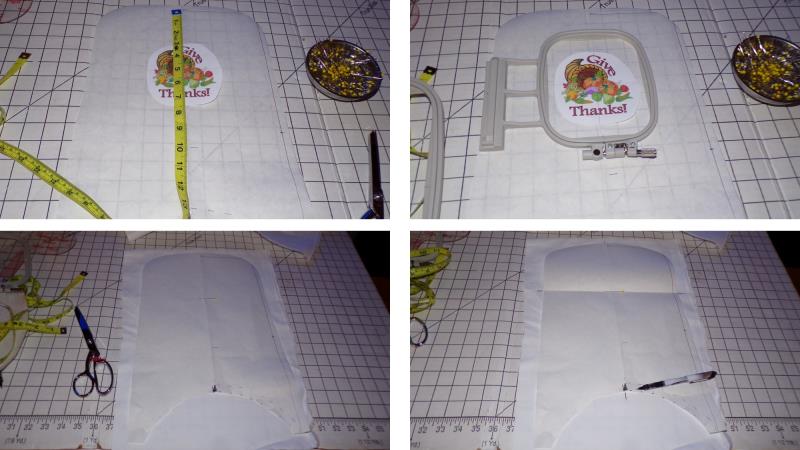
Step 13:
From the white fabric cut four flaps and two circles, marking center marks
(Click Image to Enlarge)
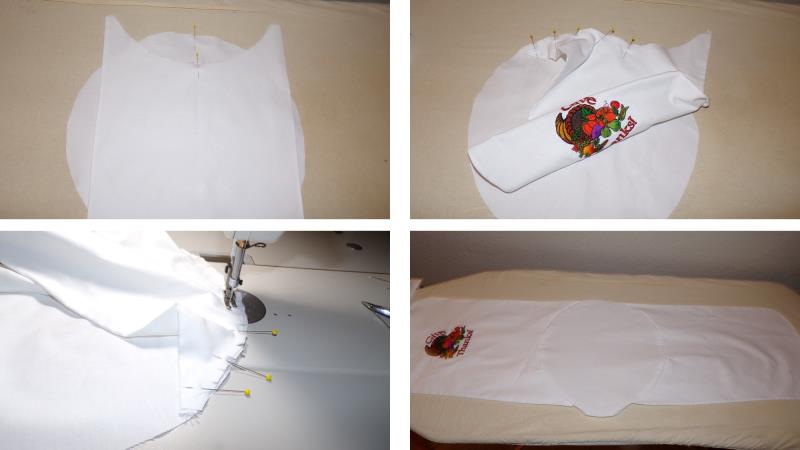
Step 14:
Fold the flap down along the center park of the design and crease lightly to aid in hooping. Hoop the fabric with tearaway stabilizer. Load the design on the machine and align the needle to the center point of the template.
(Click Image to Enlarge)
Step 15:
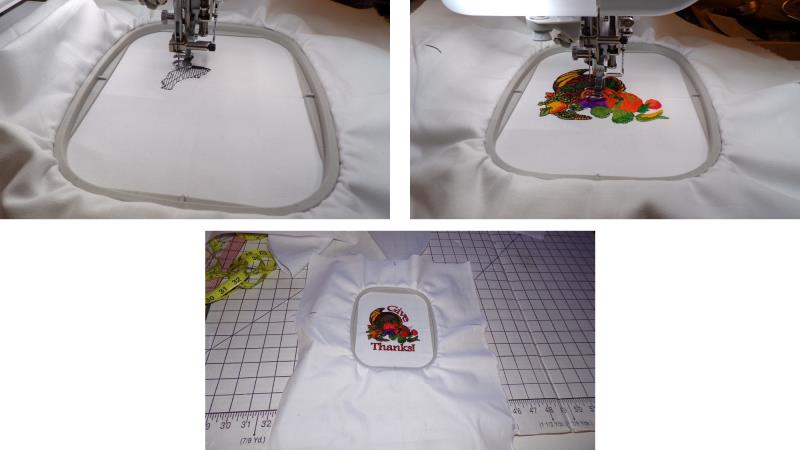
Stitch the design following the color sequence.
(Click Image to Enlarge)
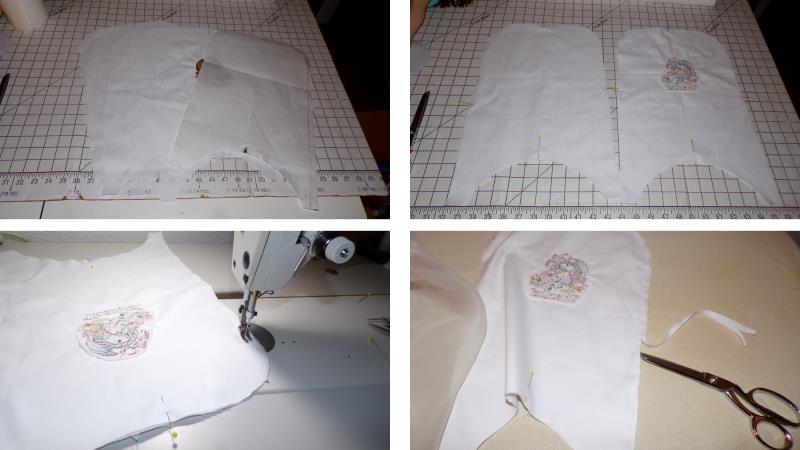
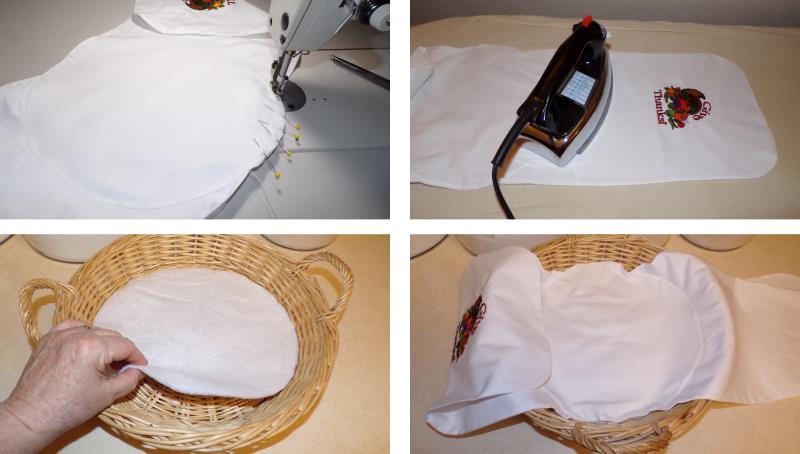
Step 16:
Remove the design from the hoop and trim away the excess stabilizer. Place one remaining flap right side to the embroidered flap matching all cut edges and pin. Place right sides together of the remaining two flaps, and pin. Sew up one long side, across the top, and down the other long side using a ½” seam allowance (bottom of the flap is left open). Trim the seam allowance to scant ¼”.
(Click Image to Enlarge)
Step 17:
Press the seam and turn; press again. Repeat for the remaining flap. Place pins at the center of the bottom flap openings.
(Click Image to Enlarge)
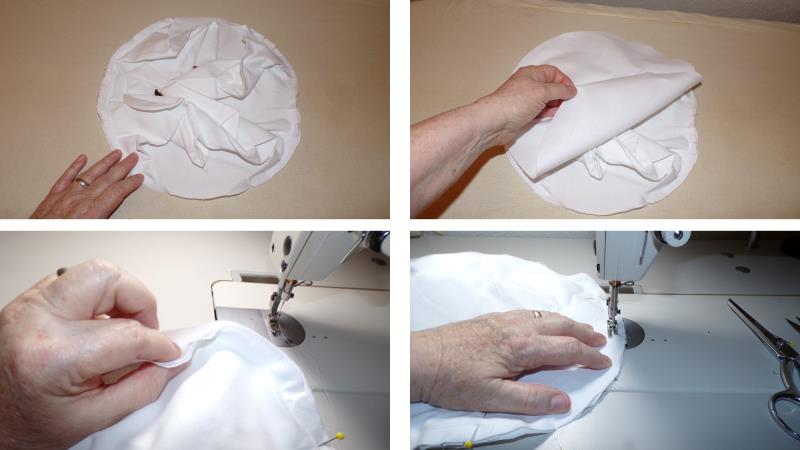
Step 18:
Match one circle center to one flap opening. Pin the bottom of the flap to the circle, clipping the flap opening as needed. Repeat for the other flap opening and other side of the circle (both flaps are on one circle, opposite each other). Baste the flaps to the circle. It should look like the photo in the lower right when finished.
(Click Image to Enlarge)
Step 19:
Now tuck the flaps inside the circle. With right sides together, place the remaining circle over the flaps and pin the circles together. Sew the circles together using a ½” seam leaving and opening for turning.
(Click Image to Enlarge)
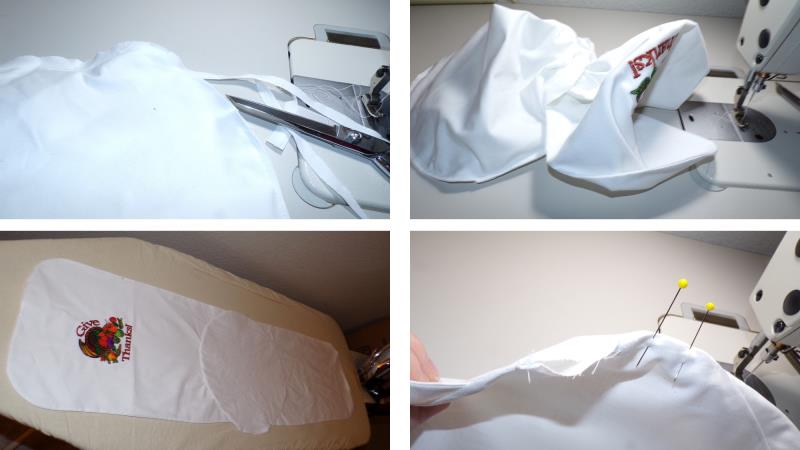
Step 20:
Trim the seam to scant ¼”. Turn the piece out through the opening and press well. Turn the seams to the inside of the opening and pin the opening closed.
(Click Image to Enlarge)
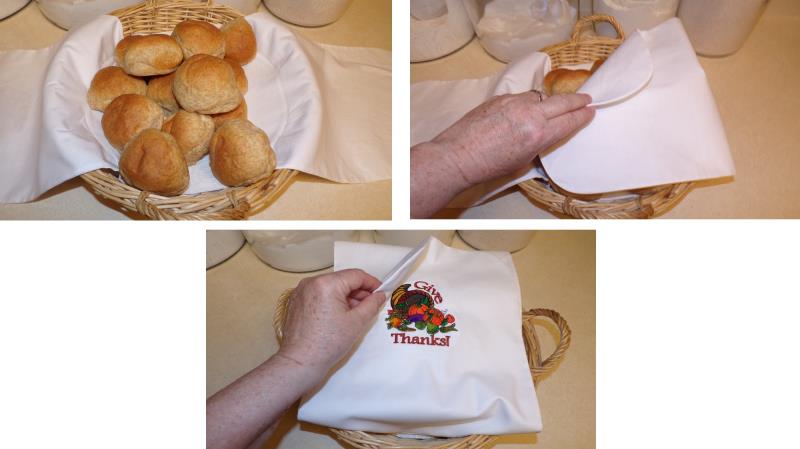
Step 21:
Edge stitch around the circle, closing up the seam. Press the bread cozy well. To use, place the circle of Insul-Bright in the bottom of the basket and then place the bread cozy in the basket.
(Click Image to Enlarge)
Step 22:
Fill the basket with rolls. Place the blank flap over the rolls and then fold the embroidered flap on top.
(Click Image to Enlarge)
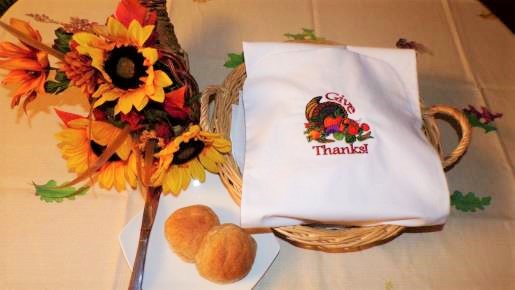
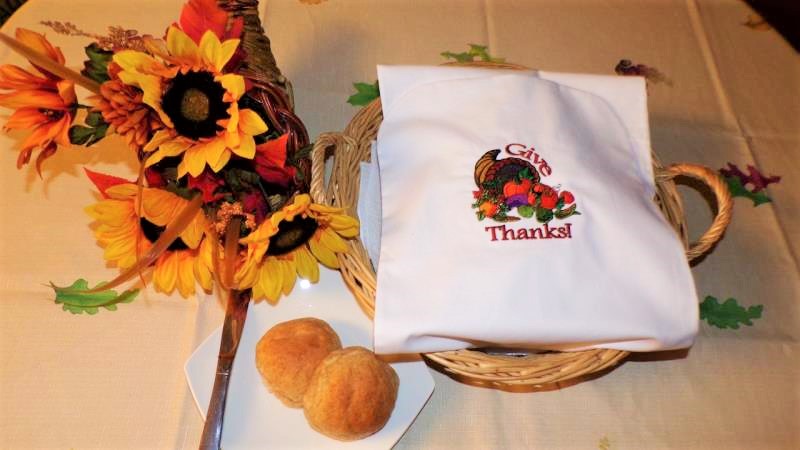
Step 23:
Congratulations on creating a beautiful and useful Bread Basket Cozy for your Thanksgiving table.
Ramona Baird has been in the embroidery industry for over 23 years. She and her husband owned a commercial and retail embroidery store in Arizona for many years. She is an experienced digitizer having been mentored by award-winners Pat Williams and Lindee Goodall. Ramona is a contributor to “Creative Machine Embroidery” magazine having 5 covers to her credit. Ramona has worked for Wilcom America and served many years as Education Director for the American Sewing Guild. With a degree in fashion design, she is able to design and execute patterns which Pat Williams says are “out of the box” in creativity and application. Ramona likes to challenge the boundaries of embroidery and bring new and exciting designs, ideas, and projects to EmbroideryDesigns.com. She wants embroiderers of all levels to increase their skills and enjoyment in using their embroidery machine for gift-making and personal pleasure.