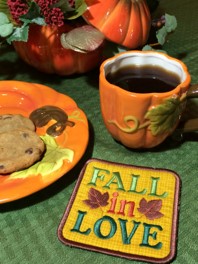
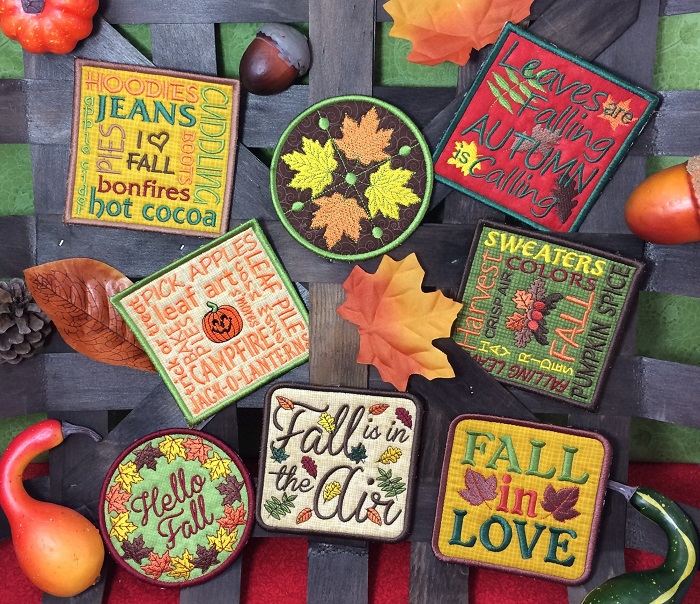
This set has 12 different Fall Coaster embroidery designs. You could make one of each design, or a set using the same design. Regardless of how many or which designs you use, how you make the coasters will be the same way.
After Step 1, you will place the cutaway, low nap batting, and fabric in layers on top of the placement stitches. Stitch step 2. Remove the hoop from the machine and trim the excess materials. Return the hoop to the machine. Stitch the design. The last two steps in each design are the same for each coaster. Remove the hoop from the machine before stitching the next to the last color change. Add one piece of cutaway stabilizer and one piece of cotton fabric. Stitch the next to the last step. Remove the hoop and trim excess fabric. Attach the hoop. Stitch the last step which is a satin finish stitch.
Step 1:
(Click Image to Enlarge)
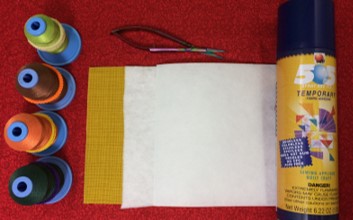
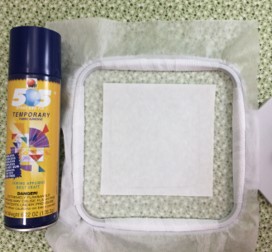
Collect the materials needed for this project. Read the directions and prepare the materials. Materials shown in the picture is for one coaster. There are 12 designs in this fall variety embroidery pack. Each design will use two 5”x5” pieces of seasonal fabric, one 5”x5” piece of low nap batting, two 5”x5” pieces of 2.5 oz. cutaway stabilizer, and one piece of water soluble backing to fit the hoop.
Step 2:
(Click Image to Enlarge)
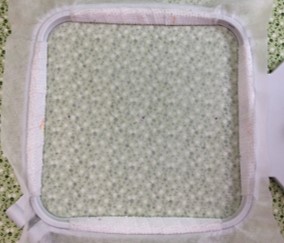
Hoop one piece of water soluble backing stabilizer. (A 6”x6” hoop was used in the example. It is the smallest hoop size that I have. A 4”x4” hoop is an ideal size.)
Step 3:
(Click Image to Enlarge)
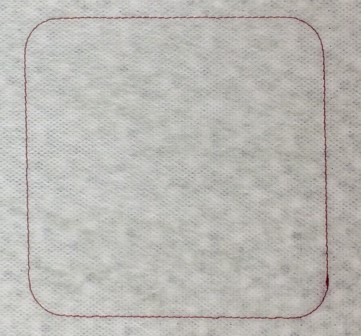
Load the embroidery design on your machine. Stitch step 1. Step 1 is a placement stitch.
Step 4:
(Click Image to Enlarge)
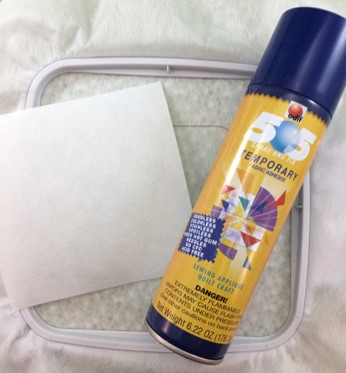
Lightly mist the stabilizer in the hoop with 505 Temporary Adhesive spray. Gently press ONE piece of the cutaway stabilizer onto the water-soluble stabilizer. Make sure that the surface is smooth and wrinkle free.
Step 5:
(Click Image to Enlarge)
Lightly mist the cutaway stabilizer with 505 Temporary Adhesive spray. Gently press ONE piece of low nap batting onto the stabilizer. Make sure that the surface is smooth and wrinkle free.
Step 6:
Lightly mist the cutaway stabilizer with 505 Temporary Adhesive spray. Gently press ONE piece of the cotton fabric onto the batting. Make sure that the surface is smooth and wrinkle free.
Step 7:
(Click Image to Enlarge)
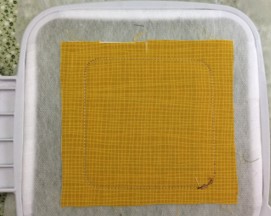
Stitch step 2. Color change 1:2 will always be a zig-zag stitch around the outer edges of the coasters.
Remove the hoop from the machine but DO NOT remove the project from the hoop. Trim the excess cutaway stabilizer, batting and fabric from the outer side of the stitching.
Step 8:
(Click Image to Enlarge)
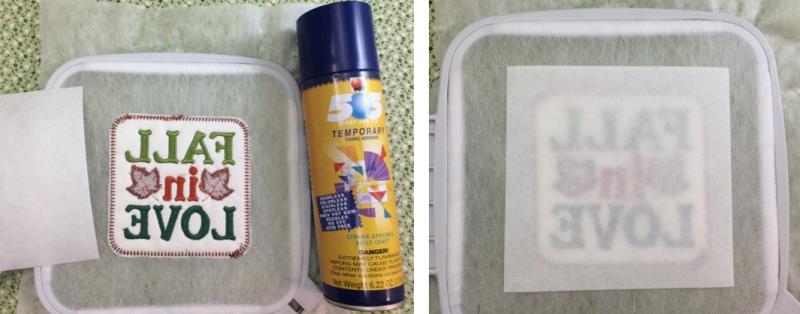
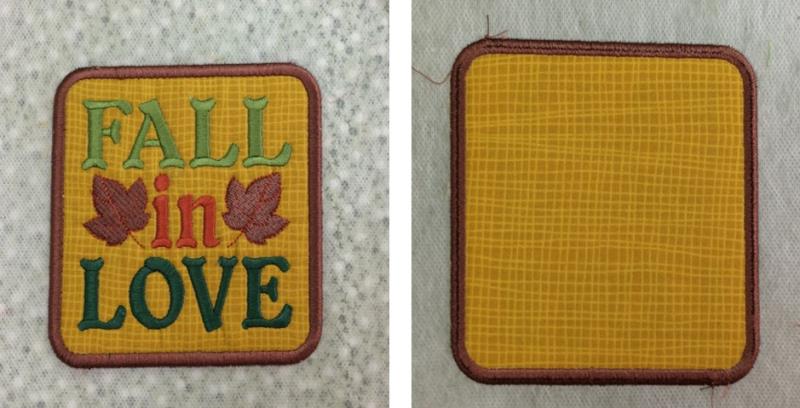
Stitch the design. Stop when you get to the last two color changes.
Step 9:
At the next to the last color change, remove the hoop from the machine. Turn the hoop over with the back side facing you. Lightly mist the surface using 505 Temporary Adhesive spray.
Gently press one 5”x5” piece of cutaway stabilizer onto the surface. Make sure the surface is smooth and wrinkle free.
(Click Image to Enlarge)
Step 10:
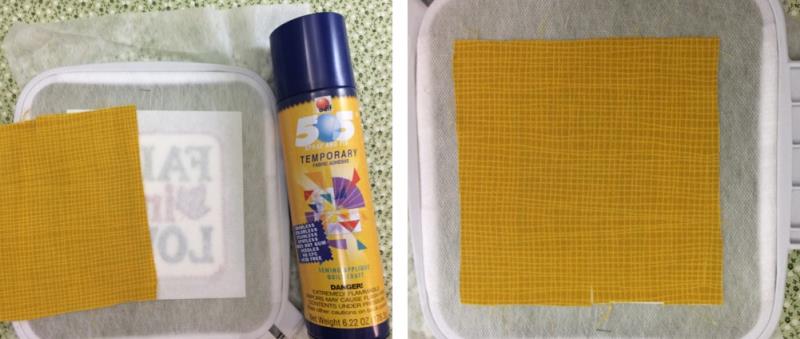
Lightly mist the surface using 505 Temporary Adhesive spray.
Gently press one 5”x5” piece of fabric onto the surface. Make sure the surface is smooth and wrinkle free.
Attach the hoop to the machine.
(Click Image to Enlarge)
Step 11:
(Click Image to Enlarge)
Stitch the next to the last color change. These stitches will attach the backing. Remove the hoop from the machine. Trim excess material from around the outer edges. Attach the hoop to the machine.
Step 12:
Stitch the last step. The last step for each coaster is a satin stitch. Remove the hoop from the machine after the stitching has completed.
(Click Image to Enlarge)
Step 13:
(Click Image to Enlarge)
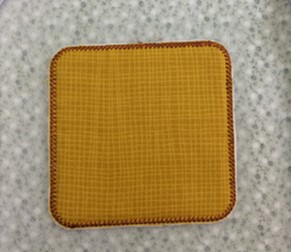
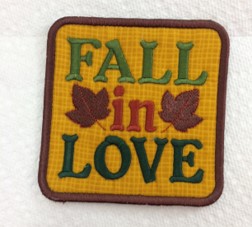
Remove the coaster from the hoop. Trim the excess stabilizer from around the coaster.
Remove the remaining water-soluble stabilizer from around the edges according to package directions. One method is using very hot water. Wet your finger tip and moisten the edges of the water soluble stabilizer. Lay on an old towel to dry.
Marisa Littleton is a retired educator with a love for teaching and learning. Interests include machine embroidery, hand embroidery, quilting, cooking, and antiques.