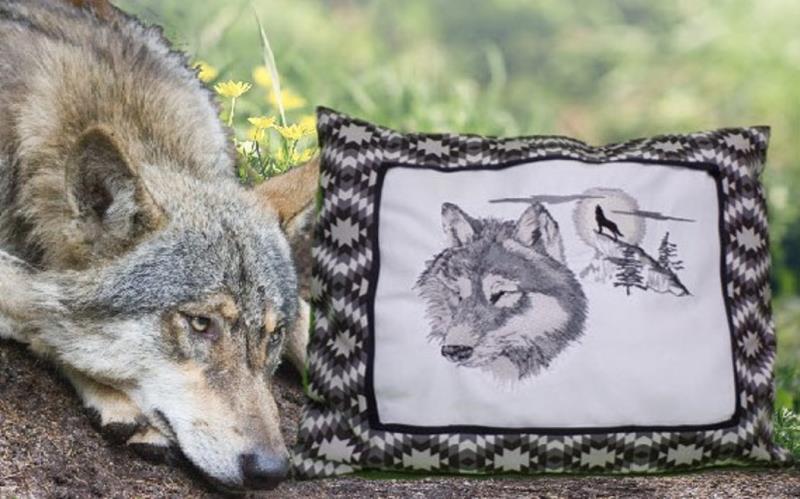
This pillow is fun to do but does take a little bit of precision. The white fabric is embroidered and trimmed. Then a “window” is created in the middle of one piece of the print fabric, trimmed with the grosgrain ribbon and the embroidered section stitched on. The second piece of print fabric is sewn on to create the pillow back, the pillow is stuffed and the opening sewn closed. Dimensions are outlined in step 2.
Step 1:
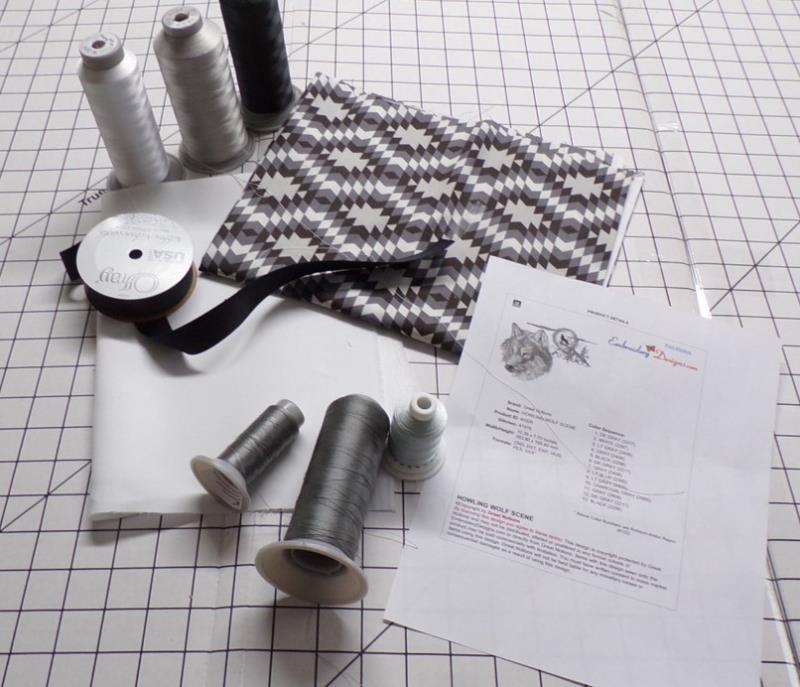
Gather the materials and read through the instructions before beginning. Print out the color sequence. The design is large so be sure your machine has a hoop to accommodate the design.
(Click Image to Enlarge)
Step 2:
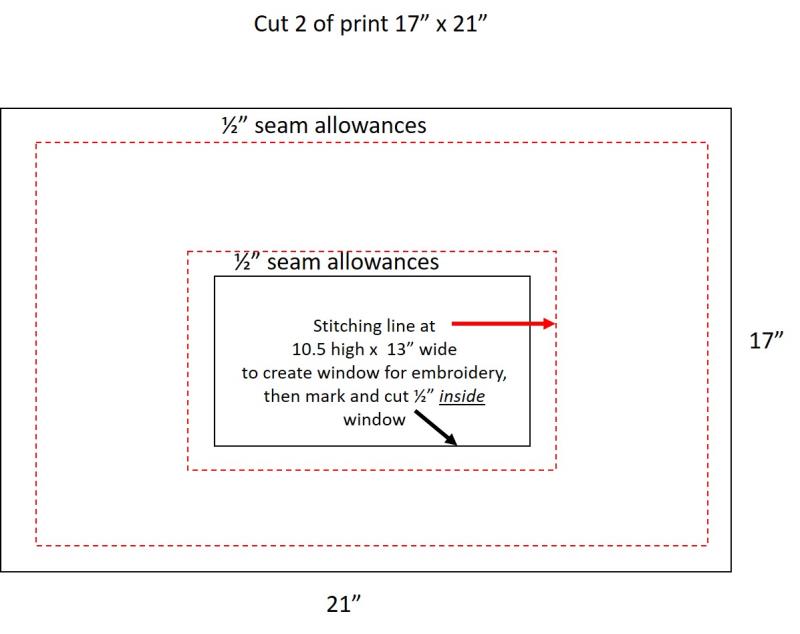
Here is how the pillow front will be constructed. Two pieces of the printed fabric are cut 17” x 21” (included ½” seam allowances). A “window” will be stitched—this is a reinforcing stitch for the line to attach the white embroidered fabric. After that line is stitched, a line is measured ½” inside the line, to create a ½” seam allowance to sew the embroidered fabric to.
(Click Image to Enlarge)
Step 3:
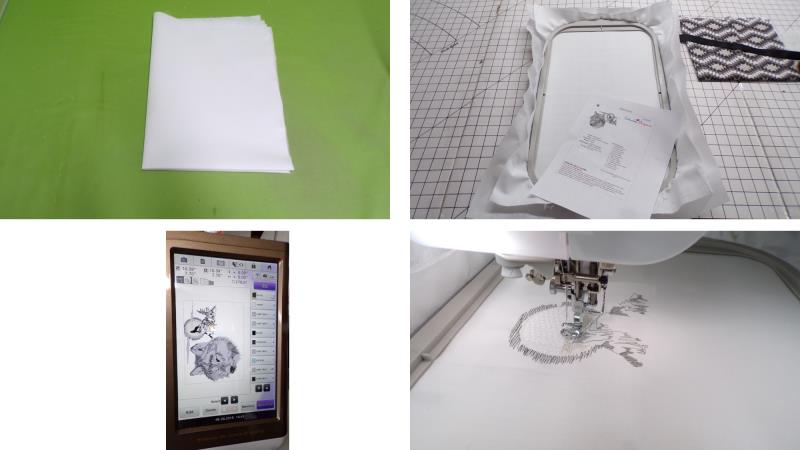
Cut the white fabric larger than needed—an optional step is to place fusible interfacing on the back. There is little to no underlay in this design and there are quite a number of stitches that end up on the bias of the fabric. The interfacing helps counter-act this stitch angle and will not totally alleviate the pull of the fabric, but it does help. Press, and then quarter fold it to find the center point. Hoop the fabric with stabilizer. Load the design on the machine and rotate it if necessary.
(Click Image to Enlarge)
Step 4:
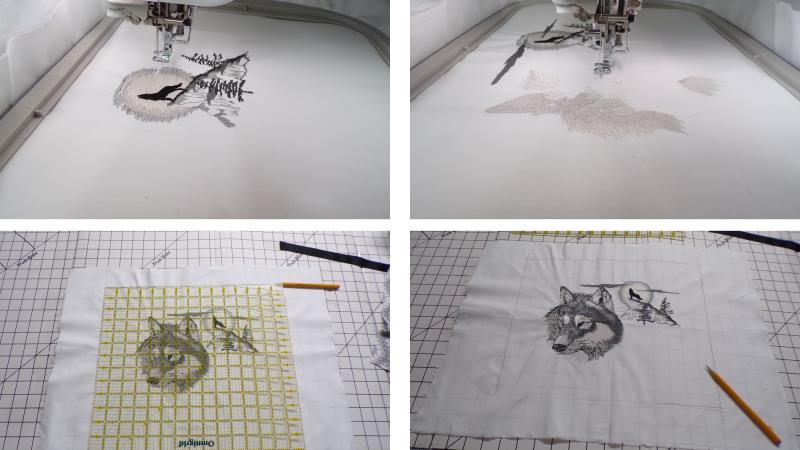
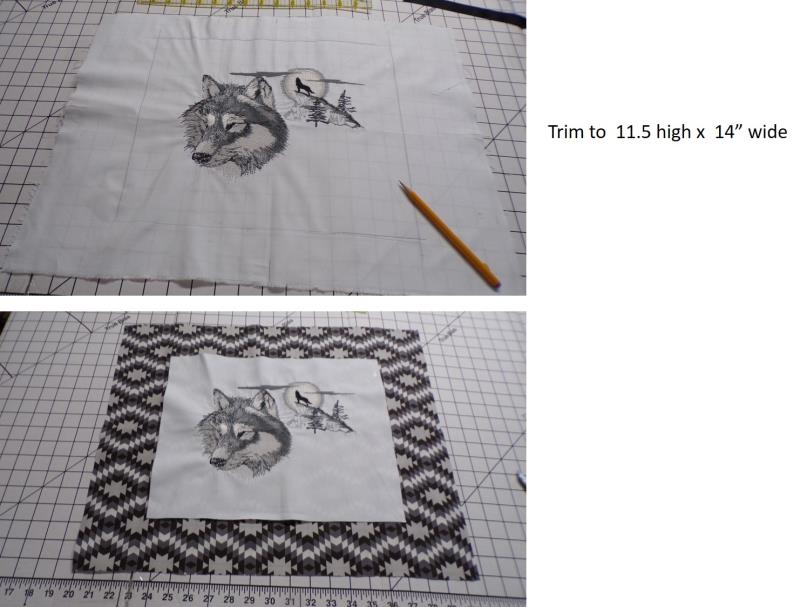
Stitch the design following the color sequence, using the colors you’ve chosen to coordinate with the fabric. Using the fold lines in the fabric as a guide, center and draw a border around the design 11.5” high x 14” wide.
(Click Image to Enlarge)
Step 5:
Cut out the embroidered fabric along the drawn line. Now the embroidered fabric will be placed behind the “window” of the front print fabric.
(Click Image to Enlarge)
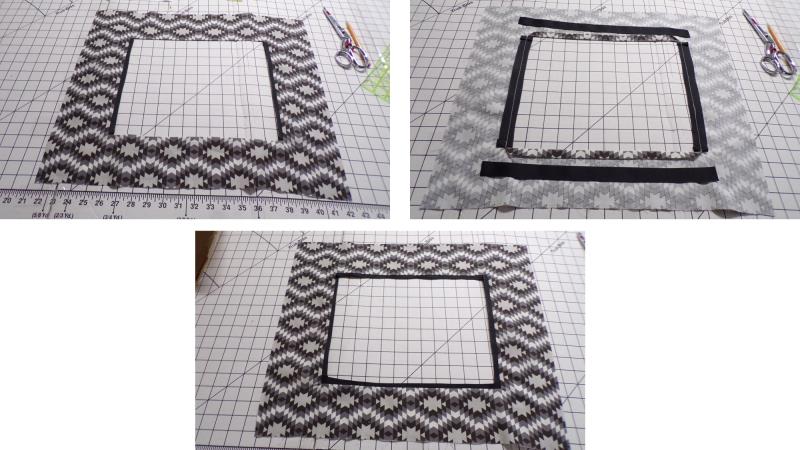
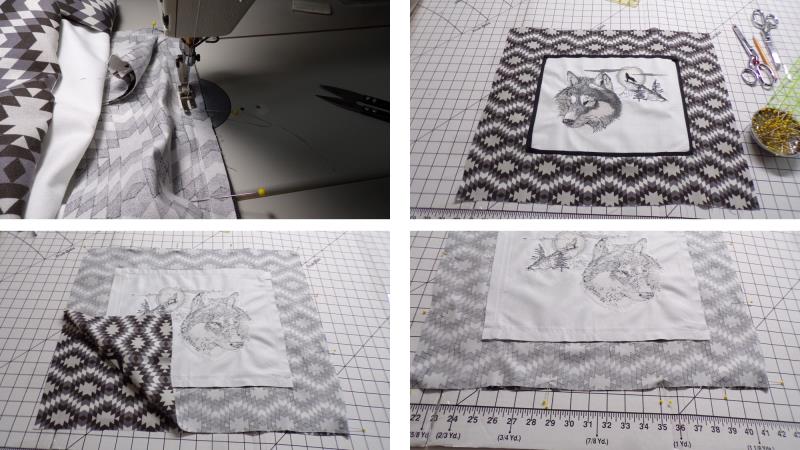
Step 6:
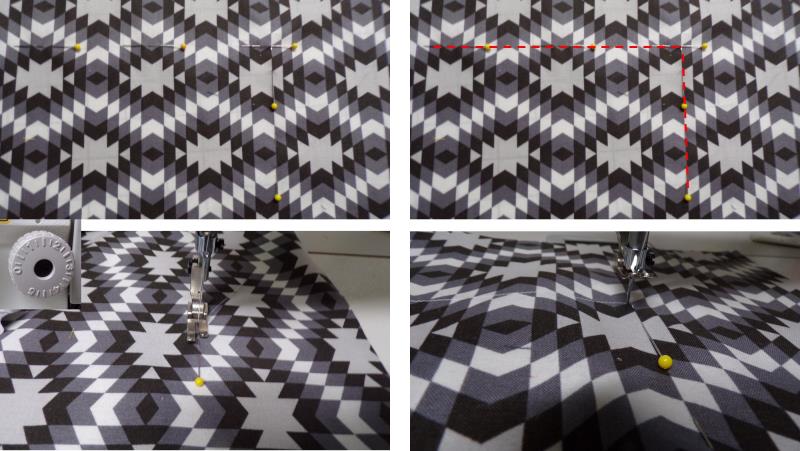
Using pins (or use chalk) to mark the “window” opening. The window should be centered on the front fabric piece and measure 10.5” high x 13” wide. Load the sewing machine with the sewing thread in the top and bobbin. Stitch around the marked window line using a 1.5mm stitch length,
(Click Image to Enlarge)
Step 7:
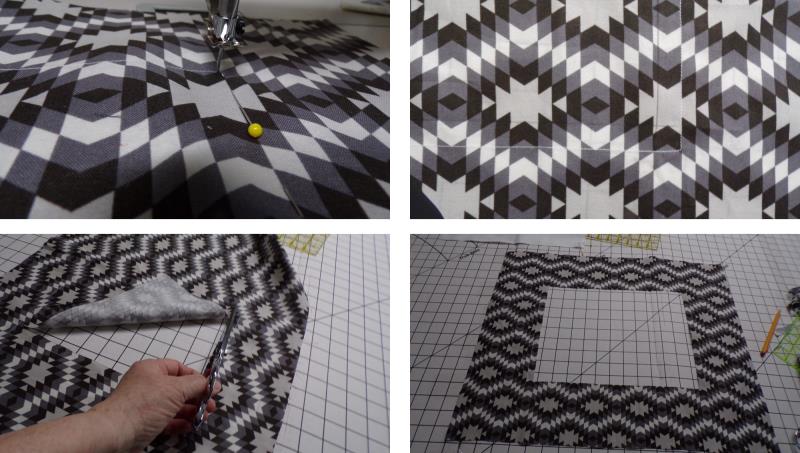
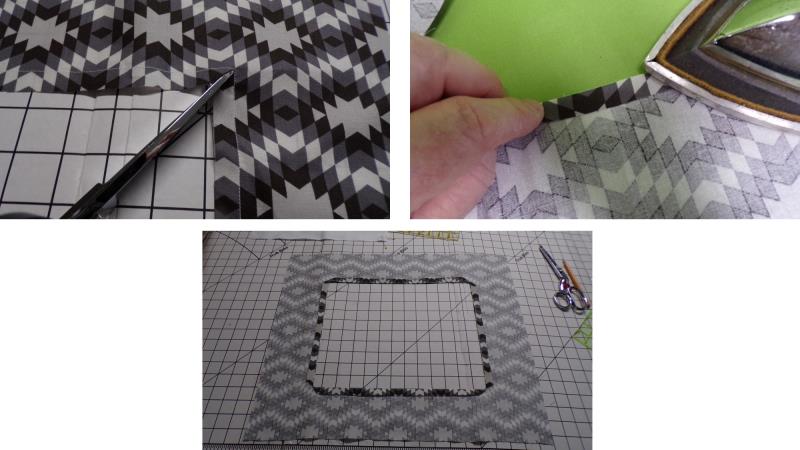
pivoting at the corners. Now mark ½” away from the stitching line to the inside of the window. Cut along the marked line; this creates a ½” seam allowance to sew on the grosgrain ribbon trim and the embroidered piece to the window.
(Click Image to Enlarge)
Step 8:
Using the tip of a sharp shear, snip into each corner but do not clip the stitching line. To make it easier to see where to stitch the seam, press the seam allowance to the back side of the fabric.
(Click Image to Enlarge)
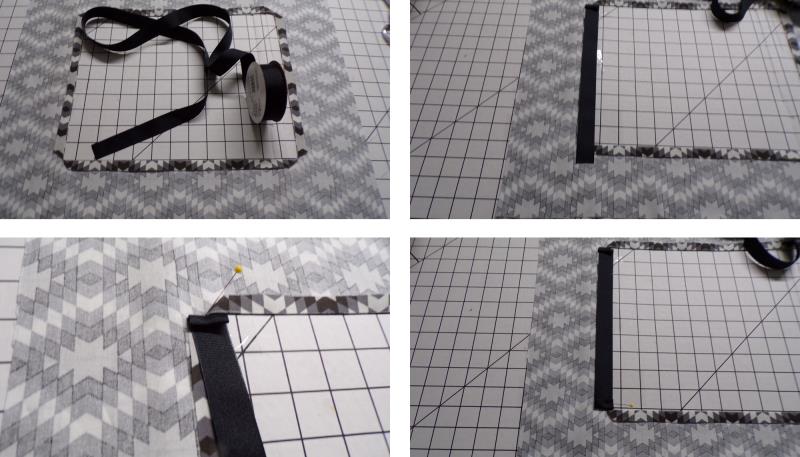
Step 9:
Cut the lengths of grosgrain ribbon which will be used to create a flange around the window. Begin with the ribbon for the left side of the “window”. Fold back ¼” on each end of the ribbon, and then fold ¼” again. Align the folded edge right at the corner and pin in place. Repeat for the other end of the ribbon, double folding and placing in the corner. Pin the outer edge of the ribbon at the cut edge of the seam allowance, pinning only through the seam allowance. The remaining part of the ribbon will extend into the window creating the first part of the flange.
(Click Image to Enlarge)
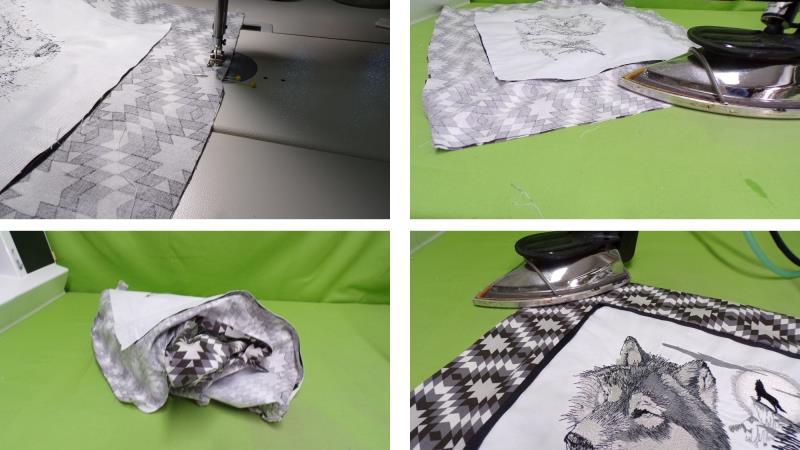
Step 10:
Now do the same folding and pinning to create the flange for the right side of the window. Now grab the pinned seam allowance and ribbon and baste the ribbon to the pillow front along the reinforcement stitching, backstitching at each corner. Repeat for the ribbon on the other side. Press the seam allowance toward the fabric. This will make the flange flip toward the inside of the “window”.
(Click Image to Enlarge)
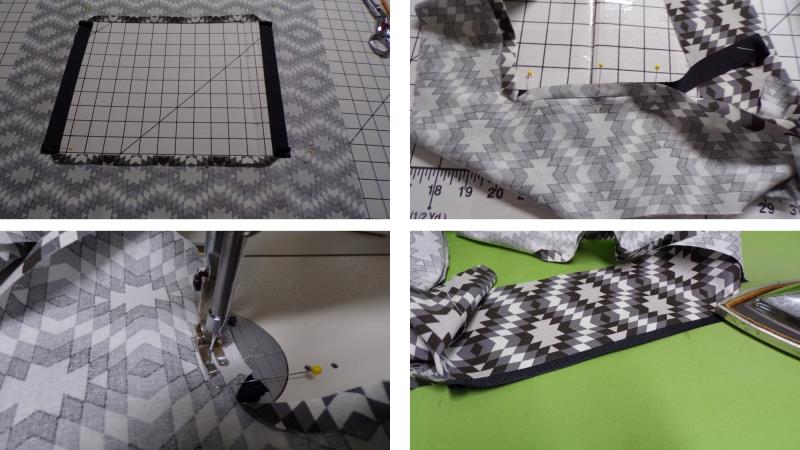
Step 11:
Once the left and right sides are done, repeat the steps for the top and bottom ribbon sections.
(Click Image to Enlarge)
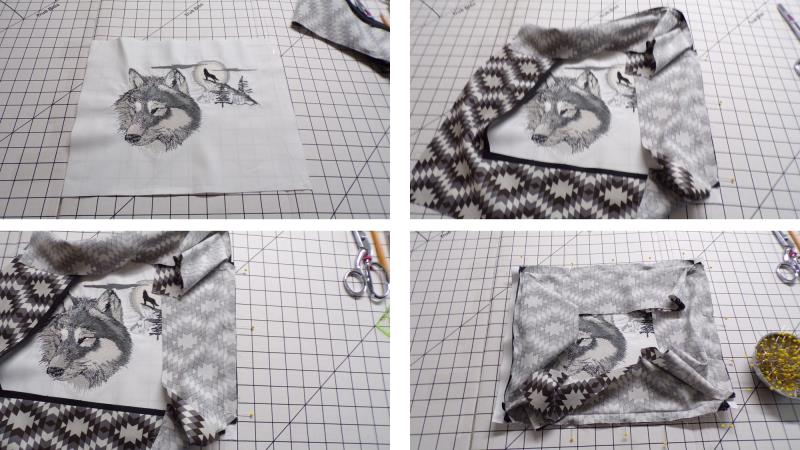
Step 12:
Now will be to sew the embroidered section to the window. Place the embroidered fabric on a flat surface. Lay the “window” over the embroidered section. Beginning at the right side of the “window”, fold back the fabric exposing only the seam allowance. Pin the seam allowance to the right side of the embroidered fabric from corner to corner. Repeat for the other three sides.
(Click Image to Enlarge)
Step 13:
Stitch the embroidered piece to the “window” on all sides, stitching just to the left side of the reinforcement stitching line. Re-press the seams toward the printed fabric. To finish the pillow, with right sides together, pin the second piece of printed fabric to the pillow front. Leave an opening in the bottom edge of the pillow for stuffing.
(Click Image to Enlarge)
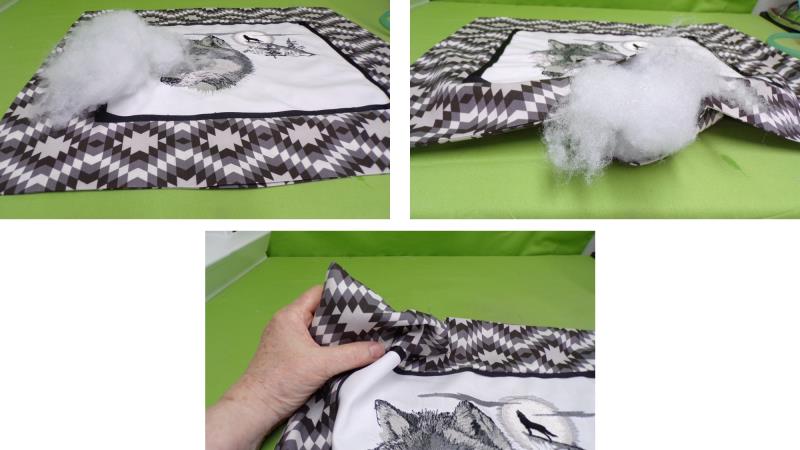
Step 14:
Begin at the lower edge where the opening is to be left, sew all around the pillow using a ½” seam allowance, and end at the other end of the opening. Press the seam to set the stitches and then turn the pillow right side out, forming the corners well. Press the seam all along the edges.
(Click Image to Enlarge)
Step 15:
Begin with small amount of fiberfill and stuff it in the corners, then fill in along the edges, and finally finish filling the center. Stuff so it is softly firm.
(Click Image to Enlarge)
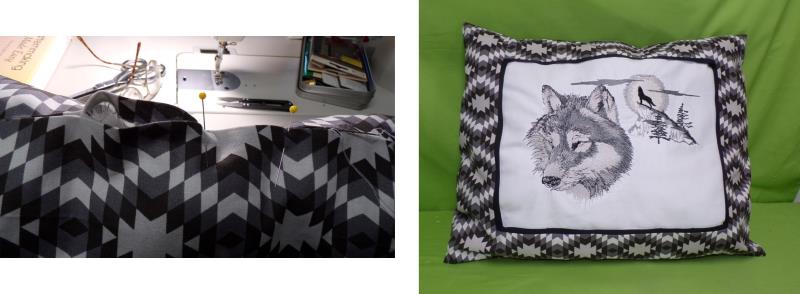
Step 16:
On the opening, turn in the seam allowances and pin the edges together. Use a ladder stitch to close the opening.
(Click Image to Enlarge)
Step 17:
Congratulations on completing this wonderful “Howling Wolf Scene” on a pillow.
Ramona Baird has been in the embroidery industry for over 23 years. She and her husband owned a commercial and retail embroidery store in Arizona for many years. She is an experienced digitizer having been mentored by award-winners Pat Williams and Lindee Goodall. Ramona is a contributor to “Creative Machine Embroidery” magazine having 5 covers to her credit. Ramona has worked for Wilcom America and served many years as Education Director for the American Sewing Guild. With a degree in fashion design, she is able to design and execute patterns which Pat Williams says are “out of the box” in creativity and application. Ramona likes to challenge the boundaries of embroidery and bring new and exciting designs, ideas, and projects to EmbroideryDesigns.com. She wants embroiderers of all levels to increase their skills and enjoyment in using their embroidery machine for gift-making and personal pleasure.