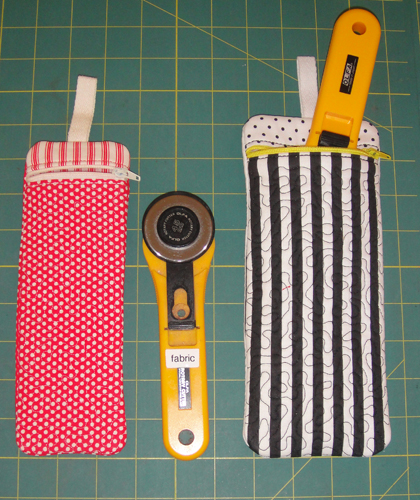
Quick to make ITH Rotary Cutter cases, padded and quilted, to protect your valuable tools. Two sizes are available, one for your 45mm rotary cutter and one for your 65mm cutters. Make them for yourself, as gifts, or as craft fair items.
Pressing your fabrics with Magic Sizing or spray starch before you begin this project will make the fabrics easier to handle while completing this project. There are a number of color stops in these designs, but they are all just to make the machine stop so that you can add layers to the project. You can use the same color thread throughout the project.
Step 1:
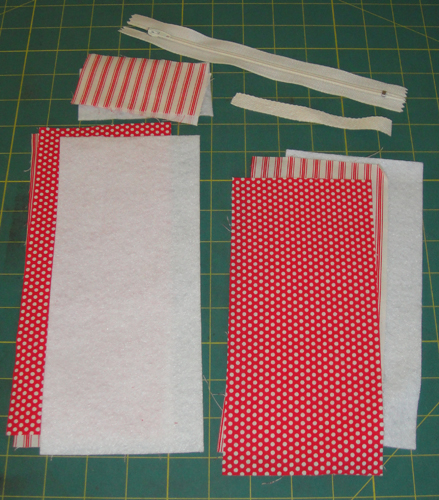
Cut the fabrics and batting as follows: a. For the 45mm case: i. Cut 2 2” x 4” rectangles of fabric for the case top ii. Cut 1 2” x 4” rectangle of batting iii. Cut 1 8 ½” x 4” rectangle each of fabric, lining and batting for the case front iv. Cut 1 10 ½” x 4” rectangle each of fabric, lining and batting for the case back b. For the 65mm case: i. Cut 2 2” x 5” rectangles of fabric for the case top ii. Cut 1 2” x 5” rectangle of batting iii. Cut 1 9 ½” x 5” rectangle each of fabric, lining and batting for the case front iv. Cut 1 11” x 5” rectangle each of fabric, lining and batting for the case back
Step 2:
(Click Image to Enlarge)
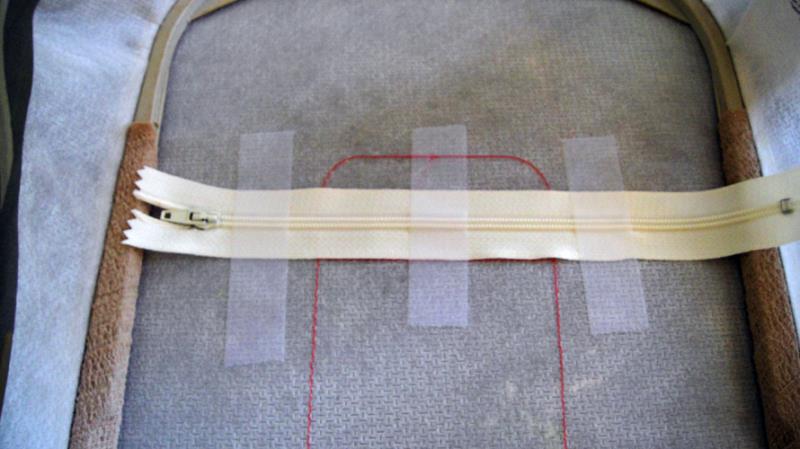
Tautly hoop your no show stabilizer in a 6” x 10” or larger embroidery hoop. Run color stop (CS) 1 as a placement line.
Step 3:
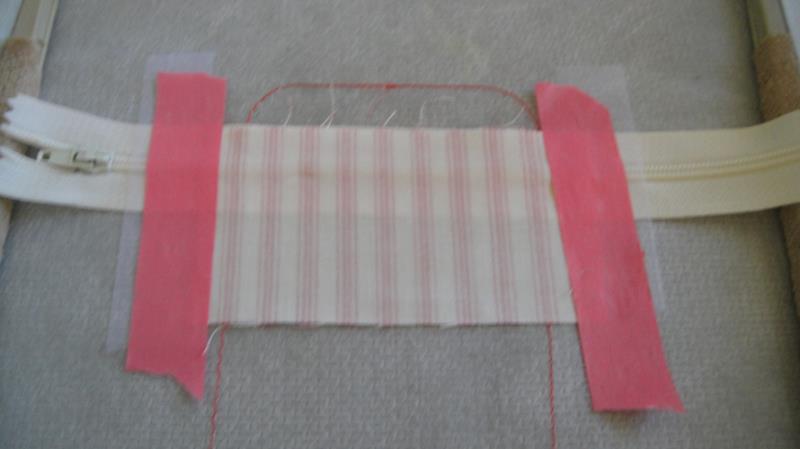
Position the zipper right side up between the placement lines. Both ends of the zipper should extend well beyond the outline of the case. Tape each end and the middle of the zipper with cellophane tape.
(Click Image to Enlarge)
Step 4:
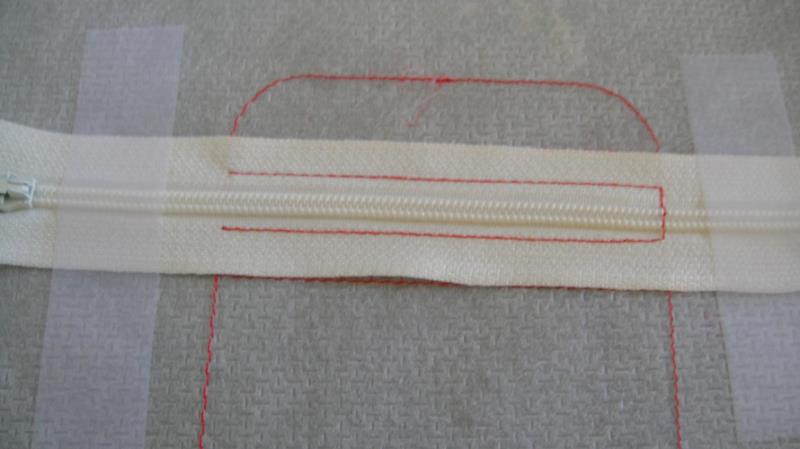
Run CS 2 to tack down the zipper. Remove the tape from the middle of the zipper.
(Click Image to Enlarge)
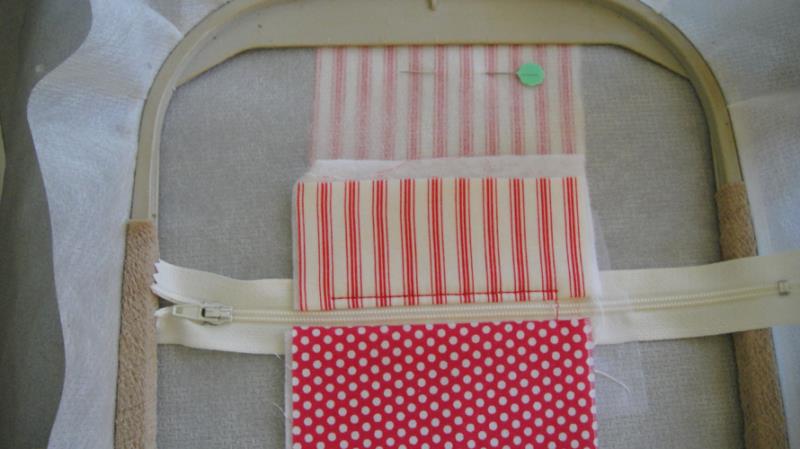
Step 5:
Align one of the 2” fabric rectangles, face down, with the top of the zipper. Tape the fabric in along the sides.
(Click Image to Enlarge)
Step 6:
Remove the hoop from the machine, do not unhoop. Lay the hoop face down on a flat surface. On the back of the hoop position a 2” fabric rectangle, face down, with the top of the zipper. Tape the sides of the fabric into place. Return the hoop to the machine and run CS 3 to seam the fabrics to the zipper.
(Click Image to Enlarge)
Step 7:
Remove the hoop from the machine and place face down again. Spray adhesive on the wrong side of the fabric and gently press the fabric towards the top of the hoop. Be sure to not put too much pressure on the back of the stabilizer as you do not want to loosen it.
(Click Image to Enlarge)
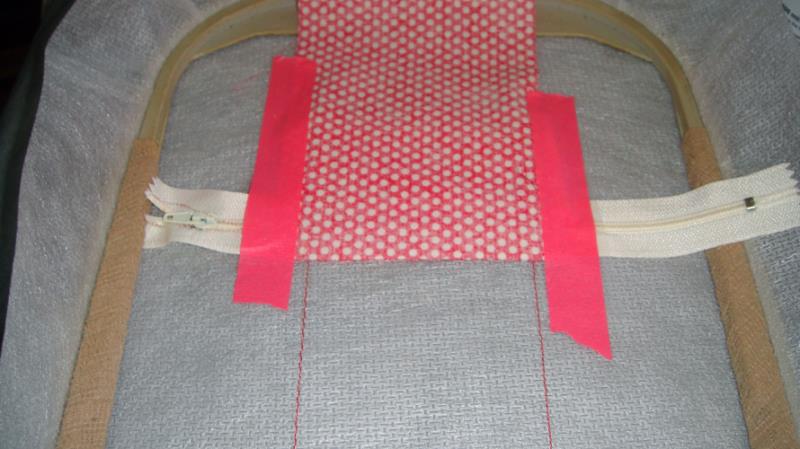
Step 8:
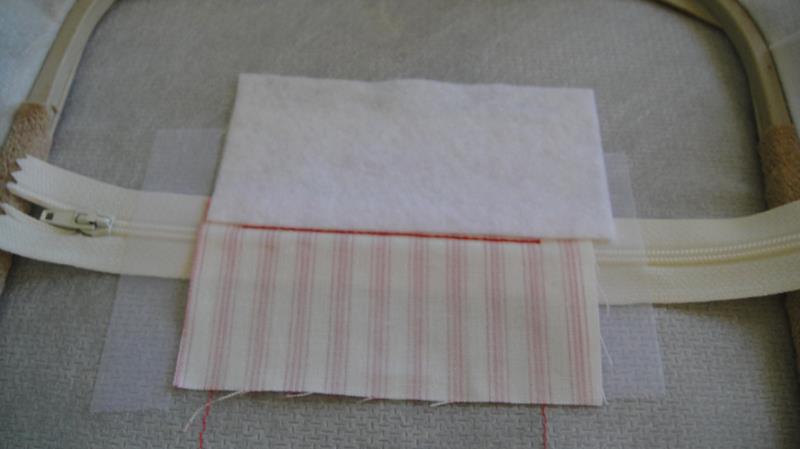
Turn the hoop right side up. Spray adhesive on the 2” rectangle of batting. Position the bottom of the batting just above the seam line and centered from side to side over the placement lines.
(Click Image to Enlarge)
Step 9:
Spray the wrong side of the top fabric with adhesive spray and smooth over the batting.
(Click Image to Enlarge)
Step 10:
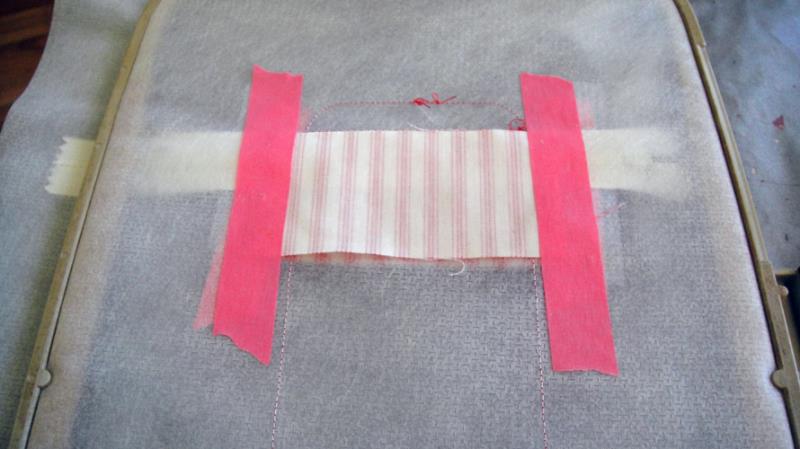
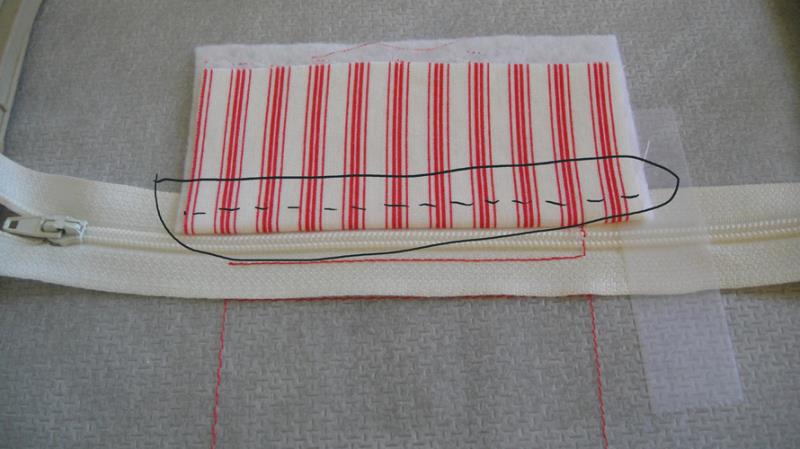
Run CS 4 which will topstitch the top fabrics into place.
(Click Image to Enlarge)
Step 11:
Remove the hoop from the machine. Do not unhoop. Position the front fabric rectangle, face down, along the bottom edge of the zipper. Tape the sides of the fabric in place.
(Click Image to Enlarge)
Step 12:
Turn the hoop over and position the lining fabric face down on the back of the hoop along the bottom edge of the zipper. Tape the fabric into place. Return the hoop to the machine and run CS 5 which will seam the fabrics to the zipper.
(Click Image to Enlarge)
Step 13:
Remove the hoop from the machine. Spray adhesive on the front batting and place just below the seam line just sewn centering the batting from side to side over the originally stitched placement lines.
(Click Image to Enlarge)
Step 14:
Spray adhesive on the top of the batting and bring the front fabric down over the batting.
(Click Image to Enlarge)
Step 15:
Do not bring down the lining fabric yet. If fact you can pin it to the stabilizer outside of the sewing field so that it stays up at the top of the hoop until needed.
(Click Image to Enlarge)
Step 16:
Return the hoop to the machine and run CS 6 to tack down the fabric and batting.
(Click Image to Enlarge)
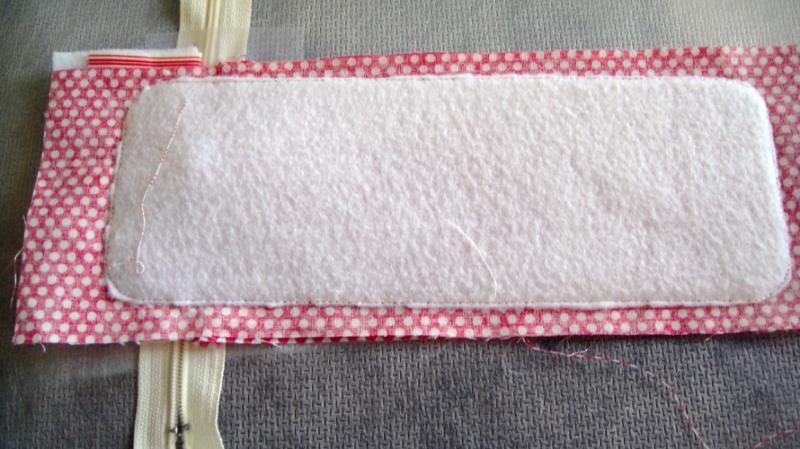
Step 17:
Trim the batting underneath the front bottom of the case as close as possible to the tack down line, this will reduce the bulk when turning the project.
(Click Image to Enlarge)
Step 18:
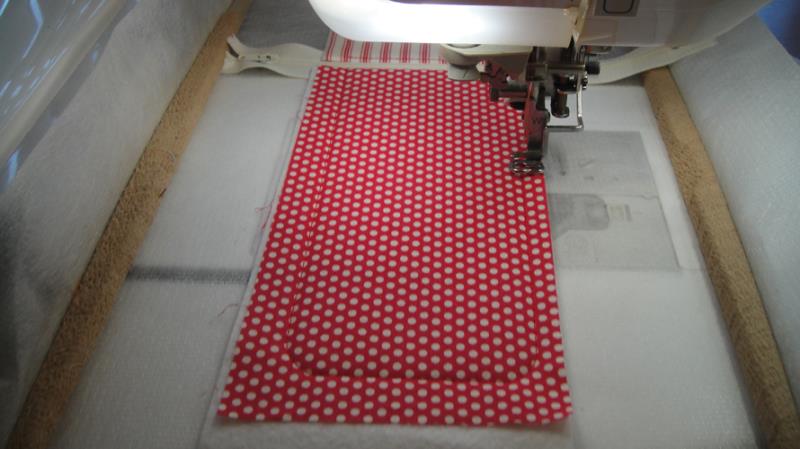
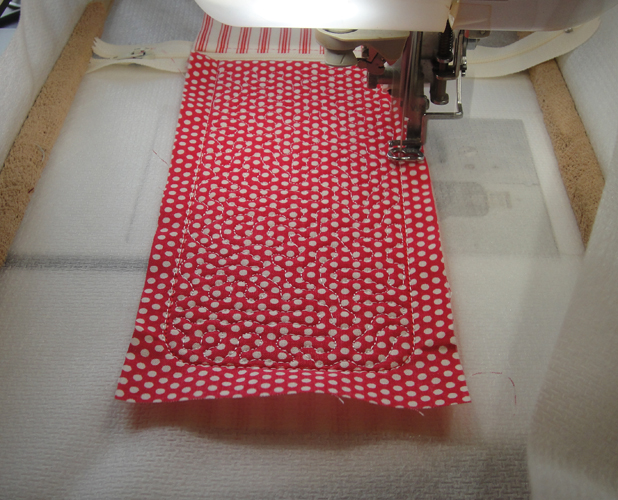
Run CS 7 in the same or another color to quilt the case front.
(Click Image to Enlarge)
Step 19:
Remove the hoop from the machine, place face down on a flat surface. Unpin the lining from the top of the hoop. Spray the back of the lining with adhesive and smooth down towards the bottom of the hoop.
(Click Image to Enlarge)
Step 20:
Return the hoop to the machine, run CS 8 to tack down the lining.
(Click Image to Enlarge)
Step 21:
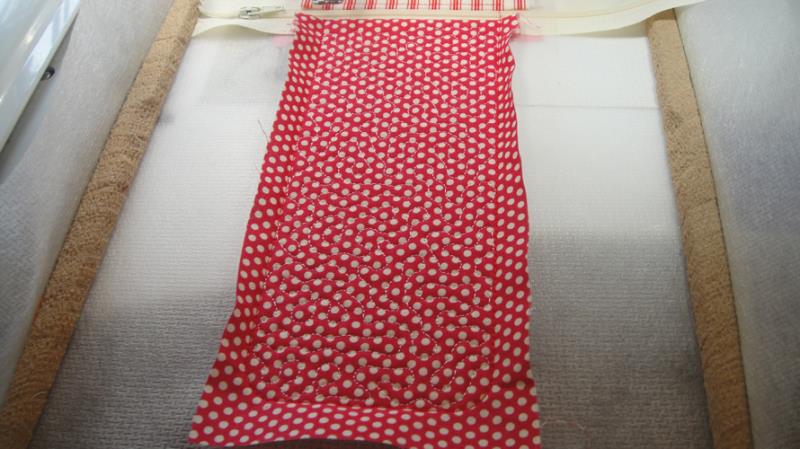
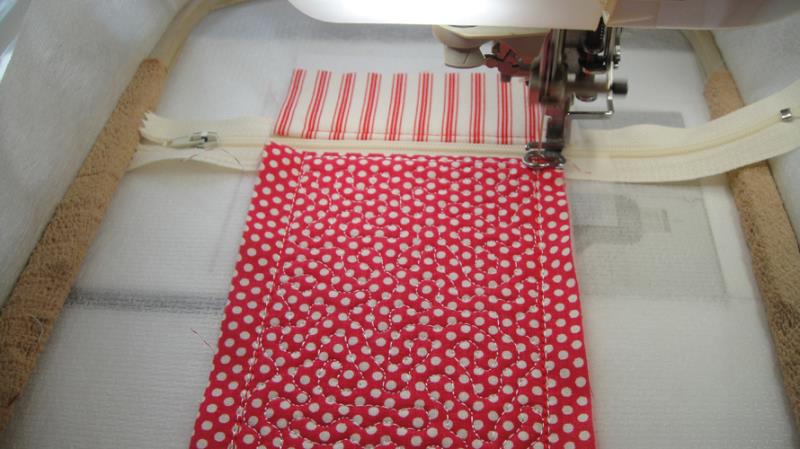
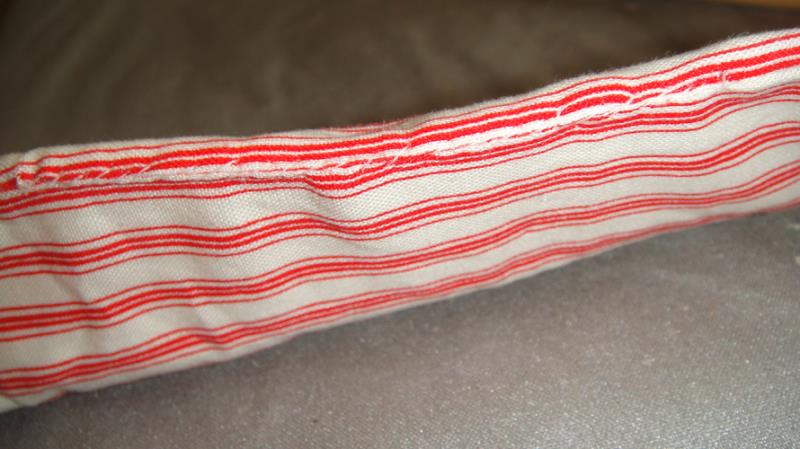
Run CS 9 to top stitch the bottom section of the front.
(Click Image to Enlarge)
Step 22:
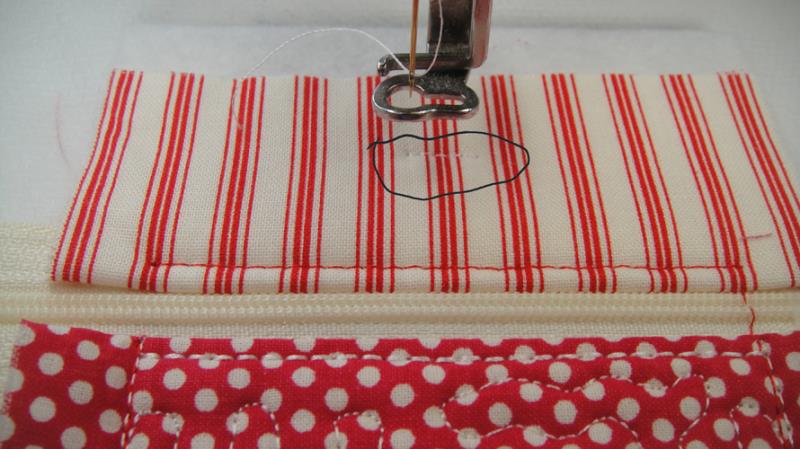
Run CS 10 as a placement line for the loop at the top of the bag.
(Click Image to Enlarge)
Step 23:
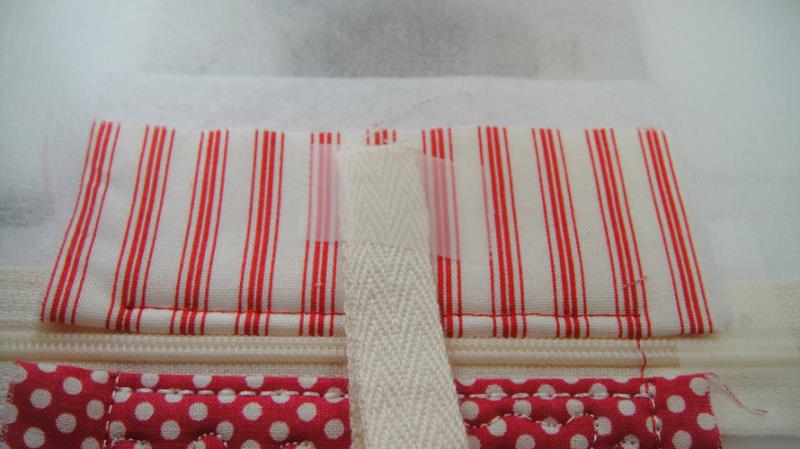
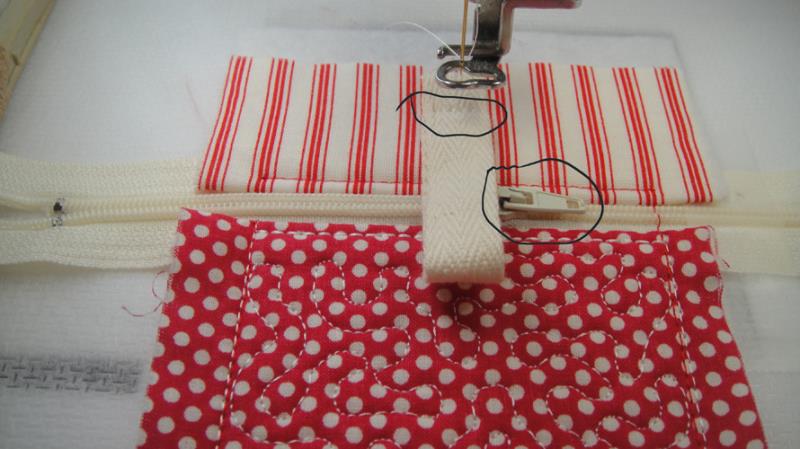
Fold the twill tape in half and place the raw edges about ½” above the placement line. Tape in place right across the placement line.
(Click Image to Enlarge)
Step 24:
Run CS 11 to tack down the twill tape. Remove the tape. IMPORTANT: Unzip the zipper a little more than half way. If you fail to do this at this point you will not be able to open the bag.
(Click Image to Enlarge)
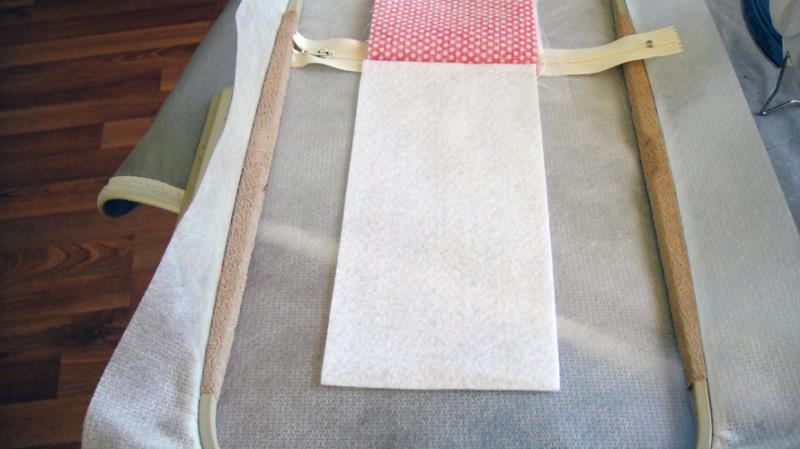
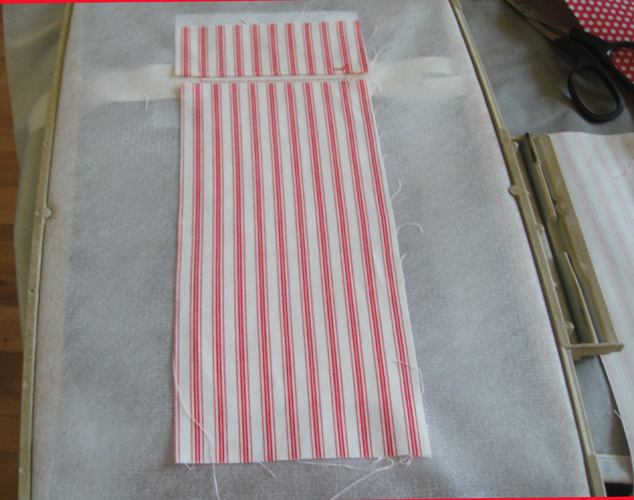
Step 25:
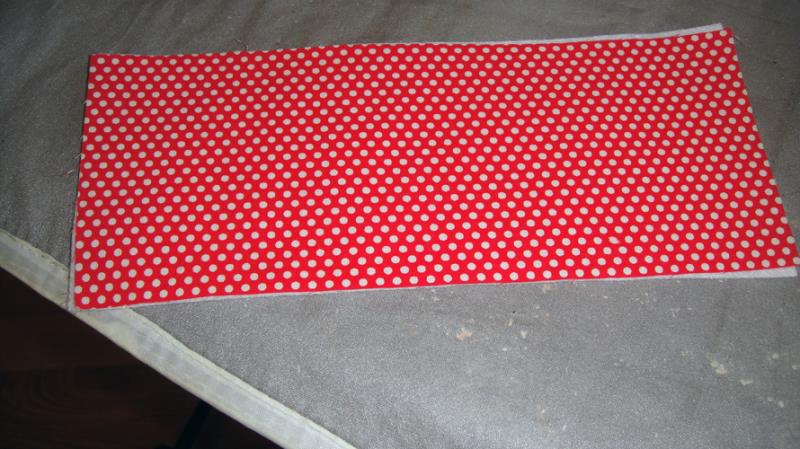
Spray adhesive on the back batting and place the back outer fabric over the batting, smooth together.
(Click Image to Enlarge)
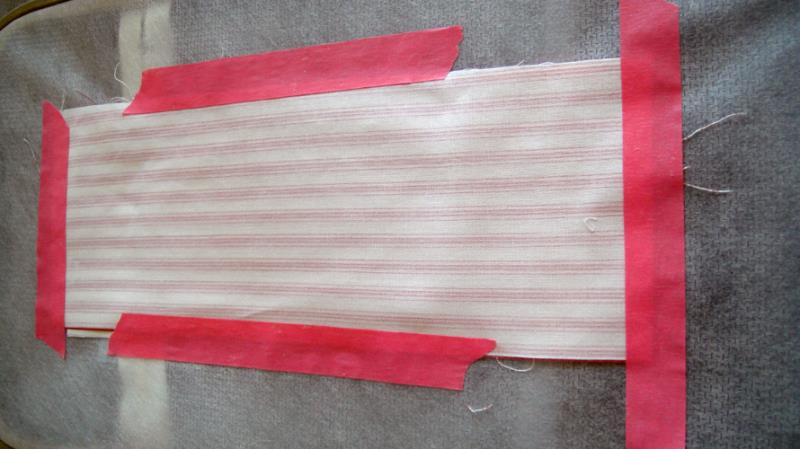
Step 26:
Place the fused back fabric face down over the case and tape on all edges.
(Click Image to Enlarge)
Step 27:
Return to the hoop and run CS 12 to stitch the back fabric and batting to the front. This picture shows that stitching from the back side of the hoop.
(Click Image to Enlarge)
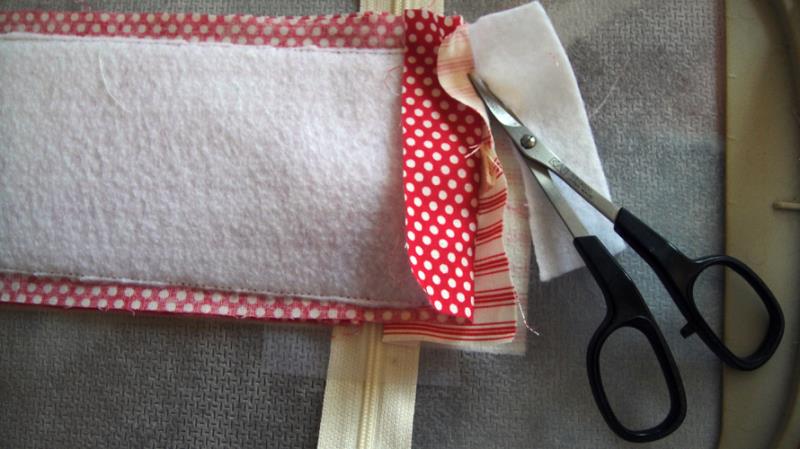
Step 28:
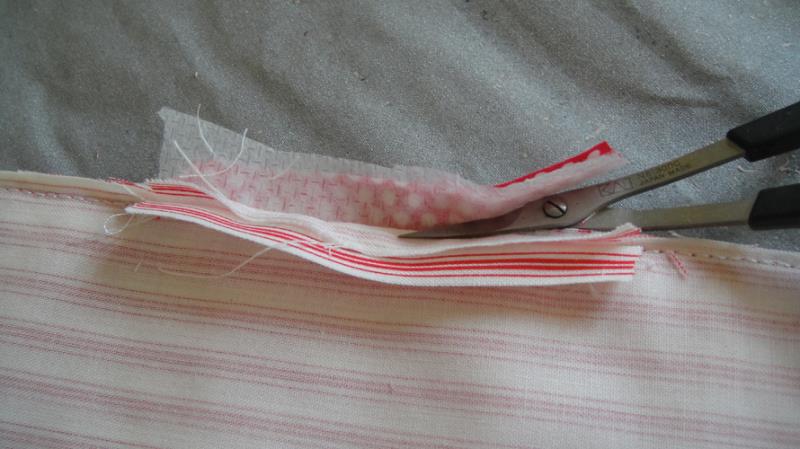
Trim the back batting as close as possible to the tack down stitches.
(Click Image to Enlarge)
Step 29:
Trim the excess batting around the top of the case too.
(Click Image to Enlarge)
Step 30:
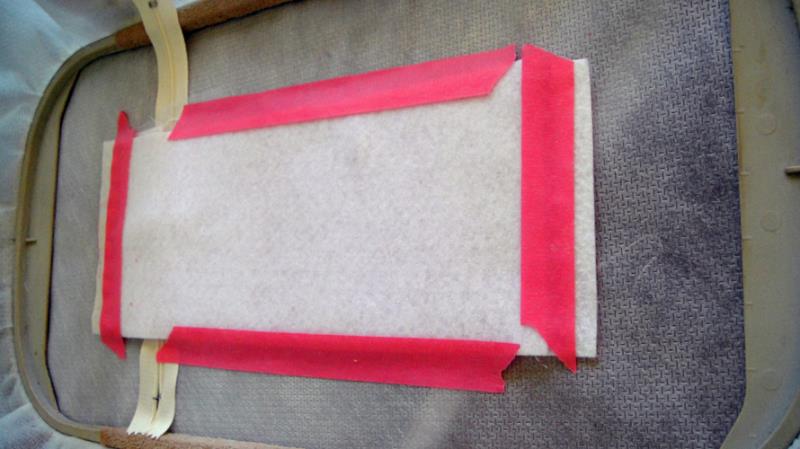
Turn the hoop face down. On the back of the hoop tape the lining fabric, right side down, over the cutter case and tape on all sides.
(Click Image to Enlarge)
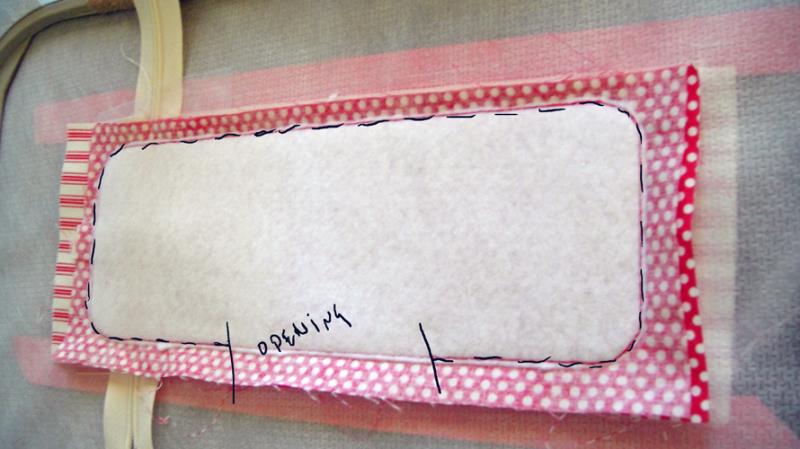
Step 31:
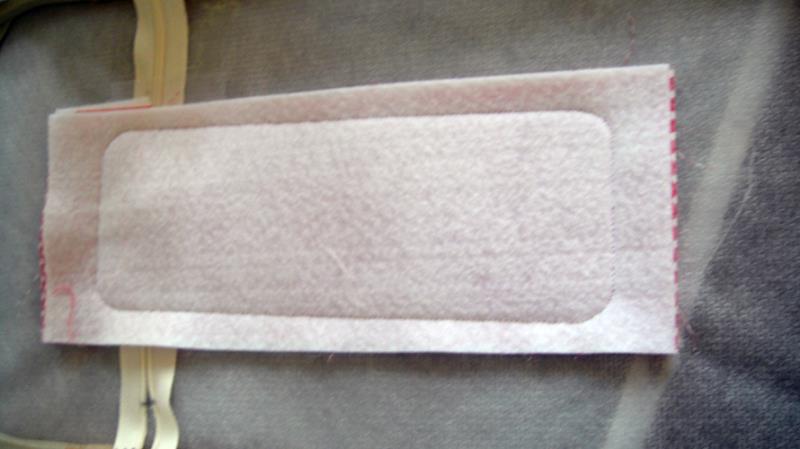
Return the hoop to the machine and stitch the last CS to sew the final seam line which will leave an opening for turning the project right side out.
(Click Image to Enlarge)
Step 32:
Remove the project from the hoop. Trim from the backside of the project so that you leave a ½” seam allowance over the opening left in the project. Cut the remainder of the seam allows to approximately ¼”.
(Click Image to Enlarge)
Step 33:
Fold back the two lining seam allowances and trim off the seam allowances to the front and the stabilizer to ¼”.
(Click Image to Enlarge)
Step 34:
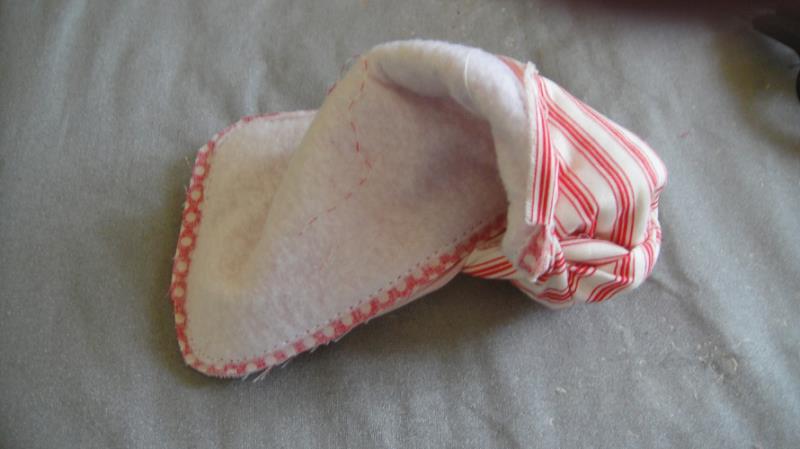
Turn the project lining side out through the opening.
(Click Image to Enlarge)
Step 35:
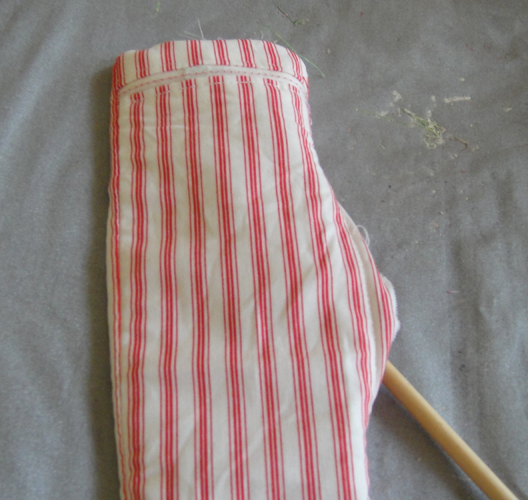
Use a wooden dowel or chopstick to push out the corners.
(Click Image to Enlarge)
Step 36:
Turn in the lining seam allowances over the opening and whipstitch shut. These stitches don’t have to be too neat. They will never be seen.
(Click Image to Enlarge)
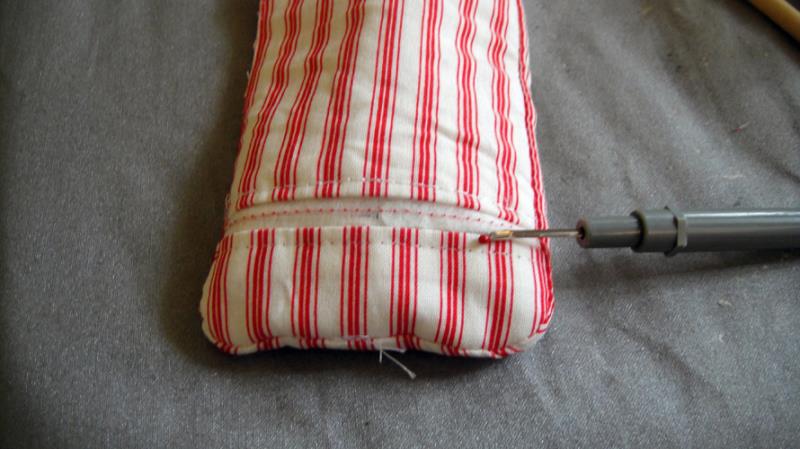
Step 37:
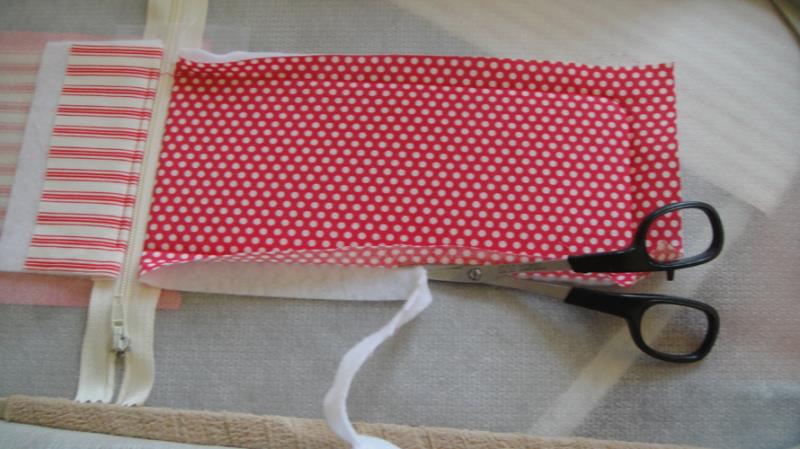
Use a seam ripper and small scissors to remove the stabilizer that sits over the zipper. Unzip the zipper.
(Click Image to Enlarge)
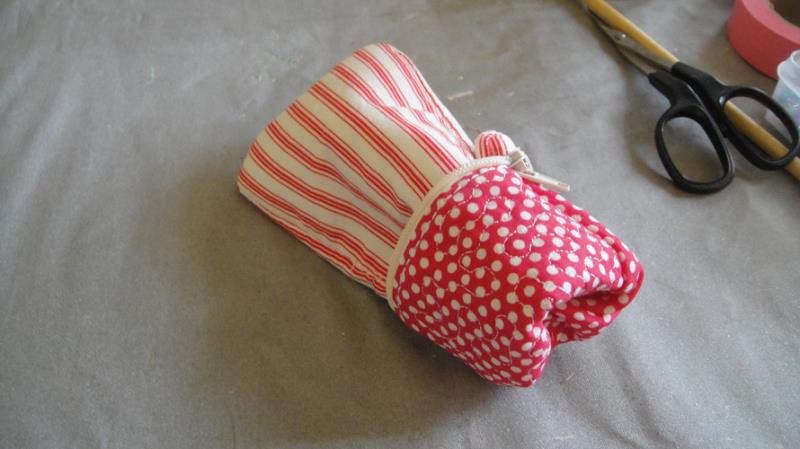
Step 38:
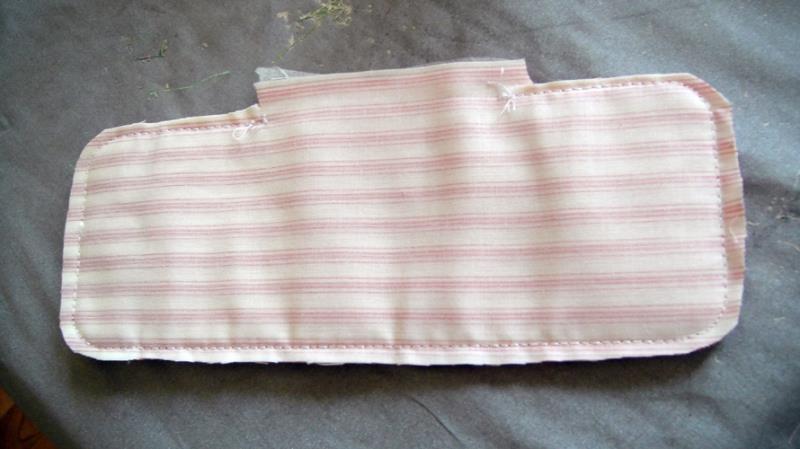
Turn the bag right side out through the zipper opening.
(Click Image to Enlarge)
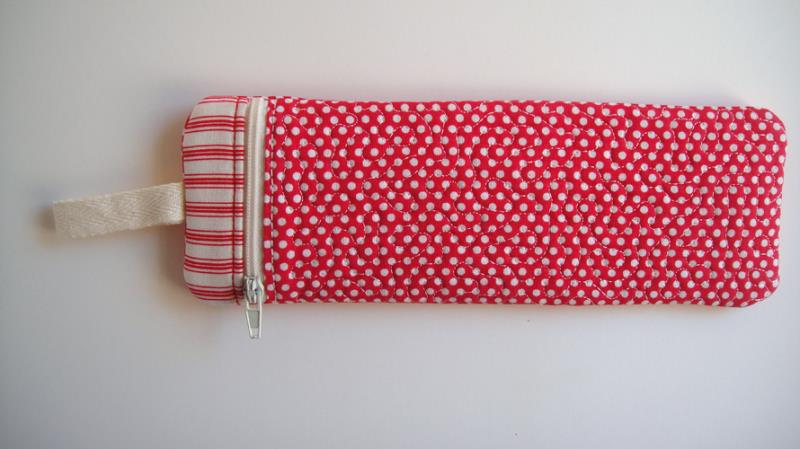
Step 39:
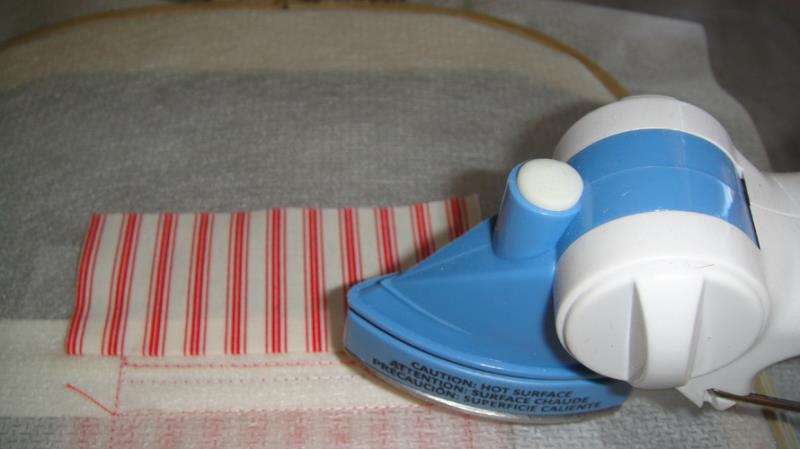
Press the case with a steam iron after completion. Congratulations your ITH Rotary Cutter Case is complete!
(Click Image to Enlarge)
Step 40:
Make both sizes to safely store your rotary cutters.
Award winning Digitizer, Embroidery Educator, Author and a Consultant to the Industry, Pat Williams has 30 years of experience in the embroidery industry. Pat has won multiple awards for her digitizing expertise including the 2007 Impressions Awards Grand Championship, Best of Show as well as the 1st and 2nd Place Awards. Pat’s love of digitizing has afforded her the opportunity to write numerous articles for Impressions magazine in the United States and Images Magazine in Europe. In 2001 Pat was named “Embroidery Educator of the Year.” For many years Pat taught digitizing seminars at the ISS Shows in Long Beach, CA and for Compucon software. She now resides in Tucson, AZ.