{{superHeaderAds.title}}
Live Chat
Embroidery Designs
Welcome, Embroiderer
Login
Wedding guest book
{{mainImageAlt || (productInfo._source && productInfo._source.name) || ''}}

Wedding guest book Embroidery Project

By   Kylie Burke   on   March 22, 2018

PROJECT DETAILS

SKILL LEVEL
Some Experience
TIME REQUIRED
02:00
Description

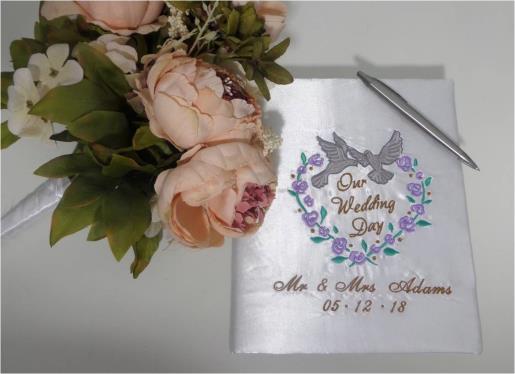
A beautifully personalized wedding guest signing book is the perfect keepsake! No need to search for the perfect guest book anymore when you can create it.

Project Preview Video

Materials
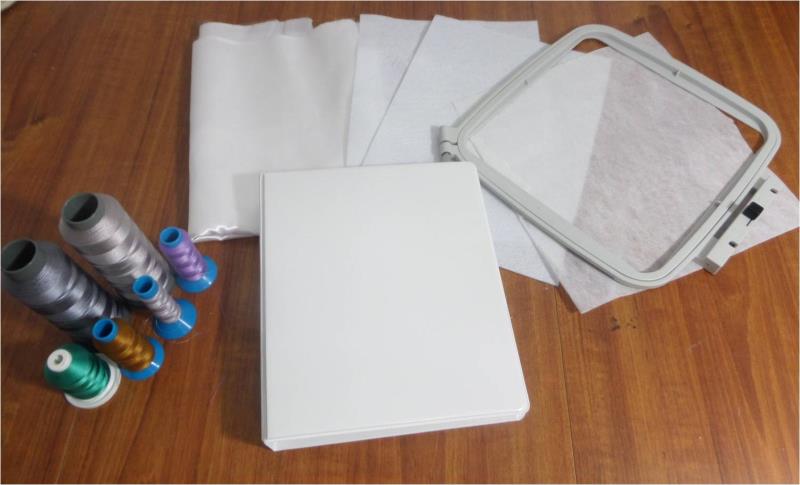
  • 21” x 12 ½” White satin
  • White felt
  • 2 A4 pieces of White cardstock
  • Tearaway stabilizer
  • A5 binder folder
  • 7 thread colors
  • Temporary adhesive spray
  • Hot glue gun

  • Designs used in this project

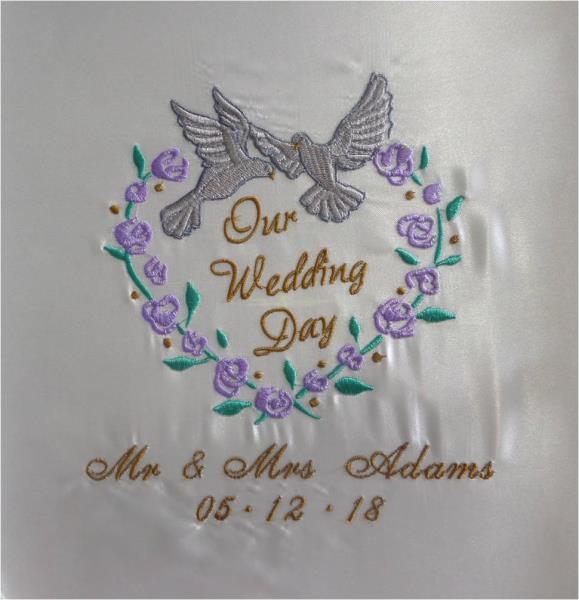
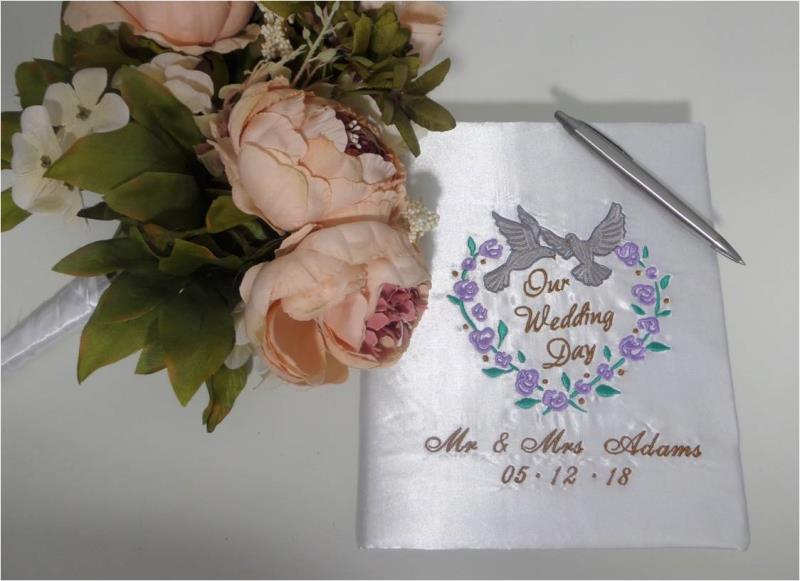
    Final Product: What You Will Create

    Preface:
    You could also use these instructions for covering a photo album


    Step 1:
    Gather the materials and read through the instructions before beginning. Have a copy of the color sequence on hand

    (Click Image to Enlarge)


    Step 2:
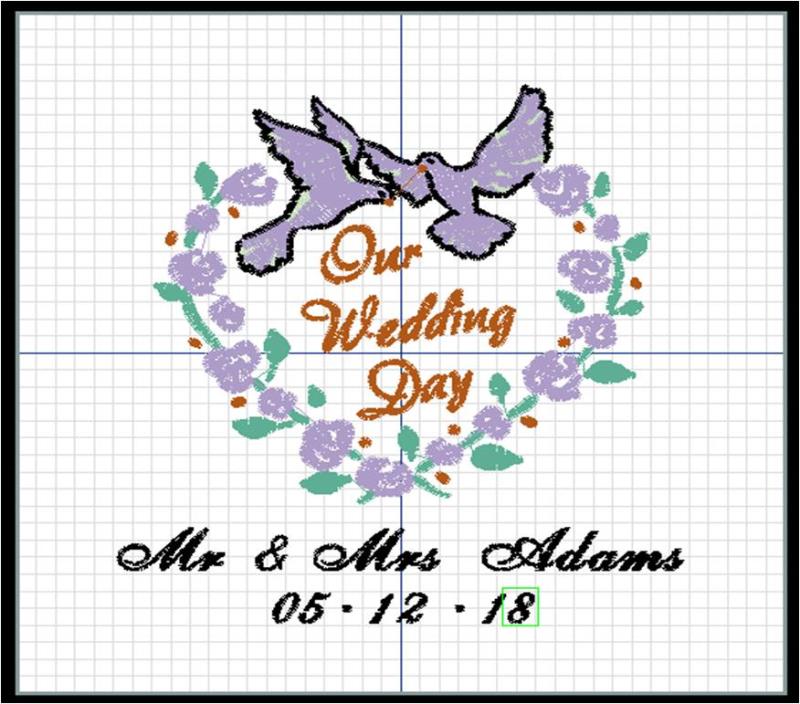
    Using an embroidery a software, if available, open the “Our wedding day” embroidery design then insert each letter and number required for the wording. Align text below the wedding design and save the file.

    (Click Image to Enlarge)


    Step 3:
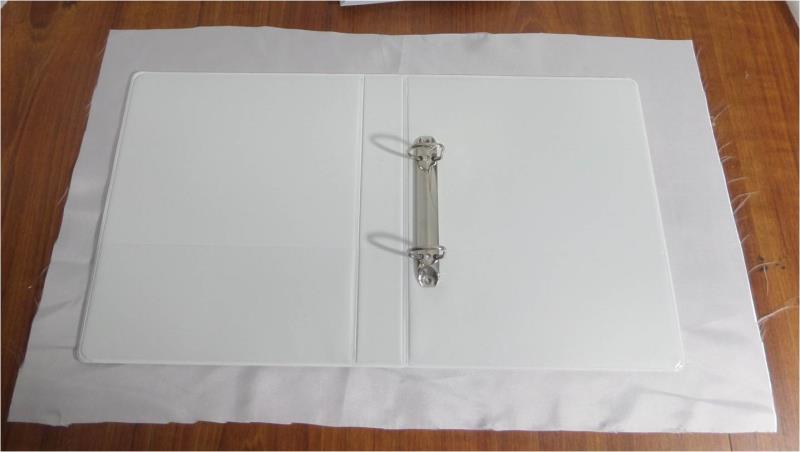
    Cut the satin into a 21” x 12 ½” rectangle. This allows for 1 ½” excess around the folder. 

    (Click Image to Enlarge)


    Step 4:
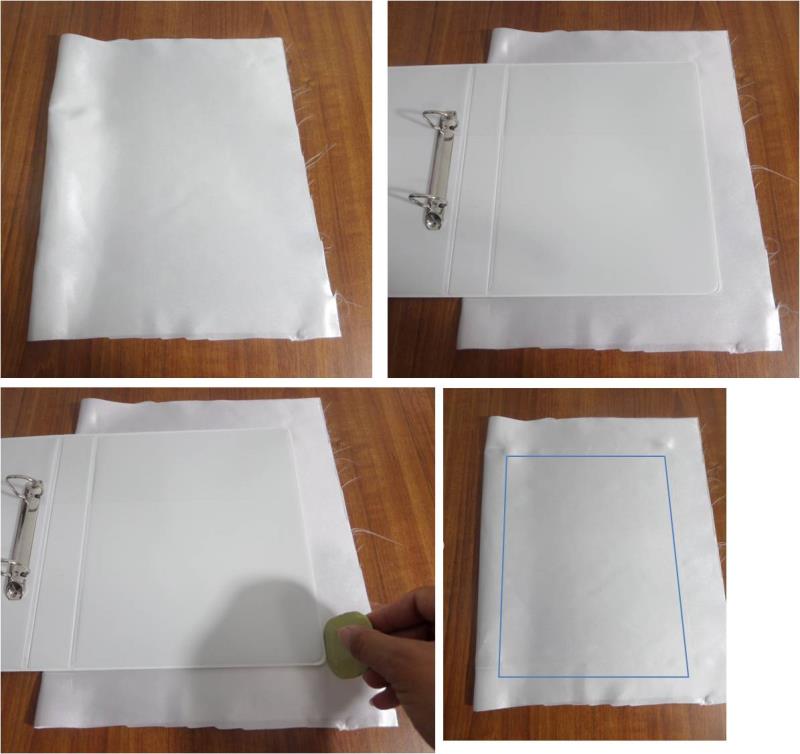
    Fold the satin in half and lay the folder on the satin, ensuring half the folder is on the satin. Then using chalk, mark the corners of the folder and the fold mark of the binder of the book and draw lines to connect those marks, this rectangle marks the front of the folder

    (Click Image to Enlarge)


    Step 5:
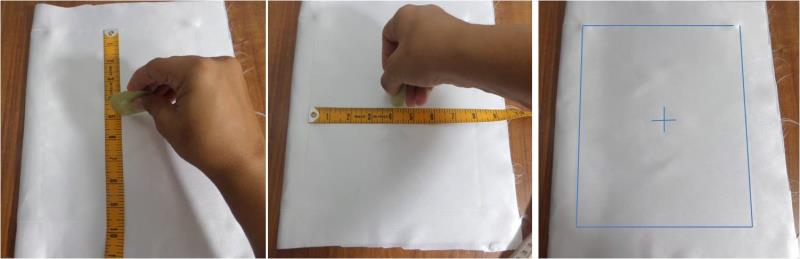
    You now need to mark the centre of that rectangle which indicates the centre of the embroidery design. Measure down from the top of the rectangle, then mark half way. Measure across the width of the rectangle and mark half way again, this will form a crosshair.

    (Click Image to Enlarge)


    Step 6:
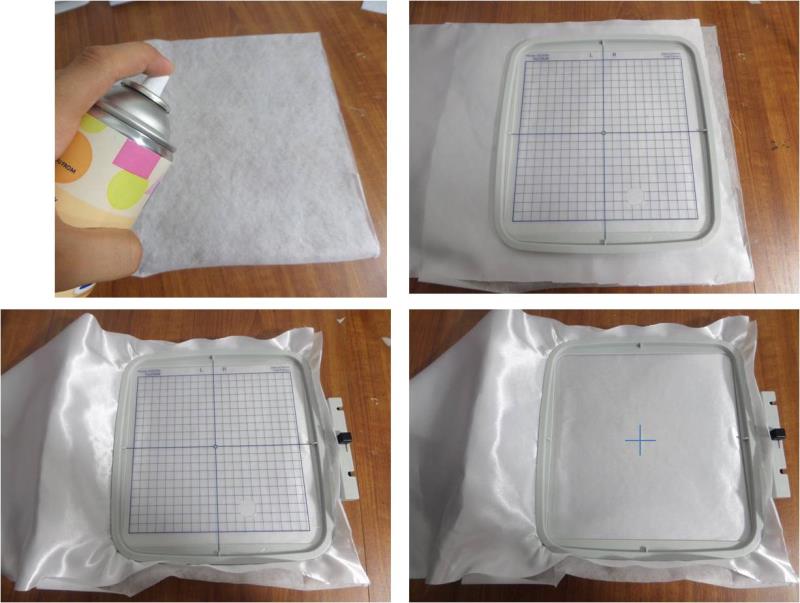
    Apply spray adhesive to the tearaway stabilizer and lay the satin on top, pressing down on the satin to bind the two layers then hoop the 2 layers together ensuring that the cross hair is centered in the hoop. 

    (Click Image to Enlarge)


    Step 7:
    Attach the hoop to your machine and stitch out the design. Once complete, remove the hoop, unhoop the fabric then remove the stabilizer and press

    (Click Image to Enlarge)


    Step 8:
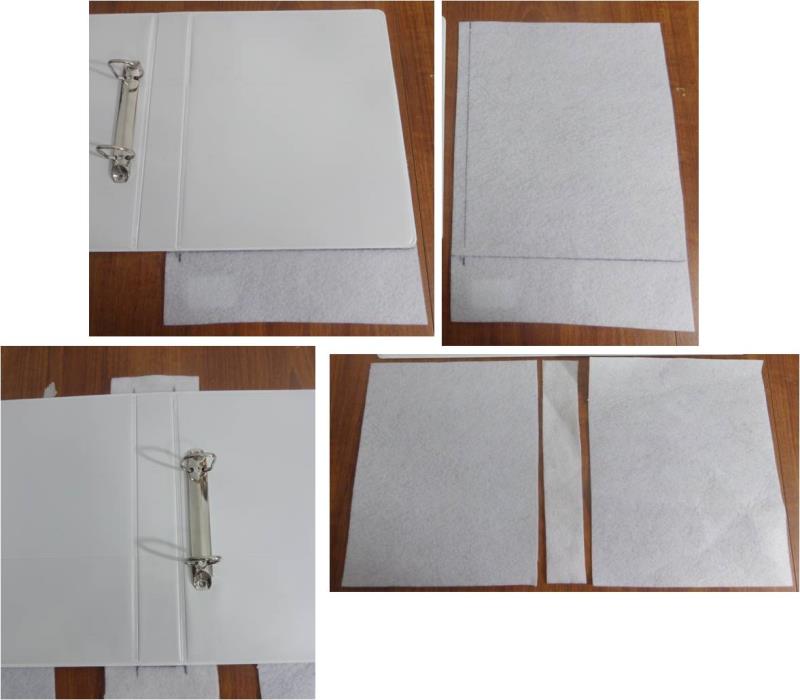
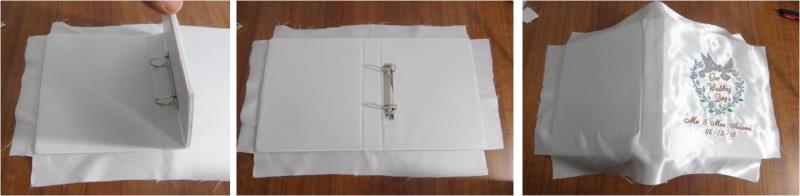
    I have applied a layer of felt to the outside of the folder to give it some softness. Lay the folder ontop of the felt and mark the front, binder edge and back and cut the felt to size. NOTE: Rather than one full piece of felt, I have cut the felt into 3 pieces so that when the folder folds open or closed that the binder edge is not bulky

    (Click Image to Enlarge)


    Step 9:
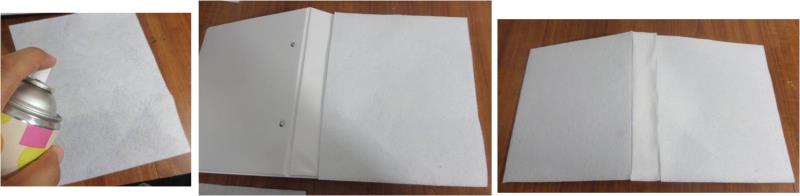
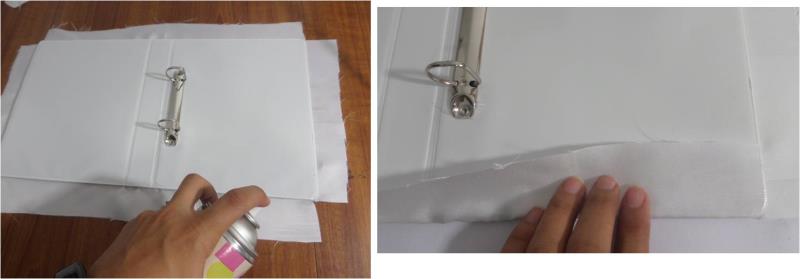
    Apply spray adhesive to the felt and lay the felt on the folder and allow to dry.

    (Click Image to Enlarge)


    Step 10:
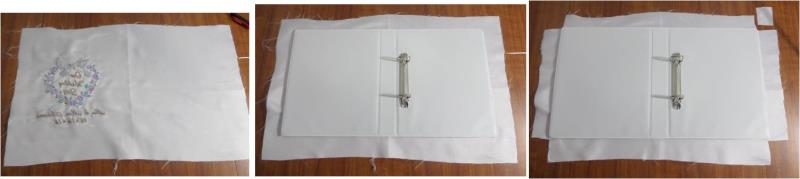
    Lay the embroidered satin right side down and position the folder on top, ensuring the embroidery design is centered. Remembering there is 1 ½” excess satin around the folder, this is a good guide to ensure the design is centered. Then cut a square out of each corner, which will remove the bulk when the satin folds in

    (Click Image to Enlarge)


    Step 11:
    Apply spray adhesive to the felt and lay the folder onto the satin, using the corner cut outs to guide you where to position it. Press down firmly

    (Click Image to Enlarge)


    Step 12:
    With the folder face down, spray adhesive onto the excess satin around the edges, then turn the satin onto the inside of the folder and press down

    (Click Image to Enlarge)


    Step 13:
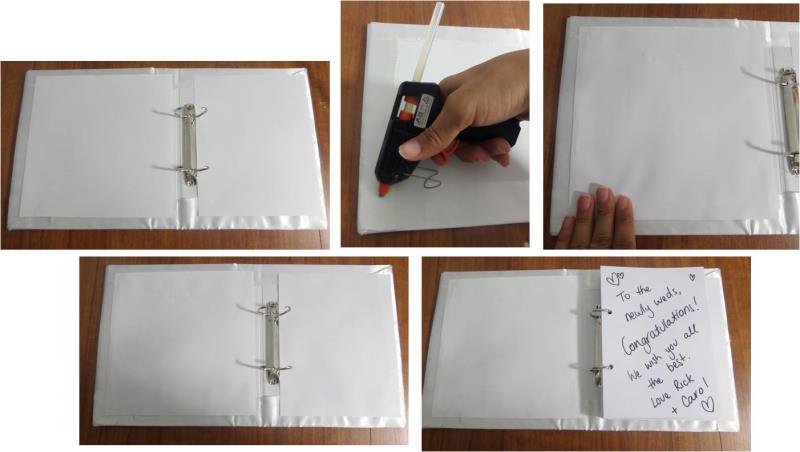
    Using cardstock, cut it down to size to fit the inside of the folder to cover the satin turnover for the front and back covers. You can now put the pages into the folder. 

    (Click Image to Enlarge)


    Step 14:
    The unique guest book is now ready for the newly weds!

    (Click Image to Enlarge)

    Meet the Author: Kylie Burke
    Kylie Burke
    Kylie is based in Australia and loves creating and sharing her unique pieces.
    More From This Author
    Link is Broken, Please check the URL
    Exclusive Embroidery Offers!
    Copyright © {{ currentDate | date:'yyyy'}} - EmbroideryDesigns.com
    GET 50% OFF! ×