{{superHeaderAds.title}}
Live Chat
Embroidery Designs
Welcome, Embroiderer
Login
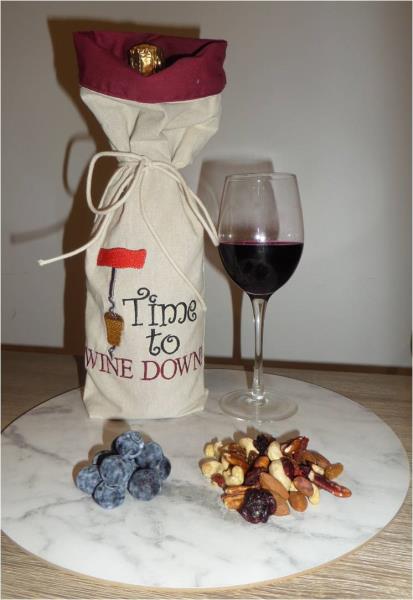
Wine bag
{{mainImageAlt || (productInfo._source && productInfo._source.name) || ''}}

Wine bag Embroidery Project

By   Kylie Burke   on   February 12, 2018

PROJECT DETAILS

SKILL LEVEL
Some Experience
TIME REQUIRED
01:00
Description

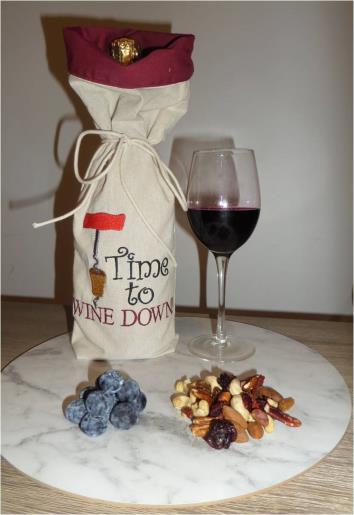
Gifting a bottle of wine and looking for a handmade option to compliment it, or just after a reusable wine bag? This lined wine bag is just what you need and is a great keepsake.

Project Preview Video

Materials
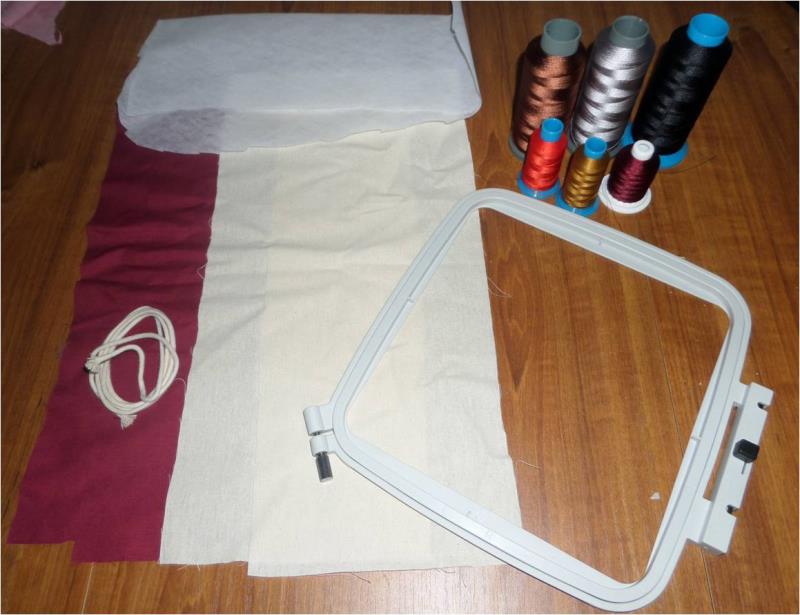
  • Tearaway stabilizer
  • 6 embroidery threads
  • Maroon color 100% cotton 2 pieces @ 18”x7”
  • Natural color calico 2 pieces @ 18”x7”
  • 35” of Cotton cording
  • Sewing machine and maroon sewing thread
  • pins

  • Designs used in this project

    Preface:
    This bag is lined with a contrasting fabric and I have used the matching contrast thread. The bag has a tie attached which sits around the neck of the bottle and gives it a “paperbag” look. 


    Step 1:
    Gather the materials and read through the instructions before beginning. Have a copy of the color sequence on hand.

    (Click Image to Enlarge)


    Step 2:
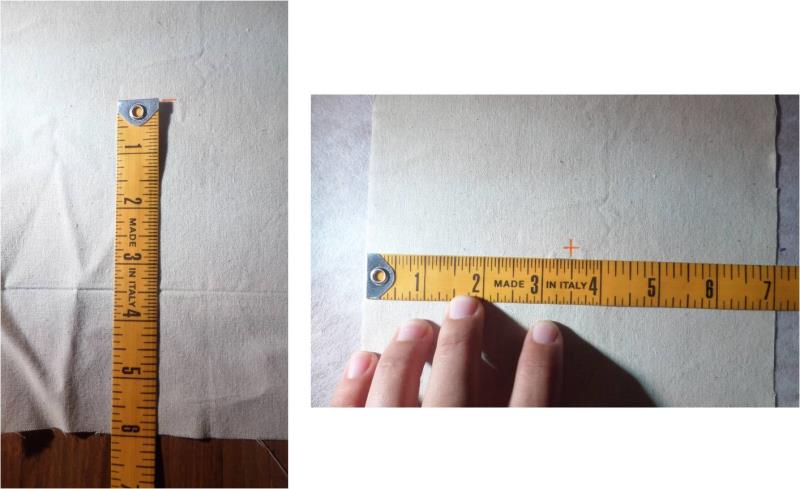
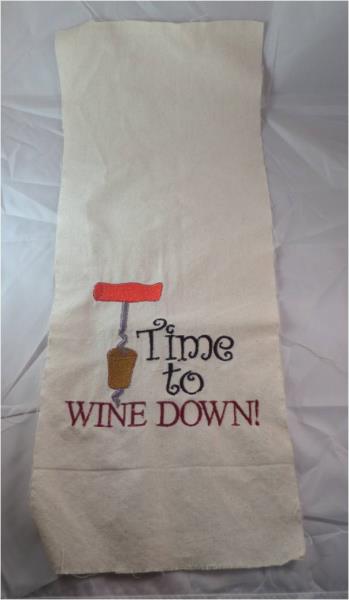
    The embroidery design will go onto the calico fabric, so on one rectangle of calico mark up 6” from the bottom then across the width mark 3.5”. This point is the center of the embroidery design

    (Click Image to Enlarge)


    Step 3:
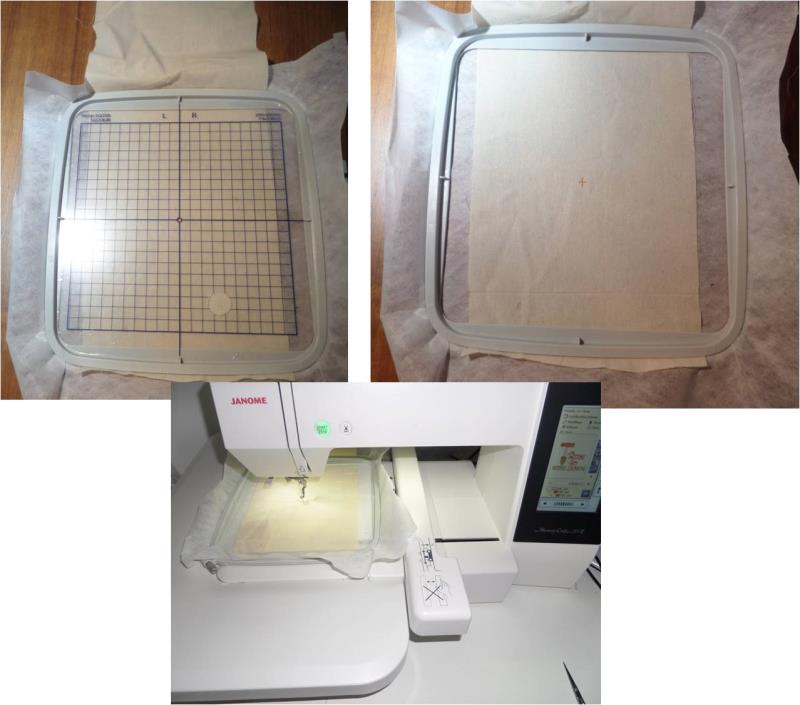
    Place the calico over the stabilizer, position the center point marking of the calico in the center of the stabilizer, then hoop them together. Use some spray adhesive here if required. Using a grid, if available, check that your mark is centered in the hoop. Load design onto your machine, attach the hoop and stitch out the 6 color design

    (Click Image to Enlarge)


    Step 4:
    (Click Image to Enlarge)
    Remove the hoop from the machine, trim threads if needed and remove stabilizer. Also a good idea to give the embroidery a press at this stage.


    Step 5:
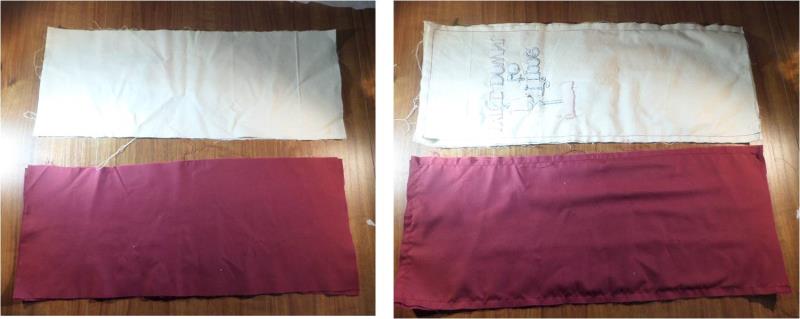
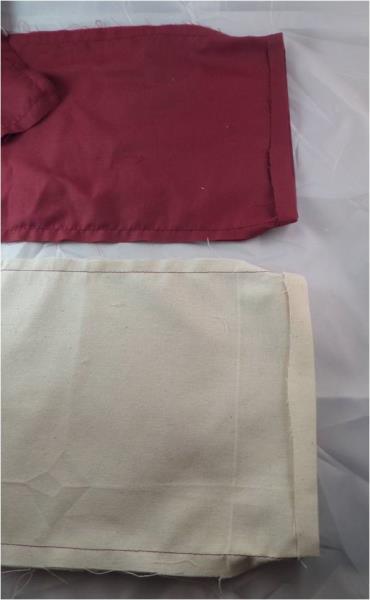
    With the calico pieces, place them right sides together and stitch around the sides and bottom, leaving the top open. Repeat with the maroon pieces

    (Click Image to Enlarge)


    Step 6:
    (Click Image to Enlarge)
    Around the top of each bag, turn back 10mm and press down


    Step 7:
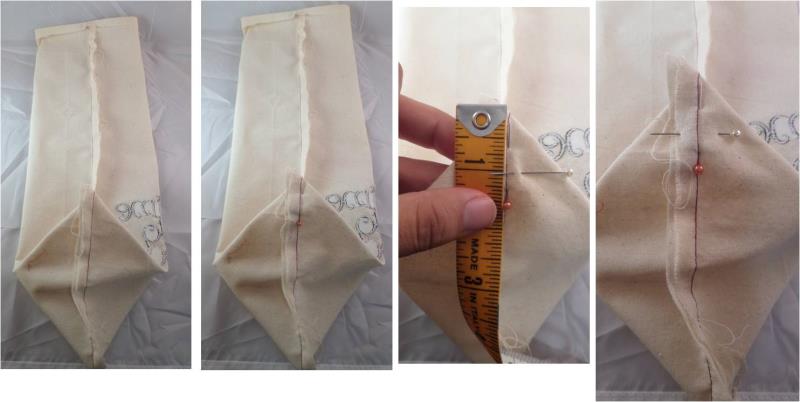
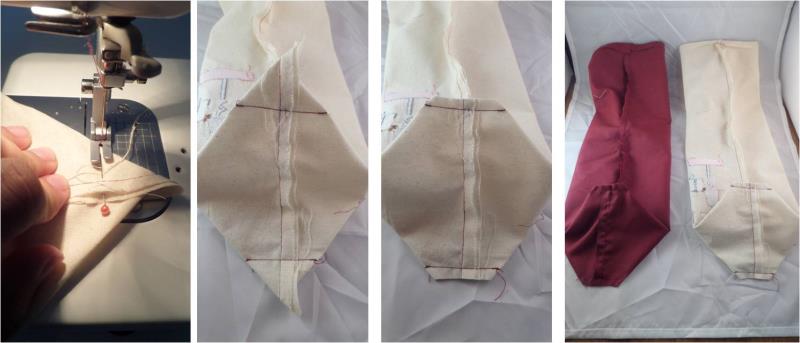
    Starting with the calico bag, line the base seam up with the side seam. The base will form a triangle. Pin the side and base together, then from the point measure down 1” and pin

    (Click Image to Enlarge)


    Step 8:
    You now need to sew along that 1” mark, this will help to form a flat base of the wine bag. Repeat on the other side, then trim off the excess corner. Repeat on the maroon bag

    (Click Image to Enlarge)


    Step 9:
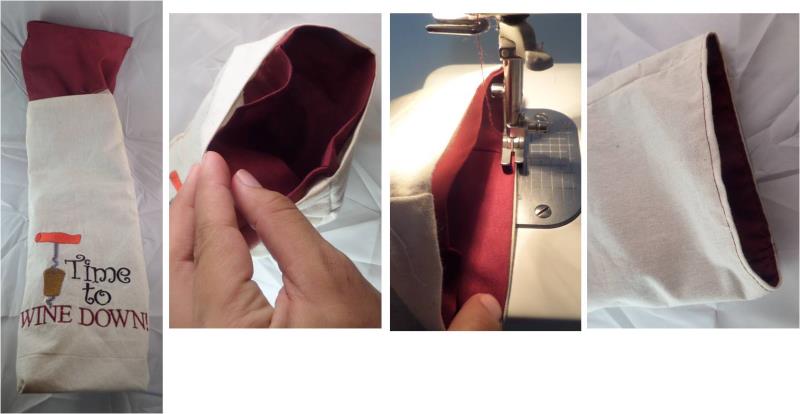
    Turn the calico bag right side out and place the maroon bag inside the calico bag. They will be wrong sides together, ensure you line up the side seams and the top. Then stitch around the top edge of the bag.

    (Click Image to Enlarge)


    Step 10:
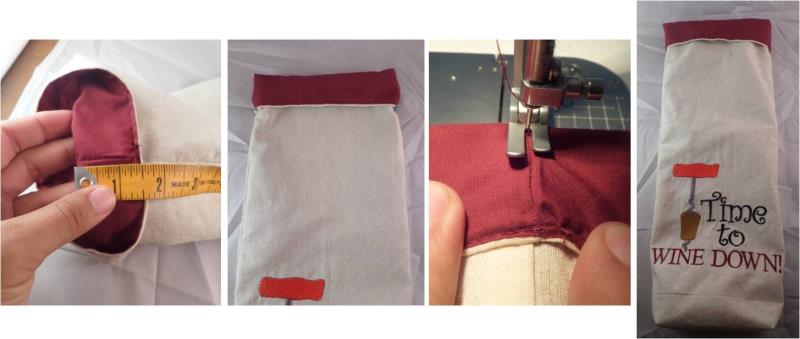
    Around the top of the bag, turn over 1½” to the outside of the bag to form a cuff. Pin down the sides then stitch along the seam for the width of the cuff

    (Click Image to Enlarge)


    Step 11:
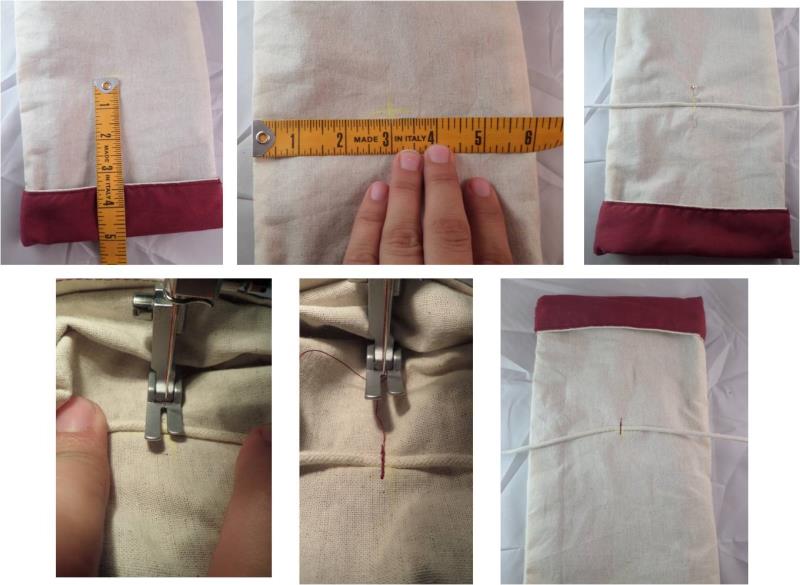
    On the back of the bag, measure down 5” from the top and mark. Measure across the width of the bag and mark half way at 3”. Place the piece of cotton cord at this point and pin it down. Stitch across the cord to hold it in place

    (Click Image to Enlarge)


    Step 12:
    It’s wine time! Well done on completing the wine bag

    (Click Image to Enlarge)

    Meet the Author: Kylie Burke
    Kylie Burke
    Kylie is based in Australia and loves creating and sharing her unique pieces.
    More From This Author
    Link is Broken, Please check the URL
    Exclusive Embroidery Offers!
    Copyright © {{ currentDate | date:'yyyy'}} - EmbroideryDesigns.com
    GET 50% OFF! ×