Border OptionsHugging border, circle, square, or rectangle — with a 3mm satin stitch.
Backing OptionsAvailable with iron-on, sew-on, or velcro backing.
Fast ShippingShipped quickly from the USA.
Free Online Tools
Powerful embroidery utilities that save time and prevent costly mistakes.
Stitch AssistantRECOMMENDED
Get the exact stabilizer, machine settings, needle, and thread color sequence for every embroidery design you purchase — based on that design's stitch density, dimensions, and color count.
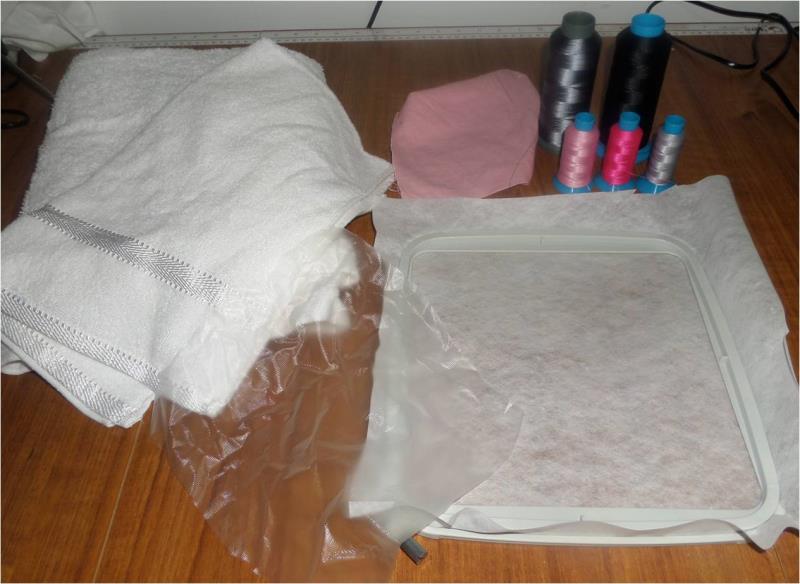
Gather the materials and read through the instructions before beginning. Have a copy of the design and color sequence handy to refer to.
(Click Image to Enlarge)
Step 2:
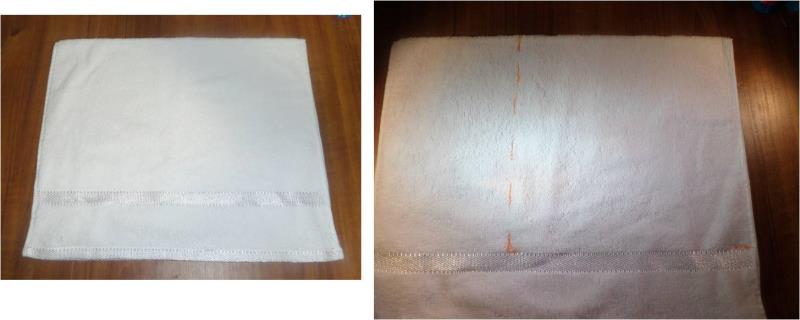
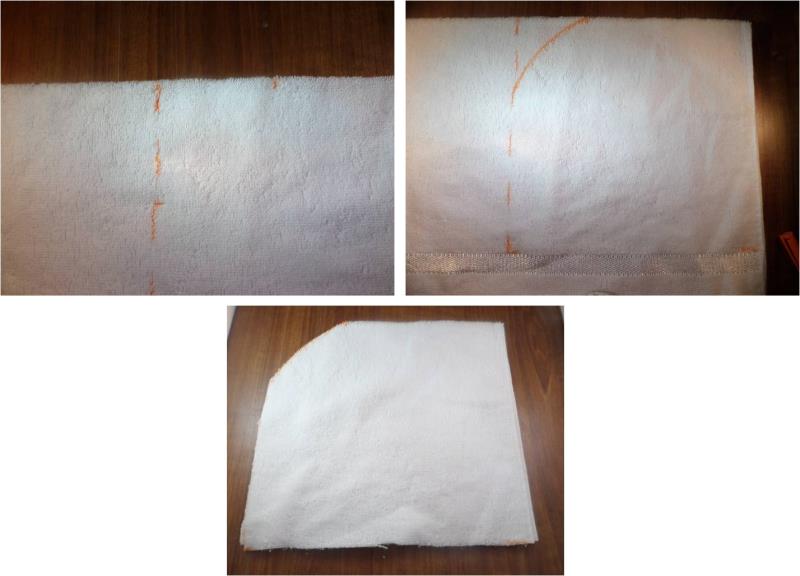
Fold the hand towel in half lengthwise and from the front edge mark in 10” along the top fold and also along the bottom. From the top of the fold at the front of the towel, mark down 10” then from the marking along the top of the towel mark down 10” also to form a square shape.
(Click Image to Enlarge)
Step 3:
From the top, measure down 3” and mark. Then measure in 3” and mark. Then free hand draw an arc from point to point. Cut out along your markings. NOTE: Keep the left over toweling for the ears
(Click Image to Enlarge)
Step 4:
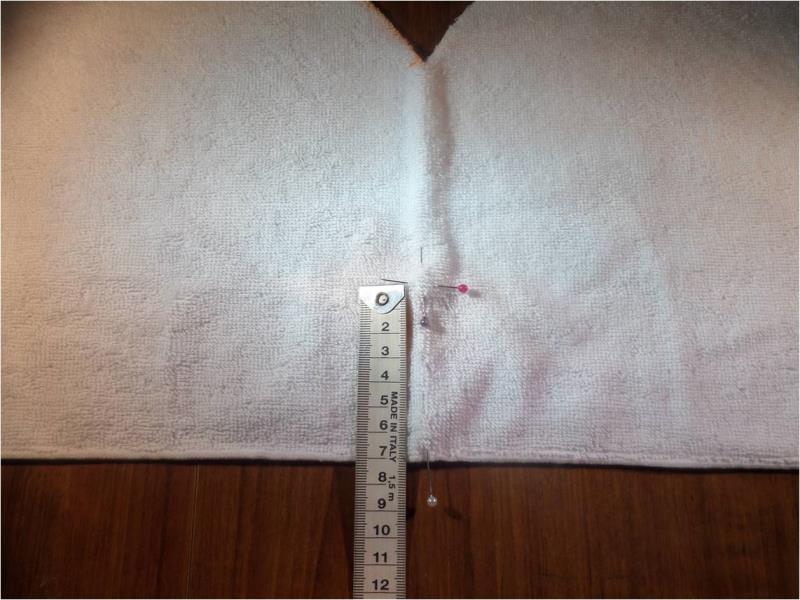
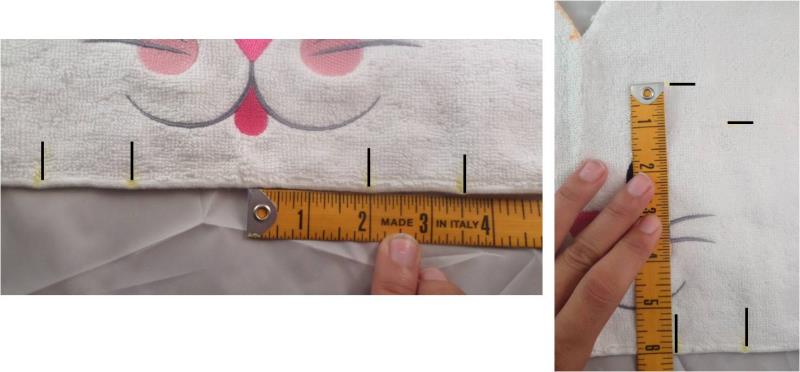
Open the hood out flat and mark the centre. From the bottom edge of the towel, mark up 70mm. This mark is the centre of the design
(Click Image to Enlarge)
Step 5:
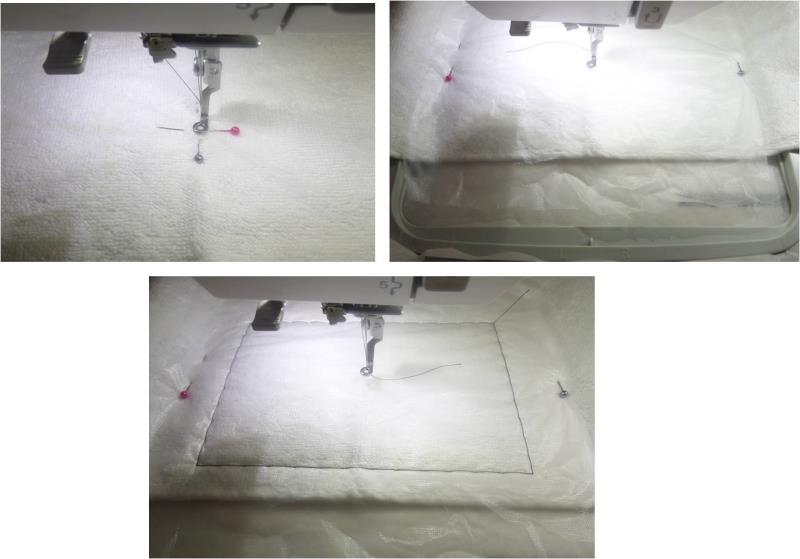
Hoop the tearaway stabilizer and attach the hoop to your machine ensuring that your machine is setup so the foot is indicating the centre of your design, then lay the hood over the hoop so the centre point you just marked on the hood needs to be under the foot of the machine. Lay the solvy ontop of the towel and either pin the solvy and toweling to the stabilizer or if you have the option on your machine use a tack down stitch to hold it all down
(Click Image to Enlarge)
Step 6:
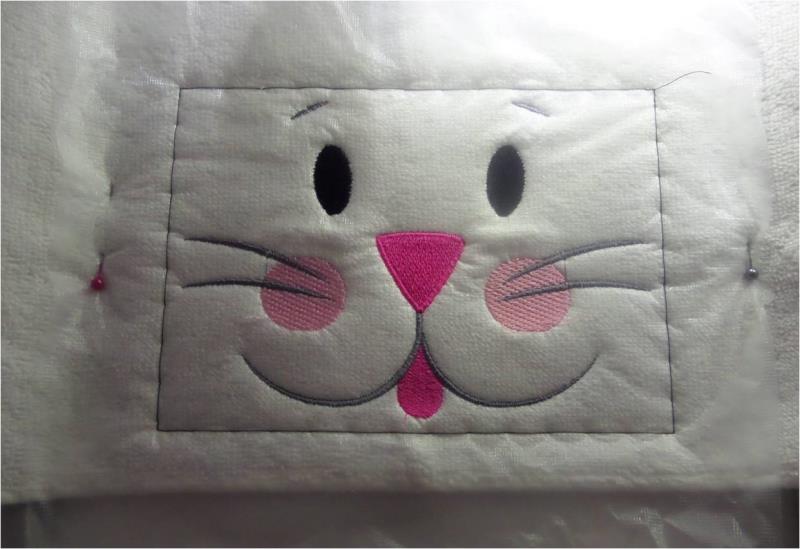
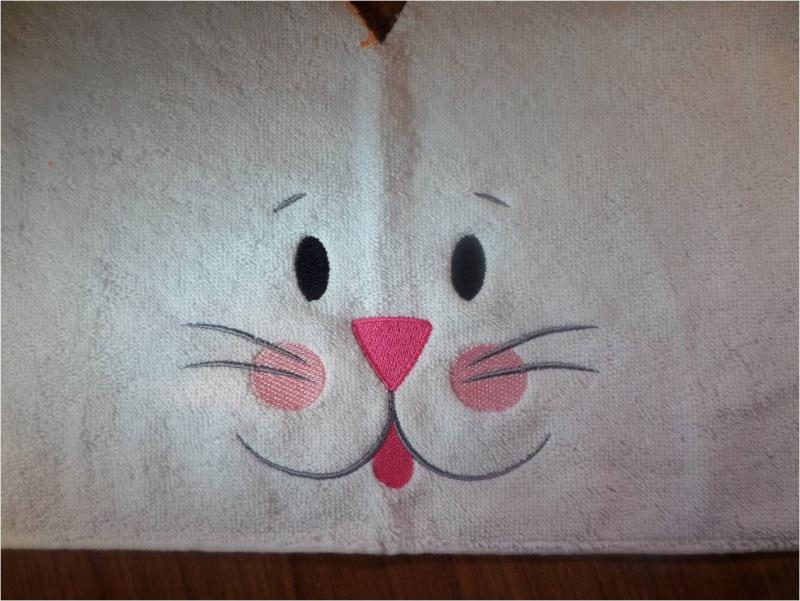
Stitch out the 5 color design. I have used the same color thread for the tounge and nose
(Click Image to Enlarge)
Step 7:
Remove the hoop form the machine and remove tack down stitch, solvy and tearaway stabilizer.
(Click Image to Enlarge)
Step 8:
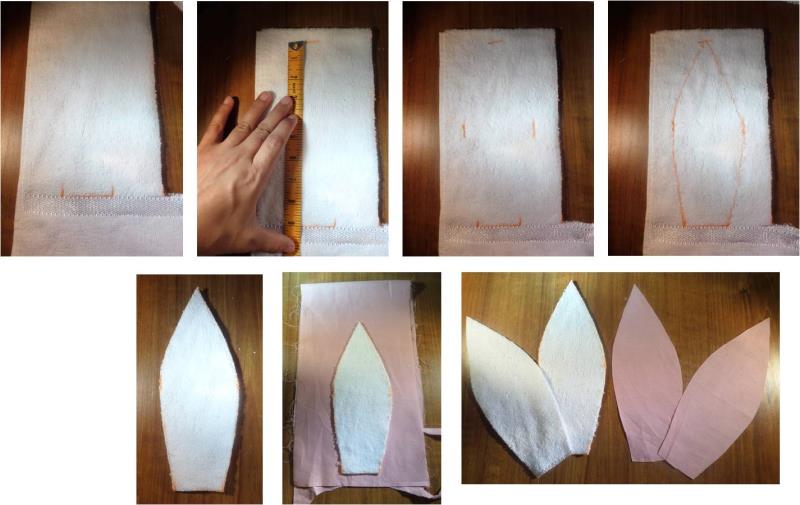
For the ears, on the leftover piece of hand towel, draw a line 2” long. Then from the centre of that line, measure up 9” and mark. From the bottom line, measure up 4.5” and mark out 3.5” which will indicate the widest point of the ear. Then just freehand draw to form an ear shape and cut 2 pieces of toweling. Using these pieces as a template, cut 2 pieces of the pink cotton fabric
(Click Image to Enlarge)
Step 9:
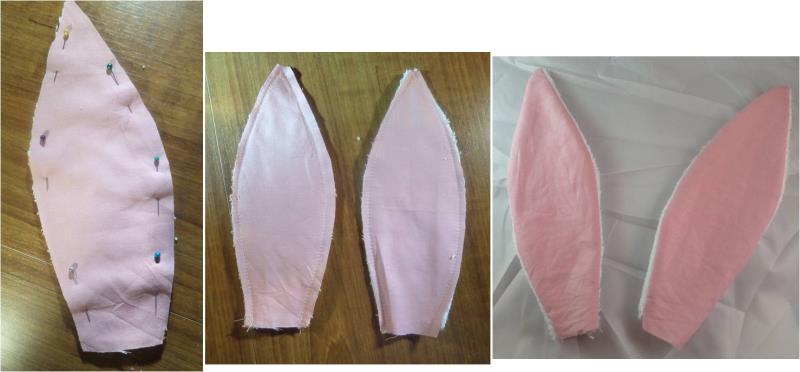
Place the cotton fabric and toweling right sides together and pin around, leaving the bottom edges open. Stitch using a ¼” seam allowance. Trim the top point of the ear then turn the ears right side out
(Click Image to Enlarge)
Step 10:
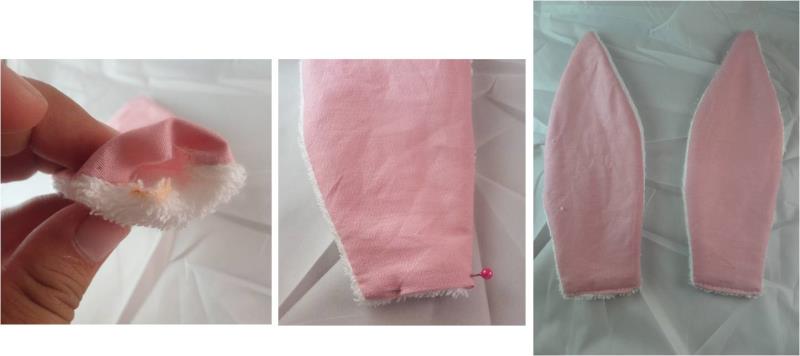
To close the bottom edges, turn in 10mm of toweling and cotton fabric then pin closed. Stitch as close to the edge as possible
(Click Image to Enlarge)
Step 11:
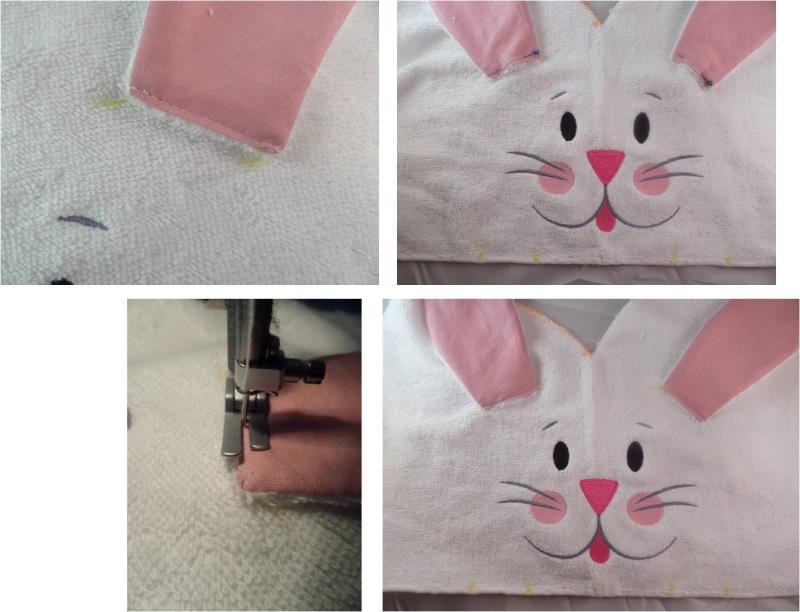
On the hood, you now want to mark the placement points for the ears. Along the bottom edge, mark out 2” and 3.5” either side of the centre line. From the 2” mark, measure up 6” and mark. From the 3.5” mark, measure up 5” and mark. Do this on both sides of the bunny face
(Click Image to Enlarge)
Step 12:
Place the ear on these points and pin down, the ear will sit on an angle. The inner edge of the ear will be higher than the outer. Repeat for the other side then stitch down the ears, trying to stitch over the same stitch line from when you closed the ears.
(Click Image to Enlarge)
Step 13:
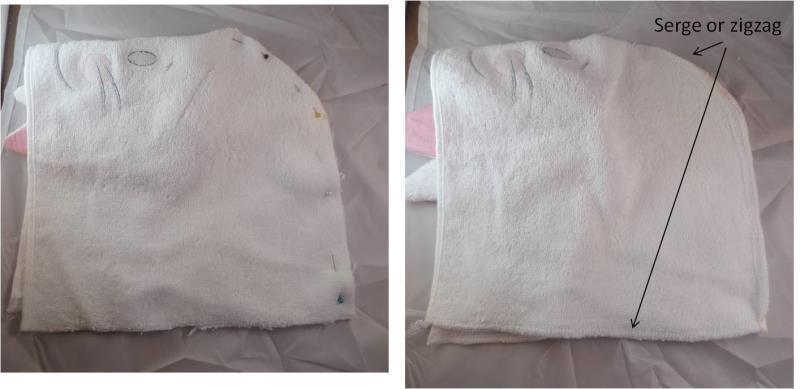
Now fold your hood with right sides facing, ensure the ears are folded down and not in the way. Pin along the hood edge then stitch using a 10mm seam allowance. I have then used a serger to finish off that edge as well as the bottom edge of the hood. If you don’t have a serger you could just zigzag along that seam so it does not fray
(Click Image to Enlarge)
Step 14:
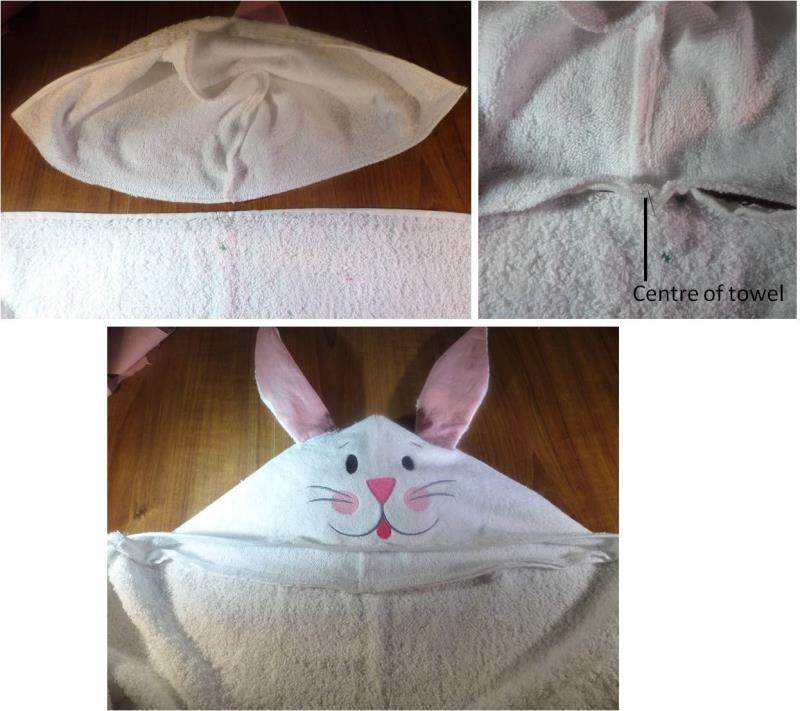
Now fold the bath towel in half and mark the centre point along the top. Place your hood with the inside facing up and line up the centre of the hood with the centre mark on the bath towel. Pin the edge of the hood to the edge of the towel then stitch using a 10mm seam allowance
(Click Image to Enlarge)
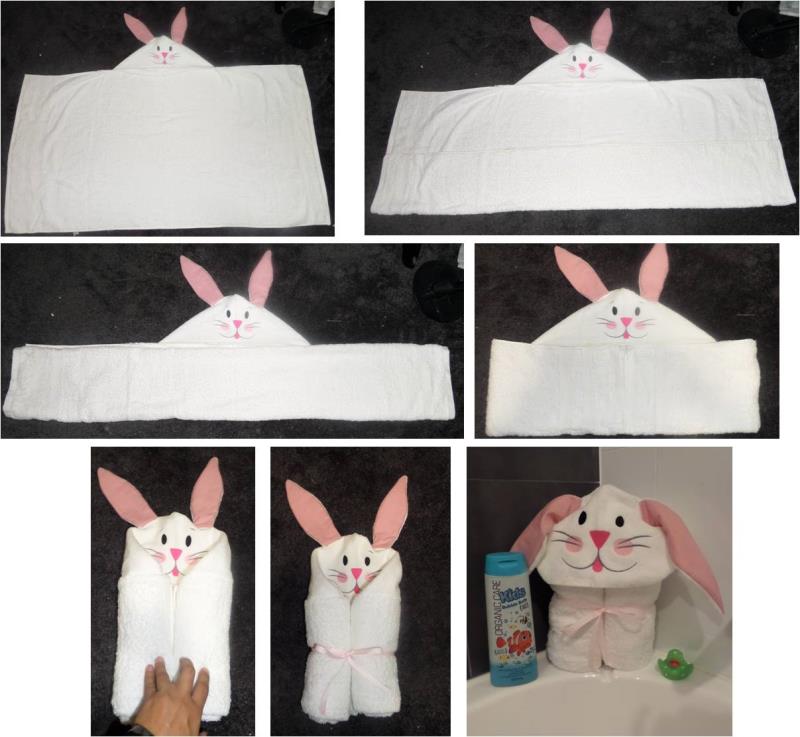
Step 15:
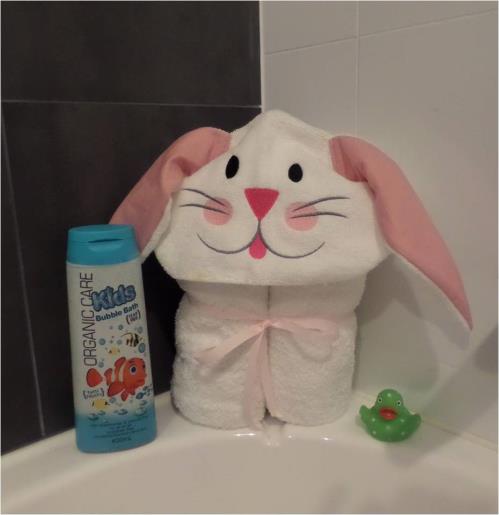
The hood is now attached to the towel and your hooded towel is complete. A nice way to fold your towel and show off the hood is to lay the towel flat, then from the bottom fold up the towel 1/3 of the way, then fold up again. Then fold in each end to the centre of the hood, then roll in each side and tie a piece of ribbon around the centre to hold in place. The hood then sits over the rolled up towel. It is a lovely way to fold the towel if it is being gifted.