This mailbox is easy to create and would even be a good project to do with a child who could help stitch and glue. Fabric covers the mailbox and the flag on the mailbox is removed, trimmed to size, and then the FSL heart design is glued in place. Add some Valentine cards and a few heart candies and you’ll have a special project to keep or to gift. These are so much fun to do you may want to plan ahead to do several. Because all paper mache’ mailbox sizes differ, general directions are given. You will have to measure and determine how much fabric and trim to purchase. Be sure to read the information on the glue you choose to be sure it will secure fabric to paper mache’.
Step 1:
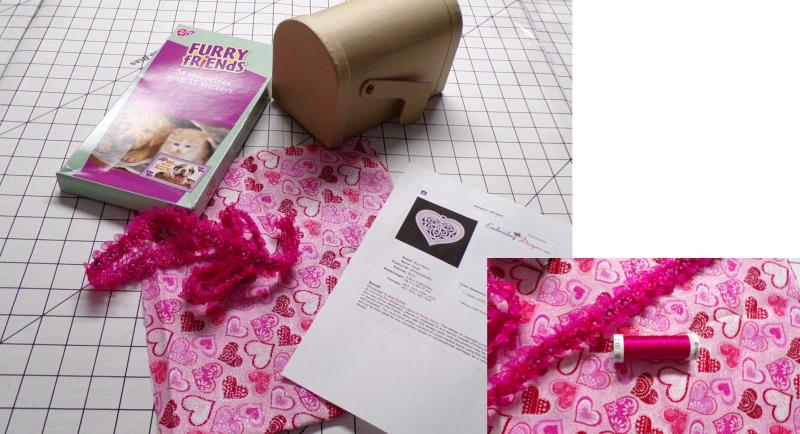
Gather the materials and read through the instructions before beginning. Print out a paper template of the design and color sequence. Choose a colorful fabric with matching trim and embroidery thread.
(Click Image to Enlarge)
Step 2:
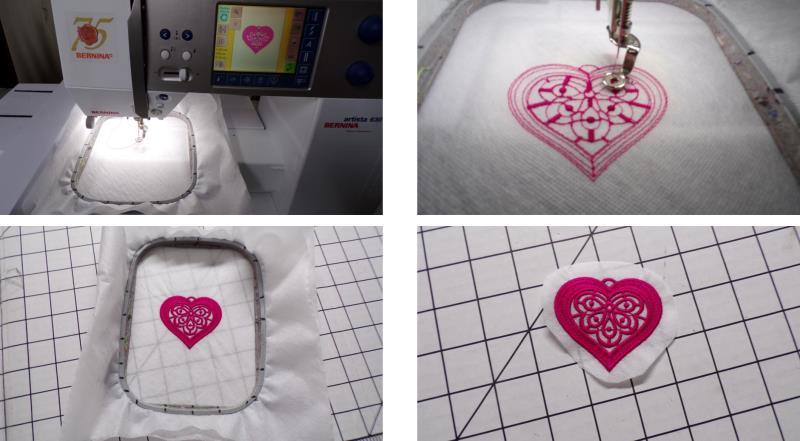
Hoop the two layers of fibrous water-soluble stabilizer and stitch the FSL heart design. After the stitching is done, remove the design from the hoop and just generally trim away the excess stabilizer.
(Click Image to Enlarge)
Step 3:
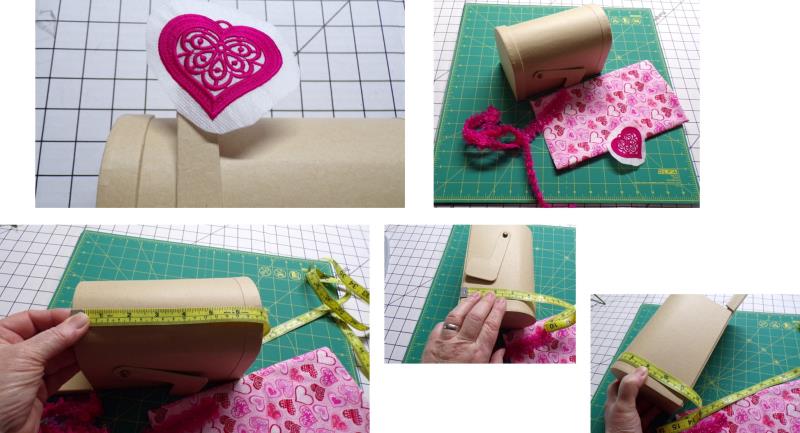
The heart will be attached to the flag portion of the mailbox. Measure the mailbox length and around the mailbox, add seam allowances to turn under and determine how much fabric you’ll need. Also, use the measurement around the mailbox to determine how much trim you’ll need.
(Click Image to Enlarge)
Step 4:
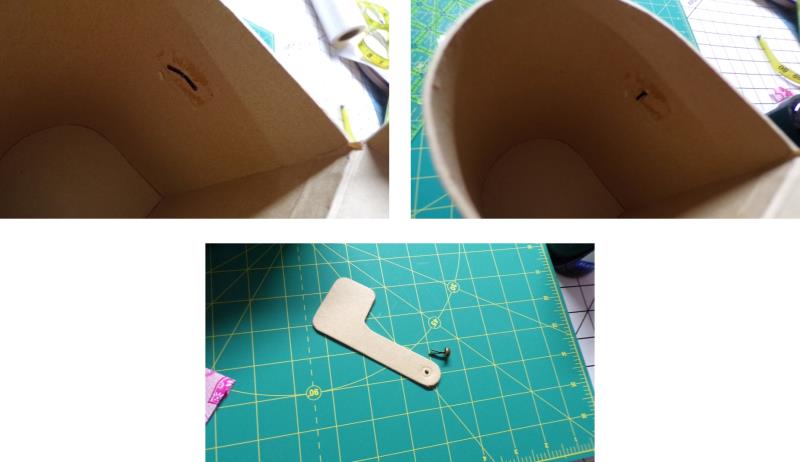
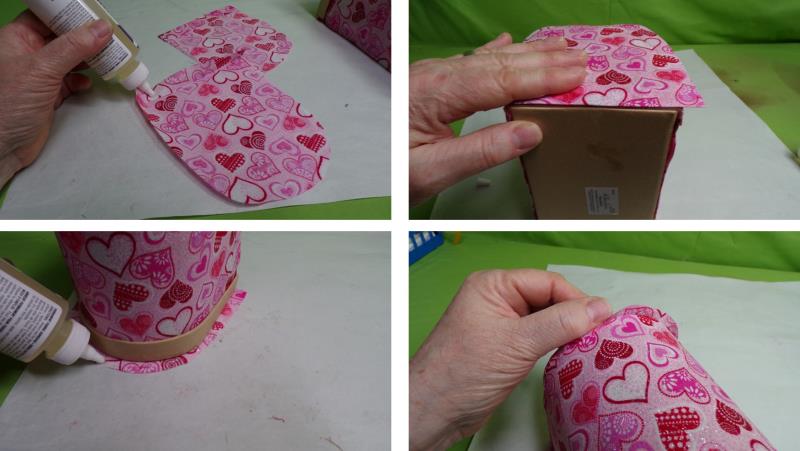
Open up the mailbox and expose the underside of the brad holding the flag to the box; bring the prongs together and remove the flag.
(Click Image to Enlarge)
Step 5:
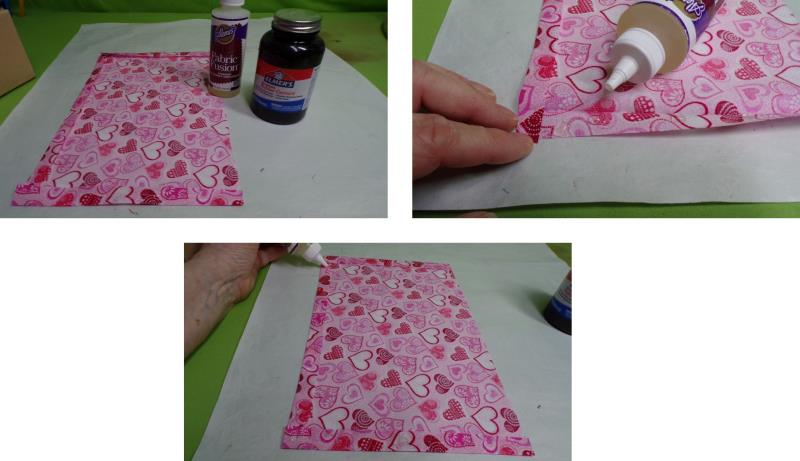
Cut fabric to wrap around the mailbox. At the front of the mailbox and at the bottom of the sides, turn under about ½” and press the fabric to clean finish the edges. Double check the fit before gluing.
(Click Image to Enlarge)
Step 6:
Begin by choosing the glue (make sure it is appropriate for fabric and paper). Place small dabs of glue on the folded edges and let that dry, and then place glue along the folded edges.
(Click Image to Enlarge)
Step 7:
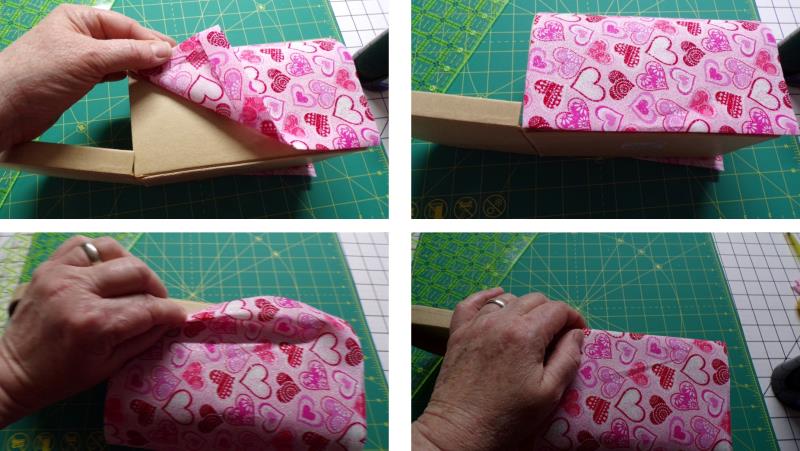
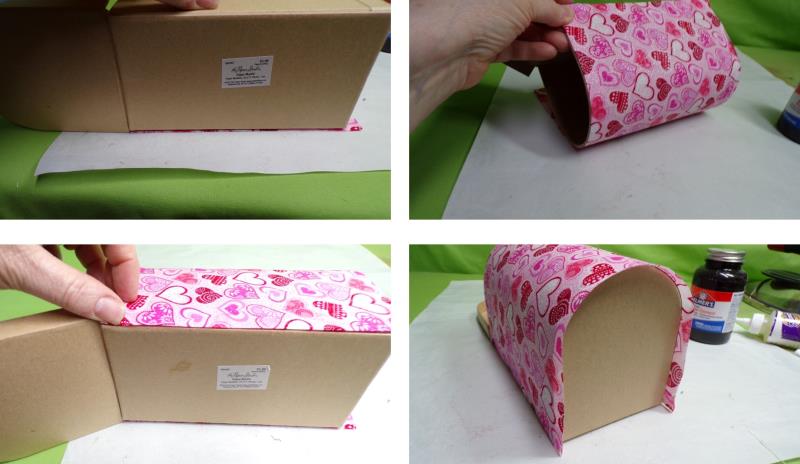
Wrap the fabric around the mailbox; the fabric should extend beyond the closed end about ½”.
(Click Image to Enlarge)
Step 8:
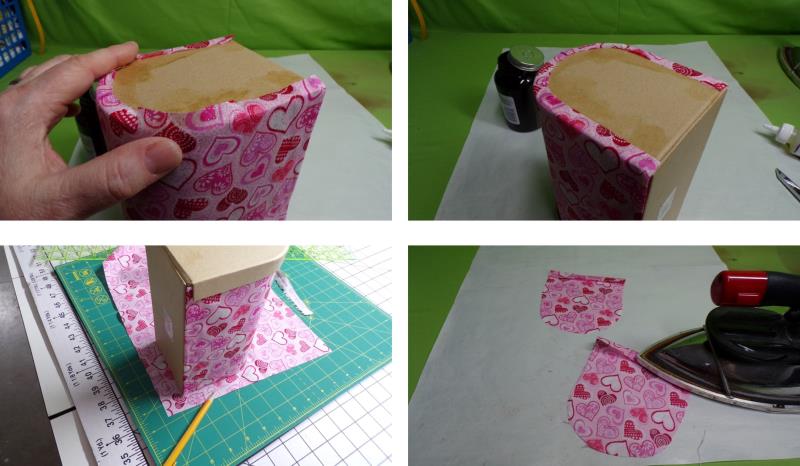
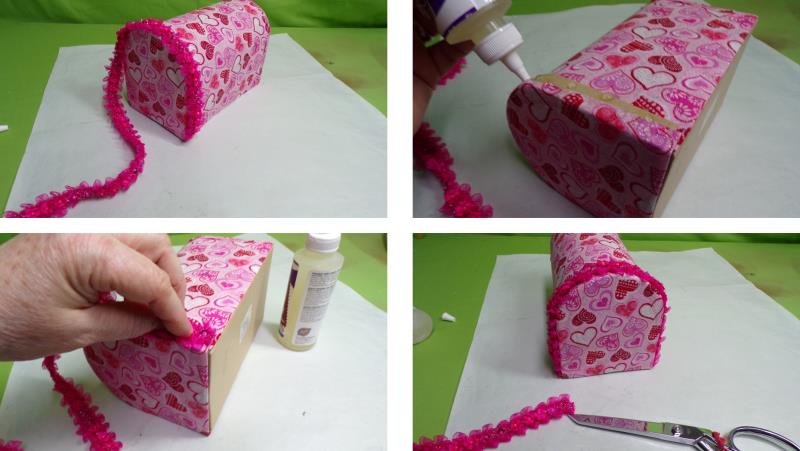
Place glue around the closed end and then smooth the fabric over the edge. After the glue dries then it is time to cut fabric pieces for the ends. Stand the mailbox over the fabric and draw on the fabric about ½” away from the shape of the mailbox end; the ½” will be seam allowances. Press under the straight edge and press. Repeat drawing, cutting, and pressing to create a second piece for the other mailbox end.
(Click Image to Enlarge)
Step 9:
Place glue under the pressed edge and let it dry. After the glue dries, place a bead of glue along the folded edge and then align it along the bottom of the box front; let the glue dry. Run a bead of glue around the curved seam allowance and then wrap the edge over the end of the front piece of the mailbox; let the glue dry. Repeat these steps for the other piece of fabric for the other end of the mailbox.
(Click Image to Enlarge)
Step 10:
Measure the trim around the mailbox end which will cover the glued raw edge. Run a piece of glue over the cut edge and then carefully position the trim over the raw edge and trim off the excess trim. Repeat for the other end of the mailbox.
(Click Image to Enlarge)
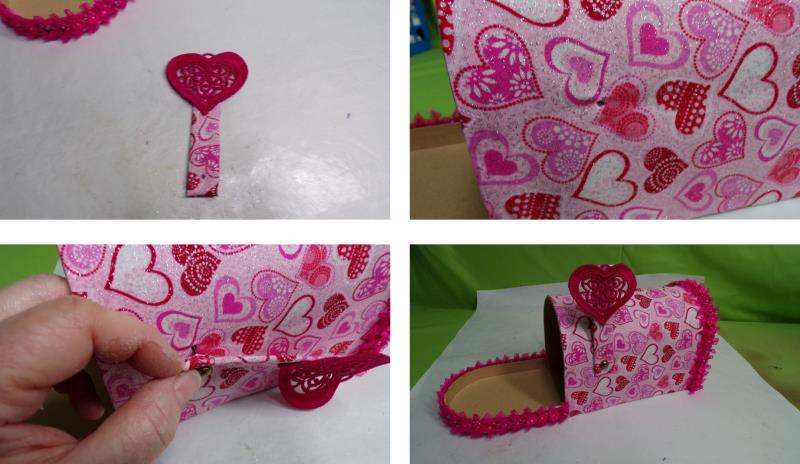
Step 11:
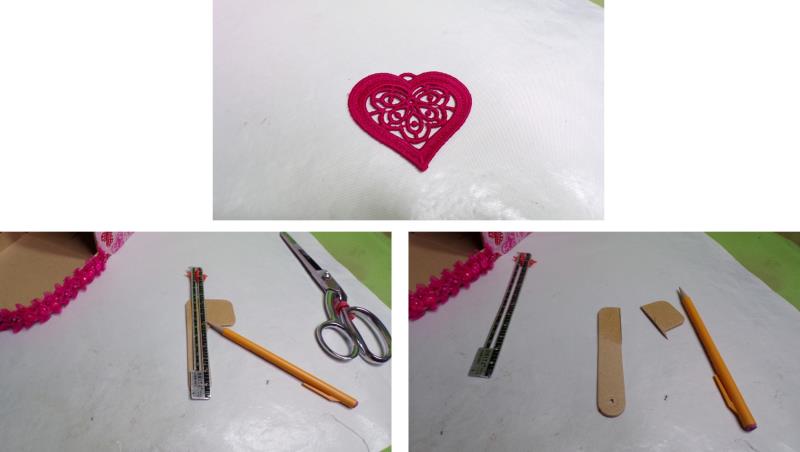
Soak the FSL design according to the stabilizer directions and dry. While the design dries, continue working on the mailbox flag. Using a ruler, draw a line straight up along the flag and cut along the line to remove the outer portion of the flag.
(Click Image to Enlarge)
Step 12:
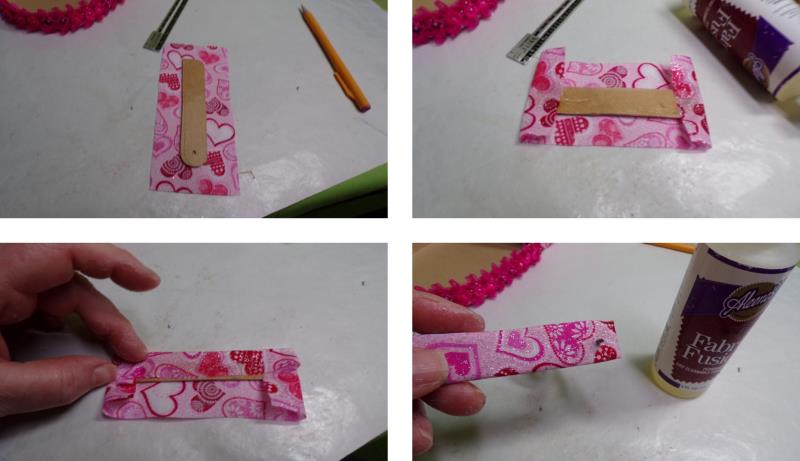
Cut a piece of fabric large enough to cover the flag stem, and overlap the ends and sides as shown. Glue the fabric to the flag stem.
(Click Image to Enlarge)
Step 13:
Glue the FSL heart design to the top of the flag stem. Use an awl to puncture the fabric at the hole at the bottom of the flag stem and also the hole in the mailbox. Place the brad prongs through the hole in the flag stem and then through the hole in the mailbox. Secure the prongs on the inside of the mailbox to hold on the new flag.
(Click Image to Enlarge)
Step 14:
Congratulations on creating an adorable Valentine Mailbox! Be careful showing it to anyone—they’ll want you to make them one, too!
Ramona Baird has been in the embroidery industry for over 23 years. She and her husband owned a commercial and retail embroidery store in Arizona for many years. She is an experienced digitizer having been mentored by award-winners Pat Williams and Lindee Goodall. Ramona is a contributor to “Creative Machine Embroidery” magazine having 5 covers to her credit. Ramona has worked for Wilcom America and served many years as Education Director for the American Sewing Guild. With a degree in fashion design, she is able to design and execute patterns which Pat Williams says are “out of the box” in creativity and application. Ramona likes to challenge the boundaries of embroidery and bring new and exciting designs, ideas, and projects to EmbroideryDesigns.com. She wants embroiderers of all levels to increase their skills and enjoyment in using their embroidery machine for gift-making and personal pleasure.