


PROJECT INSTRUCTIONS


PROJECT INSTRUCTIONS

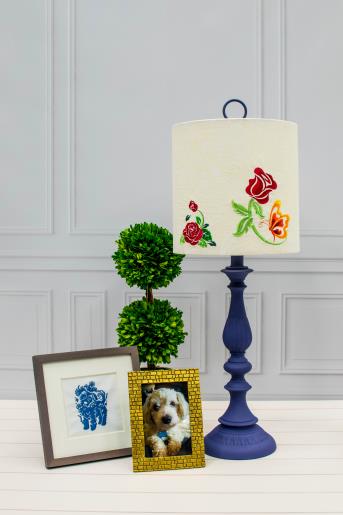
Refurbished Lampshade Embroidery Project
By
Amber Stevens
on
January 17, 2018
PROJECT DETAILS
SKILL LEVEL
Beginner
TIME REQUIRED
04:00
FINISHED SIZE
15 x 10 inches
Description
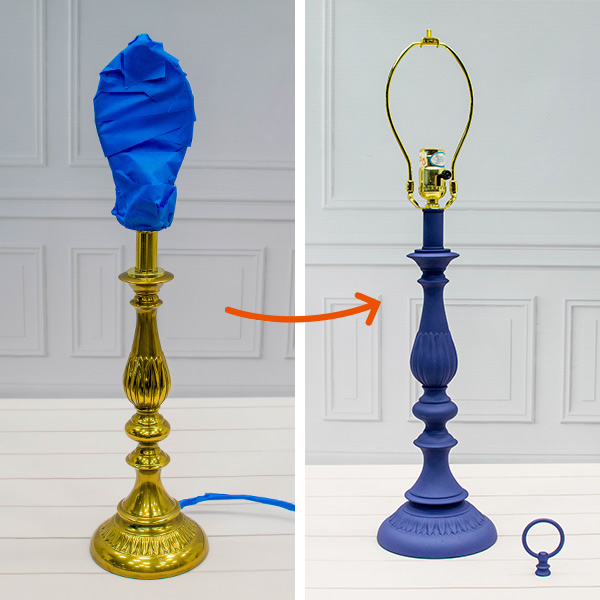
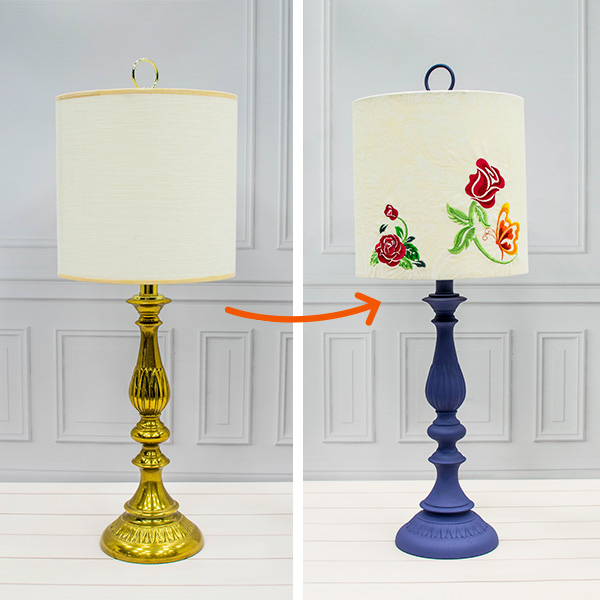
Instead of ditching your old lamp for a new one, try this tutorial to upcycle your lampshade. Take your lamp from trash to treasure with stylish fabric, beautiful embroidery, and a new coat of paint.
Project Preview Video

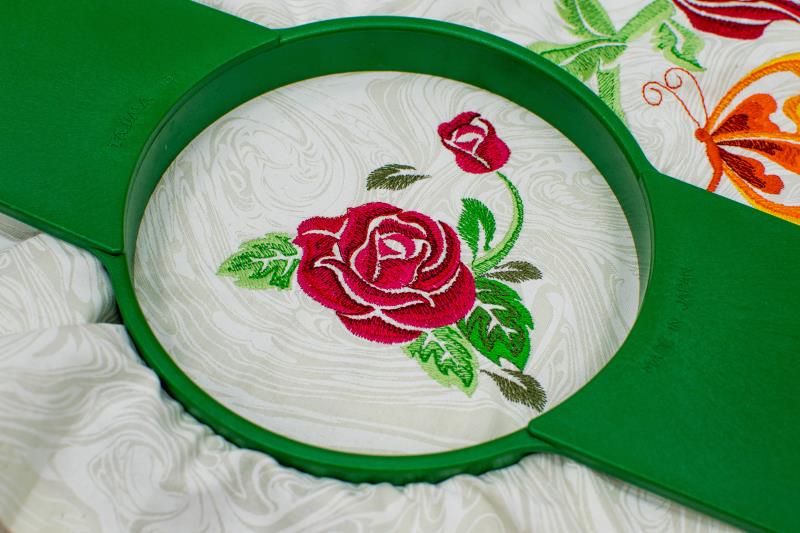
Rose with Butterfly
$10.00
$4.00
Circle Price: $4.00

Abstract Roses
$10.00
$4.00
Circle Price: $4.00

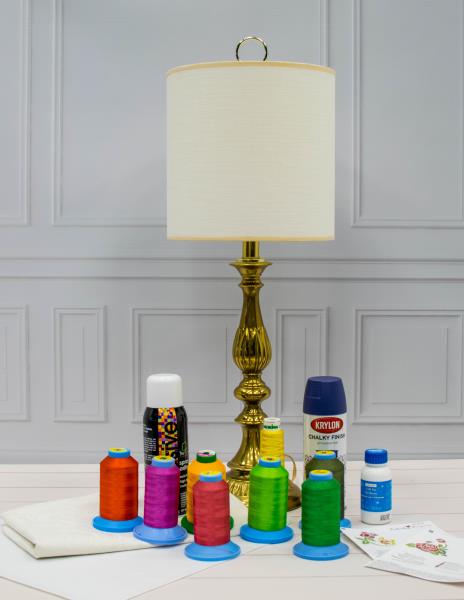
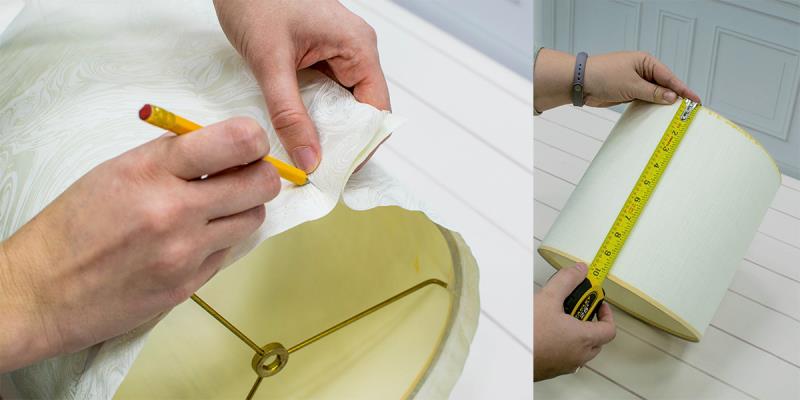
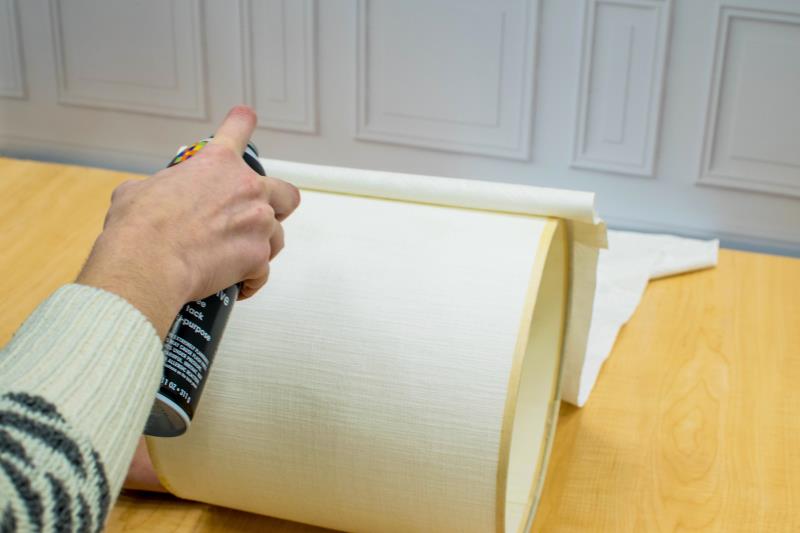
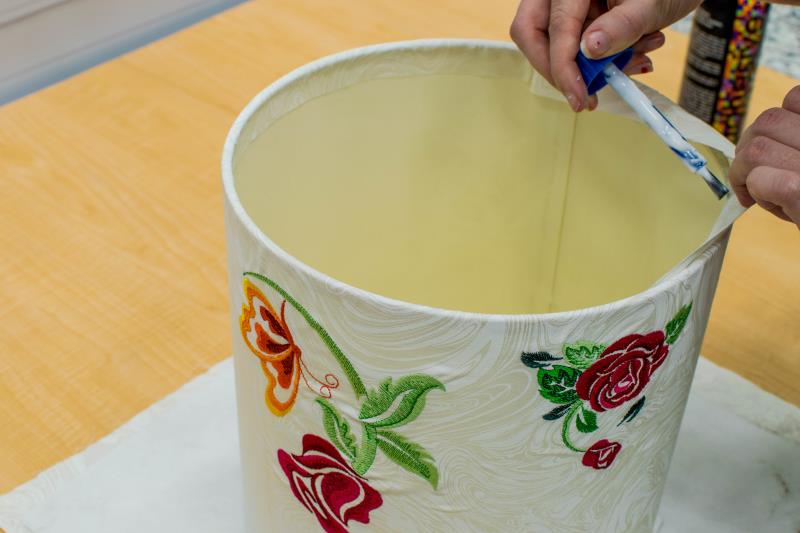
| Materials Lampshade Lamp Base 1 yard of Cotton or Linen Fabric (Length depends on the size of your lampshade) 5x7 Hoop Embroidery Thread Cut Away Stabilizer Painter’s Tape Spray Paint Spray Adhesive for Fabric Fabric Glue Measuring Tape or Ruler |
| Designs used in this project |
|


Projects You May Like
Meet the Author:
Amber Stevens

Amber, the Designer Extraordinaire over at Adventures in Stitcherland, has been sewing since she was 9 years old. When she's not creating stunning embroidery designs, she is elbow-deep in all things fashion.
Feedback
Characters Remaining
Please Login to Submit a Feedback
Invalid Characters, Please enter a valid Comment
Please enter a valid Comment
Reviewed On
Link is Broken, Please check the URL