Follow the instructions to make the ears in the first hooping. Hoop a new piece of stabilizer to embroidery the face on the front of the pillow, note that this second file runs sideways in your hoop in order to use a 5” x 7” hoop. The ears and the pillow back are stitched on at your sewing machine.
Step 1:
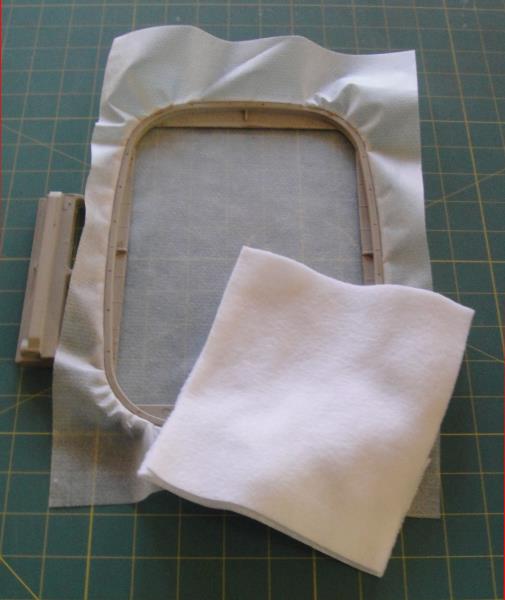
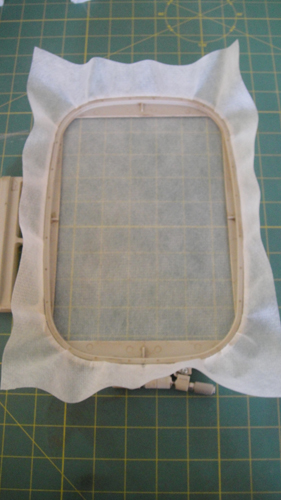
Hoop no show stabilizer in a 5” x 7” hoop. Cut two squares of fleece 8” x 6” with the greater stretch of the fleece going across the 6” width.
(Click Image to Enlarge)
Step 2:
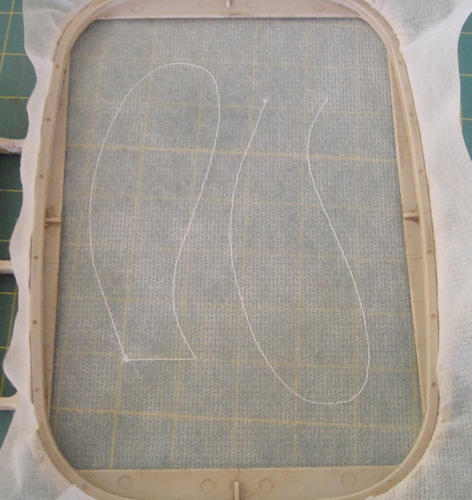
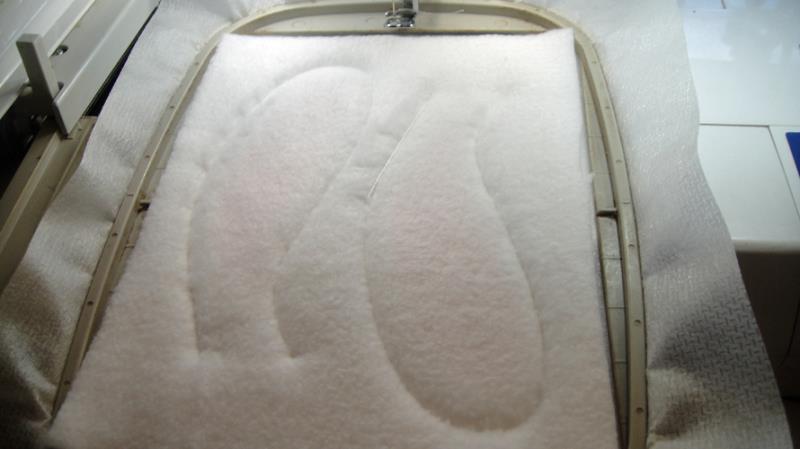
Load design file EBP01 and run color stop (CS) 1 in white as a placement line.
Step 3:
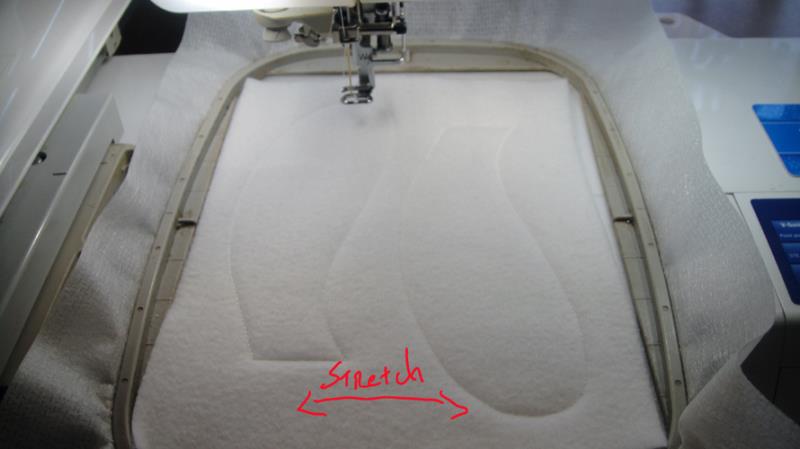
Fleece does have a right and wrong side, the smooth side is the right side and the wrong side is a little bumpier. Spray adhesive on the wrong side of the fleece and position over the placement lines so that the fabric exceeds the placement lines by at least a ¼” in all directions. Run CS 2 in white to tack down both ears.
(Click Image to Enlarge)
Step 4:
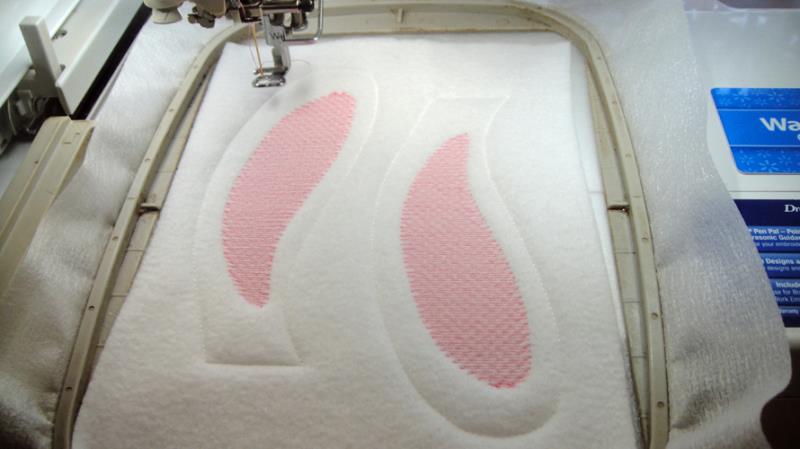
Run CS 3 in Pink Carnation (1108) to stitch the center of the ears.
(Click Image to Enlarge)
Step 5:
Lay the second piece of fleece over the embroidery, right side down, so that the fabric exceeds the placement lines by ¼” in all directions. Run CS 4 in white to seam the ear backs to the fronts.
(Click Image to Enlarge)
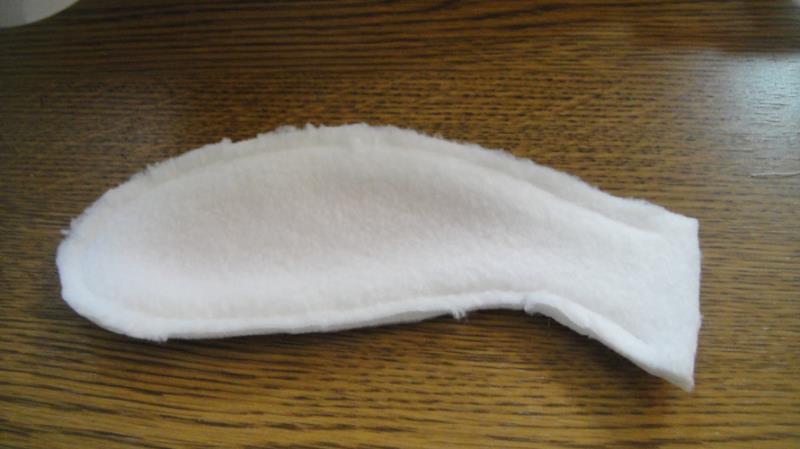
Step 6:
Cut out each ear with a ¼” seam allowance. Clip through the stabilizer and fleece around the inner and outer curves of the ears.
(Click Image to Enlarge)
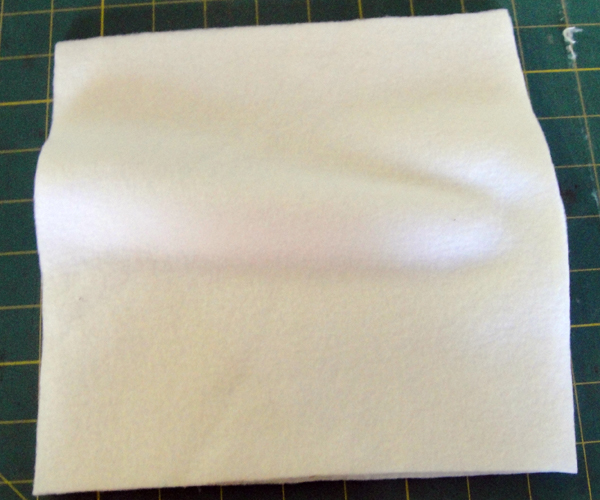
Step 7:
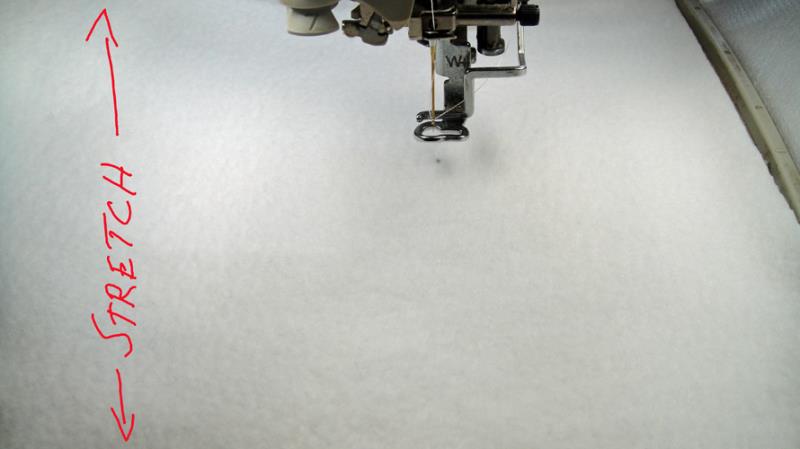
Cut 2 9” squares of fleece. Make sure you are aware of where the greater stretch is, we always want the greater stretch to go across the face.
(Click Image to Enlarge)
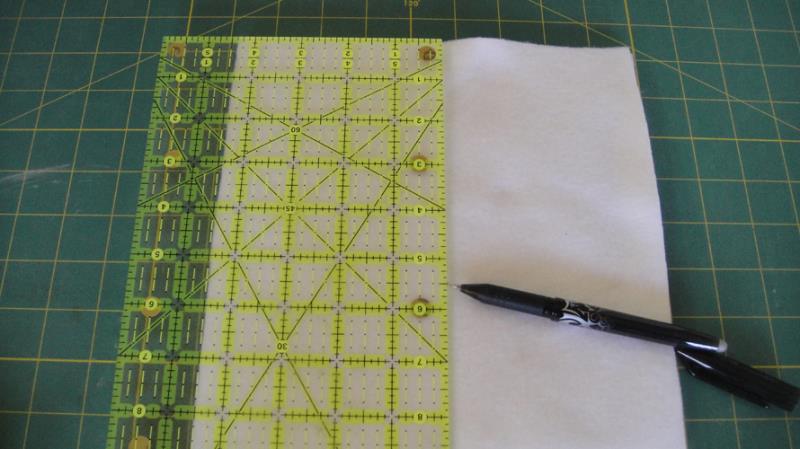
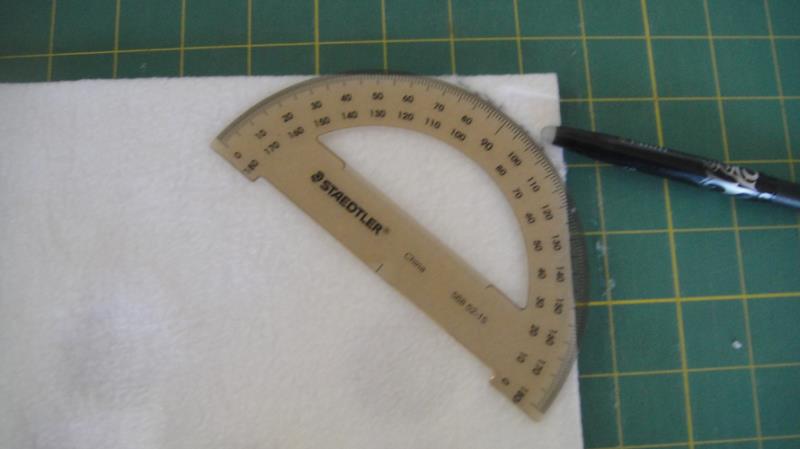
Step 8:
Measure over 4 ½” from the side of the fabric and 5 ½” from the top of the fabric and make a dot with a fabric marker.
(Click Image to Enlarge)
Step 9:
(Click Image to Enlarge)
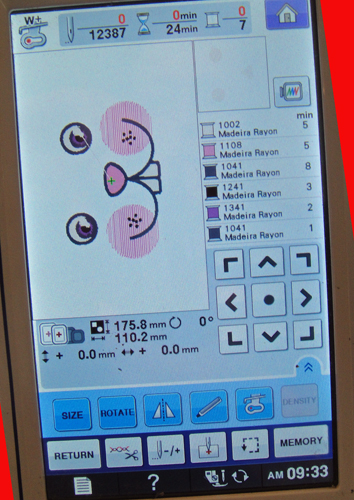
Load design EBP02 to embroider the face on the pillow front. Note that the design is rotated 90 degrees in order for it to fit in a 5” x 7” hoop.
Step 10:
(Click Image to Enlarge)
Hoop no show stabilizer in your hoop. Place it in the machine so you can see where the needle sits for the center of the design.
Step 11:
Spray adhesive on the back of a 9” fleece square and place it in the hoop so your dot on the fleece falls right under the needle with the stretch of the fleece being vertical in the hoop.
(Click Image to Enlarge)
Step 12:
(Click Image to Enlarge)
Follow the color chart to stitch the face.
Step 13:
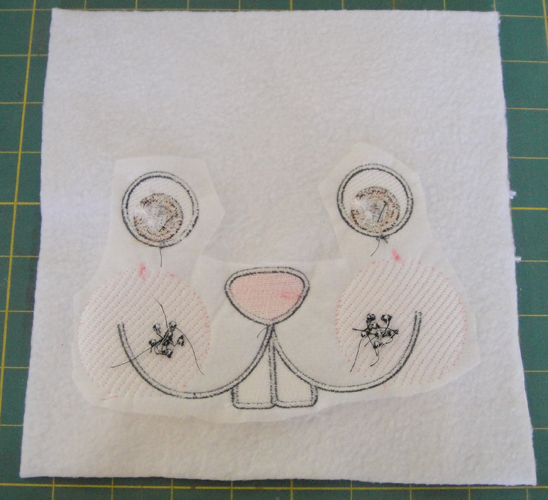
Cut away the stabilizer around the face features.
(Click Image to Enlarge)
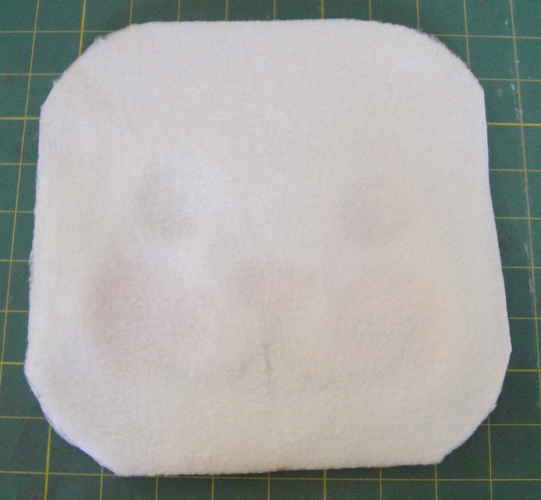
Step 14:
Lie the embroidered fleece right side up on a table, place the blank fleece square right side down over the embroidered fleece. Use a compass, a glass or other round object over the corners and draw a line to round the corners of the fabrics.
(Click Image to Enlarge)
Step 15:
Trim the corners into curves so your project looks like this.
(Click Image to Enlarge)
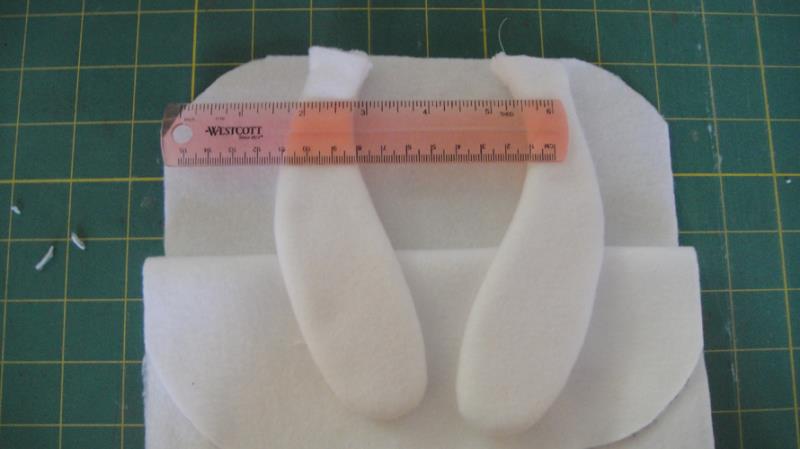
Step 16:
Fold back the back of the pillow and place the ears face down on the embroidered face about 3 ¼” from the outside edges of the pillow. Pin in place. Pin the back to the front of the pillow over the ears.
(Click Image to Enlarge)
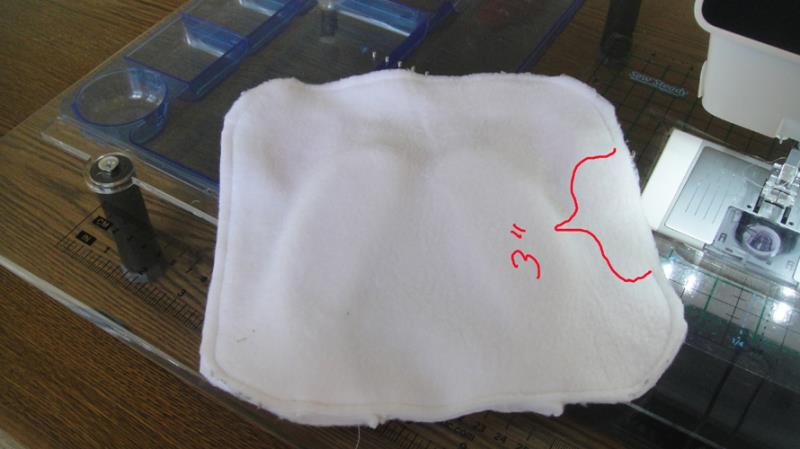
Step 17:
At your sewing machine stitch around the pillow with a ¼” seam allowance leaving a 3” opening on one side for turning the pillow. A 3mm stitch length works better going through these thicknesses rather than the standard 2.5 mm stitch length.
(Click Image to Enlarge)
Step 18:
Turn the pillow right side out using a blunt object to smooth the corners. Stuff to the desired firmness. Small bits of stuffing added at a time results in a smoother pillow.
(Click Image to Enlarge)
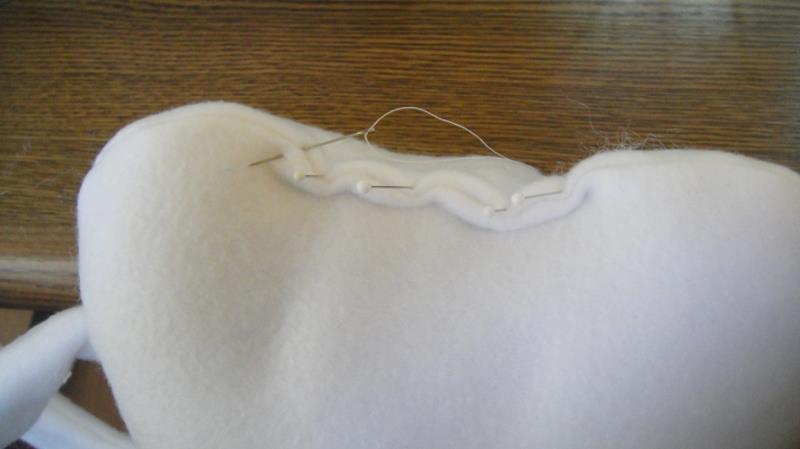
Step 19:
Turn in the seam allowances of the opening and hand stitch shut with a ladder stitch or whip stitch.
(Click Image to Enlarge)
Step 20:
(Click Image to Enlarge)
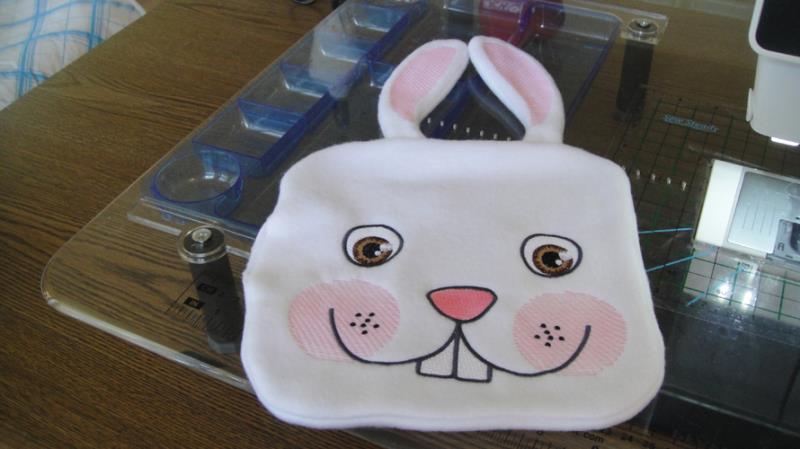
Congratulations you Easter Bunny Pillow is complete!
Award winning Digitizer, Embroidery Educator, Author and a Consultant to the Industry, Pat Williams has 30 years of experience in the embroidery industry. Pat has won multiple awards for her digitizing expertise including the 2007 Impressions Awards Grand Championship, Best of Show as well as the 1st and 2nd Place Awards. Pat’s love of digitizing has afforded her the opportunity to write numerous articles for Impressions magazine in the United States and Images Magazine in Europe. In 2001 Pat was named “Embroidery Educator of the Year.” For many years Pat taught digitizing seminars at the ISS Shows in Long Beach, CA and for Compucon software. She now resides in Tucson, AZ.