{{superHeaderAds.title}}
Live Chat
Embroidery Designs
Welcome, Embroiderer
Login
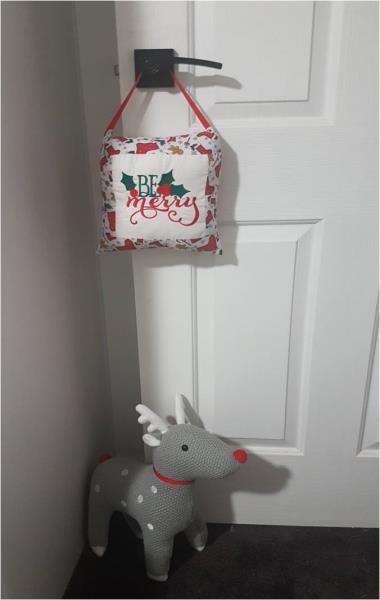
Be Merry hanging cushion
{{mainImageAlt || (productInfo._source && productInfo._source.name) || ''}}

Be Merry hanging cushion Embroidery Project

By   Kylie Burke   on   December 19, 2017

PROJECT DETAILS

SKILL LEVEL
Intermediate
TIME REQUIRED
01:30
FINISHED SIZE
9.84 x 9.84 inches
Description

Add some Christmas cheer with this decorative hanging cushion. Simple to make with some basic sewing required. Hang it on your Christmas tree or even a bedroom door, also a great gift idea.

Project Preview Video

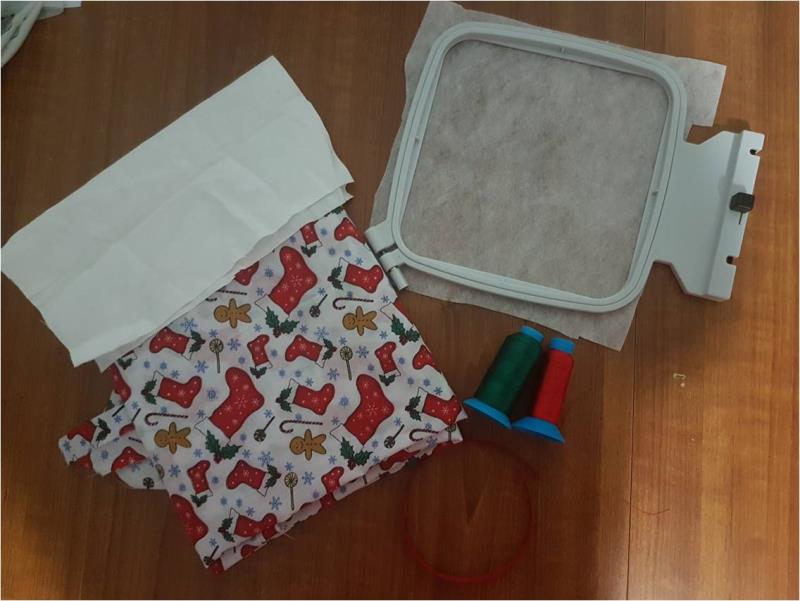
Materials
  • Fabric of your choice, you require a 25cmx25cm square for the embroidered panel then 30cm of a print or plain fabric for the borders and backing
  • 1 layer of tearaway stabilizer
  • Green and Red embroidery thread
  • Polyester filling
  • Red or green ribbon
  • pins
  • Sewing thread to match fabric
  • Hand sewing needle

  • Designs used in this project

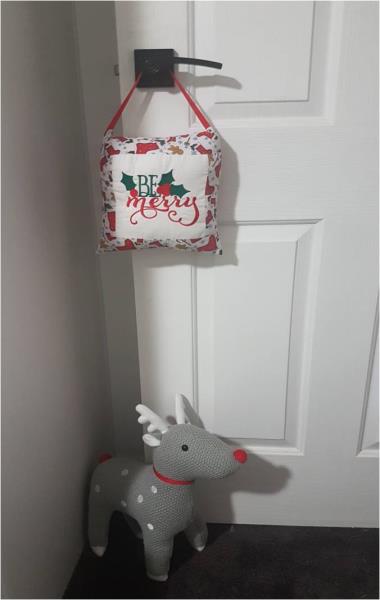
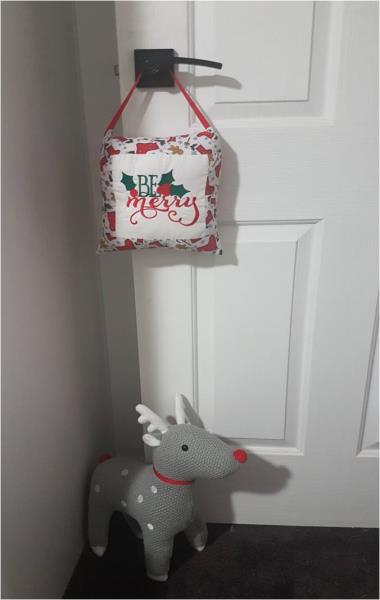
    Final Product: What You Will Create

    Preface:
    You could make this cushion any size you like, you could also leave out the ribbon
    for a nice decorative cushion for the couch. 


    Step 1:
    1.Gather the materials and read through the
    instructions before beginning.

    (Click Image to Enlarge)


    Step 2:
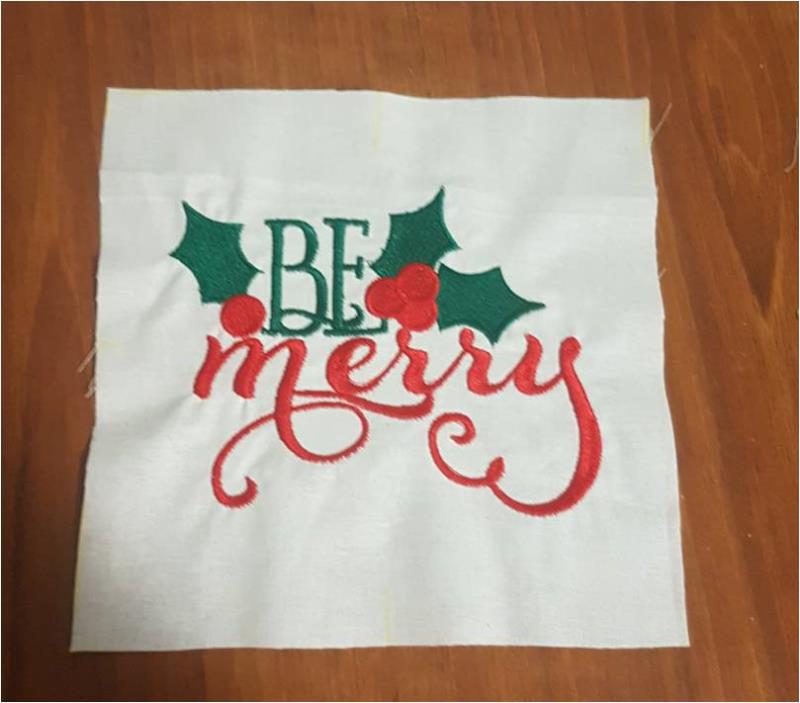
    Cut a 25cm x 25xm square of tearaway stabilizer and the panel of your fabric to be embroidered, I have choosen plain white, then hoop both of these pieces together. Attach the hoop to your machine and
    embroider the 2 colour design.


    Step 3:
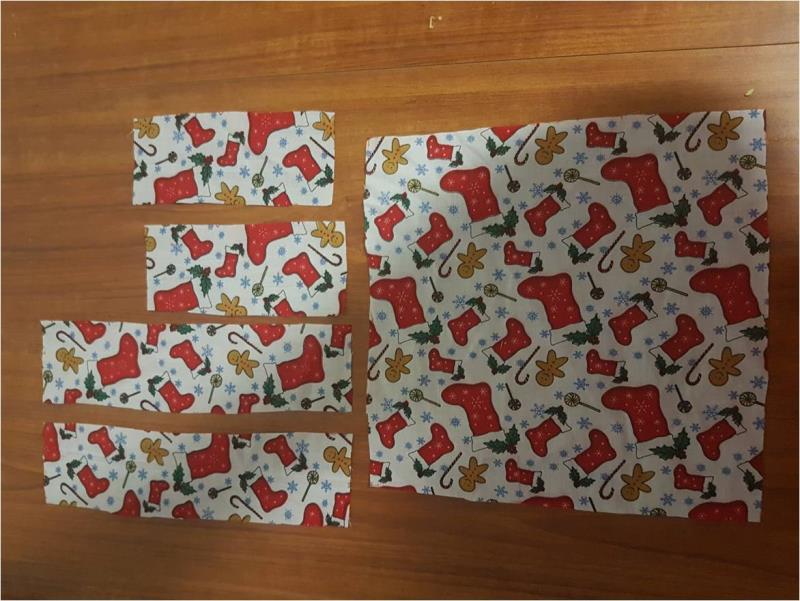
    Whilst the design is stitching out, cut your border and backing pieces from the second fabric. I have choosen a Christmas print. You will need 2 rectangles 7cm x 17cm, 2 rectangles 7cm x 27cm and 1
    square 27cm x 27cm for the backing.

    (Click Image to Enlarge)


    Step 4:
    Once the embroidery is complete, unhoop your design and tearaway the stabilizer,
    iron is needed. Then cut the embroidered panel down to a 17cm x 17cm square.

    (Click Image to Enlarge)


    Step 5:
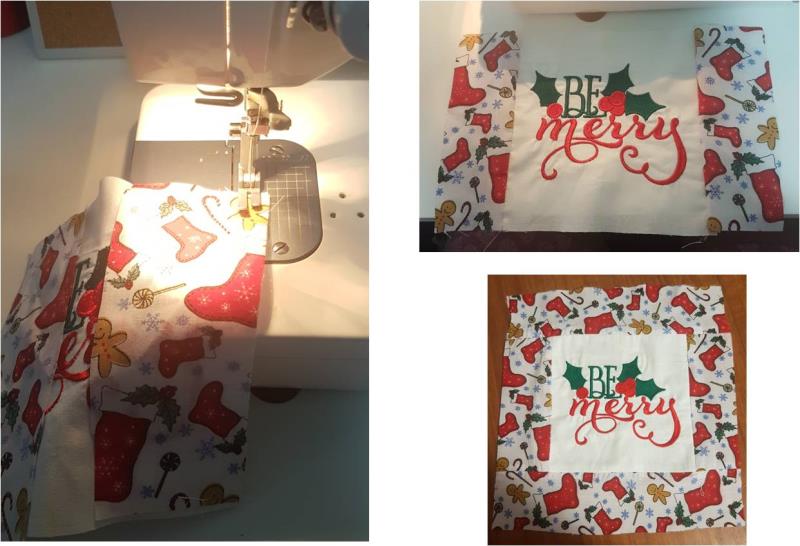
    Pin the small 7cm x 17cm rectangles to each side of the square and sew these on, using a 1cm seam allowance. Pin the remaining 2 rectangles to the top and bottom of the panel and sew, using a 1cm seam
    allowance. Press all seams open

    (Click Image to Enlarge)


    Step 6:
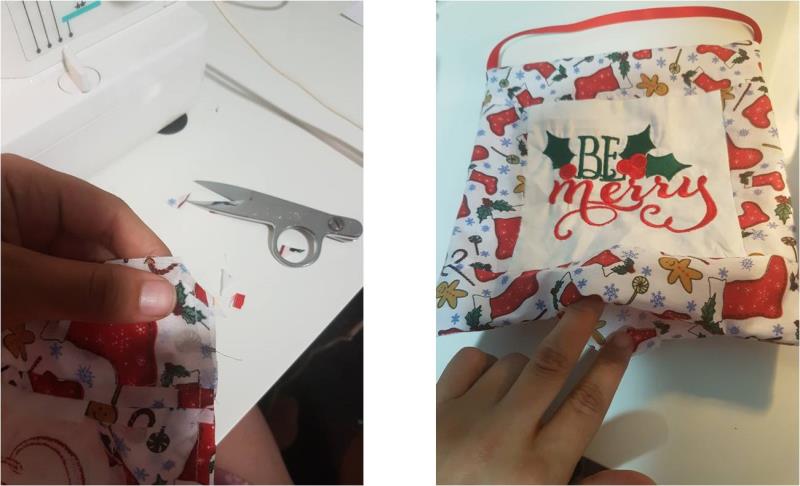
    Place the ribbon on the top corners of the panel and tack down. Then lay the backing piece ontop of the panel with right sides together and starting at the bottom of the panel stitch around the square, ensuring the ribbon is sandwiched between the 2 pieces and make sure to leave an opening at the bottom to fill the cushion, use a 1cm seam allowance. Snip the corners of the square and turn it right side out, push out the corners so they are nice and square.

    (Click Image to Enlarge)


    Step 7:
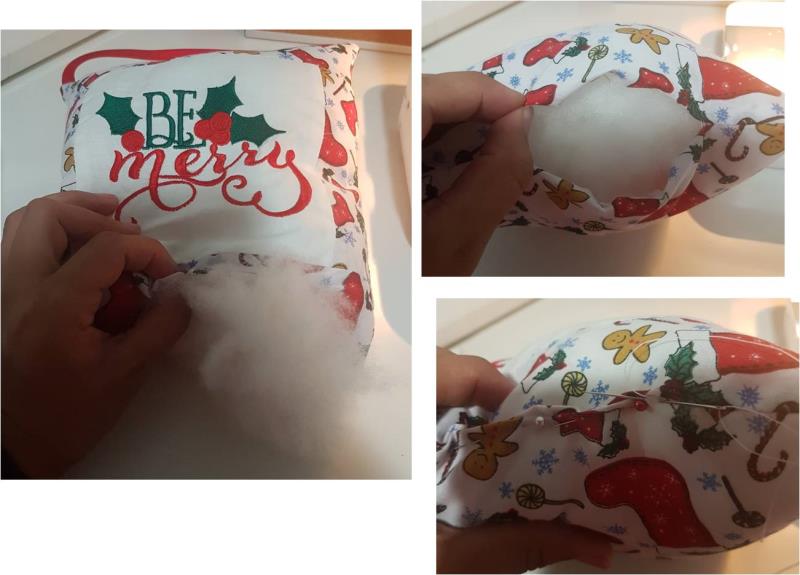
    Using your filling of choice, fill the cushion through the opening you left. Once it is filled, at the opening make sure your seam allowance is pressed back then pin together the opening and hand
    stitch it closed using a blind ladder stitch

    (Click Image to Enlarge)


    Step 8:
    (Click Image to Enlarge)
    Merry Christmas! You have finished your hanging cushion.
    Meet the Author: Kylie Burke
    Kylie Burke
    Kylie is based in Australia and loves creating and sharing her unique pieces.
    More From This Author
    Link is Broken, Please check the URL
    Exclusive Embroidery Offers!
    Copyright © {{ currentDate | date:'yyyy'}} - EmbroideryDesigns.com
    GET 50% OFF! ×