This project presumes you are familiar with quilting techniques and can measure and cut the fabrics judiciously so there is enough fabric for all parts of the project. The fabrics are cut in strips as needed for sashings, borders, and squares for both the front and back of the project. Quilting is simply done, but if you have time, do your own free-motion quilting.
Step 1:
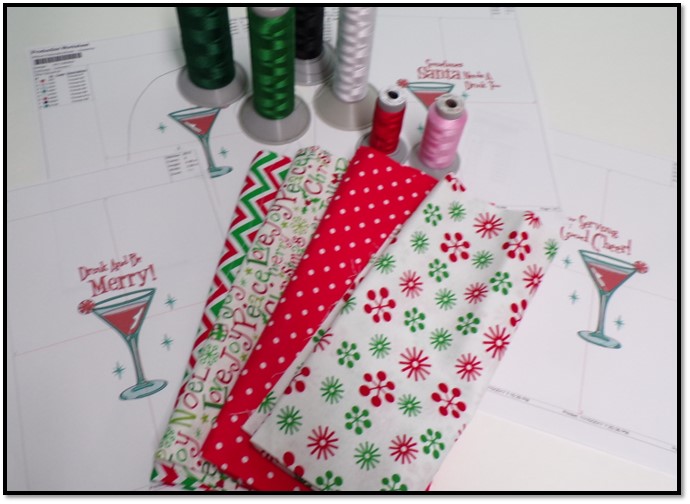
Gather the materials and read through the instructions before beginning. Print out a paper template of the design and color sequence. ¼” seams are used throughout the project. Decide which fabrics will be used for which part of the mat. For the project, the dot fabric was used as 2” (finished) sashing strips between the embroidered pieces and also for the binding; the word fabric was used for 3” (finished) borders. The snowflake fabric was used for the 2” square (finished size) in the center and also for the center square on the back of the fabric. The zig-zag fabric was used for borders on the fabric back.
For the front cut: • 1- 2.5” square for the center • 4- sashing strips 2.5” wide x 6.5” long (for the project, the strips were cut slightly longer and then after they were sewn on to the embroidered blocks, they were cut to size) • 4- border strips 3.5” wide by the width of the fat quarter (these will be cut down as they are sewn on)
For the back cut: • 1- 14.5” square for the center square • 4- 3.5” x the width of the fat quarter (these will be cut down as they are sewn on)
For the binding cut: • Cut the remaining fabric that was chosen for the sashing into strips enough to create binding to go around the quilt—depending upon whether you are using purchased goods, fabric from your stash, or fat quarters, your binding may be single or double fold binding.
(Click Image to Enlarge)
Step 2:
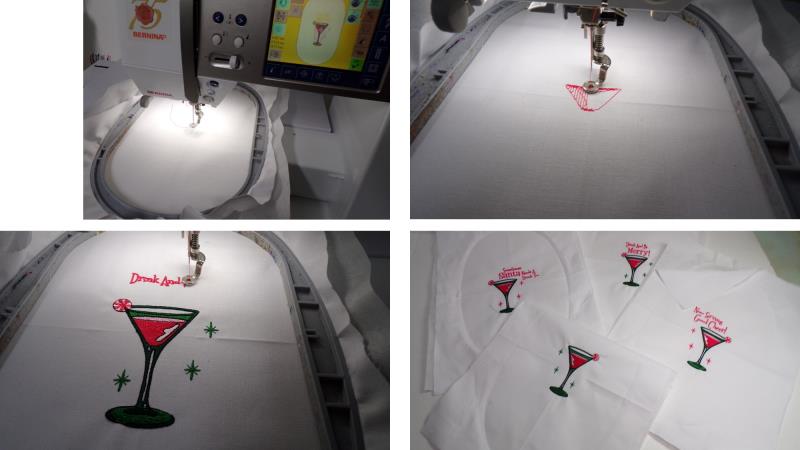
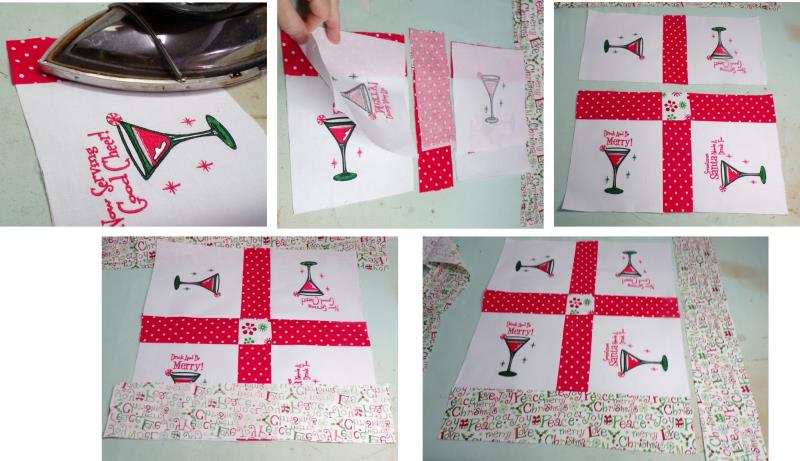
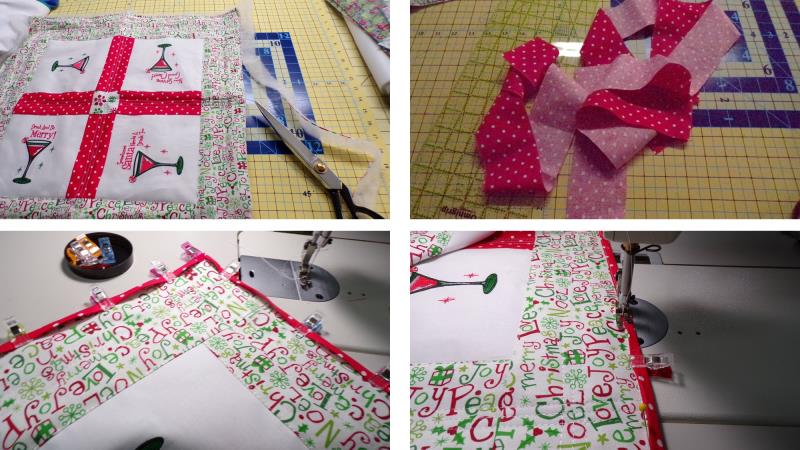
Begin by pressing and quarter-folding the four white cotton pieces of fabric—the lines pressed into the fabric will be used as guides when the embroidered fabric is cut to the final size. For each design, load the design on the machine and stitch following the color sequence; don’t remove the excess stabilizer yet—it helps when cutting the fabric to size. Note: on the website photo it looks like there is light density around the glass at the top and foot--it actually is a full fill-stitch.
(Click Image to Enlarge)
Step 3:
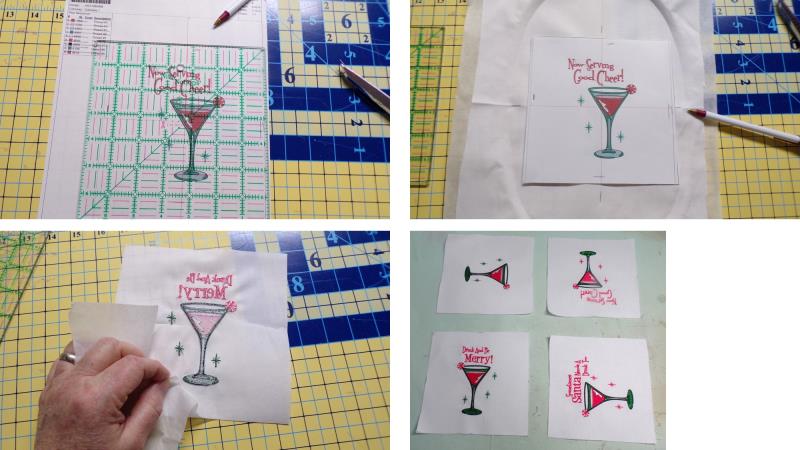
Choose the paper template for the largest design and measure a 6.5” square, on center on the paper. Cut out along the drawn line. Now use the cross-hairs on the paper to align to the pressed lines on each of the embroidered fabric pieces. Draw a light line around the paper template and cut out the fabric along the lines. Remove the excess stabilizer from the back of the design. Repeat these steps for the remaining three embroidered fabric pieces. Decide how you’d like the designs laid out for the mat. For the project, each was turned as shown.
(Click Image to Enlarge)
Step 4:
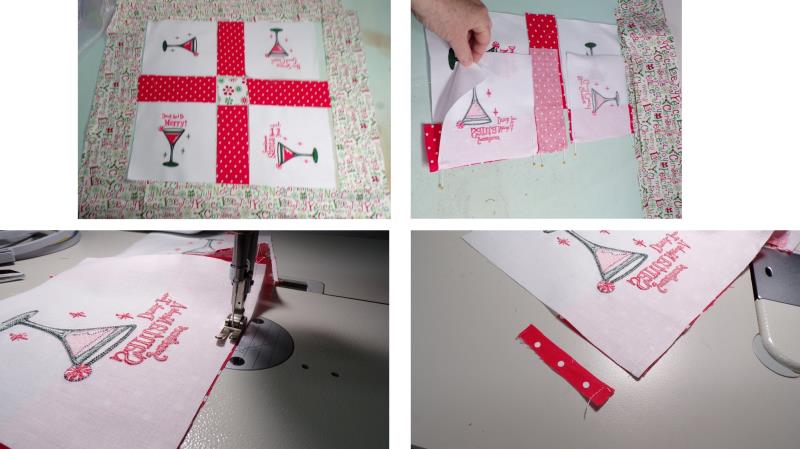
Lay out the embroidered blocks, center piece, sashing, and borders. Sew all the pieces together in sections, pressing the seams and cutting off excess edges.
(Click Image to Enlarge)
Step 5:
Press the seam allowance toward the sashing fabric. Continue sewing all the sashing pieces to the embroidered blocks, then sew the center piece to the middle sashing pieces and then sew the middle section to the embroidered blocks. After the middle section is sewn, then work around the piece sewing on the borders and trimming them as needed.
(Click Image to Enlarge)
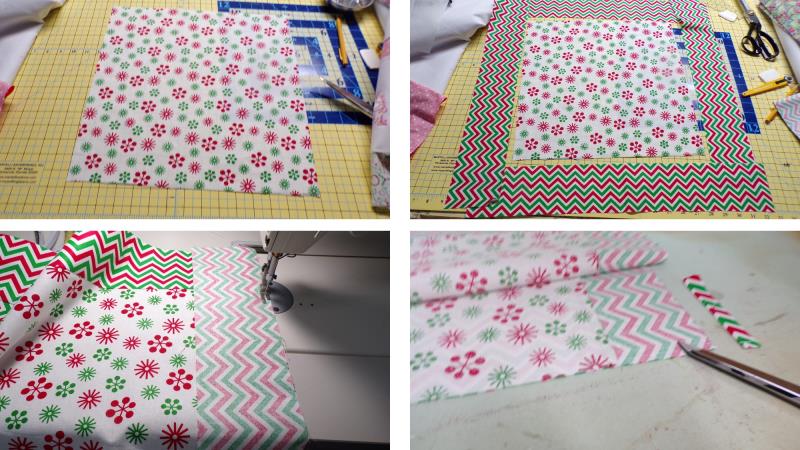
Step 6:
To construct the back, measure the inner area (blocks and sashings) of the top just completed from the outer edge to the outer edge and cut the inner square this size—it should measure about 14.5”-15” square. Then cut the border pieces. Sew the border pieces around the center square one side at a time, trimming off the excess at each edge.
(Click Image to Enlarge)
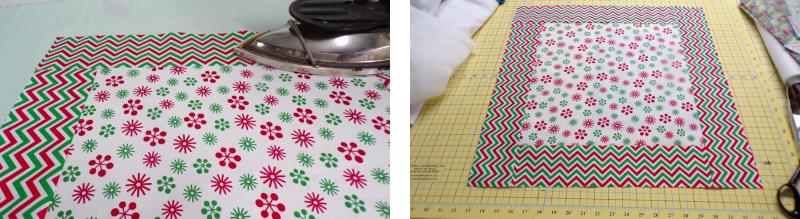
Step 7:
Press as you go. Sew on all four borders.
(Click Image to Enlarge)
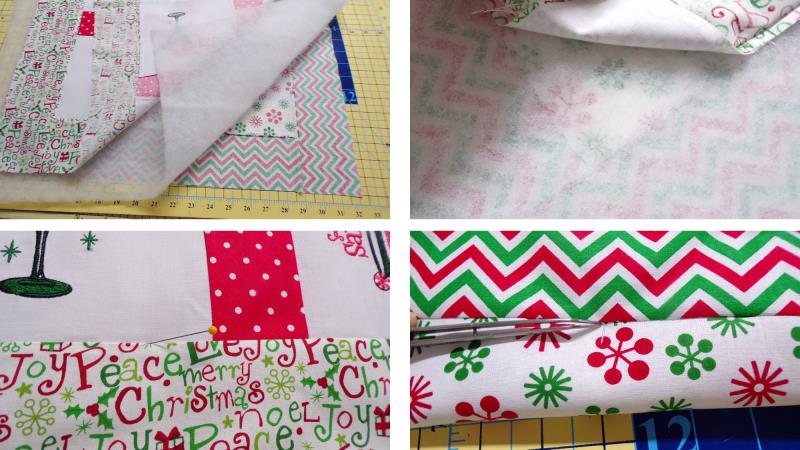
Step 8:
Lay the back wrong side up, then the batting, and then the top to make the quilt sandwich. Be sure the seam allowances along the inner squares match up—they can be seen through the binding. All around the seams of the inner squares, match and pin the top to the back.
(Click Image to Enlarge)
Step 9:
Baste around the outside edges through all the layers. Now quilt as you would like. For the project, white embroidery thread and a 3.5mm stitch length was used to sew straight down the middle of each sashing strip beginning at the border at the top of the strip, through the middle, and down to the end of the border. A seam guide was laid on the strip to keep the stitching straight (it could also be marked if you wish). The same was done for the border. After the center stitching was done, then the presser foot edge was used as a guide to stitch along each side of the first line of stitching.
(Click Image to Enlarge)
Step 10:
After all the quilting is done, trim the batting, cut the binding strips, and bind the quilt using your favorite method.
(Click Image to Enlarge)
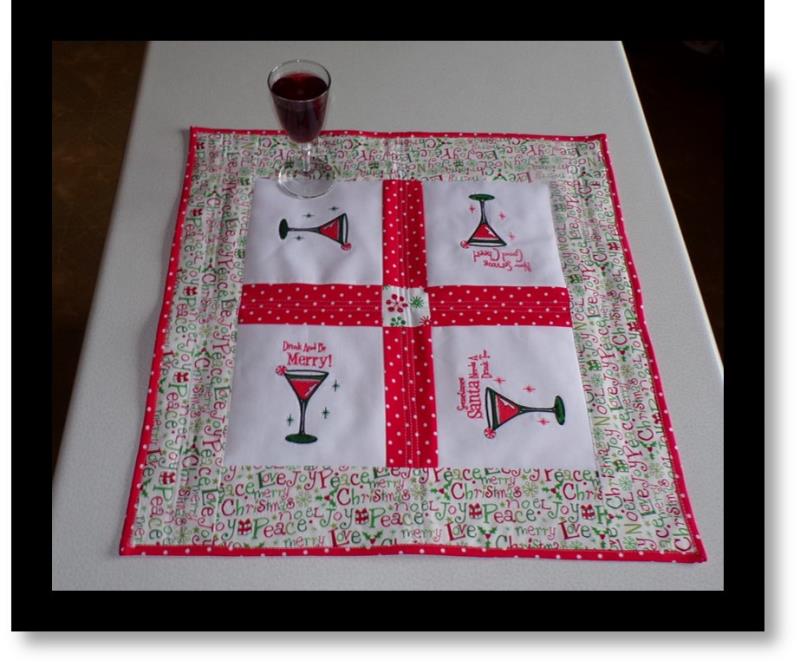
Step 11:
Congratulations on creating a “Merry Drink-Serving Mat”! Your guests will be delighted that you took the time to make serving drinks extra special.
Ramona Baird has been in the embroidery industry for over 23 years. She and her husband owned a commercial and retail embroidery store in Arizona for many years. She is an experienced digitizer having been mentored by award-winners Pat Williams and Lindee Goodall. Ramona is a contributor to “Creative Machine Embroidery” magazine having 5 covers to her credit. Ramona has worked for Wilcom America and served many years as Education Director for the American Sewing Guild. With a degree in fashion design, she is able to design and execute patterns which Pat Williams says are “out of the box” in creativity and application. Ramona likes to challenge the boundaries of embroidery and bring new and exciting designs, ideas, and projects to EmbroideryDesigns.com. She wants embroiderers of all levels to increase their skills and enjoyment in using their embroidery machine for gift-making and personal pleasure.