{{superHeaderAds.title}}
Live Chat
Embroidery Designs
Welcome, Embroiderer
Login
Fingerless Gloves
{{mainImageAlt || (productInfo._source && productInfo._source.name) || ''}}

Fingerless Gloves Embroidery Project

By   Amber Stevens   on   November 21, 2017

PROJECT DETAILS

SKILL LEVEL
Intermediate
TIME REQUIRED
01:00
Description

Keep your hands tech-ready, but still nice and toasty with fingerless gloves. This project takes you step-by-step through the process.

Project Preview Video
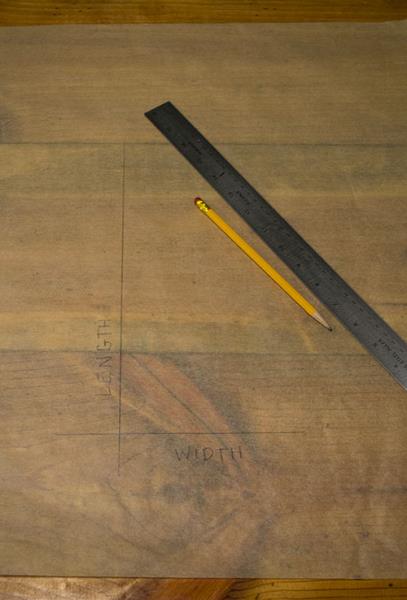
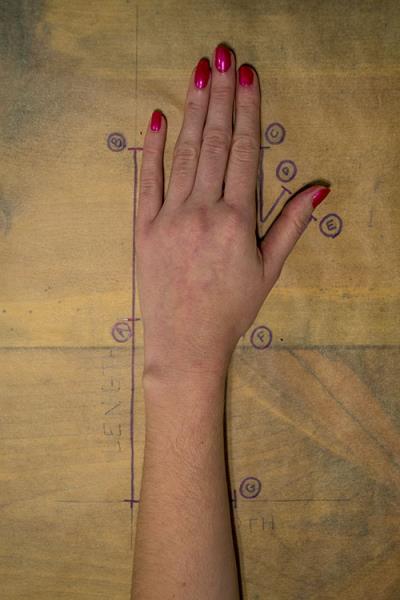
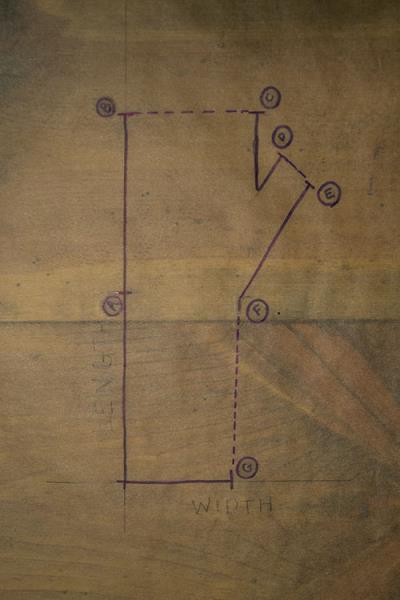
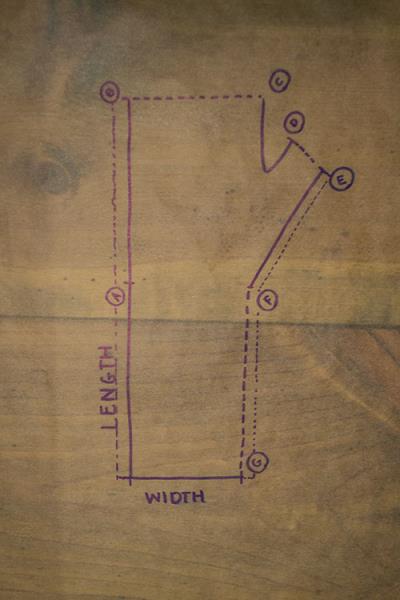
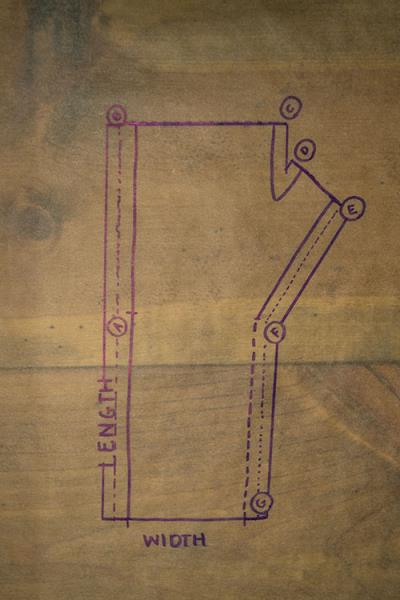
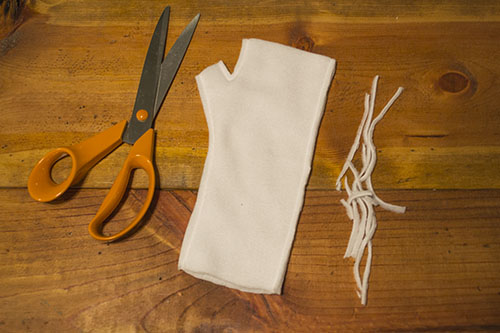
Materials
  • Fleece 1/3 yard
  • Ruler
  • Pencil
  • Pattern Paper


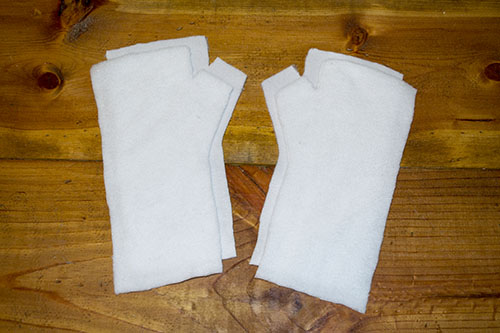
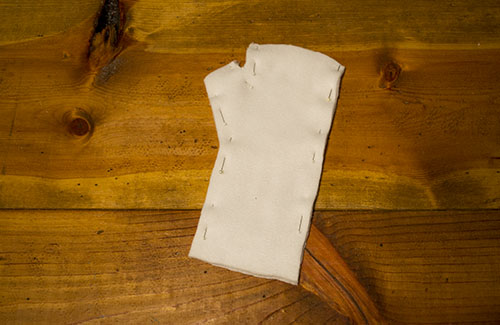
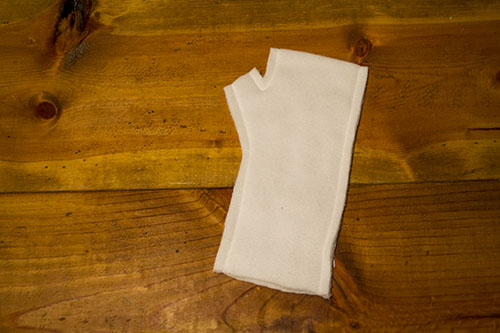
  • Final Product: What You Will Create

    Preface:
    Keep your hands tech-ready, but still nice and toasty with fingerless gloves. This project takes you step-by-step through the process.
     
    How to Make Your Pattern:


    Step 1:
    Draw two perpendicular lines on a piece of pattern paper. Label the vertical line “Length” and the horizontal line “Width”. We will call their intersection the apex.

    (Click Image to Enlarge)


    Step 2:
    You will use your hand to create your pattern and to find the following plot points.
    • Decide how long you would like your gloves. Our example is 5 in from the base of the hand. Therefore, we marked our point (A) 5 in from the apex on the vertical line.
    • To create the remaining plot points, place the base of your left hand at point (A). Mark point (B) on the length line at height of your first knuckle on your pinkie finger.
    • Mark point (C) at the second knuckle of your pointer finger.
    • Mark point (D) on the inside of your thumb ½ in from the top. Draw a line from (C) to (D) a long the edge of your pointer finger and thumb.
    • Mark point (E) on the outside or your thumb ½ in from the top.
    • Mark point (F) at the bottom of your hand.
    • Mark point (G) at the width of your wrist.

    (Click Image to Enlarge)


    Step 3:
    Connect points (A) to (B). Connect points (B) to (C). Connect points (D) and (E). Connect points (F) to (G).

    (Click Image to Enlarge)


    Step 4:
    Add ¼ in ease to sides of your pattern piece. This gives makes the fit less tight and allows your hand a greater range of movement.

    (Click Image to Enlarge)


    Step 5:
    Add a ¼ in seam allowance on sides (AB), (CD), and (GFE). This will become the final edge of your pattern. Cut along the outermost edge and cut 4 glove pieces out of fleece. 

    (Click Image to Enlarge)


    Step 6:
    Cut Your Pieces Out:
    Make sure to place the width of the pattern on the stretchy side of the fabric.


    Step 7:
    Start Sewing:
    You should now have 4 gloved shaped pieces of fabric. Pin two glove pieces (right sides together) for the left glove and two together for the right glove. Leave openings at the top and bottom for your thumb, fingers, and wrist.


    Step 8:
    Sew at ¼ in seam.


    Step 9:
    Trim your seam allowance to 1/8 in. Flip right side out.


    Step 10:
    Add your own style with embroidery and enjoy!

    (Click Image to Enlarge)

    Meet the Author: Amber Stevens
    Amber Stevens
    Amber, the Designer Extraordinaire over at Adventures in Stitcherland, has been sewing since she was 9 years old. When she's not creating stunning embroidery designs, she is elbow-deep in all things fashion.
    More From This Author
    Link is Broken, Please check the URL
    Exclusive Embroidery Offers!
    Copyright © {{ currentDate | date:'yyyy'}} - EmbroideryDesigns.com
    GET 50% OFF! ×