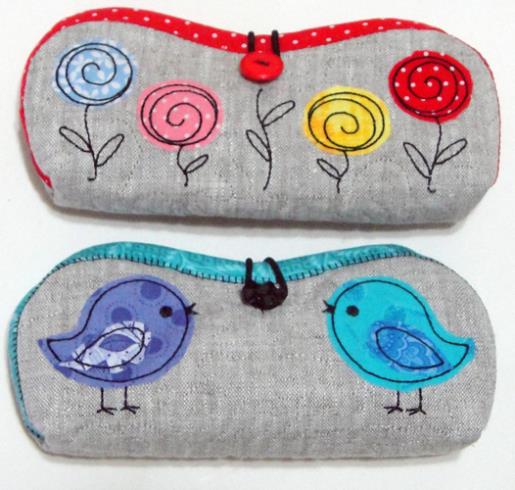
These eyeglass cases are made for those who have large hoops. An 8” x 8” is required to raw edge applique, line and quilt these eyeglasses in the hoop. The binding and final assembly is done at your standard sewing machine.
Due to the curved edges on the body of these eyeglass cases your binding must be cut on the bias. Cut and join bias strips as necessary to obtain a total length of 36” of bias binding. I rated this project for experienced embroiderers and seamstresses due to the number of curves in binding this small project. I will share later in the project hints that made it easier. The first hint is to starch your binding fabric before you cut the bias strips.
Step 1:
(Click Image to Enlarge)
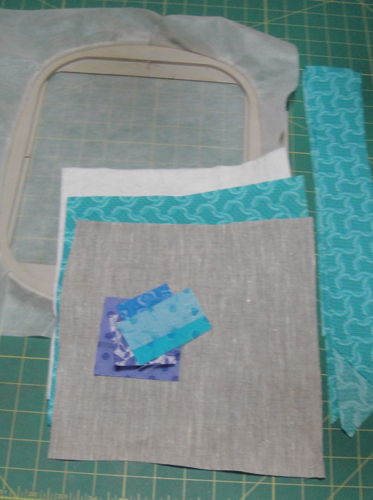
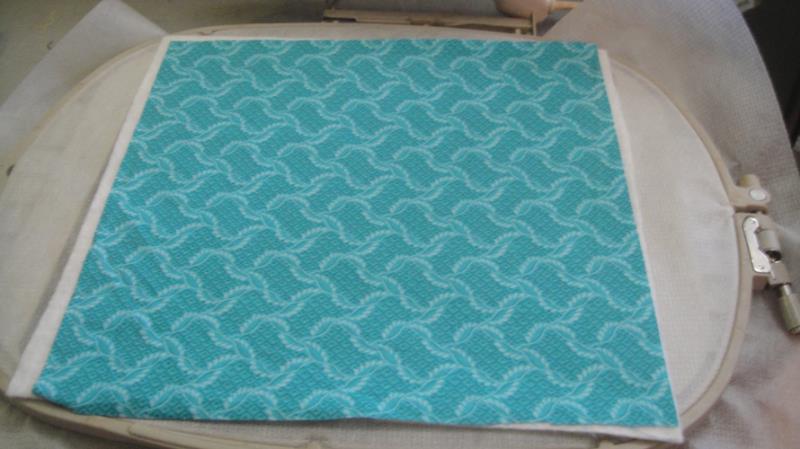
Cut a 9.5” square of your outside fabric, lining, and batting. Cut your applique pieces and Heat N Bond Lite® per the materials list above. Hoop no show stabilizer in the 8” x 8” or larger embroidery hoop.
Step 2:
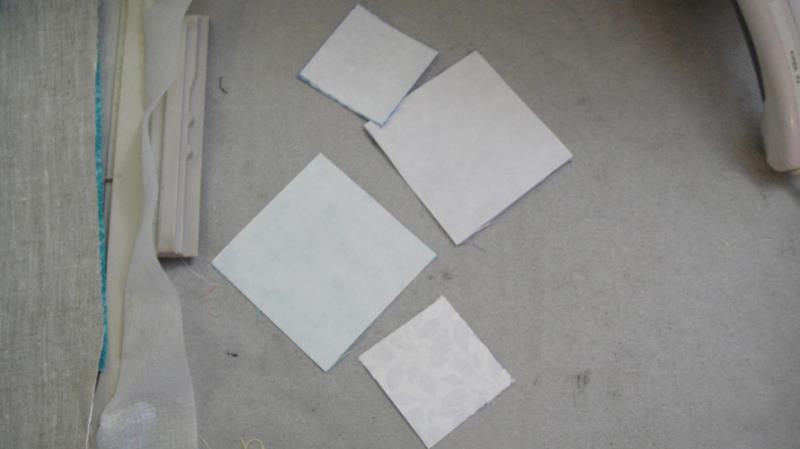
Press your applique pieces with Magic Sizing® and apply the Heat N Bond Lite® following the manufacturer’s instructions.
(Click Image to Enlarge)
Step 3:
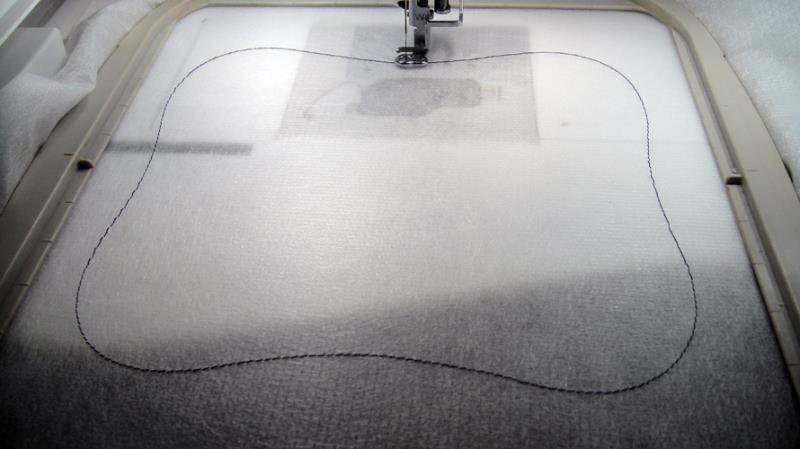
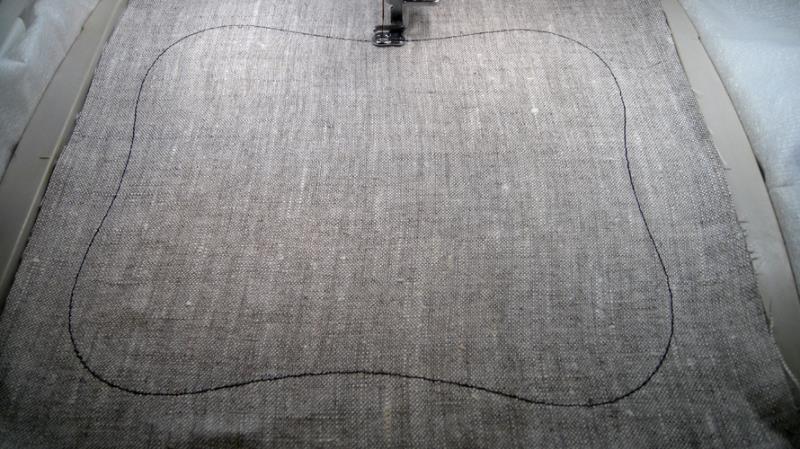
There are a number of color stops in these designs due to the placement and tack down lines but you can use black thread for all of them except when you reach the steps to do the quilting and a contrasting thread to baste and make some placement marks at the end. Run the 1st color stop as a placement line for your outer fabric.
(Click Image to Enlarge)
Step 4:
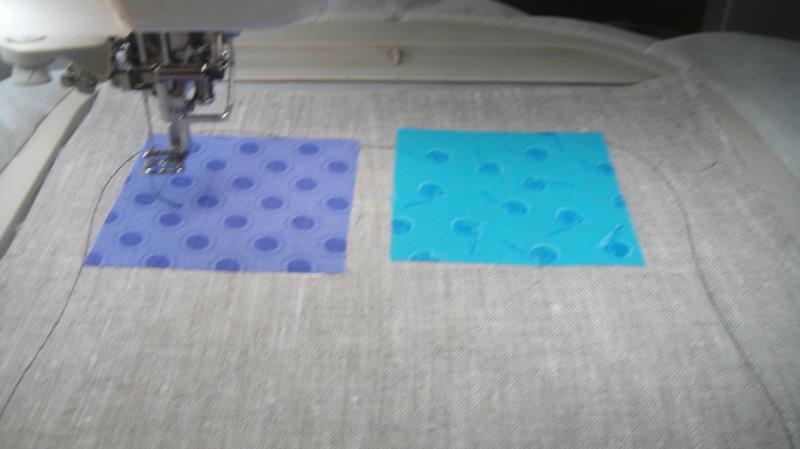
Spray adhesive on your outer fabric and position over the placement line so that the fabric exceeds the placement line by ½” on all sides. Run CS 2 to tack down the fabric.
(Click Image to Enlarge)
Step 5:
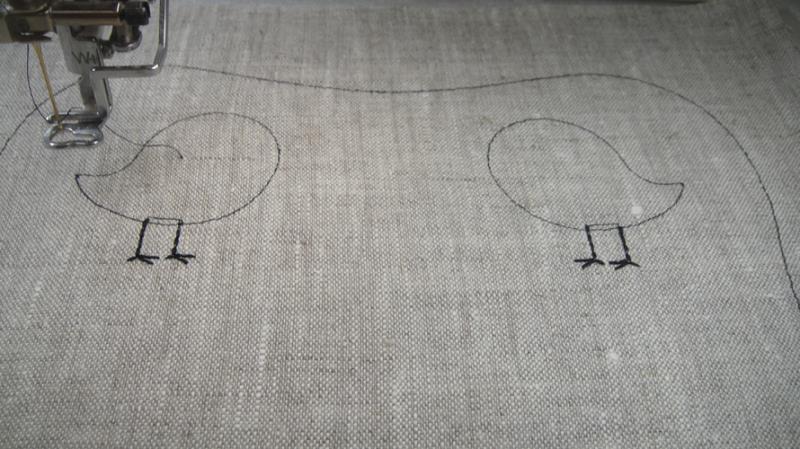
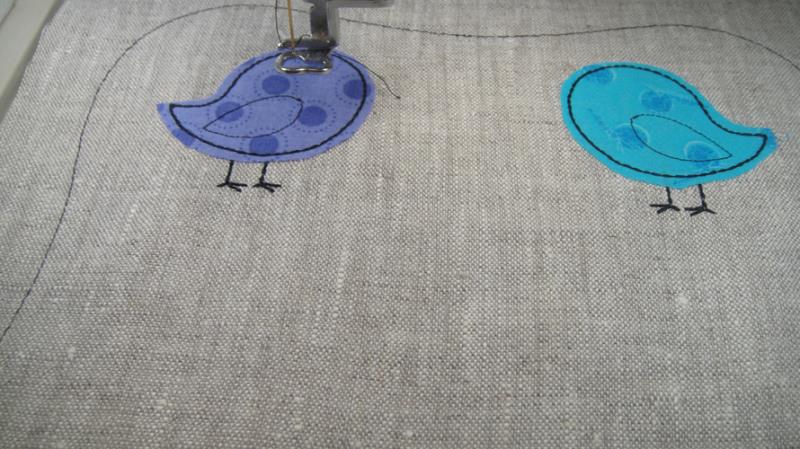
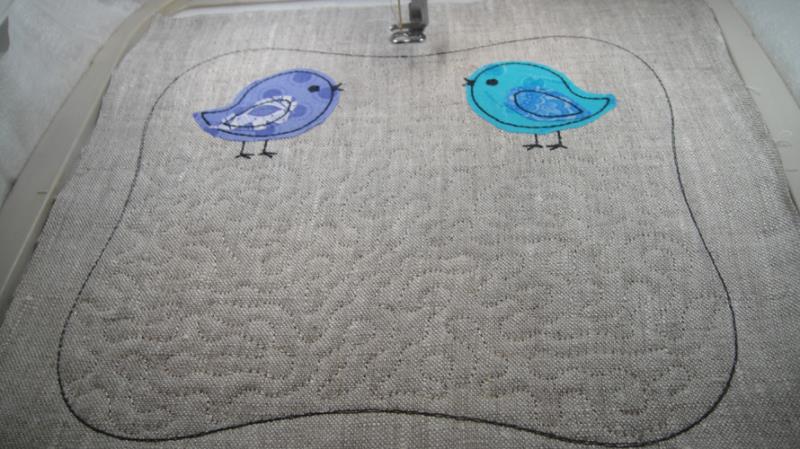
For the eyeglass case with the birds CS 3 is for the feet, they are on their own color stop just in case you want to sew them in a gold thread. CS 4 is the placement line for both birds. Both birds are appliqued at the same time as they are spaced so far apart. When stitching the flowers on the other eyeglass case each flower is appliqued separately as they are so close together.
(Click Image to Enlarge)
Step 6:
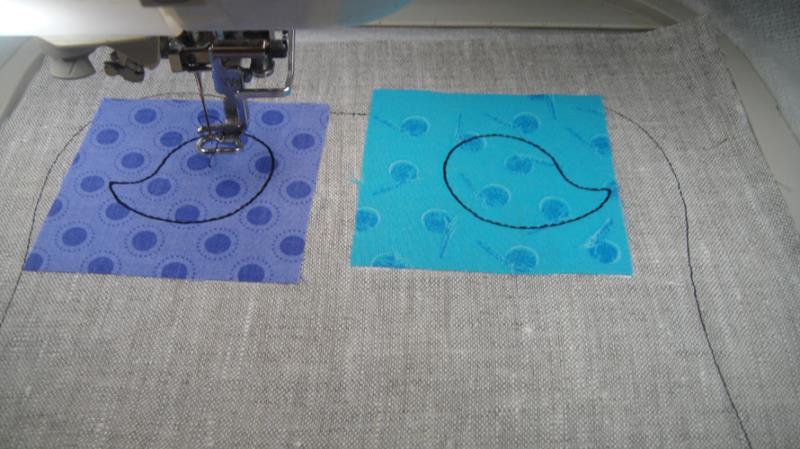
Remove the paper from the applique pieces, spray with a little adhesive and position over the placement lines.
(Click Image to Enlarge)
Step 7:
Run the next color stop to tack down the appliques.
(Click Image to Enlarge)
Step 8:
Remove the hoop from the machine, do not unhoop. As your hoop is large place it on a flat surface to trim the excess applique fabric around the tack down stitches. Press the appliques down with an applique iron.
(Click Image to Enlarge)
Step 9:
Run the next color stop as a placement line for the wings.
(Click Image to Enlarge)
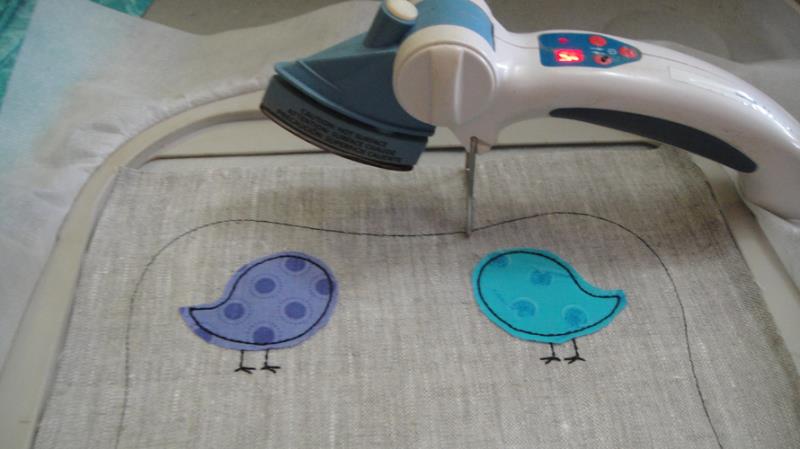
Step 10:
Apply the wings appliques as you did the bodies. Run the next color stop to tack them down, remove from the hoop and trim then press the appliques into place. If you are doing the flowered case complete all 4 flowers and stems in the same manner.
(Click Image to Enlarge)
Step 11:
Remove the hoop from the machine, do not unhoop. Lay the hoop face down on a flat surface. Spray adhesive on the batting square and align with the embroidered block; spray adhesive on the lining fabric and align over the batting.
(Click Image to Enlarge)
Step 12:
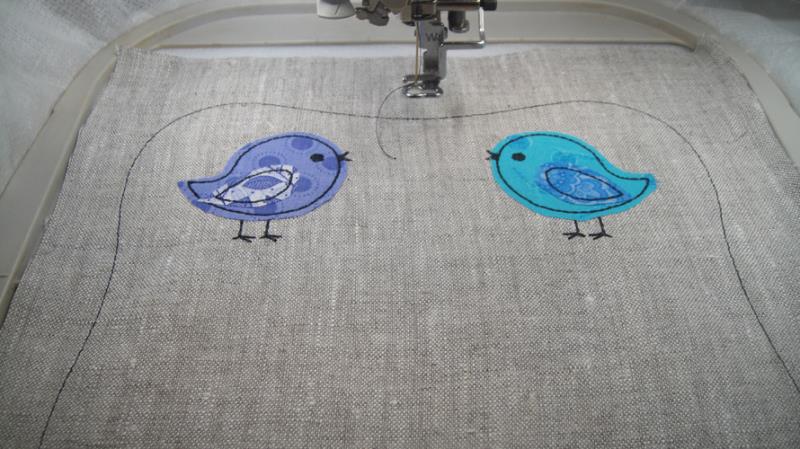
You should now have 3 color changes left in the design. Run this 3rd from the last in black thread to tack the batting and lining fabric to the block.
(Click Image to Enlarge)
Step 13:
Run the next to last color change in the color of your choice to quilt the eyeglass case. In the sample a thread matching the linen was chosen.
(Click Image to Enlarge)
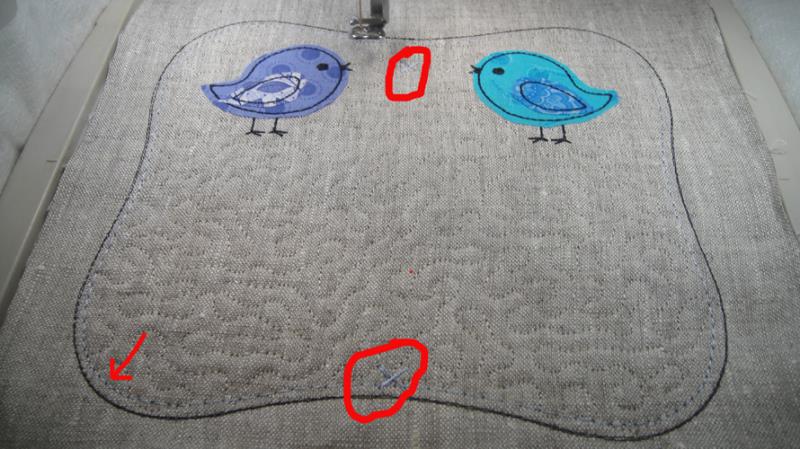
Step 14:
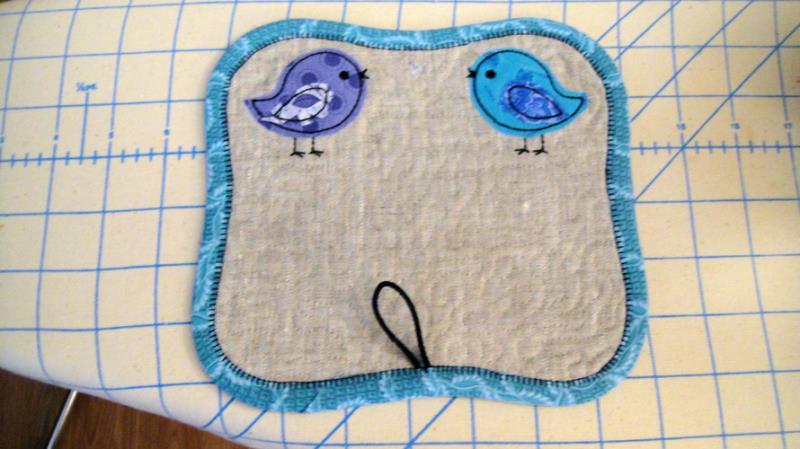
For the final CS use a thread that contrasts with your fabric. This color stop runs a basting stitch around the whole block and marks the block for where you will sew on the elastic for the closure and the button.
(Click Image to Enlarge)
Step 15:
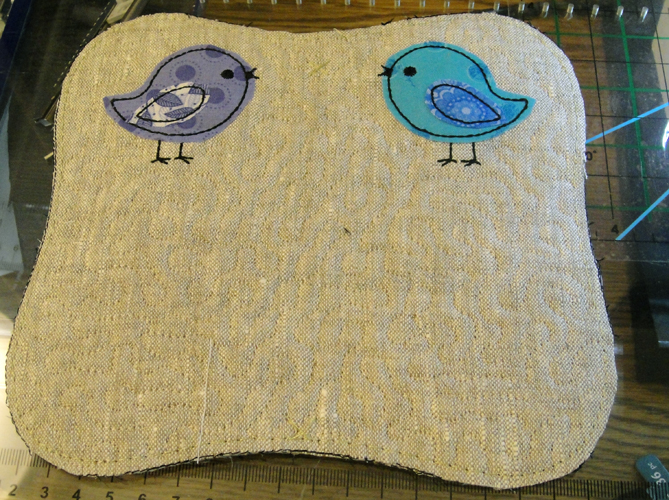
Cut out the eyeglass case right on the outside black stitches.
(Click Image to Enlarge)
Step 16:
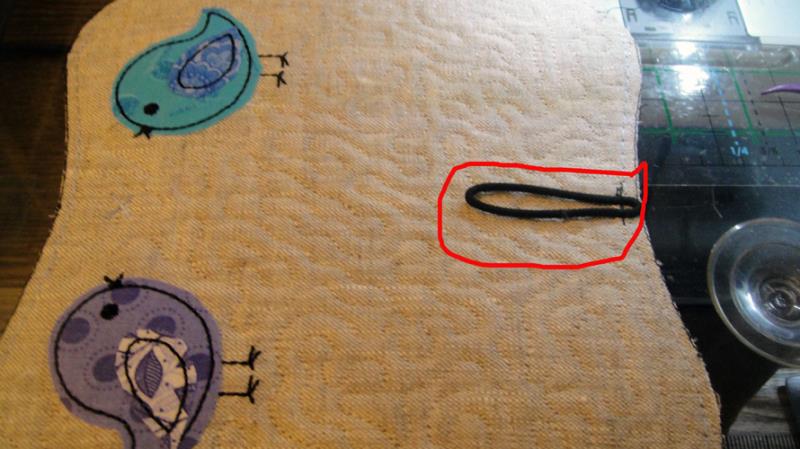
Line up the folded pony tail elastic with the placement mark at the bottom of your block. The elastics used in the samples measurers 1 7/8th” when folded in half. If yours in longer extend the excess elastic over the edge and cut if off after you have stitched it to the block. Stitch the elastic to the block and reverse stitch back over it in the space between the outside edge and the basting stitches.
(Click Image to Enlarge)
Step 17:
(Click Image to Enlarge)
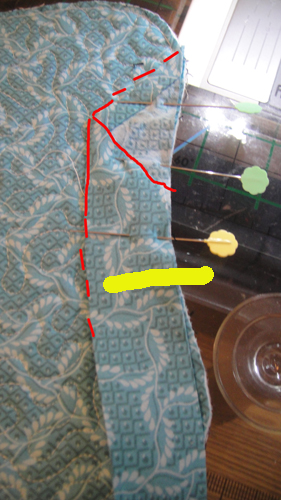
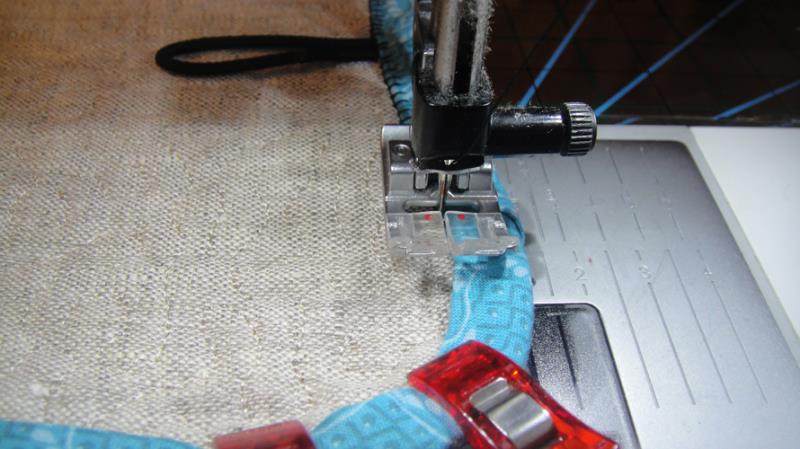
Fold one end of the bias strip at a 45 degree angle, press down ¼” to 3/8” at the top angle. Fold and press the 2 ¼” binding strip in half lengthwise. Pin the high point of the angled end to the project at a side corner curve. Pin carefully matching the raw edges of binding around the first convex curve. Start your stitching about 1 ½” below the lowest folded edge of binding.
Step 18:
With a ¼” foot and a short stitch length of 2mm slowly stitch around the project easing the binding around the convex and concave curves. It is very important that you maintain that ¼” seam allowance.
(Click Image to Enlarge)
Step 19:
When you get to the last curve, back stitch and stop stitching at about the center of that final curve.
(Click Image to Enlarge)
Step 20:
Position your final bit of binding around the remainder of the curve and trim it off about ½” below the lower folded edge of the angled binding. Tuck the final binding strip into the existing binding positioned on the block and re-pin to the block following the curve.
(Click Image to Enlarge)
Step 21:
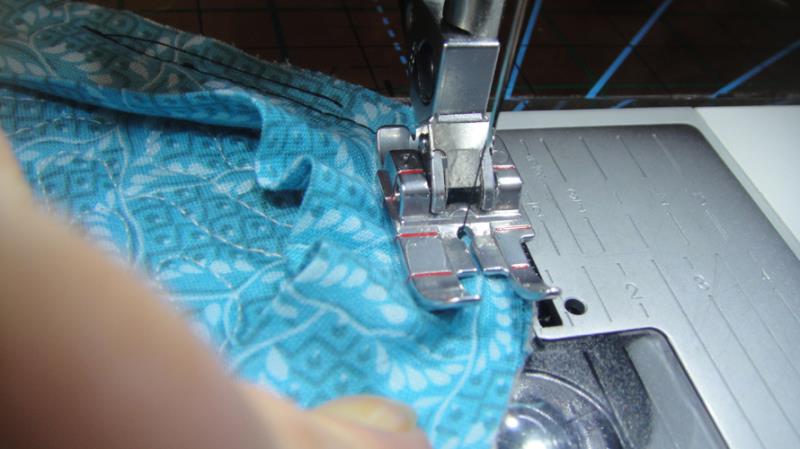
You may find it advantages to clip the binding seam allowance around the curves.
Step 22:
Fold and clip the binding to the front of the project. Edge stitch with a straight or decorative stitch to the front of the project. On this sample and E-stitch or blanket stitch was used to stitch down the binding.
(Click Image to Enlarge)
Step 23:
Press the block from the back and front to flatten out the curves.
(Click Image to Enlarge)
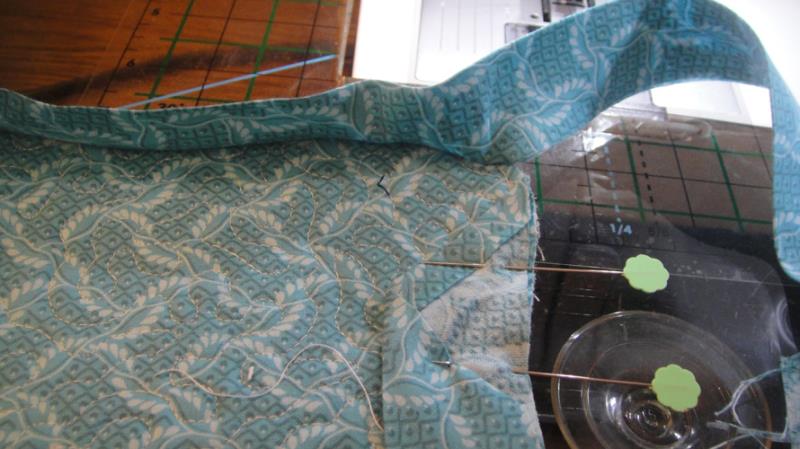
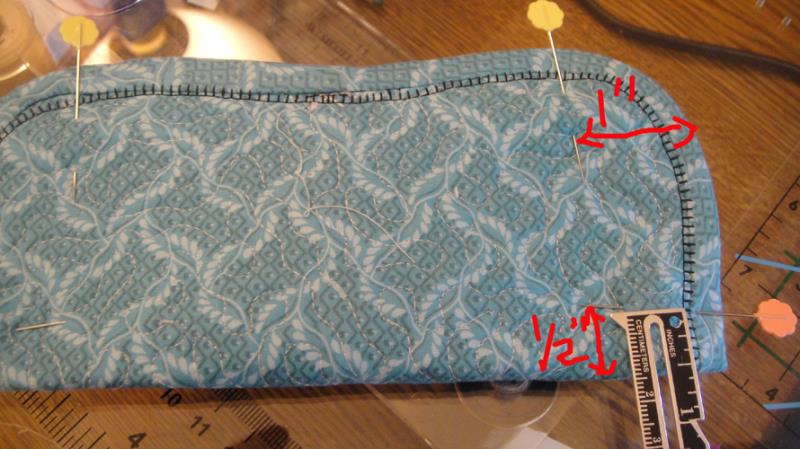
Step 24:
Bring the bottom of the project to the top of the project right sides together. Place a pin ½” on the side of the project and 1/2” up from the bottom on both sides of the bottom. At the top edges place pins 1” in from the sides of the project.
(Click Image to Enlarge)
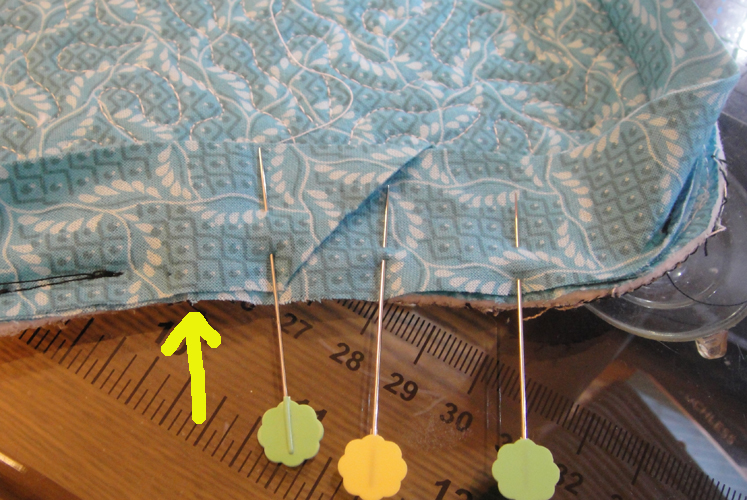
Step 25:
Edge stitch the bindings together between the pins on both sides of the project. Be sure to backstitch at both ends of the stitching.
(Click Image to Enlarge)
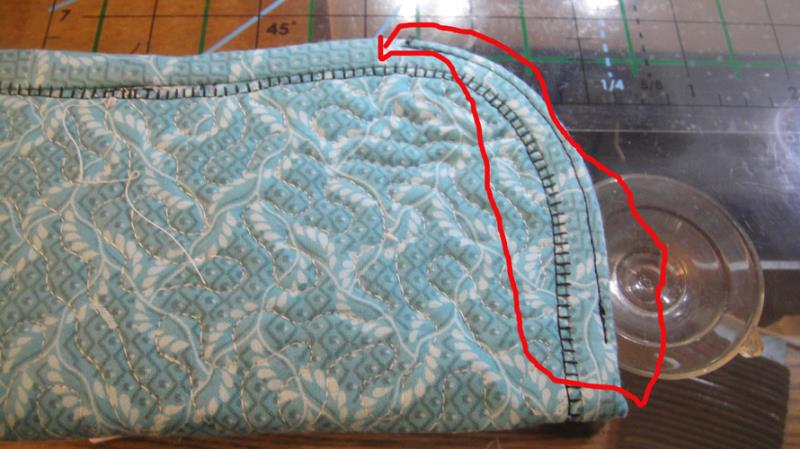
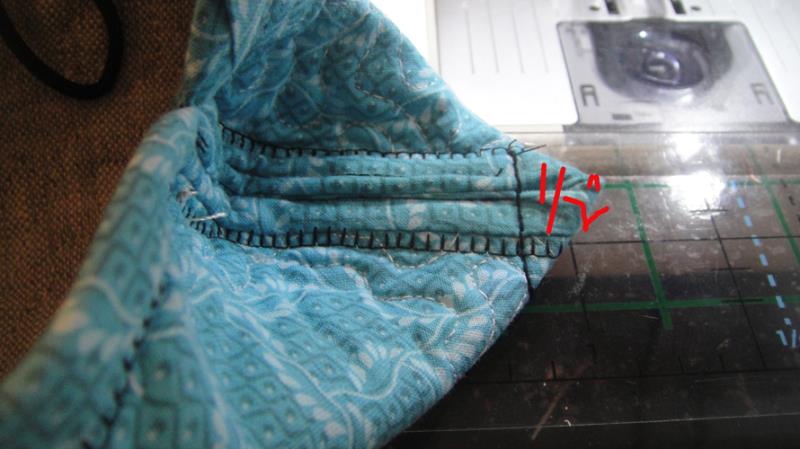
Step 26:
Push in the curved seams you have just stitched and the side seam will form a point at the end. Stitch and backstitch across this point ½” above the point. Do this on both sides. Do not clip off the point.
(Click Image to Enlarge)
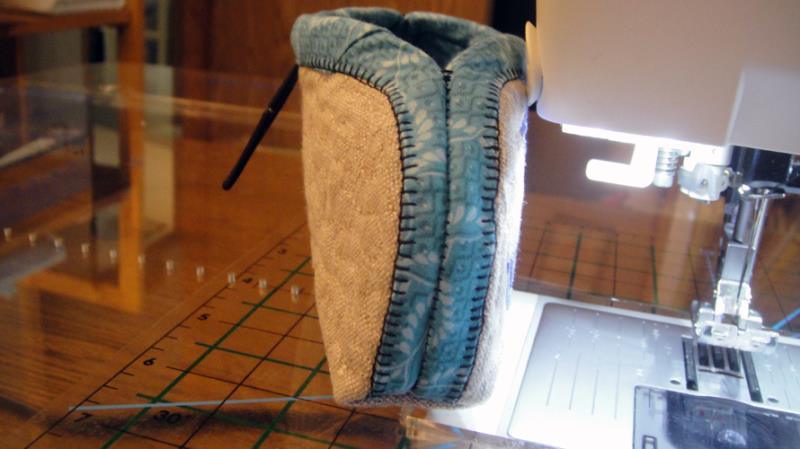
Step 27:
Turn the project right side out smoothing out the side curves with your fingers. The sides of the project will look like this.
(Click Image to Enlarge)
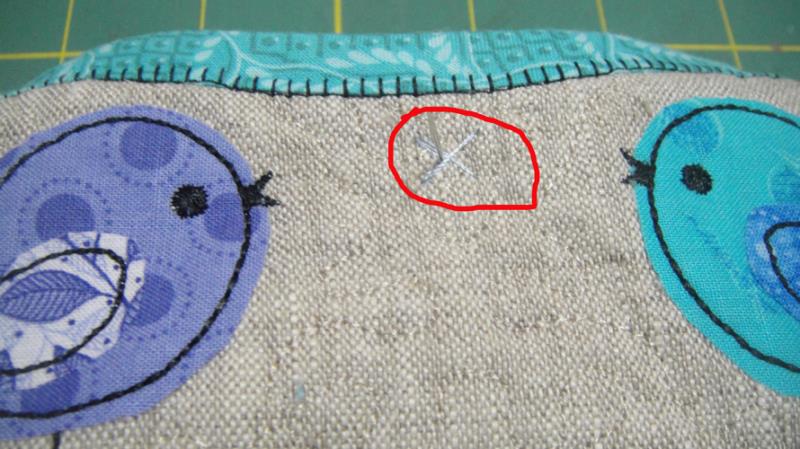
Step 28:
Attach a button with a shank, or stitch on a flat button with a thread shank over the placement lines at the top of the project. You can remove these stitches as soon as you start sewing the button on.
(Click Image to Enlarge)
Step 29:
Congratulations your Folded Eyeglass Case is complete! Just for your information I was able to test this cover out last night and it not only works for my regular sized glasses but also works for oversized sunglasses as well.
Award winning Digitizer, Embroidery Educator, Author and a Consultant to the Industry, Pat Williams has 30 years of experience in the embroidery industry. Pat has won multiple awards for her digitizing expertise including the 2007 Impressions Awards Grand Championship, Best of Show as well as the 1st and 2nd Place Awards. Pat’s love of digitizing has afforded her the opportunity to write numerous articles for Impressions magazine in the United States and Images Magazine in Europe. In 2001 Pat was named “Embroidery Educator of the Year.” For many years Pat taught digitizing seminars at the ISS Shows in Long Beach, CA and for Compucon software. She now resides in Tucson, AZ.