Each ball takes approximately 20 minutes to embroider and 25 minutes to sew together. Unlike most balls which are done with wedge shapes, this “Silly Softie Baseball” actually is shaped just like a baseball - including the “lacing” stitches!
There are four sections to the baseball; all sections are included in a single file with color stops to force a machine stop between each baseball section. After one section stitches, the machine stops for hooping the next piece of fabric, until all four sections are done. After all the sections are sewn, they are cut out and then sections 1 and 2 are seamed together and sections 3 and 4 are seamed together. After the sections are seamed together, the ball is completed by using the heavy duty thread and a ladder stitch for sewing the ball. The first ball may take a little longer to complete, but after doing the first one or two, you’ll be breezing through the stitching because the hand stitching follows along the holes already created by the lacing embroidery stitch!
It is easy to do all the embroidery first and then while movie or TV watching, complete the last step. You’ll be stitching up a whole basket of “Silly Softie Baseballs” to keep or give away to the baseball fans you know. These would also make great craft fair sale items, too.
Step 1:
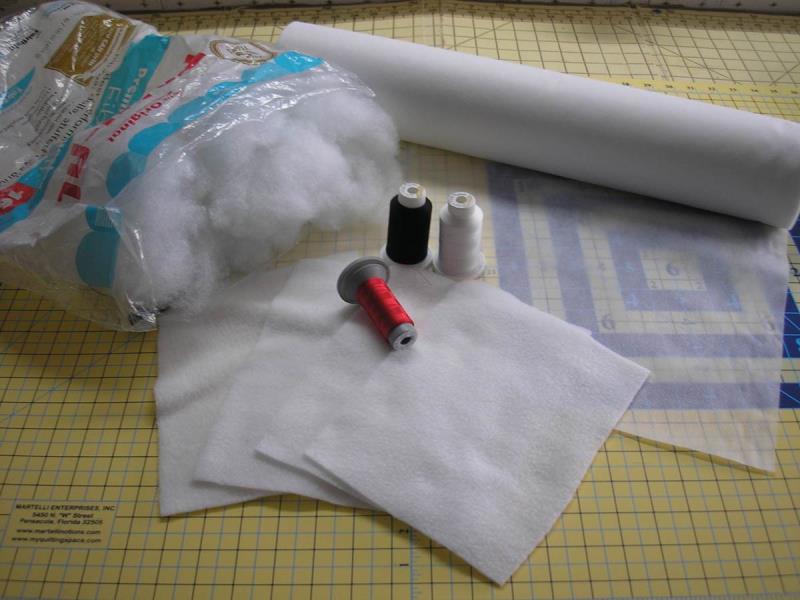
Gather the materials and read through the instructions before beginning. Print out a paper template of the design and color sequence.
(Click Image to Enlarge)
Step 2:
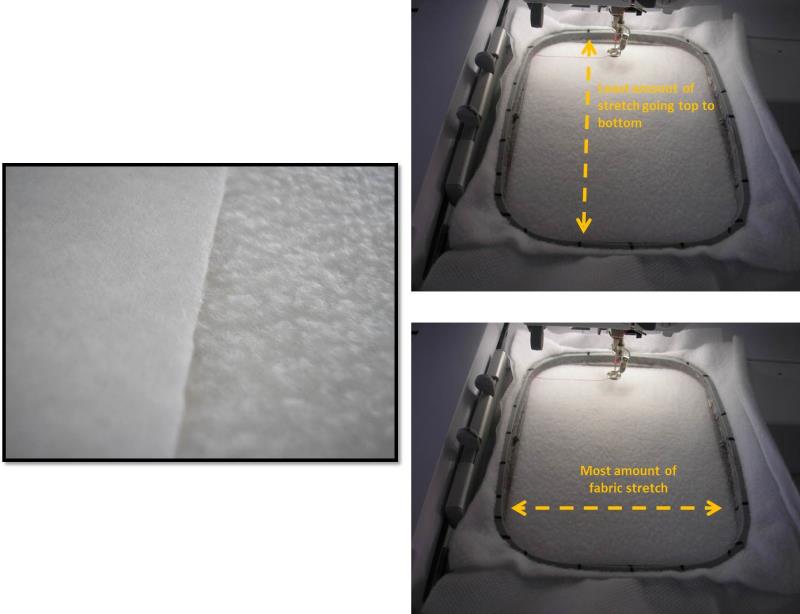
Fleece is used to make the baseballs. You will find the fleece has a smooth side and a very fluffy side; be consistent in which side you use as the right side. For the project, the fluffy side was used as the right side. Also, the fleece will have little stretch running the length of the fabric and quite a bit of stretch from side to side. Hoop the fabric so the most stability of the fabric is running from top to bottom in the hoop.
(Click Image to Enlarge)
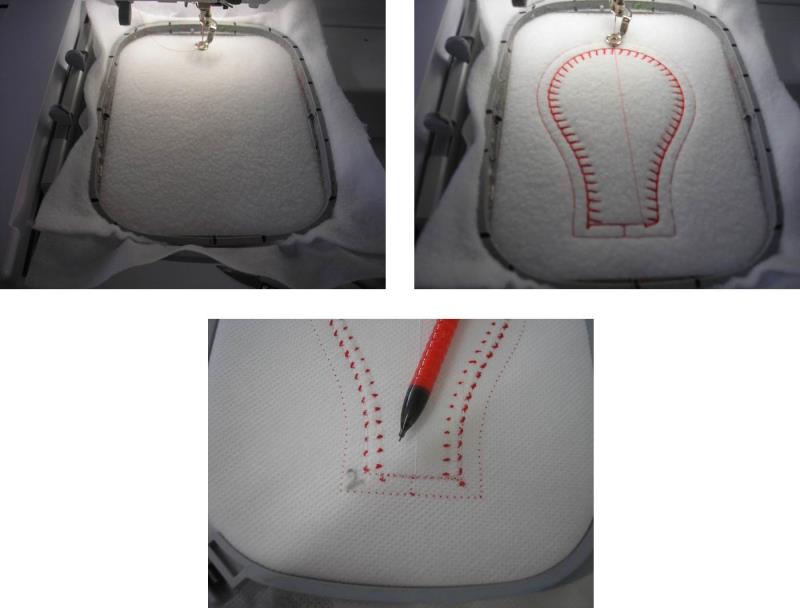
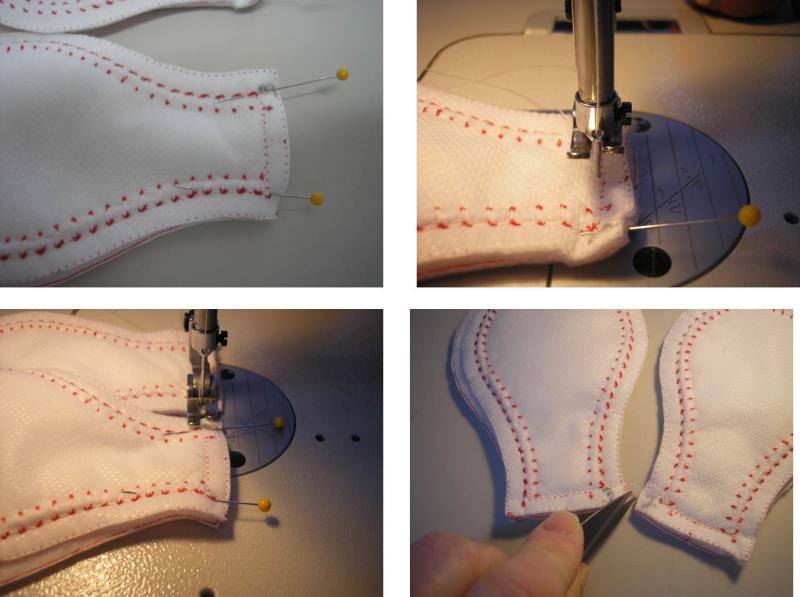
Step 3:
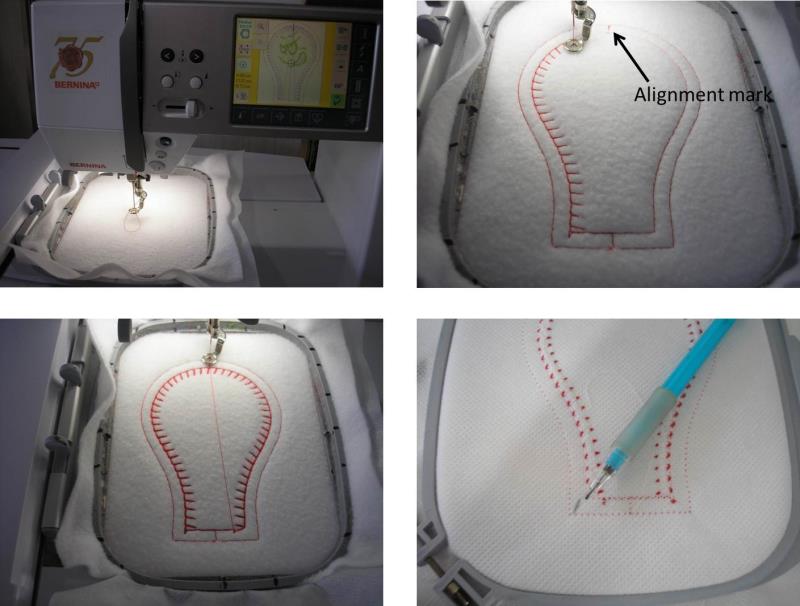
Color 1: hoop one piece of fleece with one piece of poly mesh stabilizer. Stitch the first color which will do the cutting line with an alignment mark at the top and then it will stitch the seam/lacing lines. After color one has stitched, turn the hoop over and label this section 1 within the seam allowance.
Note: For all pieces, it is important to label them with the numbers as stated in the instructions; two pieces have the lacing going in one direction and the other two are mirrored. Labeling the pieces and sewing them together as instructed will allow the “lacing” to go around the ball sections as it should.
(Click Image to Enlarge)
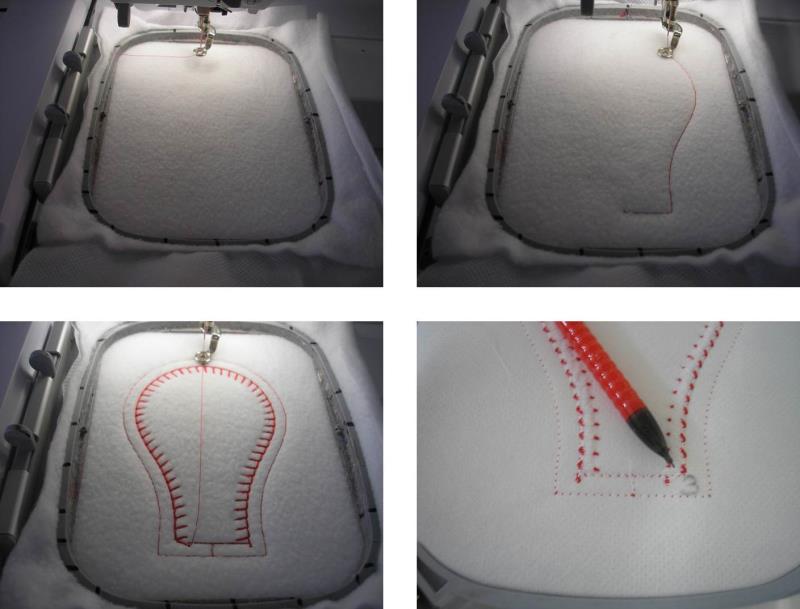
Step 4:
Color 2: hoop one piece of fleece with one piece of poly mesh stabilizer. Stitch the second color which will do the cutting line and stitching/lacing lines. After color two has stitched, turn the hoop over and label this section 2 within the seam allowance.
(Click Image to Enlarge)
Step 5:
Color 3: hoop one piece of fleece with one piece of poly mesh stabilizer. Stitch the third color which will do the cutting line and stitching/lacing lines. After color three has stitched, turn the hoop over and label this section 3 within the seam allowance.
(Click Image to Enlarge)
Step 6:
Colors 4 and on: hoop one piece of fleece with one piece of poly mesh stabilizer. Stitch the fourth color which will do the cutting line and stitching/lacing lines. After color four has stitched, follow the remaining color sequence to complete the face of the ball. Label this section 4.
(Click Image to Enlarge)
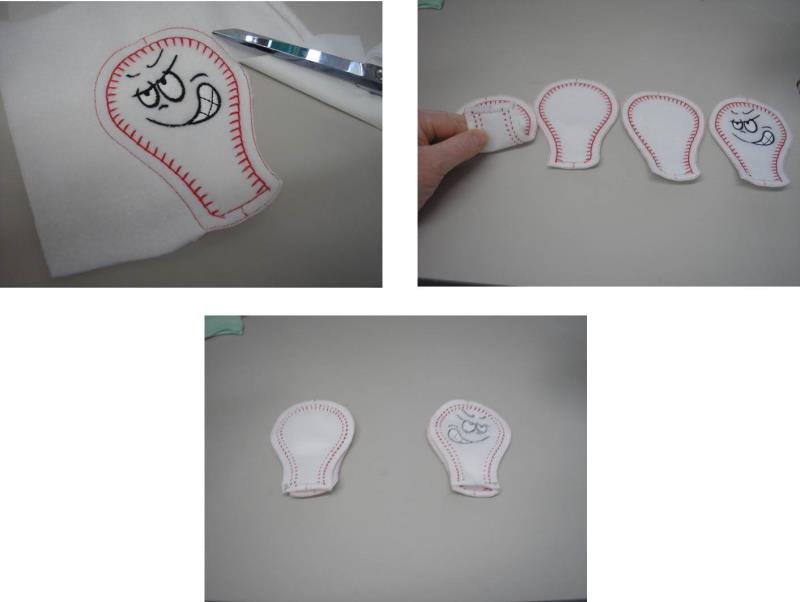
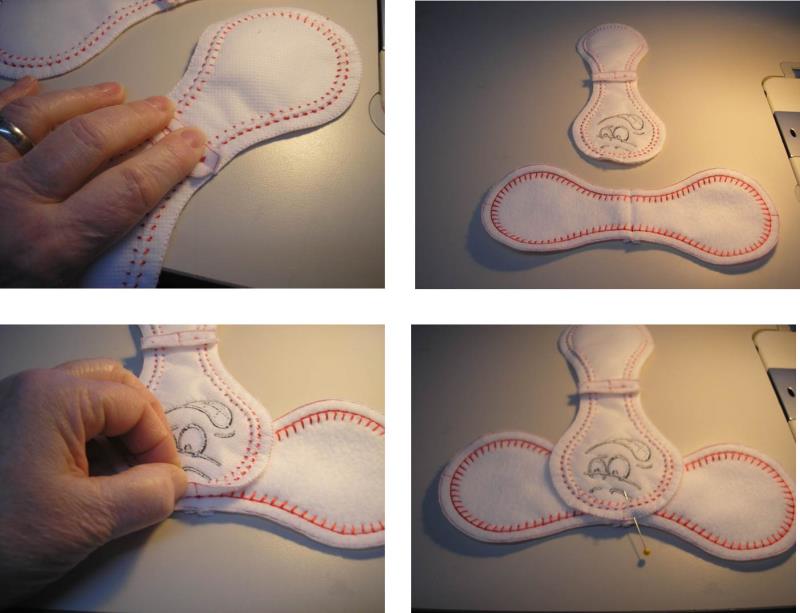
Step 7:
Cut out each section along the outer cutting line. Line up the sections in order: 1, 2, 3, and 4. Place section 2 over one, right sides together. Place section 4 over 3, right sides together.
(Click Image to Enlarge)
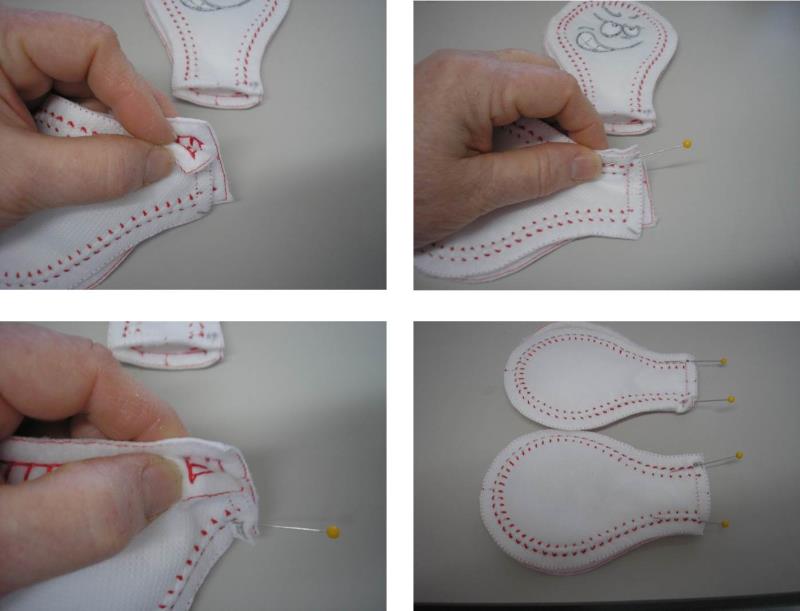
Step 8:
Pick up sections 1 and 2. At the short end, align the first lacing stitch, pin together at this point. On the opposite side, align the lacing stitches and pin them together. Repeat for sections 3 and 4.
(Click Image to Enlarge)
Step 9:
Using the sewing machine, stitch the sections together as pinned. Sew just to the left of the stitching line as shown. Butt the second sections next to the previously sewn sections, and continue sewing. Clip the sections apart.
(Click Image to Enlarge)
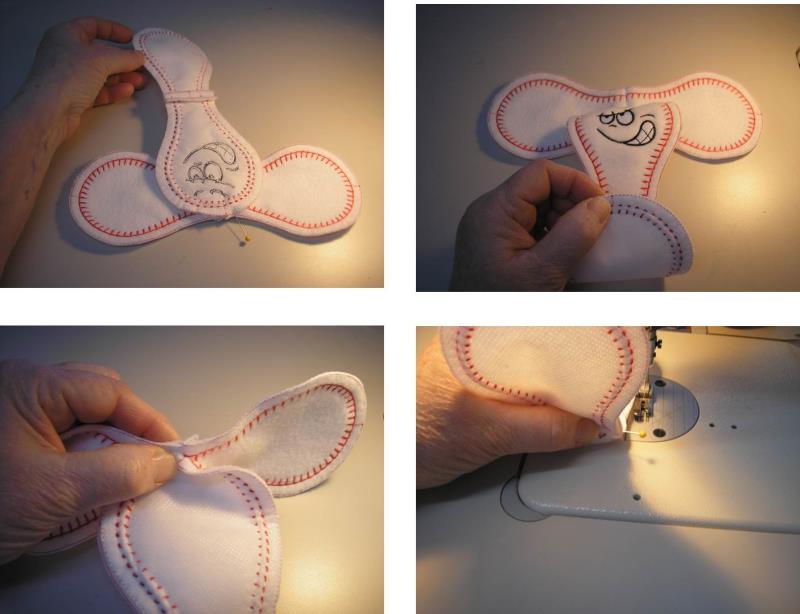
Step 10:
Finger press open the two seams. Lay the two sections as shown. Align the mark at the top of section four to the seam of the other section and pin them together.
(Click Image to Enlarge)
Step 11:
Now take section 3 and align the top alignment mark to the remaining part of the seam at the opposite side and pin them together. At the machine run just a few stitches within the seam allowance to tack the pieces together (be sure the seam allowance remains pressed open).
(Click Image to Enlarge)
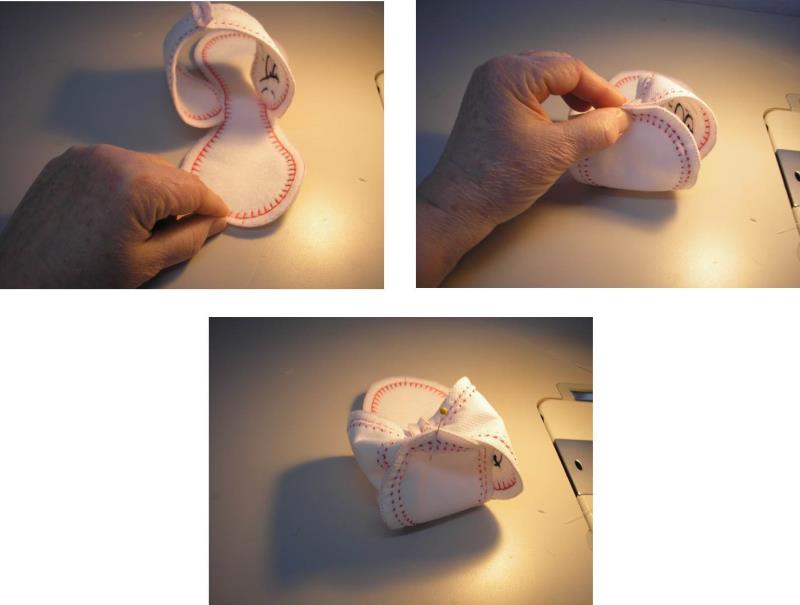
Step 12:
Repeat for the other side. The ball now looks like this.
(Click Image to Enlarge)
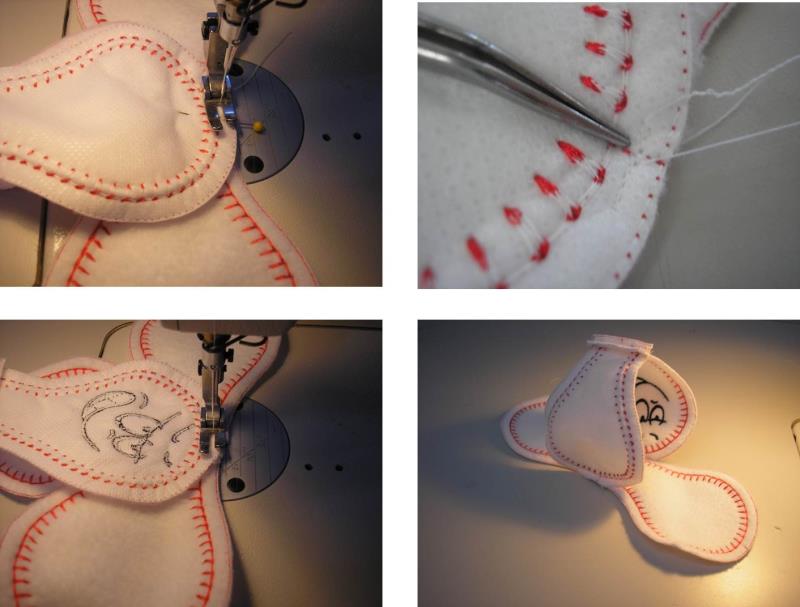
Step 13:
Align the marks of the remaining sections to the second seam and pin in place.
(Click Image to Enlarge)
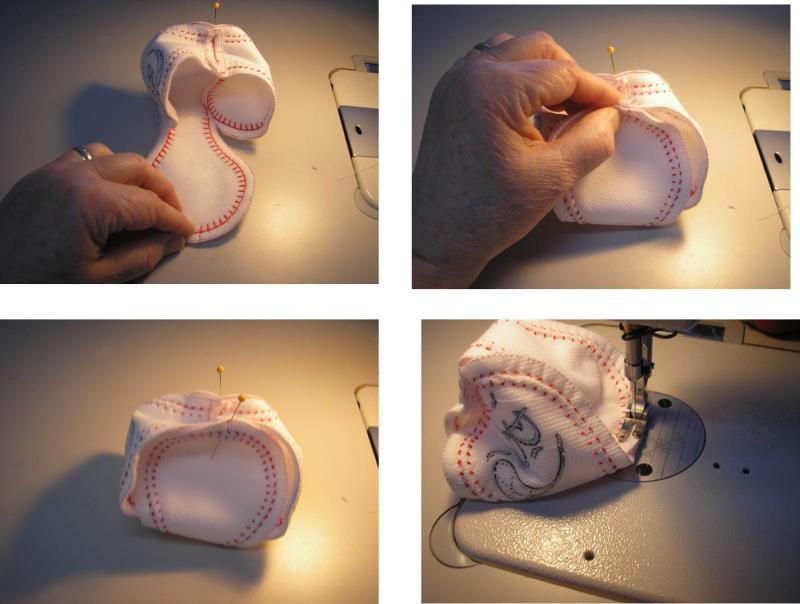
Step 14:
Tack the sections together within the seam allowances.
(Click Image to Enlarge)
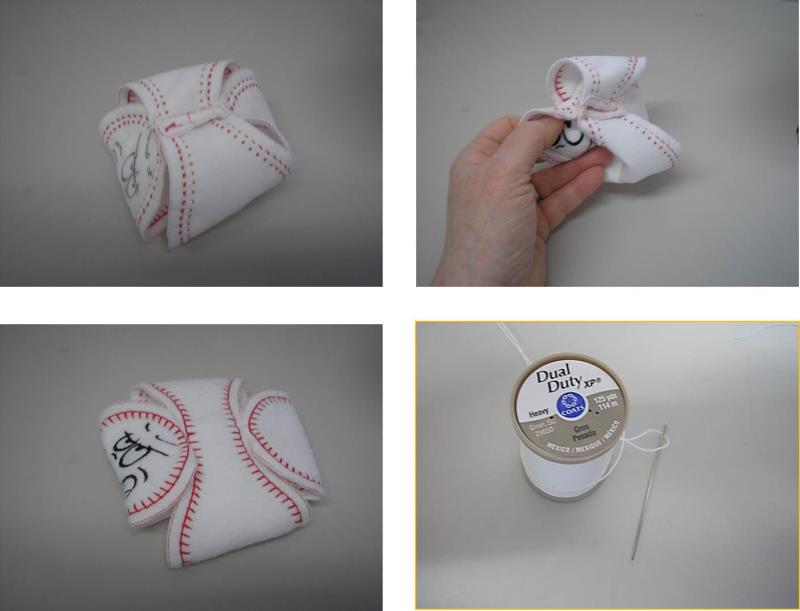
Step 15:
After all the sections are tacked together, turn the ball right side out. The ball can be flattened out at this point and more balls stitched and stacked and then a group finished up while watching a movie. To finish the ball, thread the tapestry needle with heavy duty thread and knot the end.
(Click Image to Enlarge)
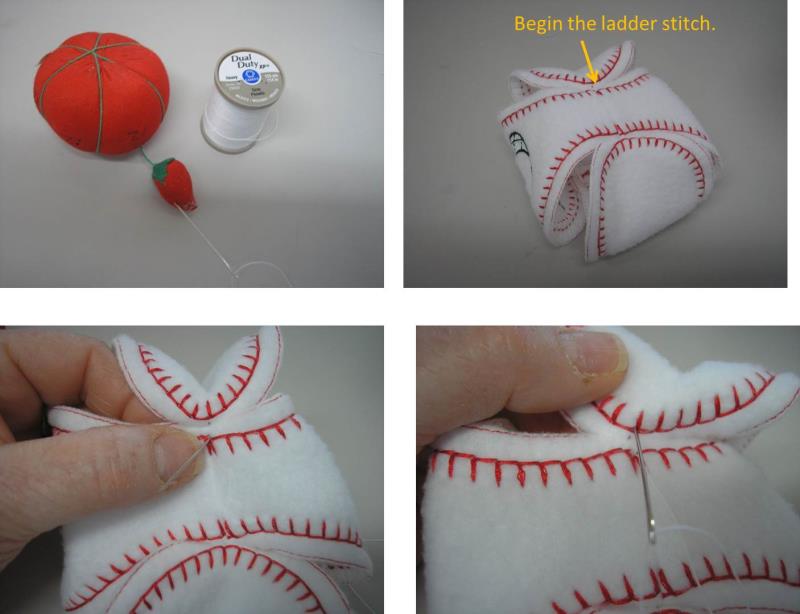
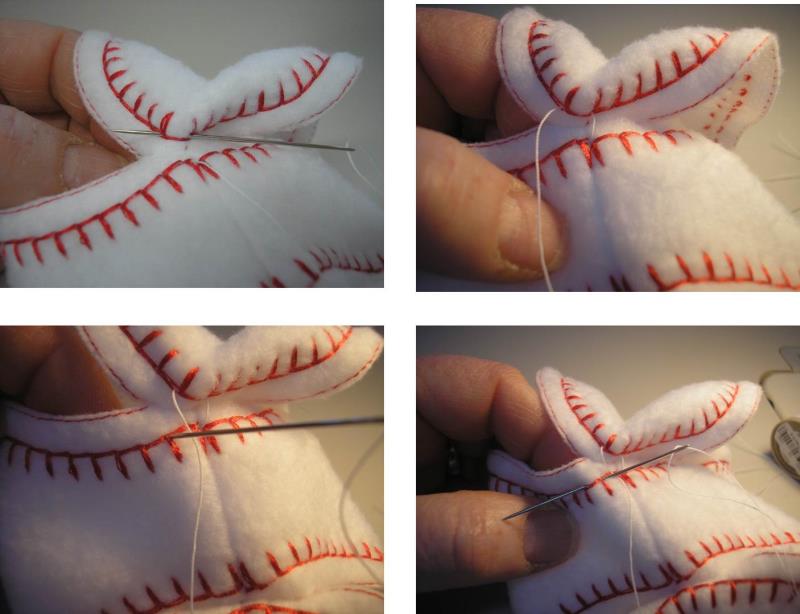
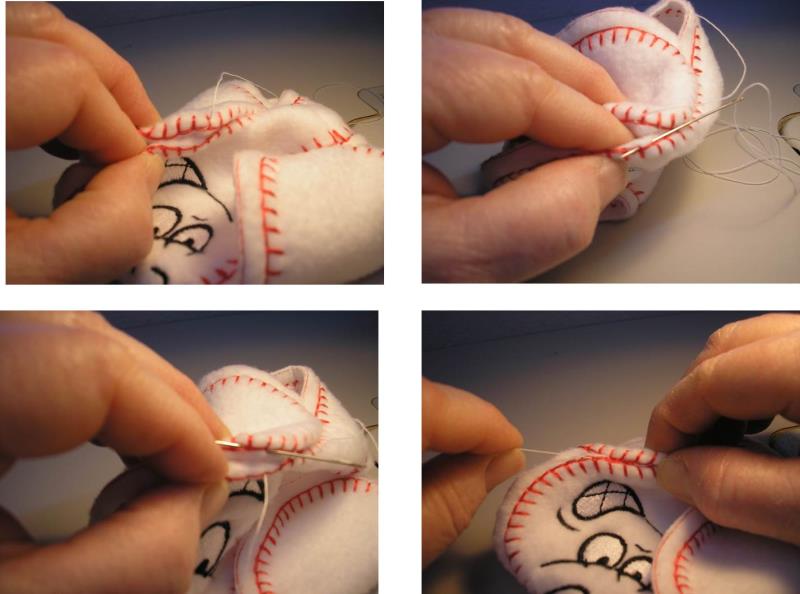
Step 16:
If the needle needs sharpening, put it through the strawberry of a pin cushion. Begin the sewing at the face section (4), lower right. Bring the needle up through the seam allowance at the lacing stitch hole and pull to make sure the knot is secure. To begin the ladder stitch, push the tip of the needle down through the lacing hole straight across from where the needle was brought up and above the matching mark.
(Click Image to Enlarge)
Step 17:
Bring the tip of the needle up through the lacing hole to the left on the same side and pull the thread through. Next, bring the tip of the needle down through the lacing hole straight across from the previous lacing hole and back up in the lacing hole to the left.
(Click Image to Enlarge)
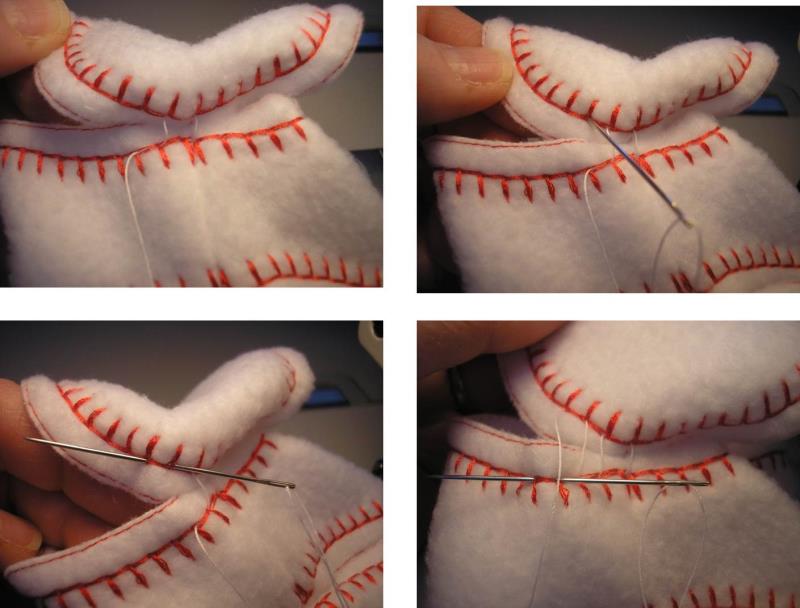
Step 18:
Continue working the ladder stitch by pushing the needle down and up on one side, and down and up in the holes directly across on the other side.
(Click Image to Enlarge)
Step 19:
After a few stitches are done, hold the thumb and forefinger firmly just outside the right most stitch and pull on the needle thread to close the stitching and cinch the seam. Continue stitching.
(Click Image to Enlarge)
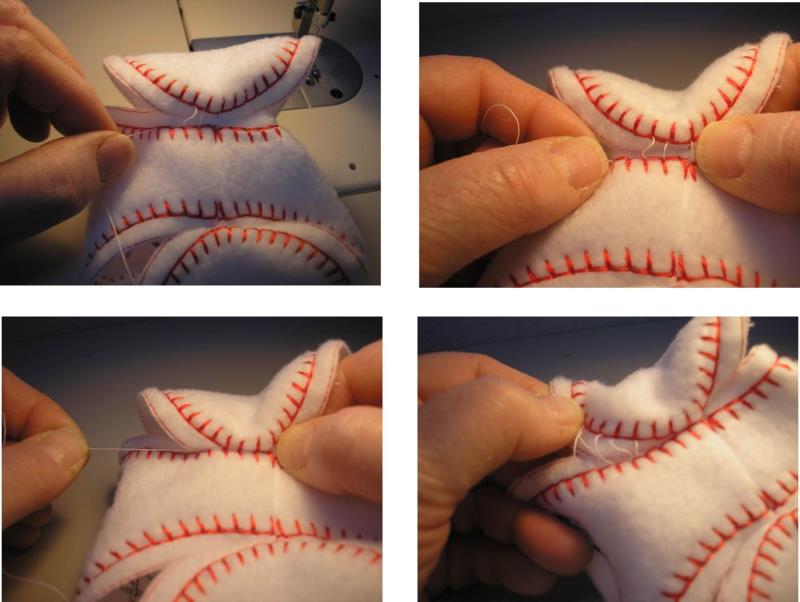
Step 20:
At the curves it may be easier to turn in the seam allowances and perform the ladder stitching through the folds, still going through the lacing holes.
(Click Image to Enlarge)
Step 21:
Just continue stitching the sections together around the face from one side to the other.
(Click Image to Enlarge)
Step 22:
Pull the stitching as you go. Do not pull the stitching too tight or the fabric will gather up. If that happens, just work the thread and fabric so the seam is smooth once again.
(Click Image to Enlarge)
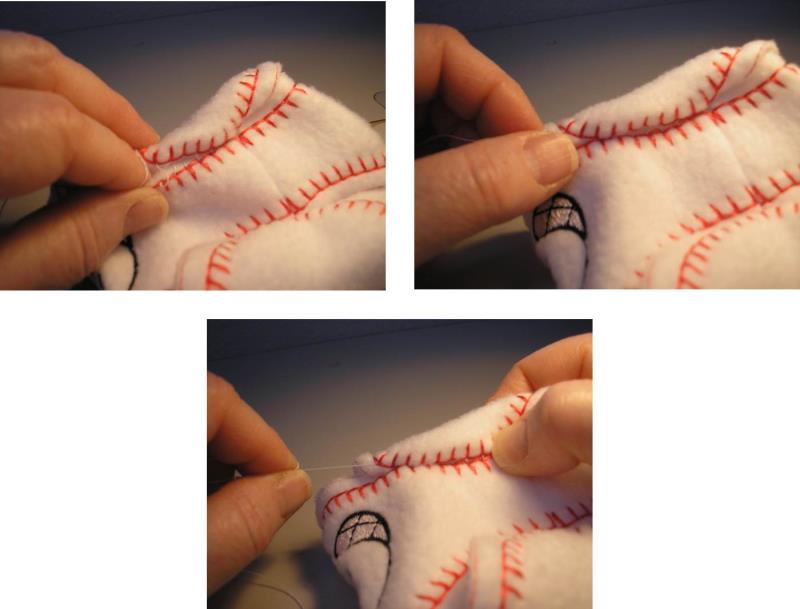
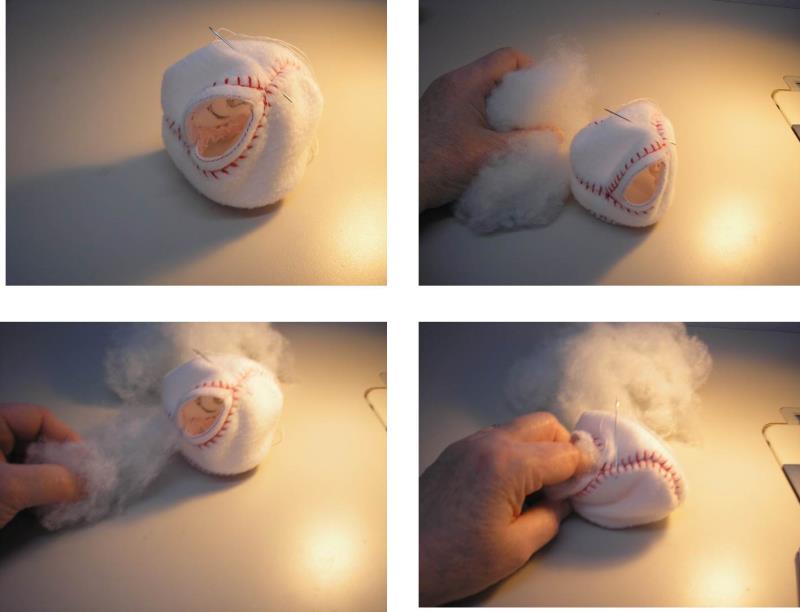
Step 23:
Stitch all around until you are almost back to the start point, leaving an opening for stuffing. Take a hand full of fiber fil and pull it apart in small section and work it into the ball.
(Click Image to Enlarge)
Step 24:
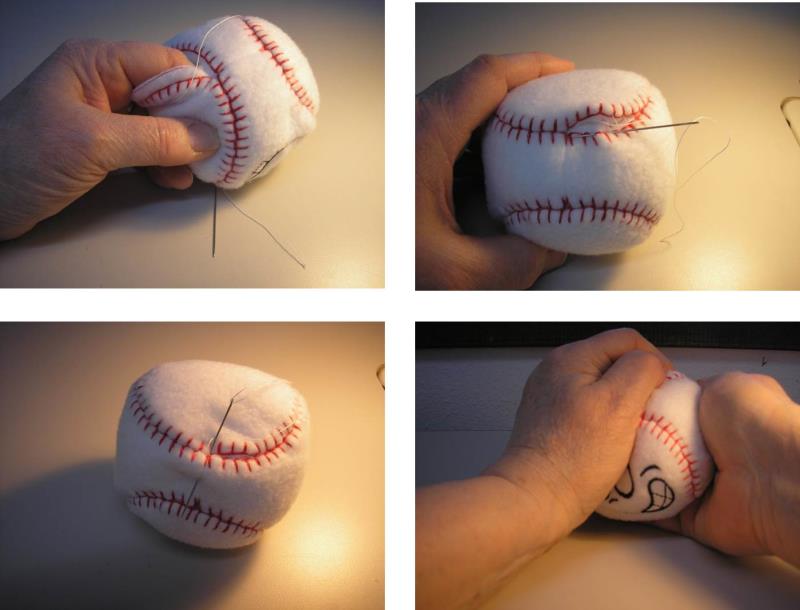
Work the fiberfil around the seams to smooth them out. Fill the ball, but do not over-stuff or the ball will become misshapen. Finish up the ladder stitching to close the opening and secure the thread within the seam allowance. Take and roll the ball on a surface and in your hands to round it out.
(Click Image to Enlarge)
Step 25:
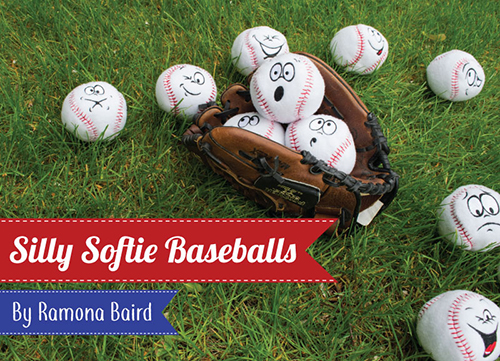
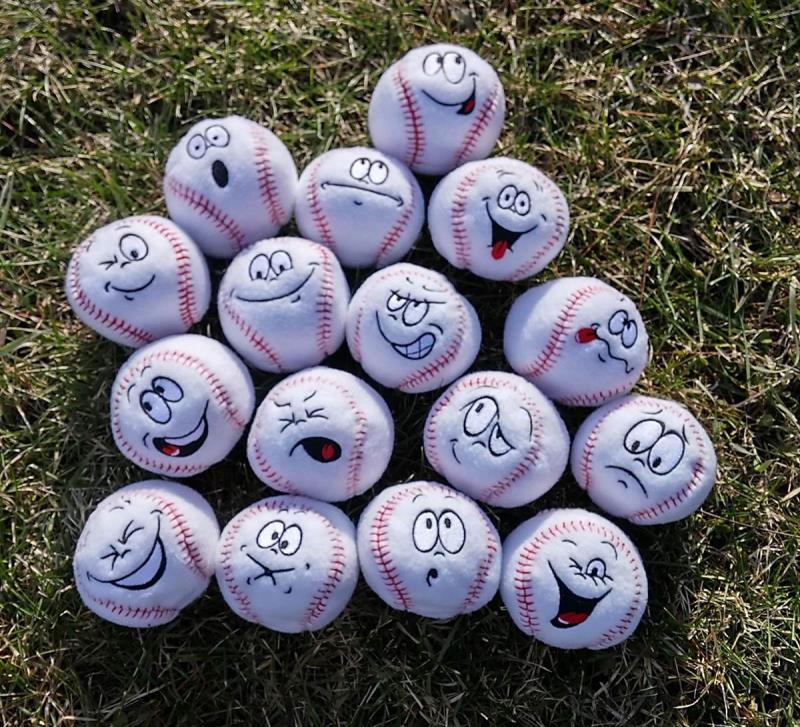
Congratulations on sewing your first “Silly Softie Baseball”. There are 16 baseballs, each with a different face. Who can you think of that would love getting these to toss around while watching their favorite team? Happy or sad, frustrated or celebrating, there is a face to fit any mood.
Ramona Baird has been in the embroidery industry for over 23 years. She and her husband owned a commercial and retail embroidery store in Arizona for many years. She is an experienced digitizer having been mentored by award-winners Pat Williams and Lindee Goodall. Ramona is a contributor to “Creative Machine Embroidery” magazine having 5 covers to her credit. Ramona has worked for Wilcom America and served many years as Education Director for the American Sewing Guild. With a degree in fashion design, she is able to design and execute patterns which Pat Williams says are “out of the box” in creativity and application. Ramona likes to challenge the boundaries of embroidery and bring new and exciting designs, ideas, and projects to EmbroideryDesigns.com. She wants embroiderers of all levels to increase their skills and enjoyment in using their embroidery machine for gift-making and personal pleasure.