Due to the E-stitch borders on the eggs no tack down lines are in this design, therefore you will want to create pre-cut fusible eggs. PDF, FCM and SVG files are available for download to cut these eggs by hand or by an electronic cutter such as the Scan N Cut. The first 20 color stops are simply an alternating placement line and tack down stitching for each egg. Use the same color thread for each outline and tack down in a color thread to compliment your fabric. Due to the size of this project the quilting is as desired by hand or machine after the embroidery is completed.
Step 1:
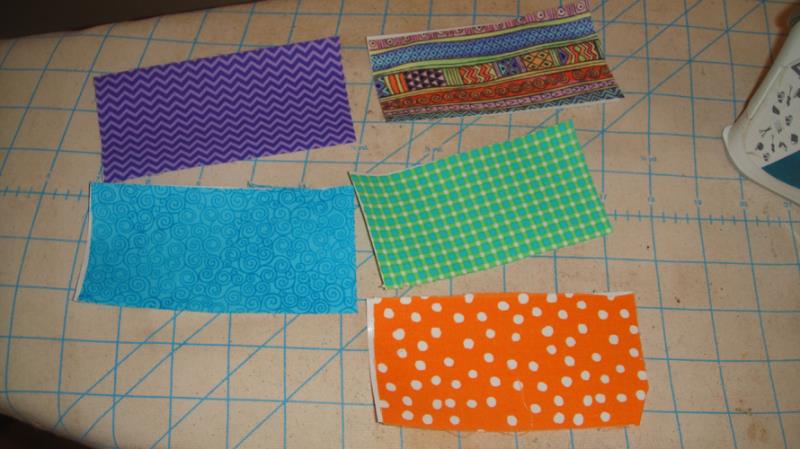
Iron each 2 ½” x 5” fabric 4 times with Magic Sizing® or spray starch to make the fabric very crisp; then apply the Heat N Bond to the back side following the manufacturer’s instructions.
(Click Image to Enlarge)
Step 2:
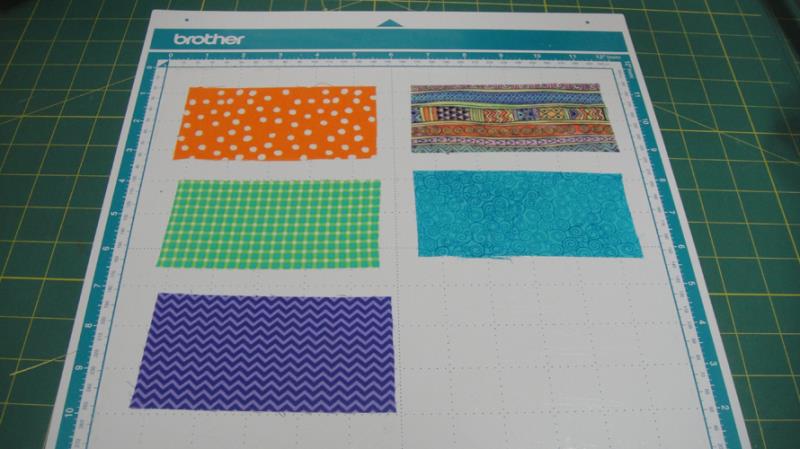
There are many ways to cut fabric on the Scan N Cut and settings can differ based upon the machine and the age of your blade. However this is how I do it. My mat has been cleaned and Zig 2 Way glue applied, which provides a nice sticky surface. I remove the paper from the Heat N Bond Lite® and place fabric side up on the cutting mat.
(Click Image to Enlarge)
Step 3:
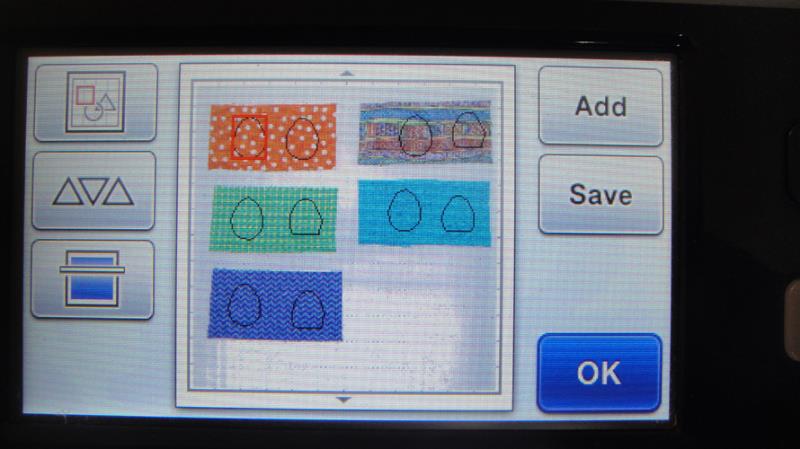
Read the FCM file into your Scan N Cut; scan the mat so you can see the fabrics; rearrange the eggs so that one flat bottomed egg goes on each of four fabrics; arrange the full eggs on the remaining fabrics; cut with a speed, pressure and blade depth of 4. If cutting by hand print out the PDF file, place the egg patterns on the fabrics and use the pattern to cut out the eggs; cut a flat bottomed egg from each of 4 fabrics and then cut the remaining eggs from the remaining fabric. Leave the paper on the back of the eggs until you are ready to place them in the embroidery.
(Click Image to Enlarge)
Step 4:
Have all of your eggs cut before you begin the design.
(Click Image to Enlarge)
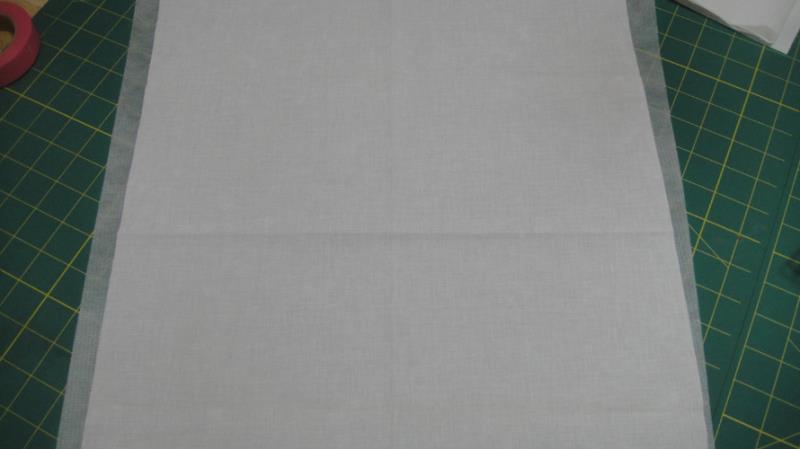
Step 5:
Fold your fabric in half lengthwise and press a crease for a vertical reference line; fold in half crosswise and press for a horizontal reference line. Align the creases in your fabric with the reference marks on your hoop while hooping the stabilizer and top fabric.
(Click Image to Enlarge)
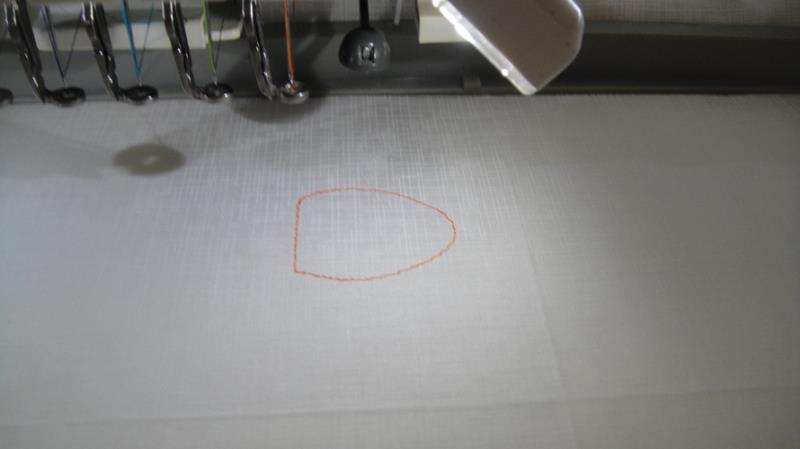
Step 6:
Color Stop (CS) 1 is a placement line for the first egg. Use an embroidery thread to match the fabric you want for that egg.
(Click Image to Enlarge)
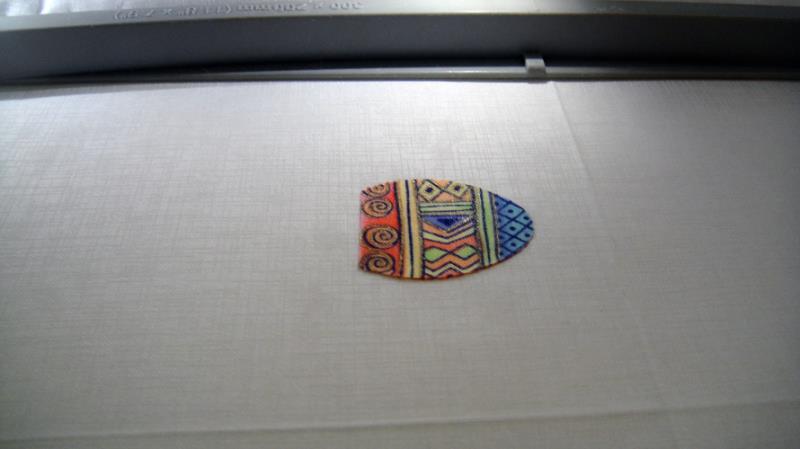
Step 7:
Position the egg (remove the paper from the Heat N Bond Lite® if you hand cut your eggs) and iron the fabric into place.
(Click Image to Enlarge)
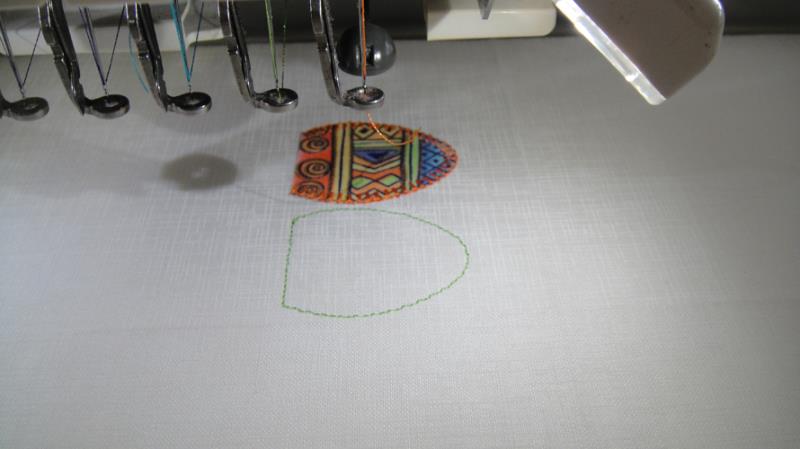
Step 8:
Run CS 2 in the same color to stitch the E-stitch border; change your thread for CS 3 to stitch the placement line for the next egg.
(Click Image to Enlarge)
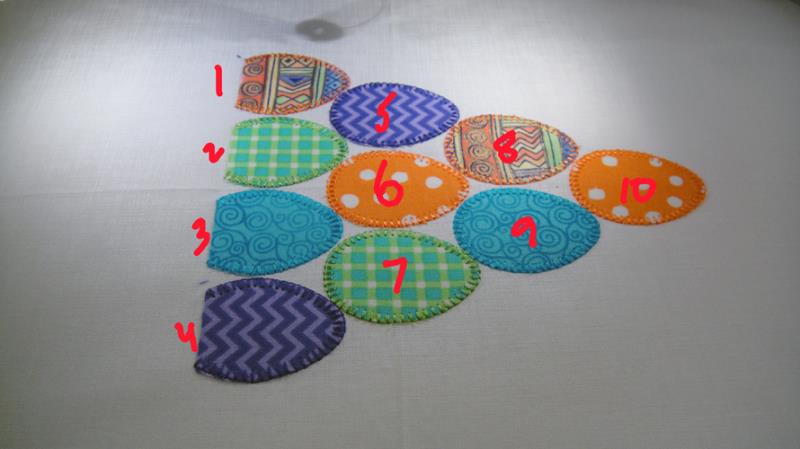
Step 9:
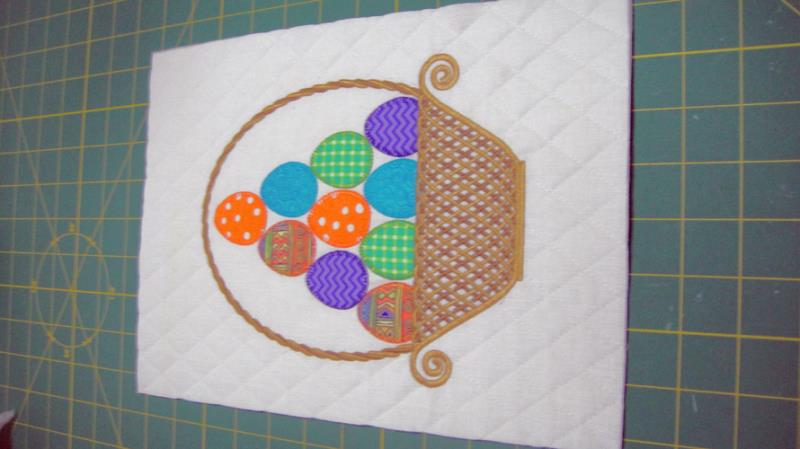
Run CS 4 to border the second egg. Continue changing the thread color to coordinate with each egg. The eggs will stitch out in the sequence shown in this picture.
(Click Image to Enlarge)
Step 10:
(Click Image to Enlarge)
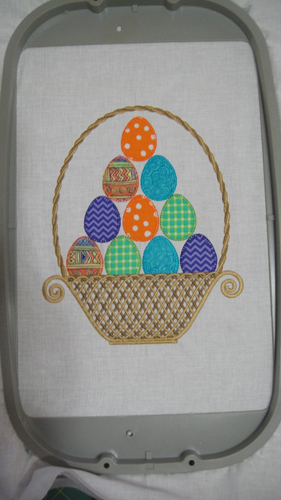
CS 21 in Camel (1344) and CS 22 in Khaki (1255) will complete the embroidery.
Step 11:
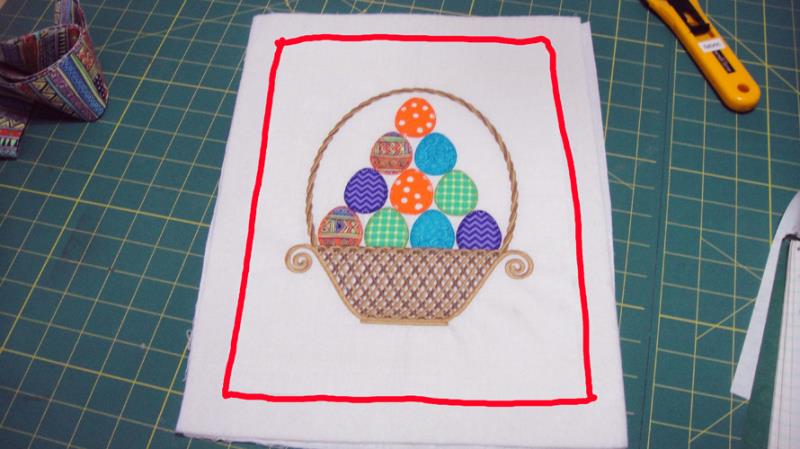
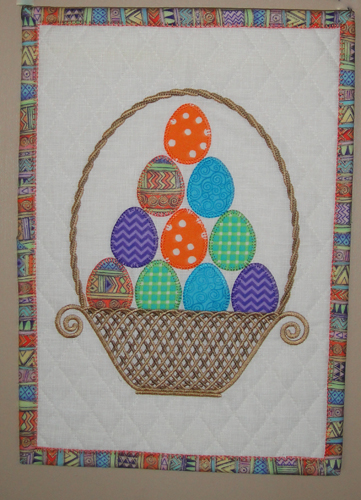
Cut the fabric down to the wall hanging size by measuring 4 ½” out from the center crease on each side of the basket and trimming off the excess fabric. Measure down 2” from the bottom of the basket and 2” above the handle to trim off the excess fabric. The final measurements will be 9” wide and 12 ¼” tall.
(Click Image to Enlarge)
Step 12:
Lay the back fabric face down on a mat; spray with adhesive and align the batting on top; spray the top block with adhesive and center over the batting and back fabric.
(Click Image to Enlarge)
Step 13:
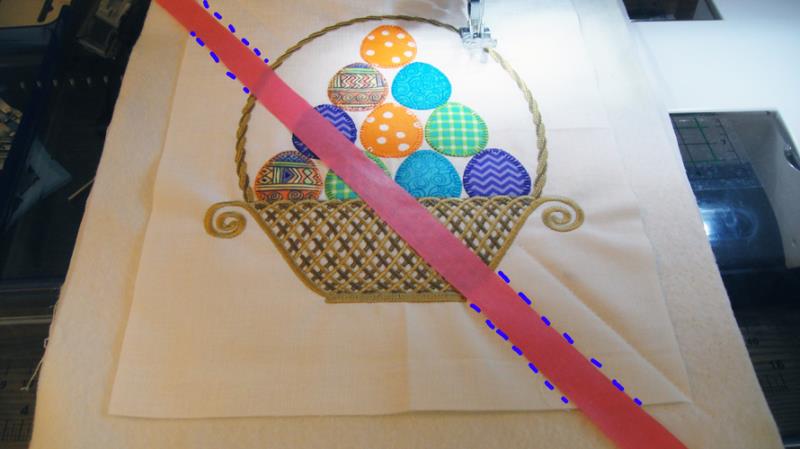
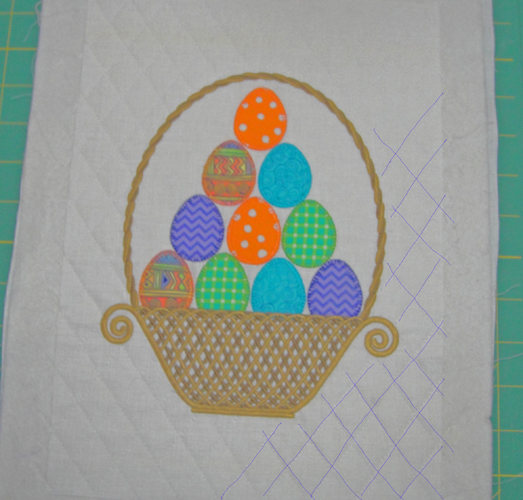
As this block is too large to quilt in the hoop you can quilt as desired at the sewing machine or by hand. I used embroidery tape placed diagonally over the block and stitched from the basket to just over the edge of the block with a 2.5mm stitch. Then continued to move the embroidery tape and align it with the last row of stitching to cover the background fabric with diagonal rows of quilting.
(Click Image to Enlarge)
Step 14:
Then reverse the angle of the embroidery tape to diagonally quilt the block in the opposite direction creating a lattice work of quilting around the basket.
(Click Image to Enlarge)
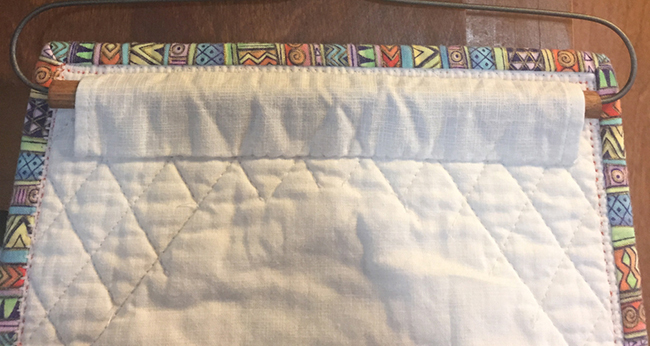
Step 15:
Trim the excess batting and back fabric from the block, squaring up the block as you do so.
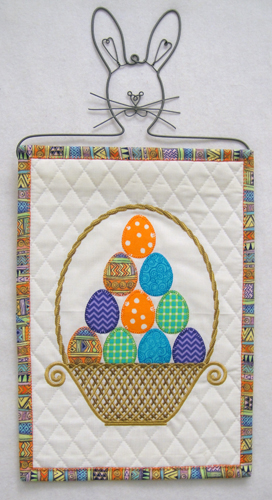
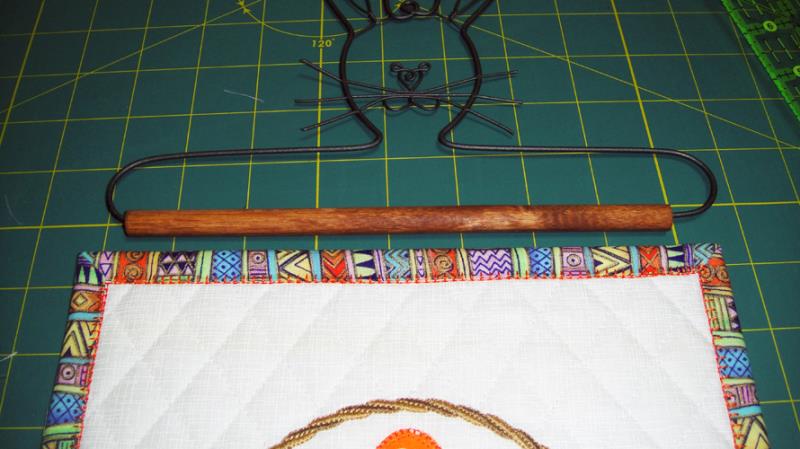
Pull the wire from one end of the Bunny holder and insert the wooden rod through the hanging sleeve. Congratulations your Easter Basket Wall Hanging is complete!
Award winning Digitizer, Embroidery Educator, Author and a Consultant to the Industry, Pat Williams has 30 years of experience in the embroidery industry. Pat has won multiple awards for her digitizing expertise including the 2007 Impressions Awards Grand Championship, Best of Show as well as the 1st and 2nd Place Awards. Pat’s love of digitizing has afforded her the opportunity to write numerous articles for Impressions magazine in the United States and Images Magazine in Europe. In 2001 Pat was named “Embroidery Educator of the Year.” For many years Pat taught digitizing seminars at the ISS Shows in Long Beach, CA and for Compucon software. She now resides in Tucson, AZ.