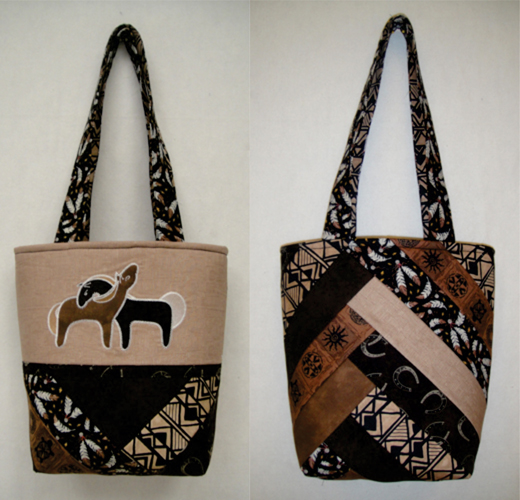
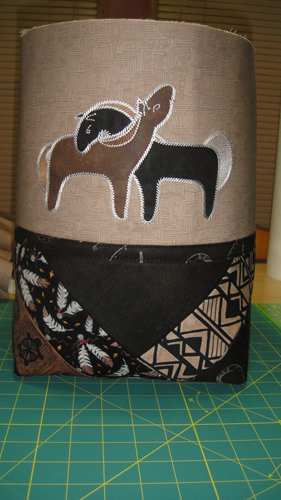
Inspired by Missouri Star Quilt Company’s youtube video on making an Improv Tote I thought this was a great opportunity to kick it up a notch by adding an embroidered panel. It is interesting to work with this great, needle friendly, fusible foam. If your quilt shop doesn’t have it on hand I bought mine on Amazon. The In-R-Form Plus® creates a bag that is soft, lightweight and squeezable, yet stands up on its own. Some of my strips were cut from fat quarters, some from quarter yards of fabric and as you will place your strips in random arrangements it is difficult to calculate exactly how many you will need of each fabric, but it will take approximately 14 strips to make the bag and the handles. You may also cut your strips at 2” instead of 2 ½” the 4 strips used to make the handles do need to be 2 ½” wide. Use a walking foot through all steps on your sewing machine if available.
Step 1:
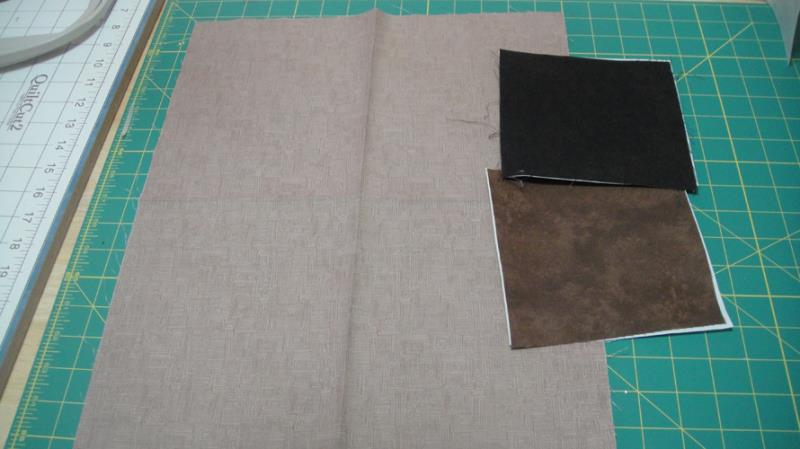
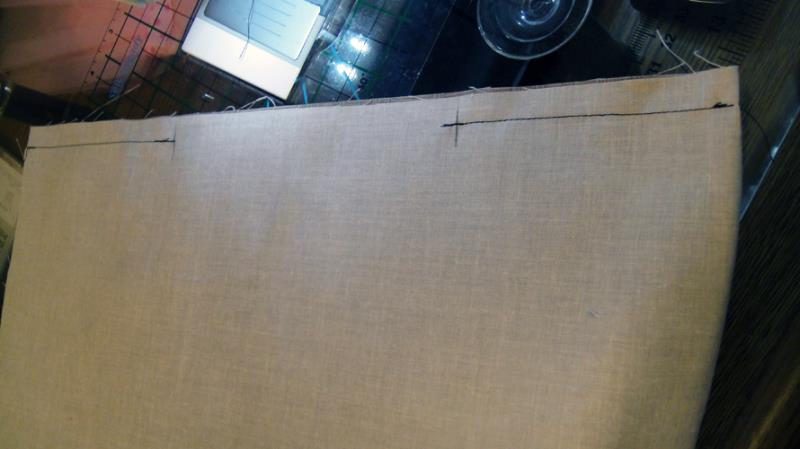
Cut a rectangle of the foam 18” x 31”; cut two 1 ½” strips down the side; cut a 7 ½” panel from top of the bag panel.
(Click Image to Enlarge)
Step 2:
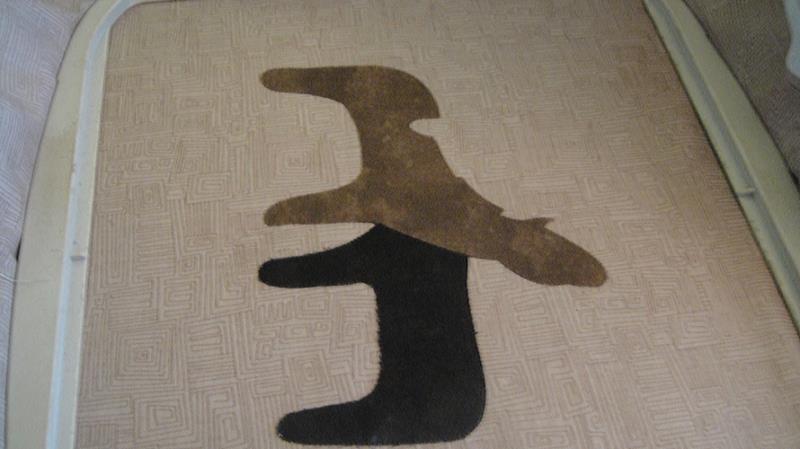
Cut a rectangle 14” x 18” of the lining fabric to use as the background for the ponies; cut 2 6” squares of the dark brown shadow play fabric and 1 6” square from the milk chocolate. Spray Magic Sizing on one dark brown square and the milk chocolate square and iron 4 times. Fuse the Heat N Bond Lite® on the wrong side of these two squares. Fold and lightly iron a crease lengthwise down the background fabric to mark the center of the panel.
(Click Image to Enlarge)
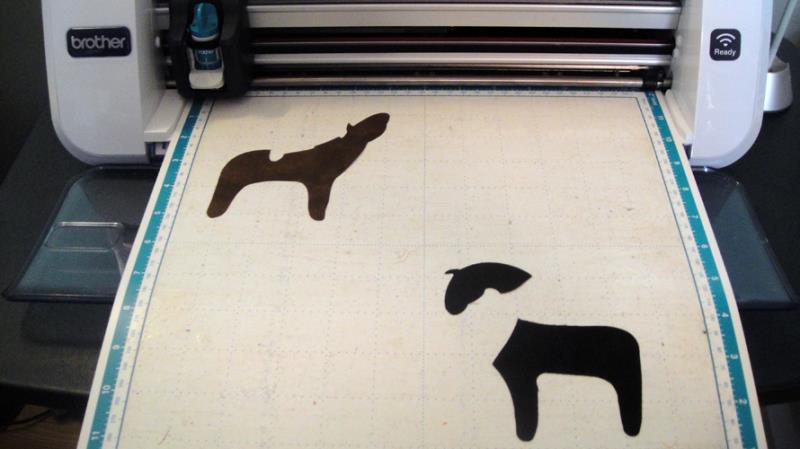
Step 3:
These applique pieces were cut with a Scan N Cut® but you may also use the stitch and trim method for applying the appliques. When using the Scan N Cut® be sure to download the FCM files as they are needed so that you can move the various cut pieces over where you placed the fabrics on the cutting mat. SVG files are also available if needed for other electronic cutters.
(Click Image to Enlarge)
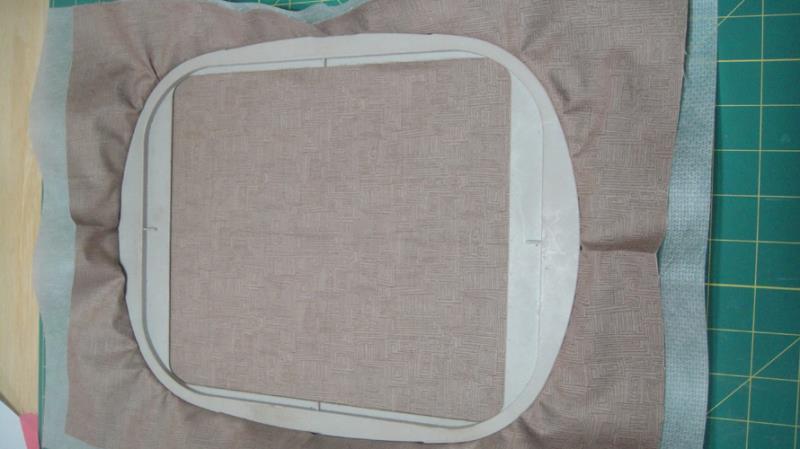
Step 4:
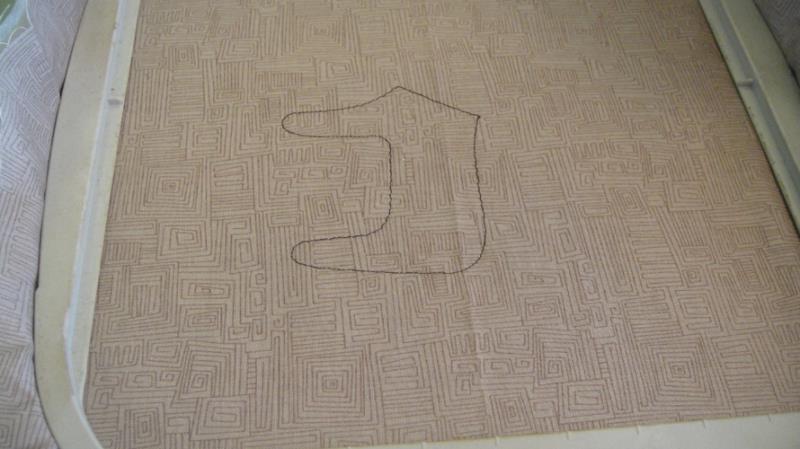
Hoop the background panel with poly mesh stabilizer in your embroidery hoop. The design will fit into a 6” x 10” hoop, since I don’t have one of those the pictures are shown using an 8” x 8” embroidery hoop.
(Click Image to Enlarge)
Step 5:
(Click Image to Enlarge)
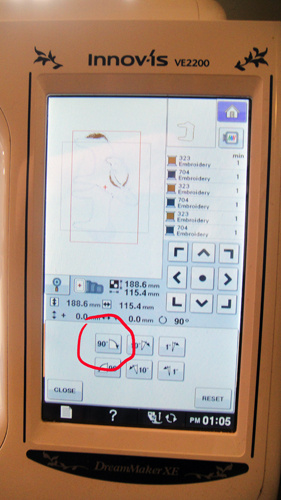
Load the design into your machine. Depending upon the embroidery format you are using you may have to rotate the design to fit into the embroidery hoop. If so rotate it 90 degrees to the right.
Step 6:
Center the needle over the crease in the fabric; run color stop (CS) 1 in a dark brown thread for the placement line for the dark brown horse.
(Click Image to Enlarge)
Step 7:
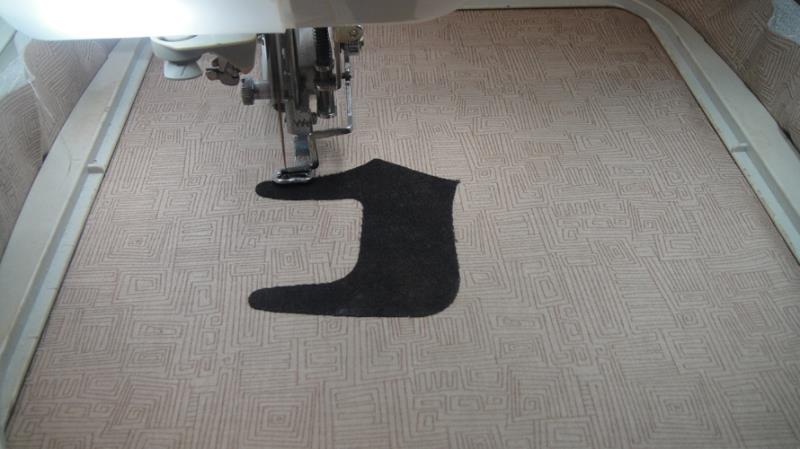
If using pre-cut appliques position the applique and press in place with an applique iron. Run CS 2 in dark brown thread which will just outline the applique. If using the stitch and trim method spray a little adhesive on the back on the applique fabric; run CS 2 to tack down the fabric; trim right up next to the tack down stitches and then press the applique for permanent adhesion.
(Click Image to Enlarge)
Step 8:
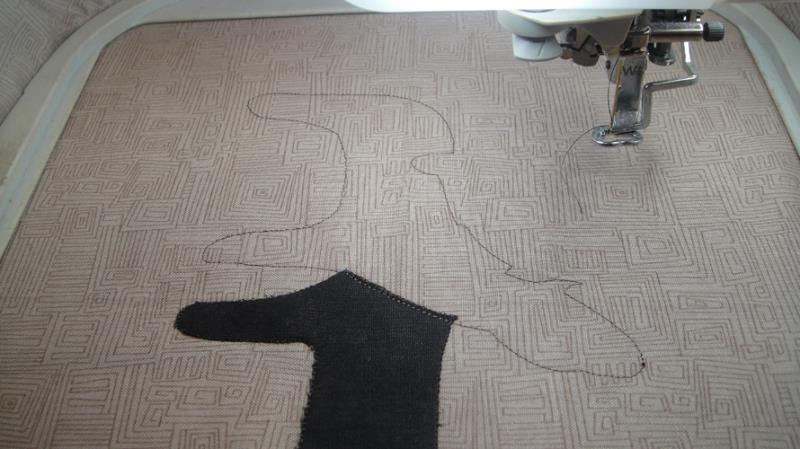
Change to a thread that matches the milk chocolate fabric and run CS 3 as a placement line for the second pony.
(Click Image to Enlarge)
Step 9:
Position and press the second applique into place. Run CS 4 to tack down the applique fabric if using the stitch and trim method. It will just outline the pony if using the pre-cut appliques.
(Click Image to Enlarge)
Step 10:
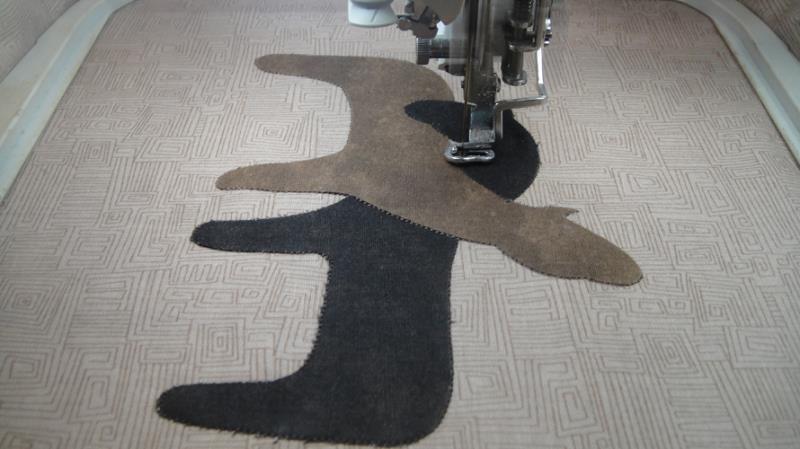
Change back to the dark brown thread and use CS 5 and CS 6 to place head of the dark pony.
(Click Image to Enlarge)
Step 11:
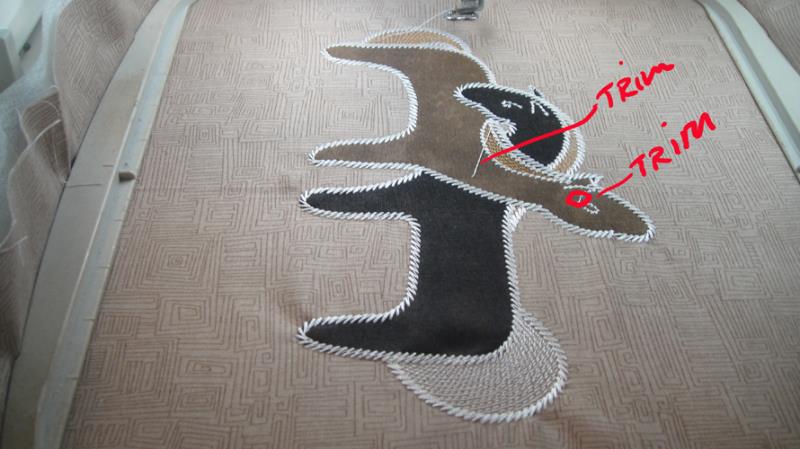
Follow the color chart, CS 7 in Golden Oak and CS 8 in Super White to complete the embroidery. Trim the jump stitch between the ear and eye of the milk chocolate pony and the return to center stitch if your machine makes one.
(Click Image to Enlarge)
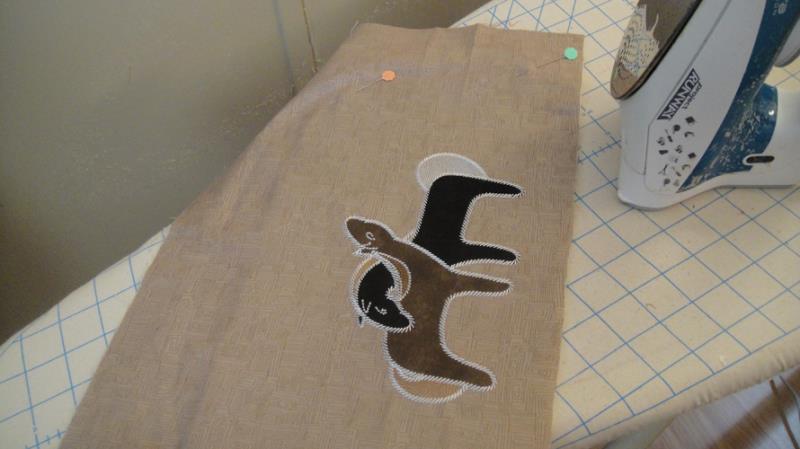
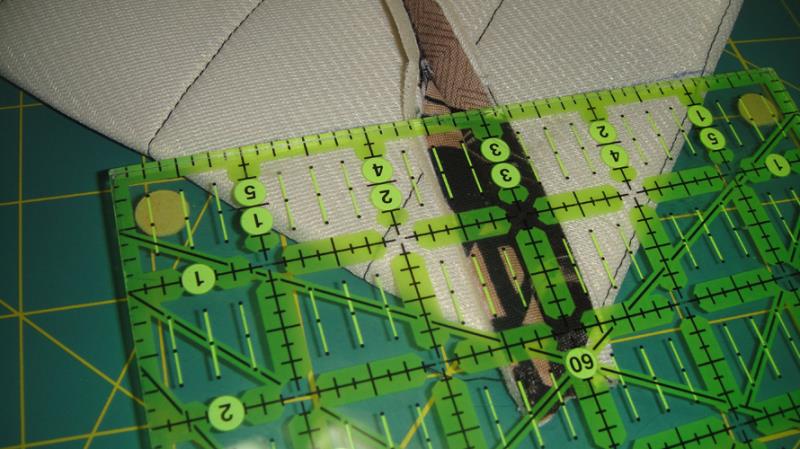
Step 12:
Trim the stabilizer as close as possible around the ponies, then align a ruler 1 ¼” from the bottom of the feet and trim off the excess fabric.
(Click Image to Enlarge)
Step 13:
Pin the pony panel to the foam panel aligning the bottom edge and fuse the fabric to the foam panel; do not iron over the pins, remove them as necessary.
(Click Image to Enlarge)
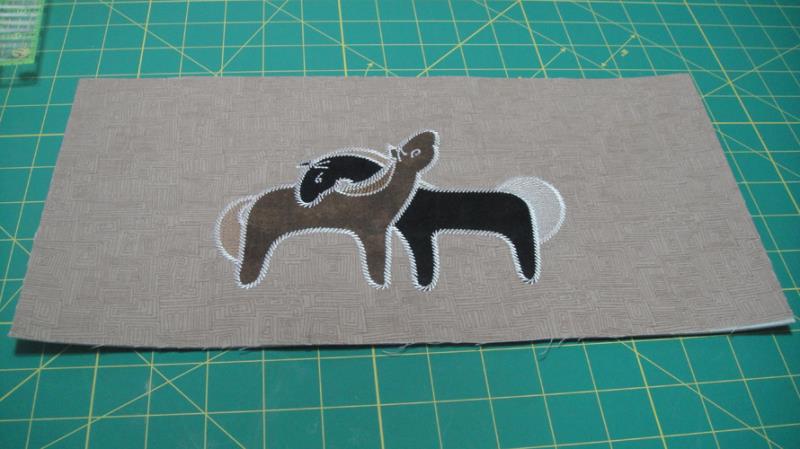
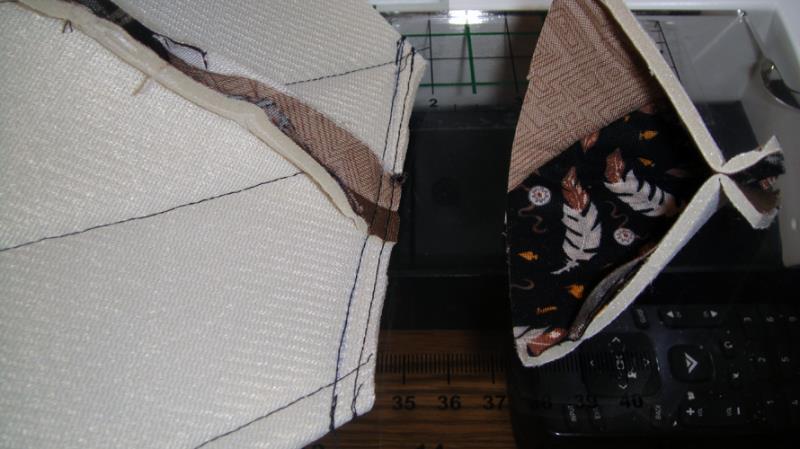
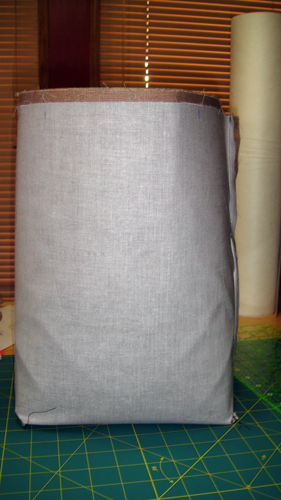
Step 14:
Trim the excess fabric from around the foam. Your top panel should now look like this.
(Click Image to Enlarge)
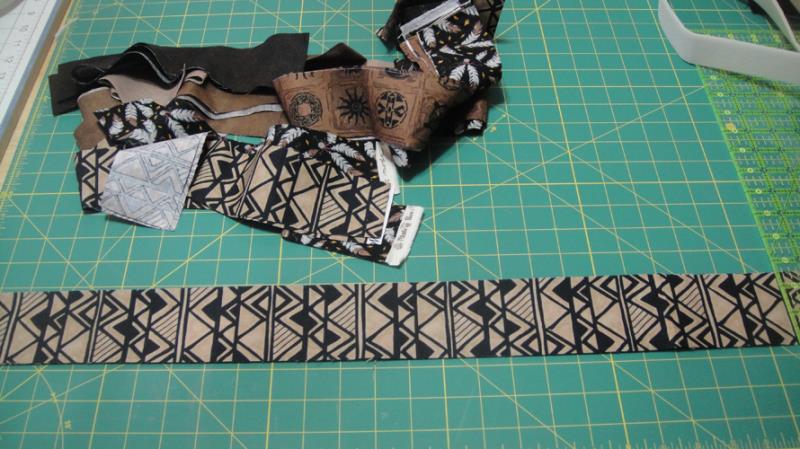
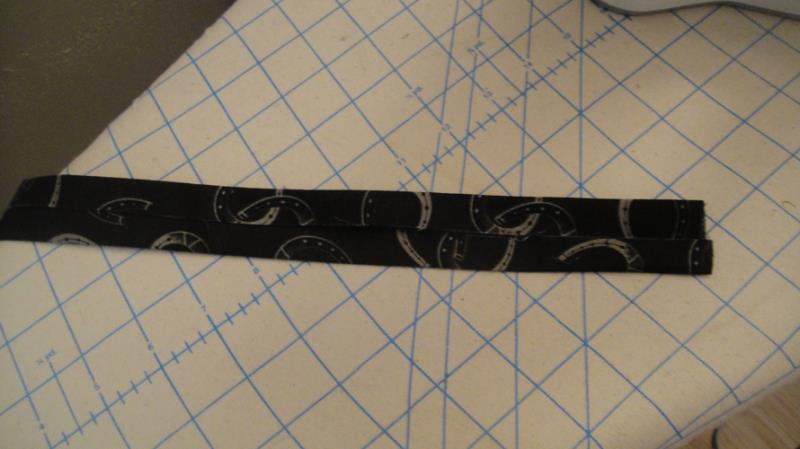
Step 15:
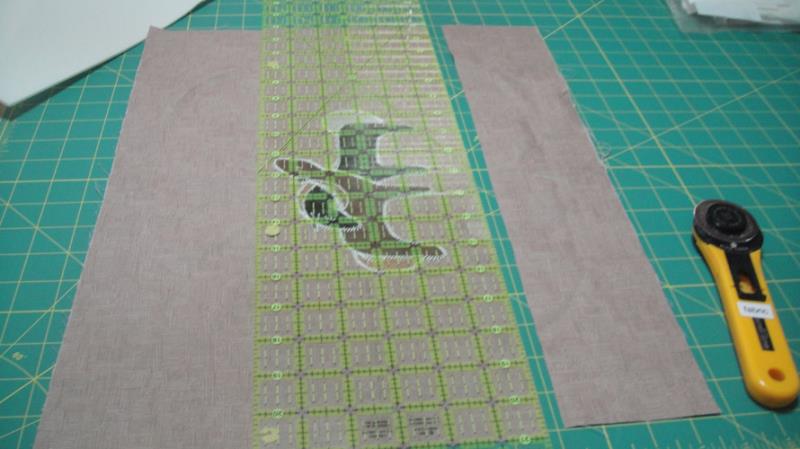
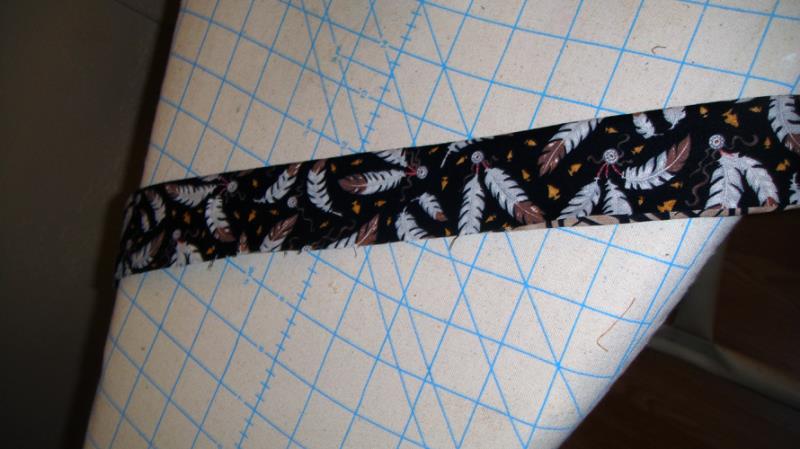
Cut 14 strips 2 ½ wide from the 4 western prints and the left over dark and milk chocolate fabrics. Cut 4 of these strips to 31” long and set aside for the handles.
(Click Image to Enlarge)
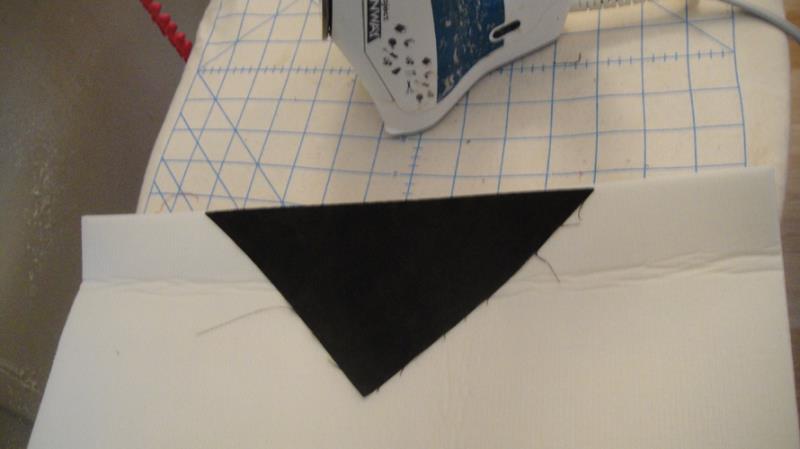
Step 16:
Cut the remaining 6” dark chocolate square in half diagonally to form a triangle. Center the triangle on the top edge of the foam panel and fuse into place. Do not let the iron come in contact with the foam itself.
(Click Image to Enlarge)
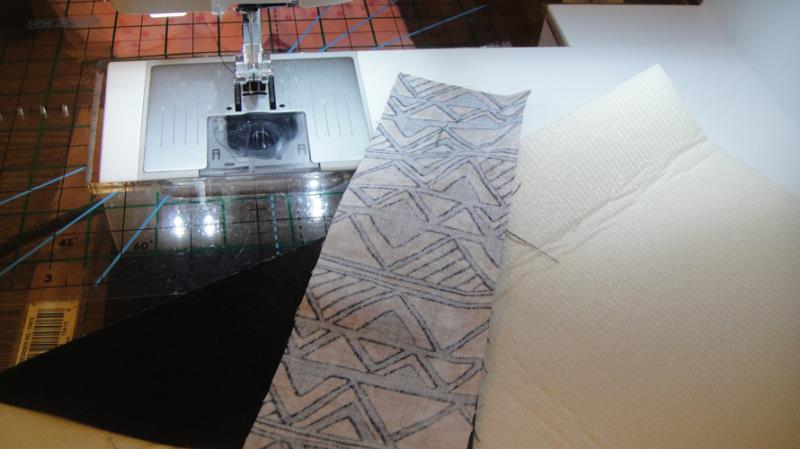
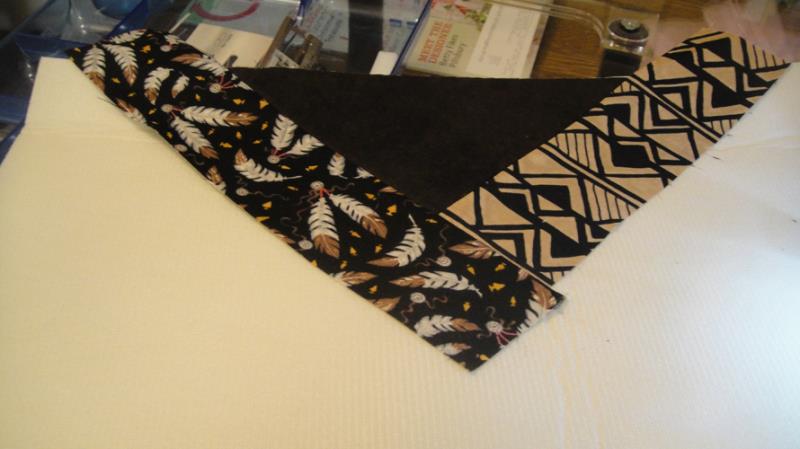
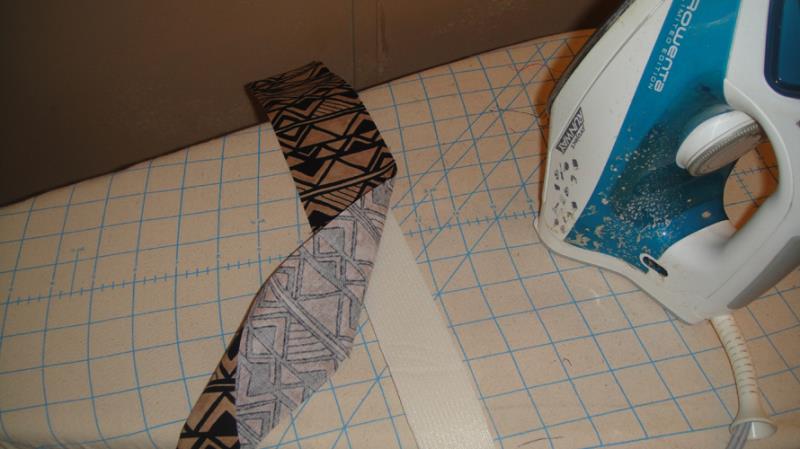
Step 17:
Lay your first strip of fabric face down along one edge of the triangle. Extend the top of the strip over the top of the foam.
(Click Image to Enlarge)
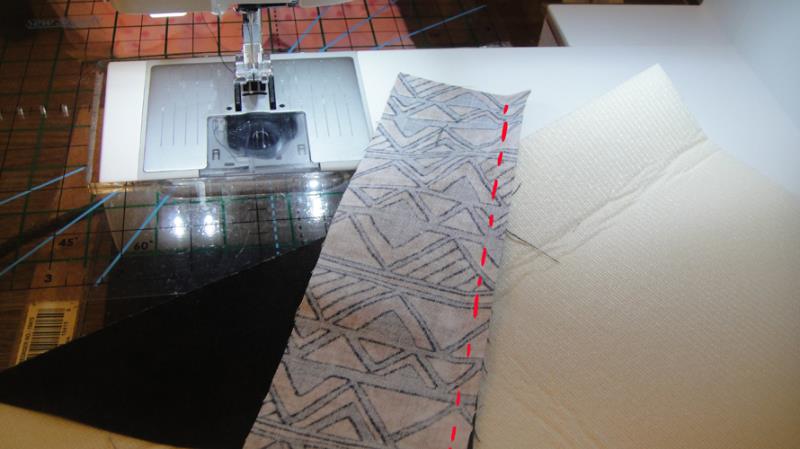
Step 18:
Before you sew the strip down with a ¼” seam fold the strip over to make sure that it will cover the foam when flipped into place.
(Click Image to Enlarge)
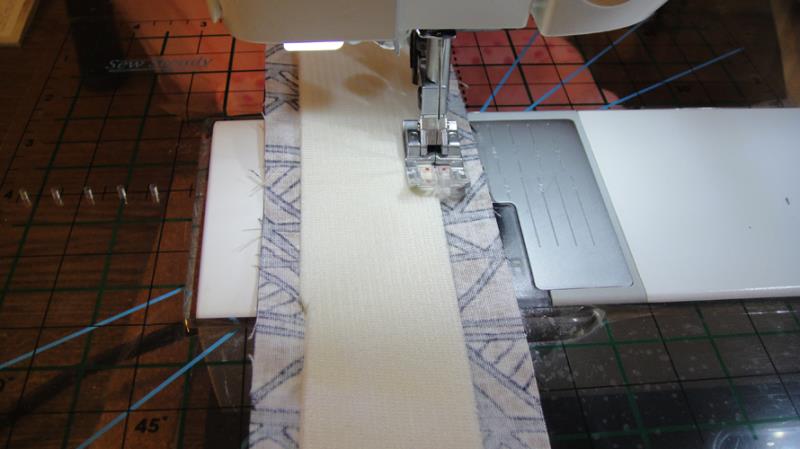
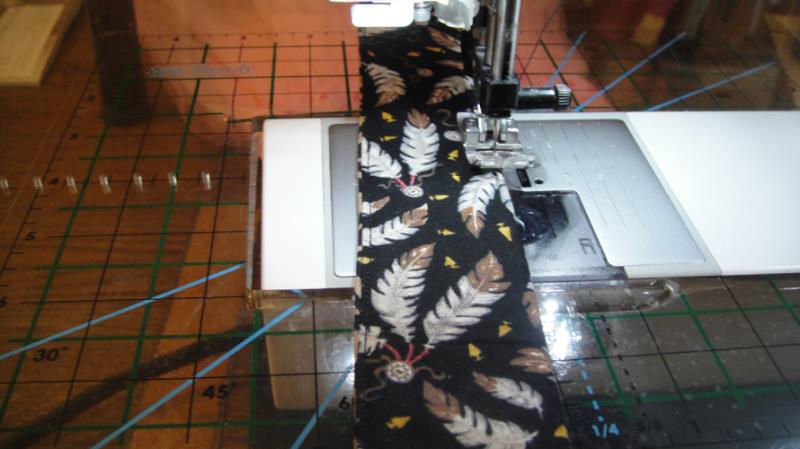
Step 19:
Flip the strip back to the face down position and stitch with a 1/4” seam allowance to the triangle. Flip the strip right side up then iron in place.
(Click Image to Enlarge)
Step 20:
Position a second strip on the other side of the triangle and stitch with a ¼” seam over the 1st strip and the triangle.
(Click Image to Enlarge)
Step 21:
Flip and fuse the second strip open.
(Click Image to Enlarge)
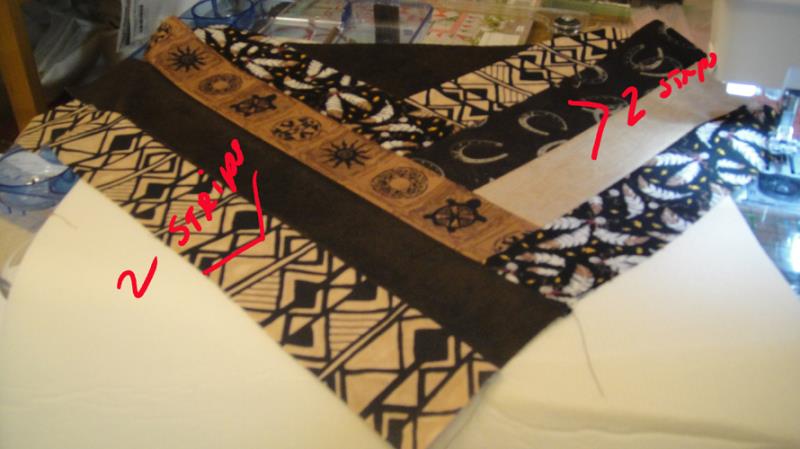
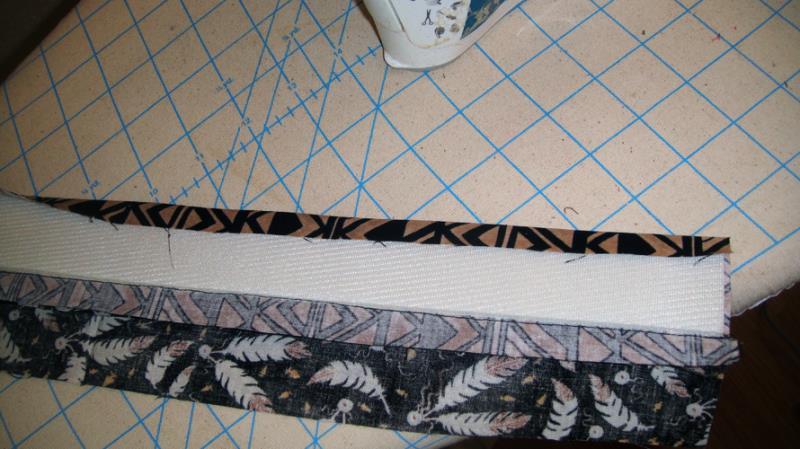
Step 22:
Continue adding and fusing strips to completely cover the foam. Add strips to alternate sides or experiment with adding two strips to one side and then the other to create some interesting patterns.
(Click Image to Enlarge)
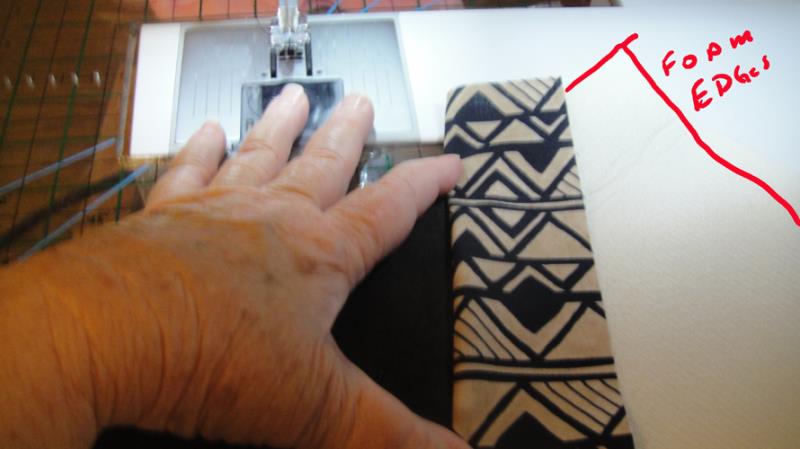
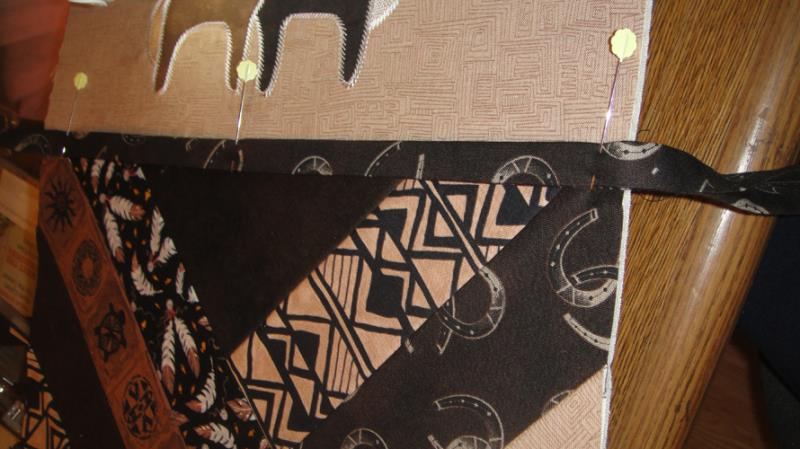
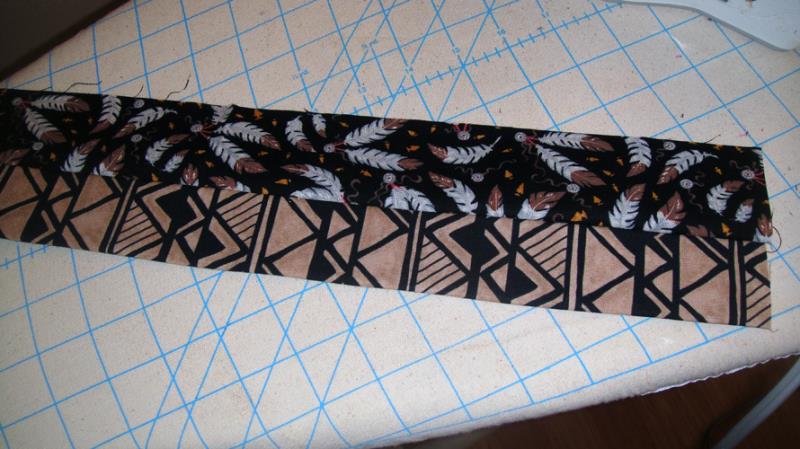
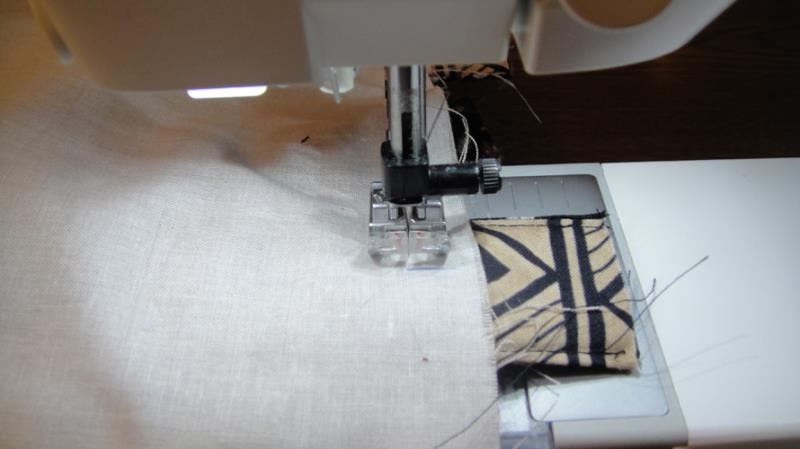
Step 23:
After you have completely covered the foam with strips trim the excess fabric to the size of the foam.
(Click Image to Enlarge)
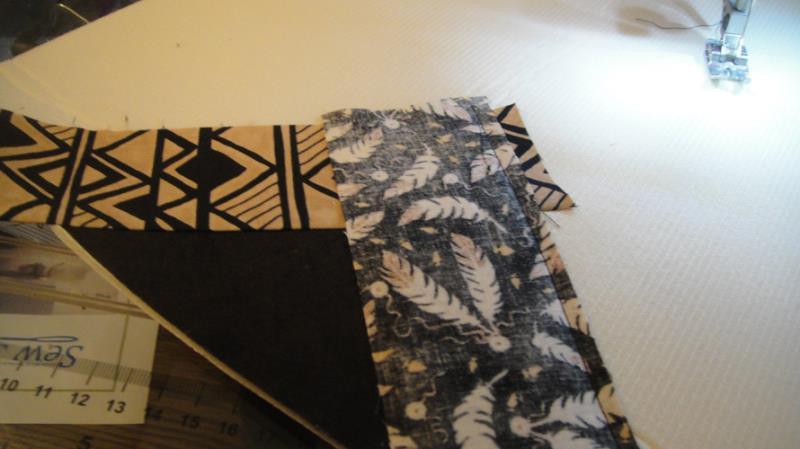
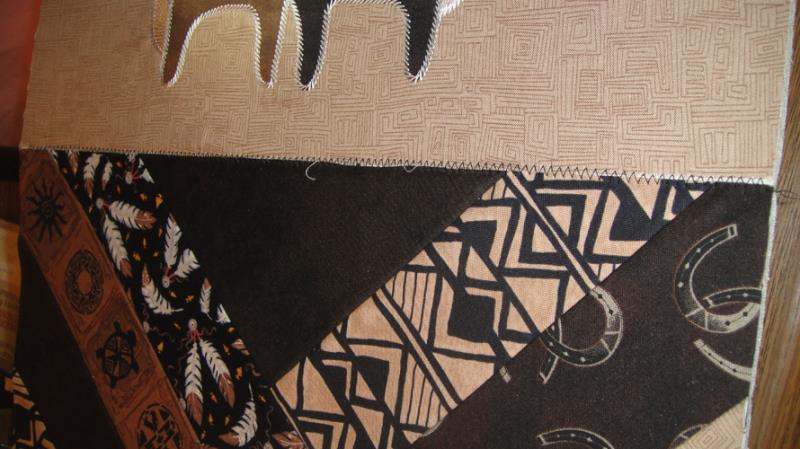
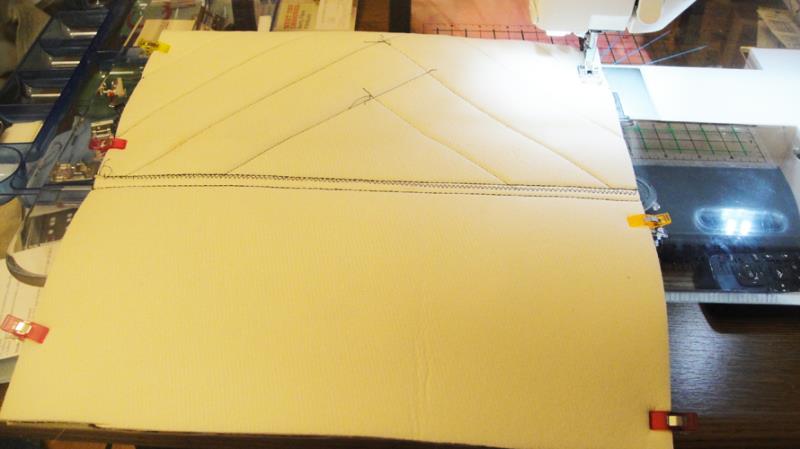
Step 24:
Butt the edges of the top panel with the body of the tote; using a wide zigzag stitch join the two together.
(Click Image to Enlarge)
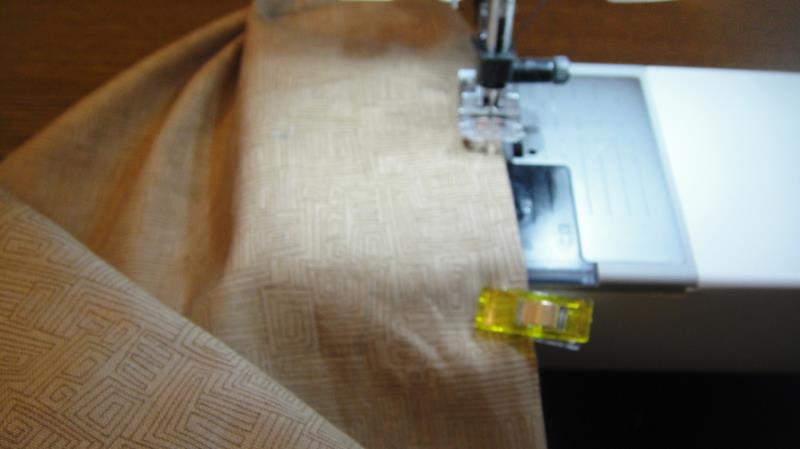
Step 25:
Take a strip that is longer than 15”; fold it in half length wise and press; open it up; fold the outside edges to the center crease and press on both sides; fold in half again and press to make a sashing to go across the body of the bag.
(Click Image to Enlarge)
Step 26:
Center and pin the sashing across the zigzag seam joining the two bag sections together. Top stitch close to both the top and bottom edges to cover the zigzag stitches. Trim off the excess sashing strip on both sides of the bag.
(Click Image to Enlarge)
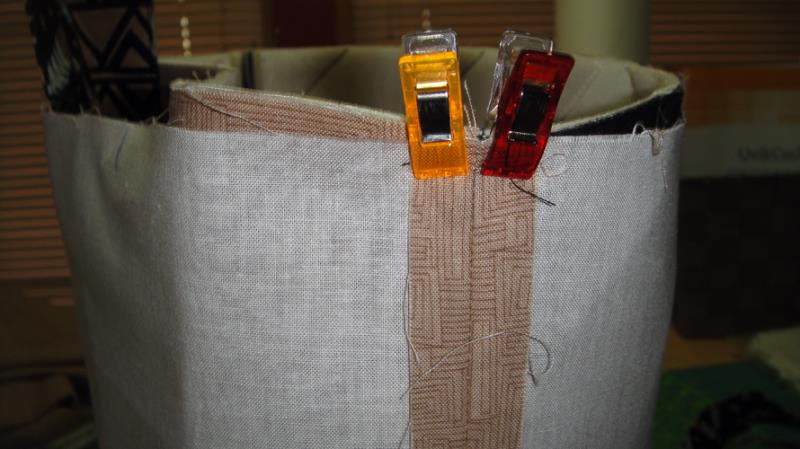
Step 27:
Fold the bag in half right sides together; craft clips are handy to hold the edges together; stitch down both sides with a ½” seam allowance.
(Click Image to Enlarge)
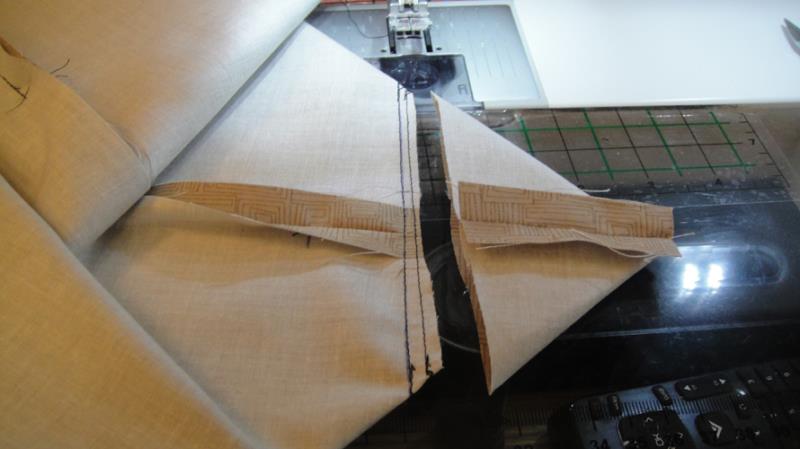
Step 28:
To box the corners; clip the seam allowance at the bottom of the bag, pull out the sides of the bag to form a triangle; the side seam should be straight against the folded bottom of the bag; place a ruler over the corner so that the 2 ½” mark is at the very tip of the triangle; draw a line across the top of the ruler.
(Click Image to Enlarge)
Step 29:
Stitch across the drawn line, backstitching at the beginning and end; stitch again across the corner about ¼” below the 1st stitched line. Trim off the corner. Repeat on the other side of the tote.
(Click Image to Enlarge)
Step 30:
(Click Image to Enlarge)
Turn the tote bag right side out.
Step 31:
Fold the lining fabric in half right sides together; stitch down one side with a ½” seam. On the second side measure and mark a 6” section in about the middle of the seam line to leave an opening for turning. Stitch a ½” seam above and below the 6” marks.
(Click Image to Enlarge)
Step 32:
Measure and box the corners in the same manner as for the tote in Step 28.
(Click Image to Enlarge)
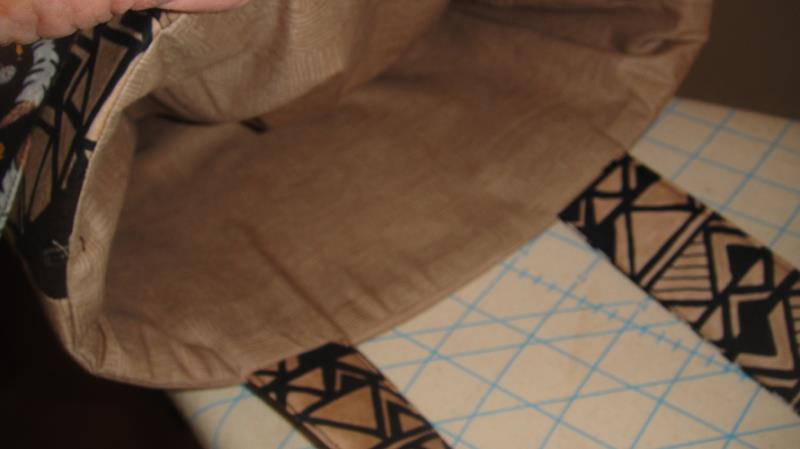
Step 33:
Lay the lining on a flat surface; at the top of the bag make a mark 4” from the seams on all sides of the bag. These will be the centering lines for the handles.
(Click Image to Enlarge)
Step 34:
(Click Image to Enlarge)
Insert the tote inside the lining, right sides together, aligning the boxed corners. Due to the thickness of the foam the lining will seem a little shorter than the tote. We will handle that when we stitch the top of the bag and lining together.
Step 35:
Lay a handle strip over the foam handle strip centering the foam and press the fabric to the foam. Do this for each handle.
(Click Image to Enlarge)
Step 36:
Place a second fabric strip, right sides together, on the fused fabric strip and stitch the two together along the side of the foam. Repeat for the second handle.
(Click Image to Enlarge)
Step 37:
Bring the raw lengthwise edge of the fused strip over the top of the foam and fuse it with just the tip of your iron. Repeat on the second handle.
(Click Image to Enlarge)
Step 38:
Open out the two strips of fabric and press the seam from the fabric side.
(Click Image to Enlarge)
Step 39:
Folding in the seam allowance fuse the second side of the handle to the foam.
(Click Image to Enlarge)
Step 40:
Stitch down both sides of each handle making sure the turned in seam allowances are caught in the stitching.
(Click Image to Enlarge)
Step 41:
Align the tops of the tote and the lining at the side seams and clip together. You will have to push the tote down into the lining a little to get them to match up.
(Click Image to Enlarge)
Step 42:
(Click Image to Enlarge)
Hold the handles up, top edges even, to make sure the handle isn’t twisted.
Step 43:
Insert the handle between the lining and the tote lining up the center of the handles with the marks you made on the lining; have the top of the handle extend 1 ½” above the top of the tote. I used long quilt pins to hold the handles into place. Repeat on the other side of the bag.
(Click Image to Enlarge)
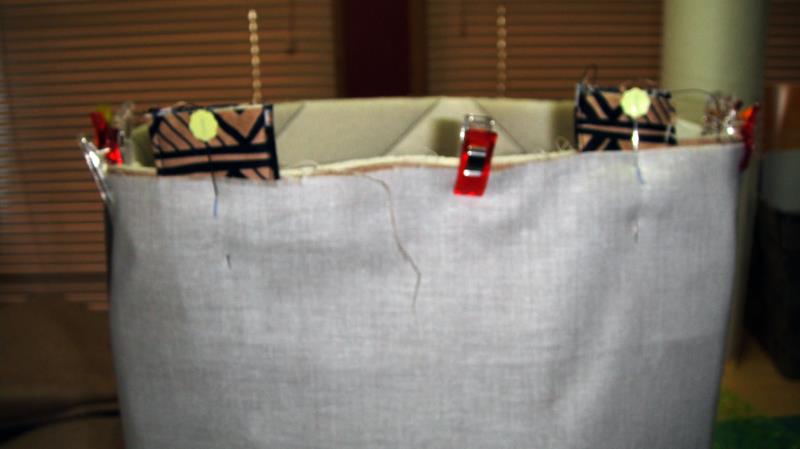
Step 44:
Pushing the bag down inside the lining so the top edges are even clip around the rest of the top of the bag.
(Click Image to Enlarge)
Step 45:
If you have free arm options on your sewing machine remove the tray or table and use the free arm to stitch around the top of the bag and lining; make sure the handles are straight before you stitch across them; do not trim off the excess handles.
(Click Image to Enlarge)
Step 46:
(Click Image to Enlarge)
Turn the bag right side out through the opening in the lining.
Step 47:
Align the side seam allowances of the opening and edge stitch together.
(Click Image to Enlarge)
Step 48:
Insert the lining into the tote and press a nice edge around the top and press the lining inside the top 1/3rd of the bag to fuse the lining to the foam.
(Click Image to Enlarge)
Step 49:
Top stitch about 3/8” around the top of the bag. I used a size 16 Jeans/Denim needle to get the machine to stitch through all of the layers with a triple run straight stitch. Congratulations your Loving Ponies Tote is complete!
Award winning Digitizer, Embroidery Educator, Author and a Consultant to the Industry, Pat Williams has 30 years of experience in the embroidery industry. Pat has won multiple awards for her digitizing expertise including the 2007 Impressions Awards Grand Championship, Best of Show as well as the 1st and 2nd Place Awards. Pat’s love of digitizing has afforded her the opportunity to write numerous articles for Impressions magazine in the United States and Images Magazine in Europe. In 2001 Pat was named “Embroidery Educator of the Year.” For many years Pat taught digitizing seminars at the ISS Shows in Long Beach, CA and for Compucon software. She now resides in Tucson, AZ.