Projects like this are a lot of fun for children to do. Simply stitch the outline, use freezer paper to back the fabric, and let the children color in the outline. It’s ok if they go outside the lines - that will only add to the charm. There are various brands of fabric crayons. Some are to be used on 100% cotton fabric and others are to be used for a cotton/poly blend fabric. Be sure to read the instructions on the fabric crayon box and choose the napkin with the appropriate fiber content. This would not only be a great gift for Santa, but stitch several napkins ahead of time and when school is closed for a snow day, let the children color a set of napkins for Christmas breakfast or for Grandma or an Aunt.
Step 1:
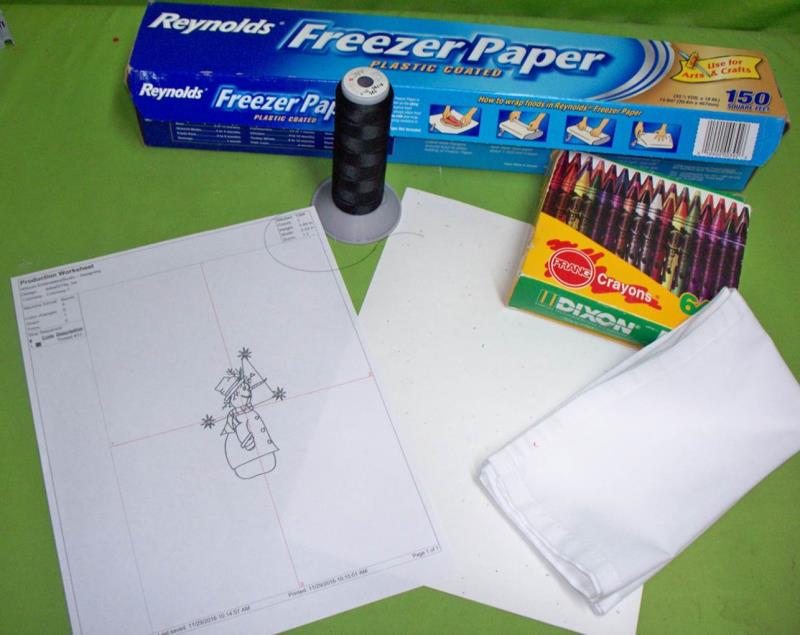
Gather the materials and read through the instructions before beginning. Print out a paper template of the design and color sequence.
(Click Image to Enlarge)
Step 2:
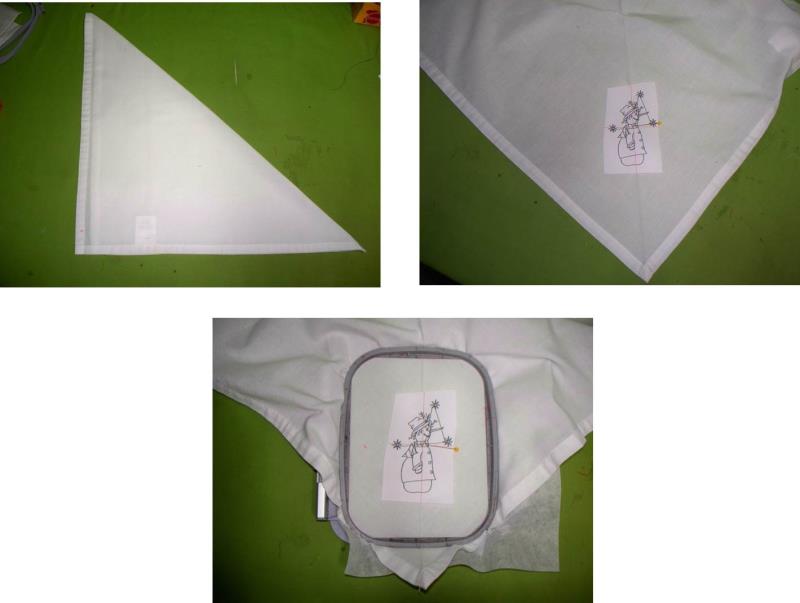
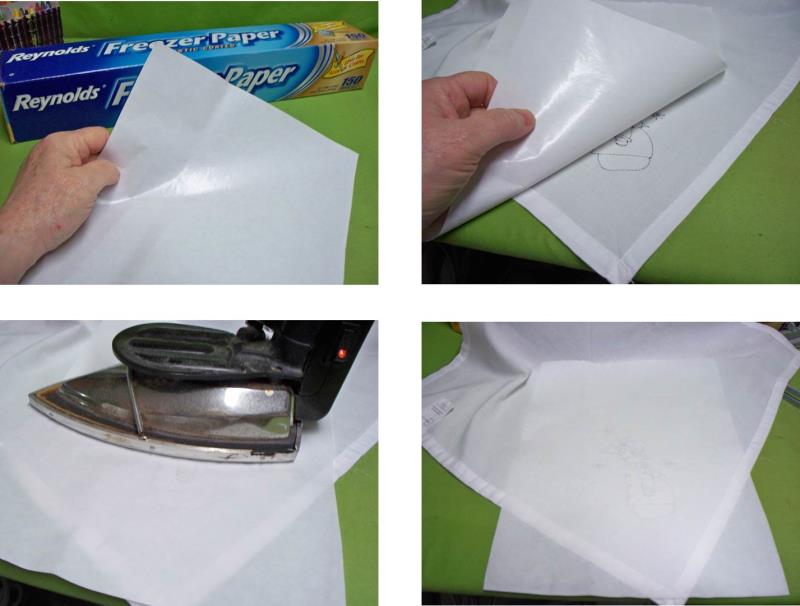
Press the napkin well but don’t use spray starch or sizing - it may interfere with the adhesion of the crayons. Fold a corner of the napkin matching adjoining sides and lightly press an alignment crease. Cut out the paper template of the design and decide where on the napkin you’d like the design. Hoop the napkin with one layer of tearaway stabilizer, centering the design in the hoop.
(Click Image to Enlarge)
Step 3:
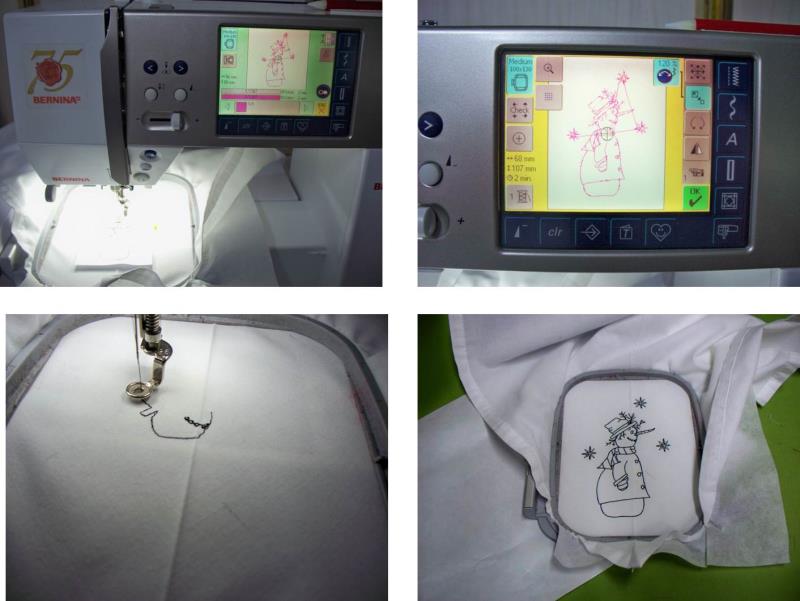
Load the design on the machine. Simple designs like this may be easily and accurately enlarged at the machine up to 20%. Increase the design size so the design will be easier to color and stitch using the black embroidery thread.
(Click Image to Enlarge)
Step 4:
Remove the fabric from the hoop and remove as much of the tearaway stabilizer as possible; press the napkin from the back to press out the alignment crease.
(Click Image to Enlarge)
Step 5:
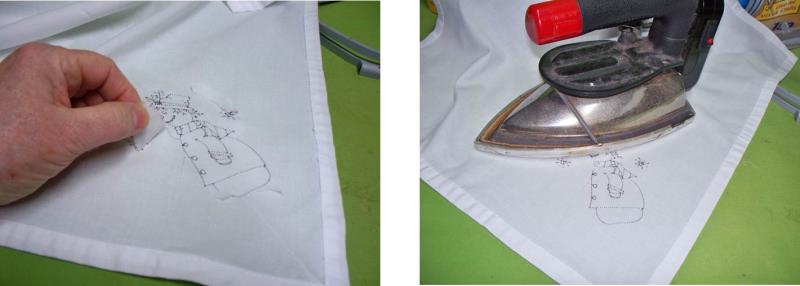
Cut a sheet of freezer paper larger than the design. Freezer paper has a waxy, shiny side. Place the shiny side over the back of the design and with a slightly warm iron, press the freezer paper to the napkin. The wax on the paper melts allowing the paper adhere to the fabric giving the fabric stability for coloring; let the fabric cool.
(Click Image to Enlarge)
Step 6:
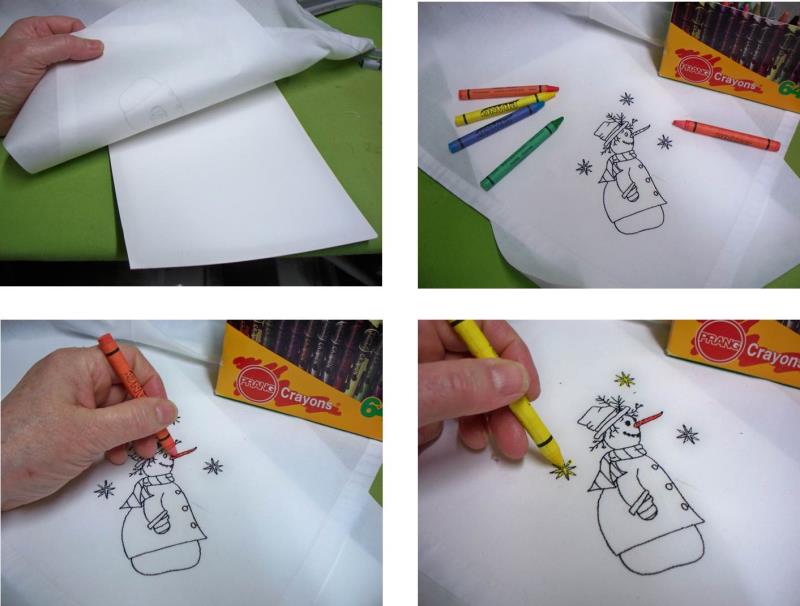
Place a stiff piece of smooth cardboard or other smooth surface under the fabric. Choose the fabric colors and color in the various areas of the design as desired.
(Click Image to Enlarge)
Step 7:
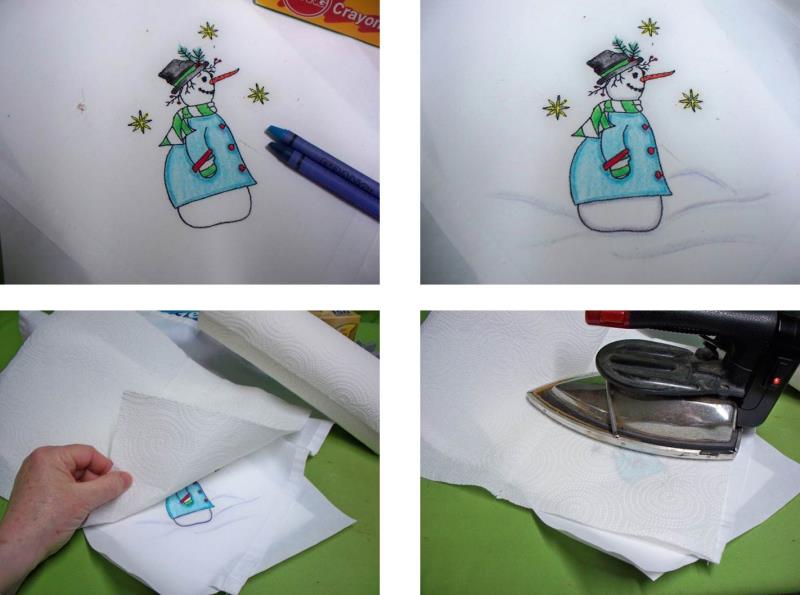
Continue coloring in the design using a bit of shading and perhaps adding a few little snow mounds around the design. Once you are satisfied with the coloring of the design, follow the manufacturer’s directions on the fabric crayon box for setting the wax color into the fabric. For these crayons the instructions say to place paper toweling over the design and with an up and down motion with the iron, place the warm iron over the area for a few seconds, lift the iron and move to the next section. If the iron is slid over the design the wax color may smear so be sure to only use an up and down motion.
(Click Image to Enlarge)
Step 8:
Any excess color will run onto the paper towel. After all the excess crayon is removed, peel off the freezer paper and press the rest of the napkin for folding.
(Click Image to Enlarge)
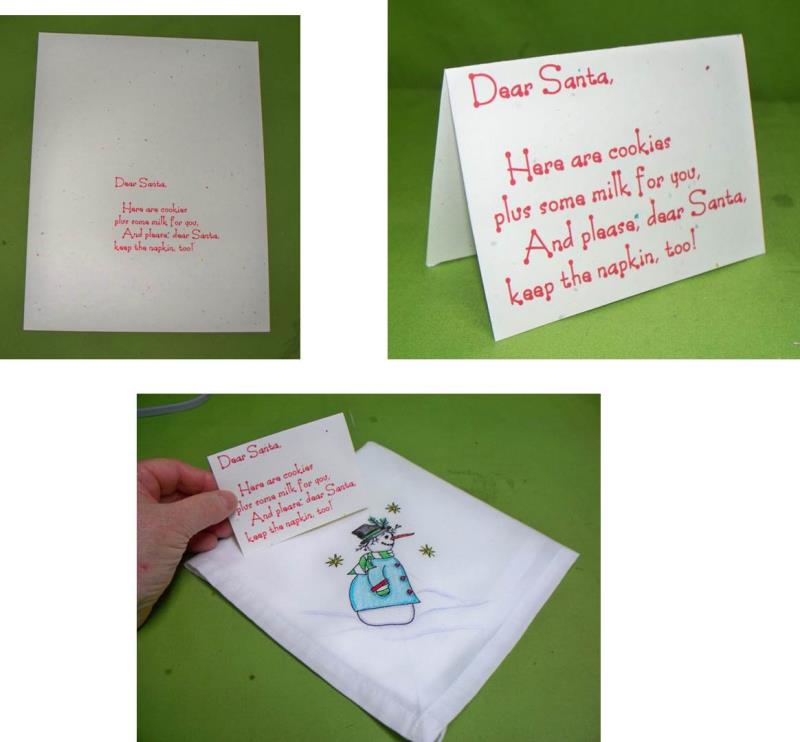
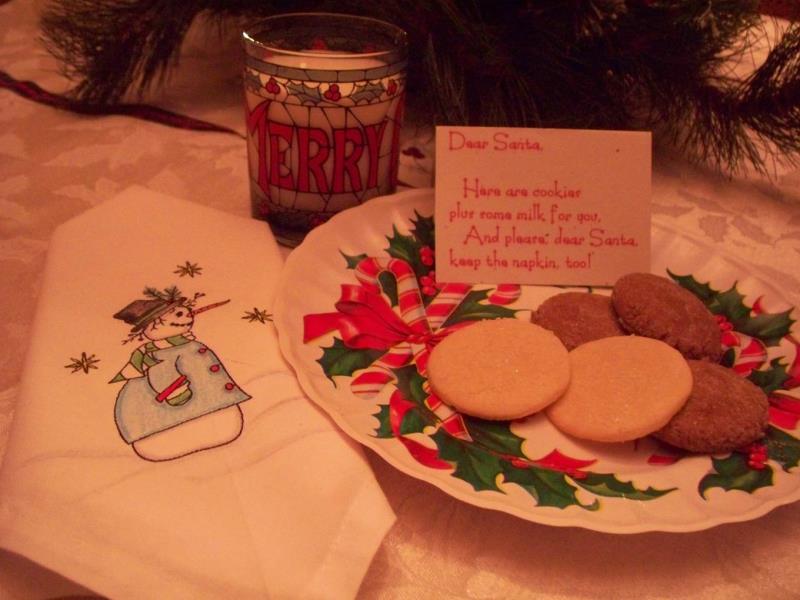
Step 9:
Use the words here or create your own Santa’s note. The note for the project was done in MS Word using a slim dot font, in bold, and printed in red ink on plain card stock. It was then folded and cut to size to be placed with the napkin.
(Click Image to Enlarge)
Step 10:
On the big night let the children place milk and cookies for Santa along with their note and the napkin. Merry Christmas!
Ramona Baird has been in the embroidery industry for over 23 years. She and her husband owned a commercial and retail embroidery store in Arizona for many years. She is an experienced digitizer having been mentored by award-winners Pat Williams and Lindee Goodall. Ramona is a contributor to “Creative Machine Embroidery” magazine having 5 covers to her credit. Ramona has worked for Wilcom America and served many years as Education Director for the American Sewing Guild. With a degree in fashion design, she is able to design and execute patterns which Pat Williams says are “out of the box” in creativity and application. Ramona likes to challenge the boundaries of embroidery and bring new and exciting designs, ideas, and projects to EmbroideryDesigns.com. She wants embroiderers of all levels to increase their skills and enjoyment in using their embroidery machine for gift-making and personal pleasure.