A beach towel is the perfect fabric to create a beach bag. Not only does it make for a very roomy bag but it is easily washed after each use. The ends of the towel are folded down and stitched to create a casing for the handles and the sides are stitched up to the casing and the bottom is boxed and stitched.
Step 1:
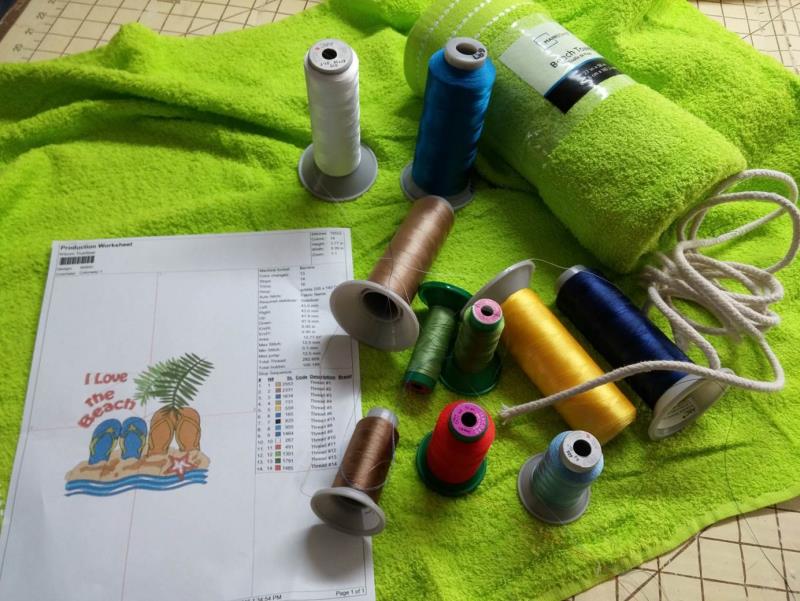
Gather the materials and read through the instructions before beginning. Print out a paper template of the design and color sequence.
(Click Image to Enlarge)
Step 2:
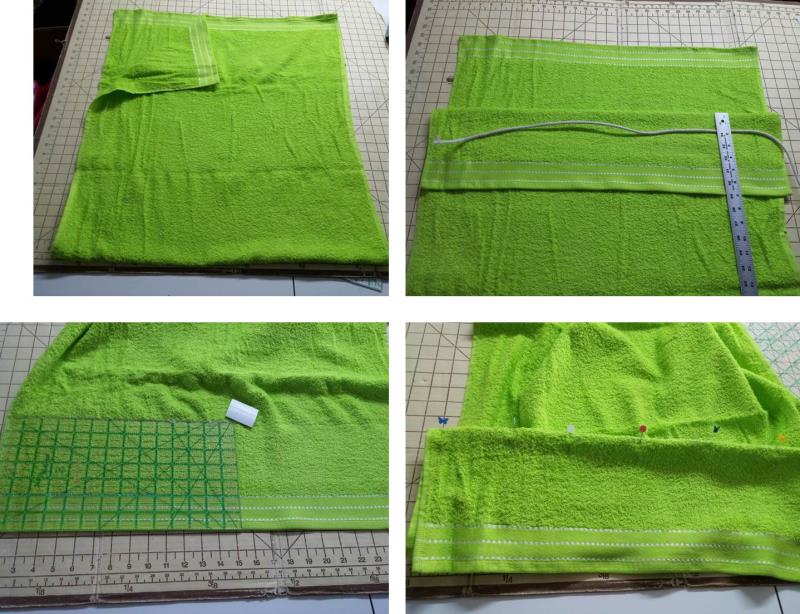
Measure, mark and fold down each end of the towel the amount desired to create a flap and casing. For the project, the towel was measured 7” from each end and marked. The towel was folded along the mark (decorative edge of the towel out) and pinned.
(Click Image to Enlarge)
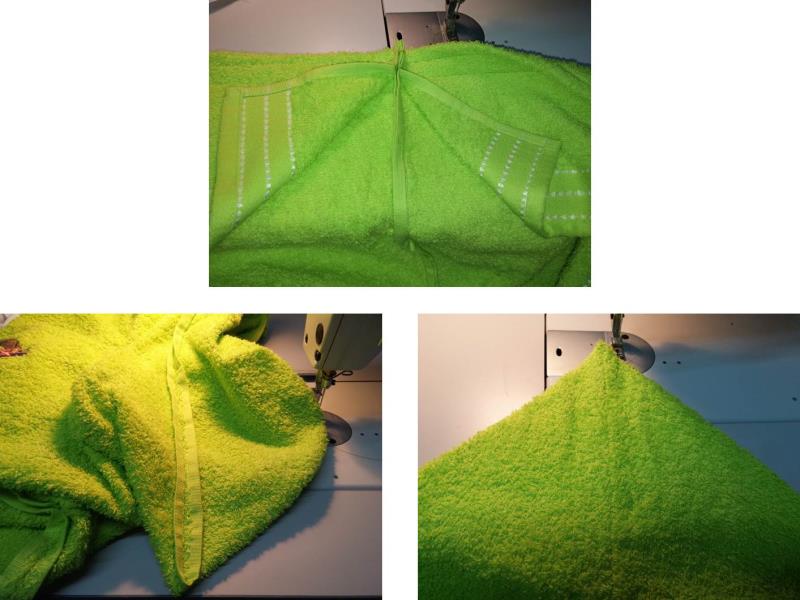
Step 3:
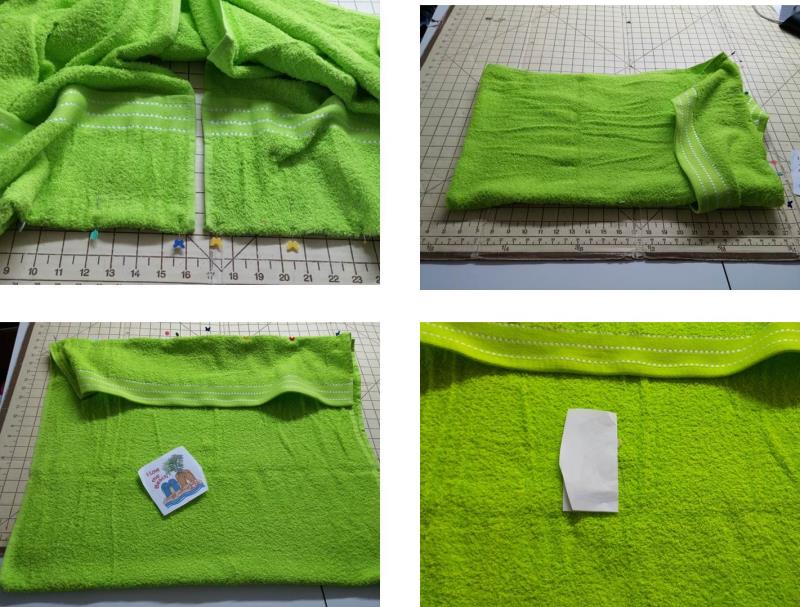
Repeat for the other side and then lay the ends of the towels together to make sure they match exactly. Now fold the towel in half horizontally and vertically; place a pin at the center of the vertical mark for the paper template placement.
(Click Image to Enlarge)
Step 4:
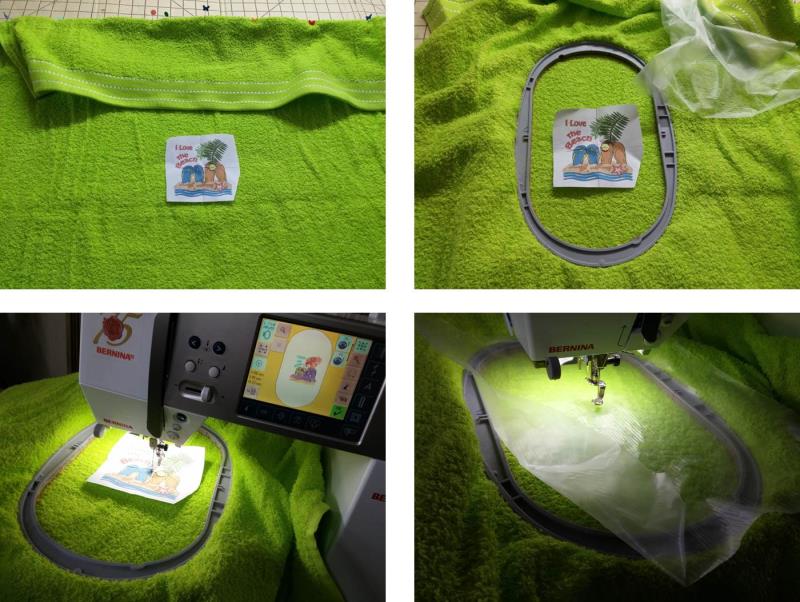
Pin the template in place and then hoop the towel with the both pieces of tearaway stabilizer. Place the hoop on the machine and align the needle to the center of the template. Remove the paper template and lay the piece of water soluble stabilizer over the fabric.
(Click Image to Enlarge)
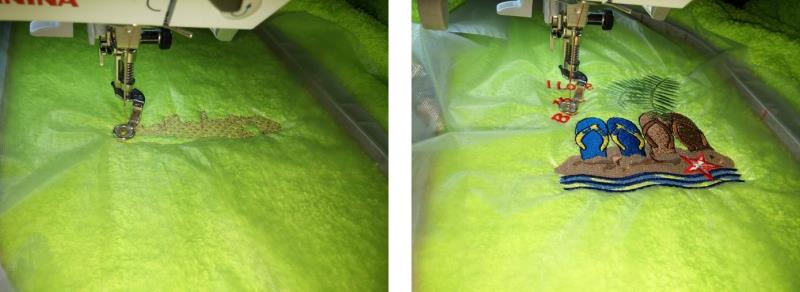
Step 5:
Stitch the design following the color sequence.
(Click Image to Enlarge)
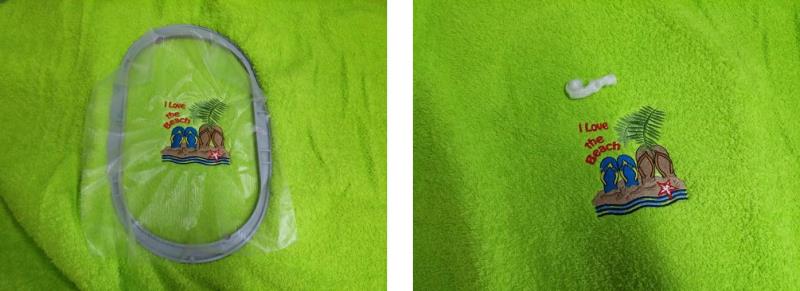
Step 6:
After the design has finished stitching, remove the fabric from the hoop and remove the excess stabilizer from the back and front.
(Click Image to Enlarge)
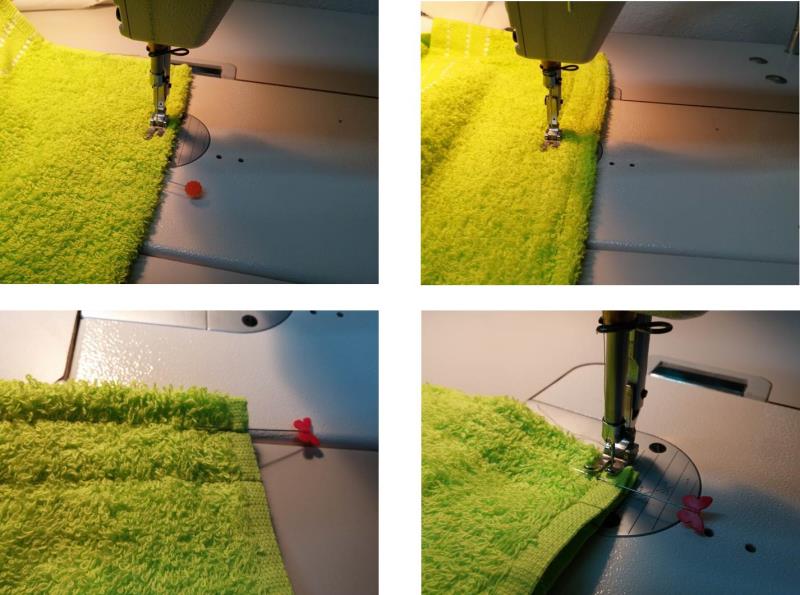
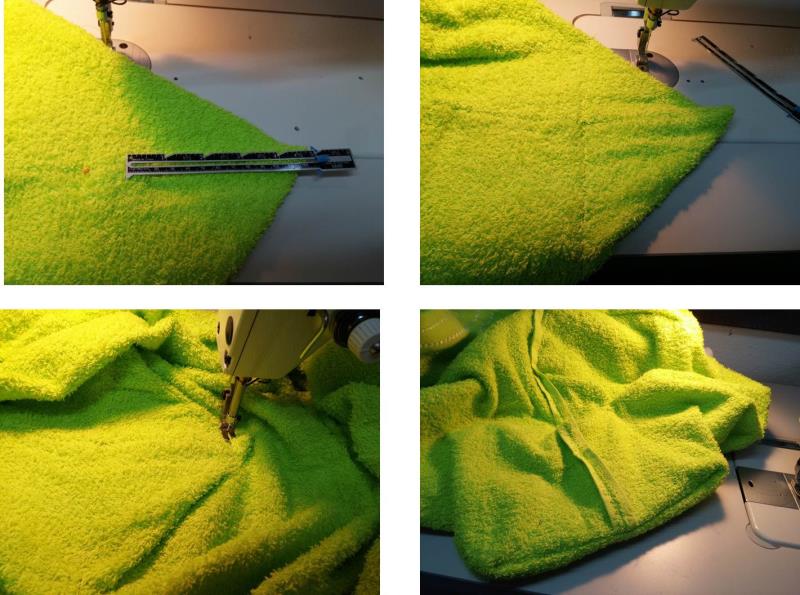
Step 7:
Now it is time to form the casing. Stitch the top folded edge of the towel about ¼-3/8” from the top and then again about 1 ¼” down from the folded edge. The area between the stitching lines is the casing. Also stitch down along each edge between the fold and the first stitching line. Repeat for the other end of the towel.
(Click Image to Enlarge)
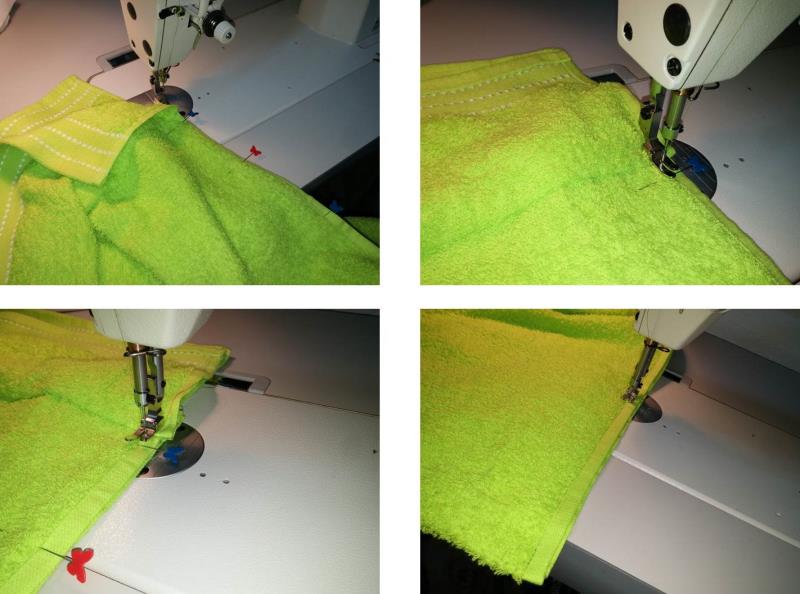
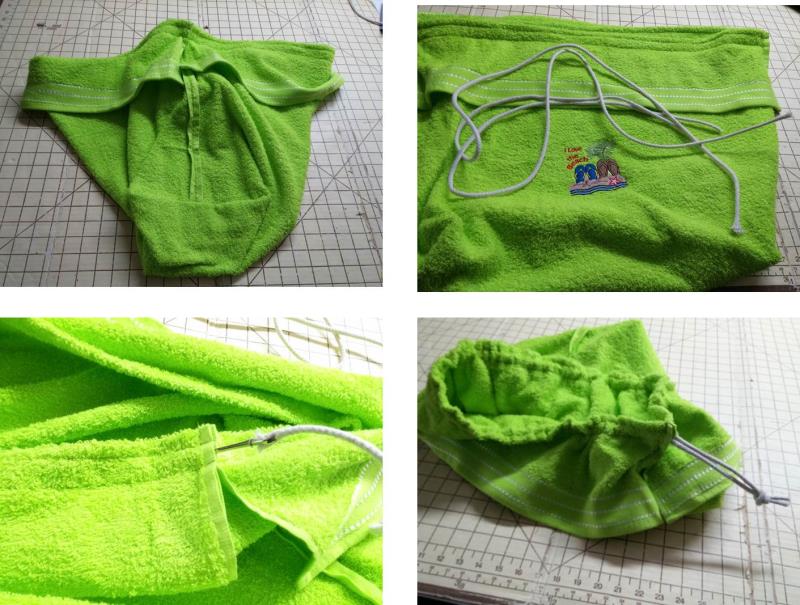
Step 8:
Fold the towel, wrong sides together matching the top folded edge and casing stitching lines. Fold the flaps up (these flaps are just decorative) and stitching down each towel side using the towel edge as a guide for stitching. Stitch again to reinforce.
(Click Image to Enlarge)
Step 9:
The side seams will be stitched and the flaps loose. Toward the bottom of the seam and finger press open the seam. Reach inside to the lower corner and pull the bag wrong side out, forming the corner well.
(Click Image to Enlarge)
Step 10:
Now is time to “box” the corner. Meet the seam to the fold at the bottom of the bag and pin them together. Measure 5” from the corner along the seam line and sea a seam across the corner at that depth. Fold the corner flap toward the bottom fold of the bag and stitch in place. Repeat for the other side. Turn the bag right side out and form the “boxed” bottom.
(Click Image to Enlarge)
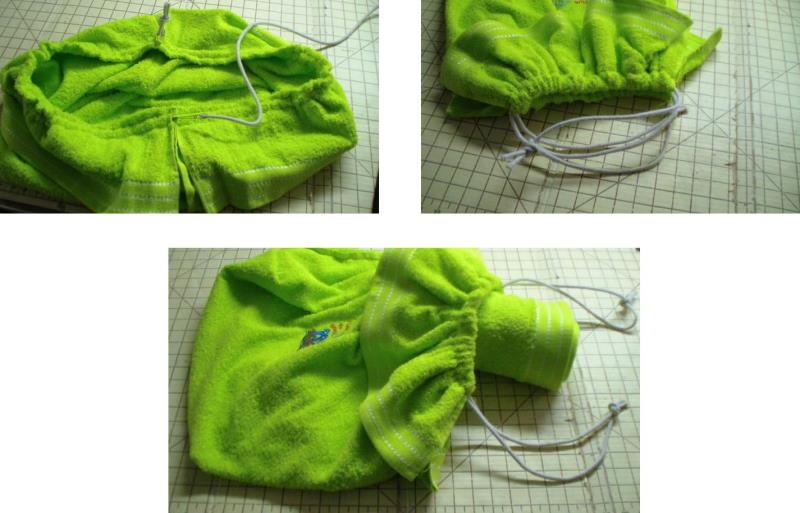
Step 11:
The bag is almost complete. Cut the cord in half. Use a bodkin to run the cord through the casing. Start at one side and run one piece of cording all the way around the casing and come back out at the same side. Knot the ends of the cord together and trim the ends at an angle.
(Click Image to Enlarge)
Step 12:
Now start at the other side seam and run the second cord all the way around through the casing, knot the ends and trim the ends at an angle. Pull on both cord ends to cinch up the bag. Open up the bag and add the other beach towel.
(Click Image to Enlarge)
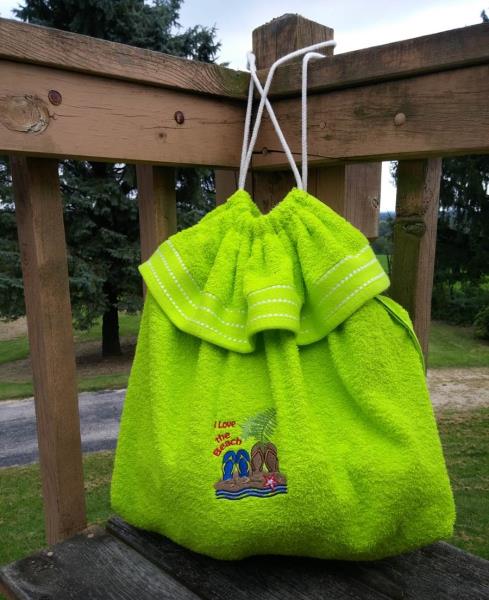
Step 13:
The bag is sturdy and washable. Create one for each family member with matching towels so each person has their own beach bag for their towel, sunscreen, water and snacks for a day of fun in the sun.
Ramona Baird has been in the embroidery industry for over 23 years. She and her husband owned a commercial and retail embroidery store in Arizona for many years. She is an experienced digitizer having been mentored by award-winners Pat Williams and Lindee Goodall. Ramona is a contributor to “Creative Machine Embroidery” magazine having 5 covers to her credit. Ramona has worked for Wilcom America and served many years as Education Director for the American Sewing Guild. With a degree in fashion design, she is able to design and execute patterns which Pat Williams says are “out of the box” in creativity and application. Ramona likes to challenge the boundaries of embroidery and bring new and exciting designs, ideas, and projects to EmbroideryDesigns.com. She wants embroiderers of all levels to increase their skills and enjoyment in using their embroidery machine for gift-making and personal pleasure.