{{superHeaderAds.title}}
Live Chat
Embroidery Designs
Welcome, Embroiderer
Login
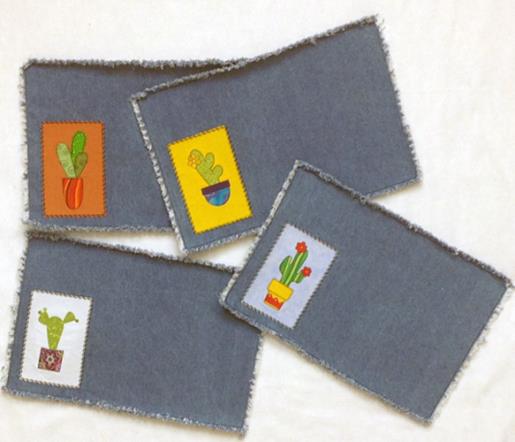
Casual Cactus Placemats
{{mainImageAlt || (productInfo._source && productInfo._source.name) || ''}}

Casual Cactus Placemats Embroidery Project

By   Pat Williams   on   August 16, 2016

PROJECT DETAILS

SKILL LEVEL
Some Experience
TIME REQUIRED
01:00
FINISHED SIZE
18 x 12 inches
Description

A bit of denim, cute cactus appliques and a little time make great casual placemats.

Project Preview Video

Materials
  • 5” x 7” embroidery hoop
  • ¾ yard Heavy Weight 100% Cotton Denim 60” wide would make six placemats
  • Fat quarters of Kona cloth, 1 each Gold, White, Terra Cotta, and Sky Blue
  • Assorted scraps, about 5” x 5” of olive, lime and printed greens for cactus appliques and bright prints and solids for pots
  • Heat N Bond Lite®
  • Poly Mesh Stabilizer
  • Tear Away Stabilizer
  • Magic Sizing or spray starch
  • Fabric marking pen
  • Applique iron
  • Optional: Rag Quilt clippers

  • Designs used in this project
  • https://www.embroiderydesigns.com/productdetails/Pat-Williams/DesignPack/1/DPCACA
  • https://www.embroiderydesigns.com/productdetails/pat-williams/designs/1/CACA05
  • https://www.embroiderydesigns.com/productdetails/pat-williams/designs/1/CACA04
  • https://www.embroiderydesigns.com/productdetails/pat-williams/designs/1/CACA03
  • https://www.embroiderydesigns.com/productdetails/pat-williams/designs/1/CACA02
  • https://www.embroiderydesigns.com/productdetails/pat-williams/designs/1/CACA11
  • https://www.embroiderydesigns.com/productdetails/pat-williams/designs/1/CACA10
  • https://www.embroiderydesigns.com/productdetails/pat-williams/designs/1/CACA09
  • https://www.embroiderydesigns.com/productdetails/pat-williams/designs/1/CACA08
  • https://www.embroiderydesigns.com/productdetails/pat-williams/designs/1/CACA07
  • https://www.embroiderydesigns.com/productdetails/pat-williams/designs/1/CACA06
  • https://www.embroiderydesigns.com/productdetails/pat-williams/designs/1/CACA01

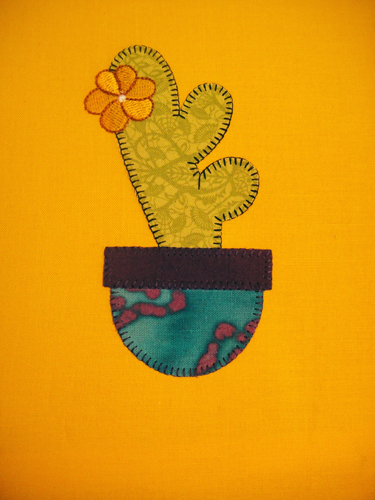
  • Final Product: What You Will Create

    Preface:
    The placemats will take you approximately 1 hour each to complete. These placements are double appliqued. That is, the appliques are first embroidered onto solid Kona cloth rectangles and then the appliqued rectangle is appliqued to the placemat. You can applique the cactus appliques directly to the placemat or any other article if desired. To do them as double appliques as presented you will need the cactus applique designs of your choice as well as the applique frame design file. As the dye in some denim fabrics will run, prewash the denim fabric before cutting.

    The cactus appliques are precut with Heat N Bond applied to the back of the fabric and edges with an e-stitch so no tack down stitches are present. SVG and FCM files are available for electronic cutting machines and PDF files are available for cutting by hand. The rectangle frame files are cut using the stitch and trim method. Note: If using a Scan N Cut download the FCM files as multiple pieces for each design are included in one file. Though the Scan N Cut now reads SVG files it does not let you move the multiple pieces around on their screen as it will let you do with the FCM files.


    Step 1:
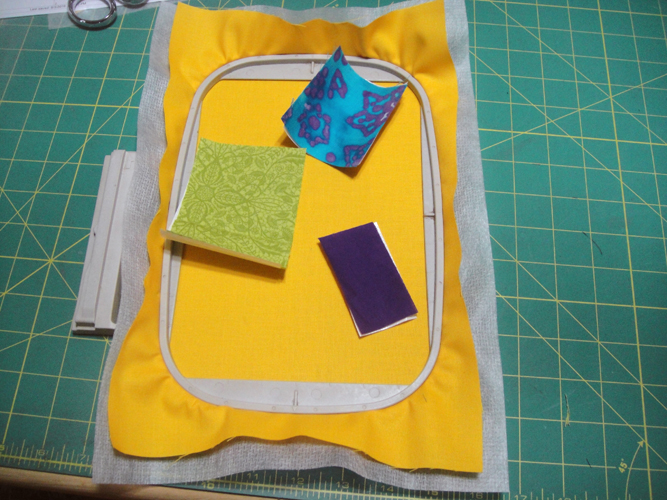
    For design CACA01 cut poly mesh backing and solid Kona cloth to fit your 5” x 7” embroidery hoop; cut a 4” x 3” light green fabric print for the cactus; cut a 1 ½” x 3” top band for the pot and a 2” x 3” coordinating print for the pot; cut a matching sized piece of Heat N Bond Lite for each applique. The size of the applique pieces needed for the other designs are listed below at Step 23.

    (Click Image to Enlarge)


    Step 2:
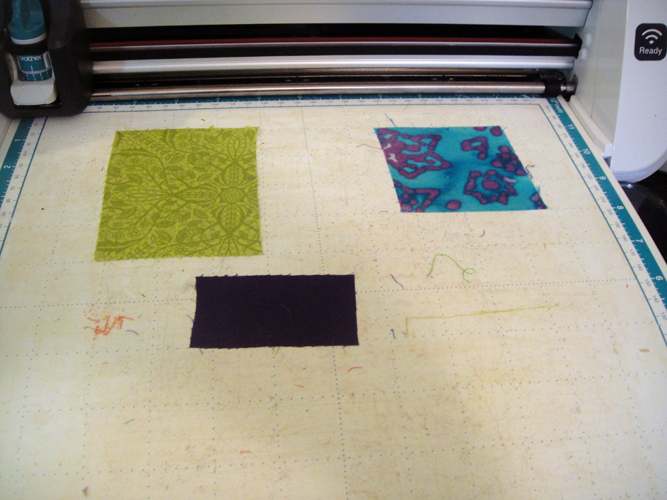
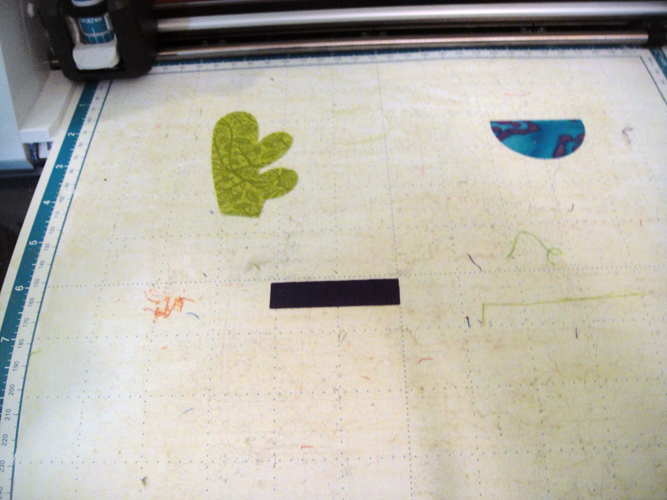
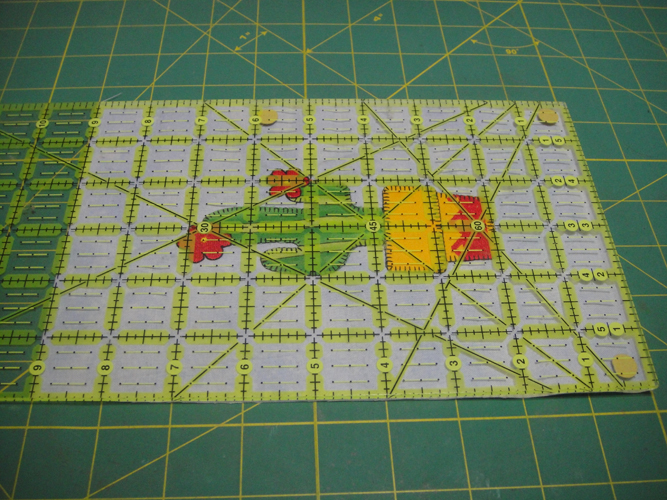
    Spray and iron each applique piece 4 times with Magic Sizing or spray starch; following the manufacturer’s instructions apply the Heat N Bond Lite to the back of each piece; remove the paper and smooth the fabric onto the Scan N Cut Mat fabric side up.

    (Click Image to Enlarge)


    Step 3:
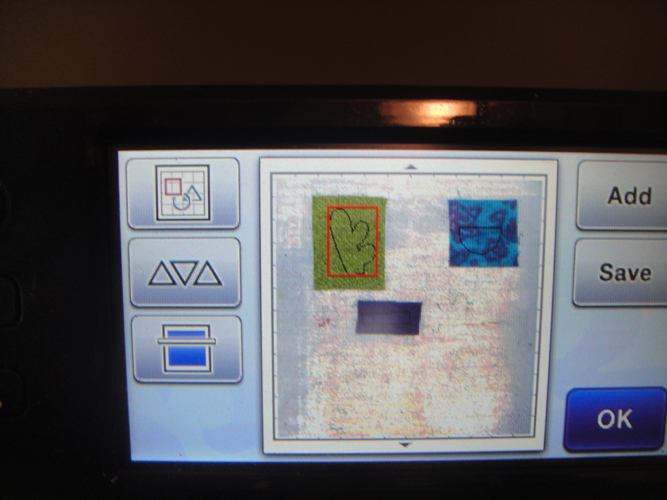
    Open the FCM file into the Scan N Cut, load and scan the mat; move the outlines of the applique pieces over the appropriate fabrics.

    (Click Image to Enlarge)


    Step 4:
    Cut the applique pieces. If cutting by hand print out the PDF files; cut apart the pieces on the paper; spray the paper with adhesive and place on the right side of your fabrics; cut out the fabrics that have been prepared for with spray starch and Heat N Bond Lite applied.

    (Click Image to Enlarge)


    Step 5:
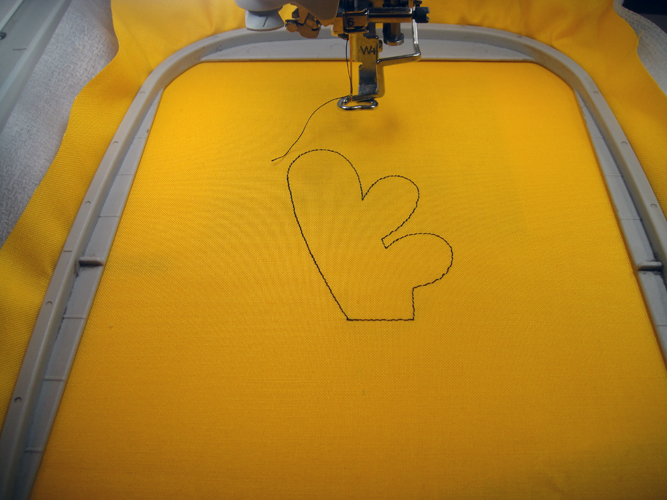
    Load the design file CACA01 into your embroidery machine and stitch the 1st color stop (CS) in black for the outline of the cactus.

    (Click Image to Enlarge)


    Step 6:
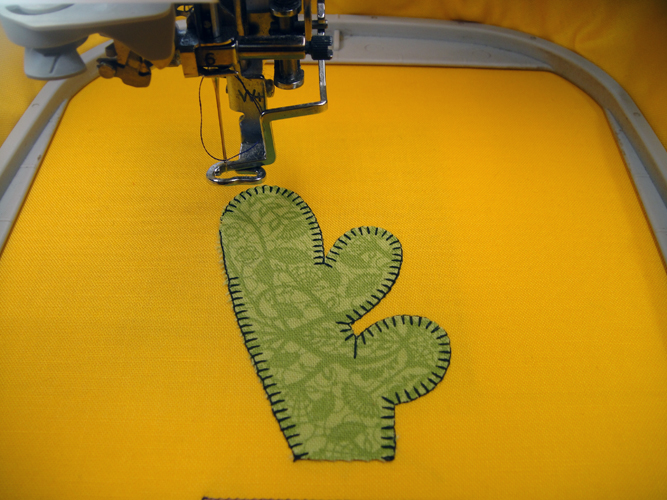
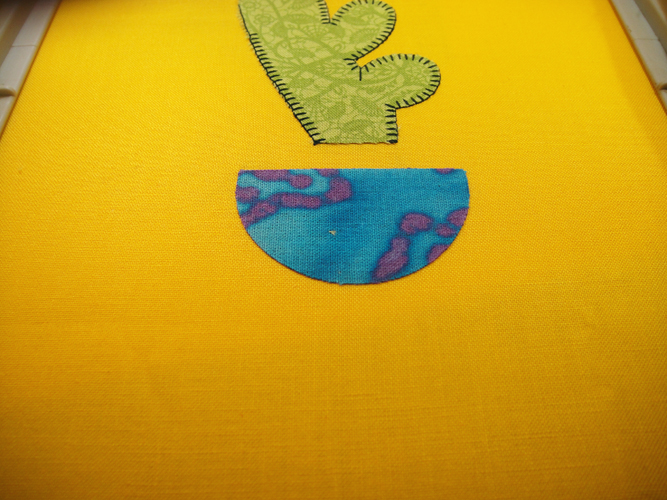
    Remove the hoop from the machine; carefully align the applique into place; run CS 2 in black to stitch the e-stitch border.

    (Click Image to Enlarge)


    Step 7:
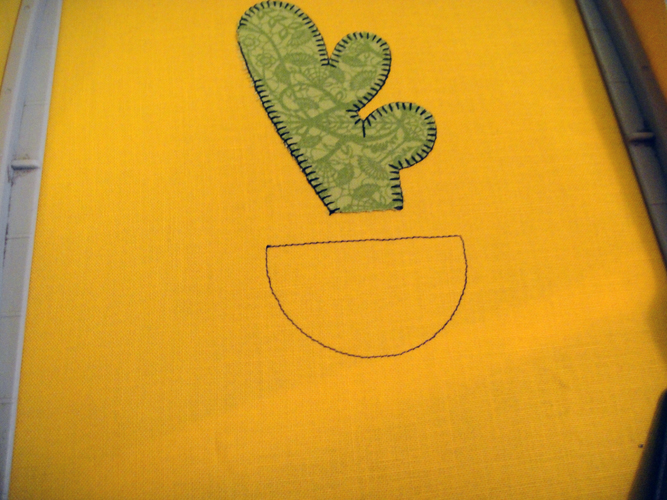
    Run CS 3 in black for an outline for the pot.

    (Click Image to Enlarge)


    Step 8:
    Iron the pot applique into position; do the same for the band at the top of pot with CS 4.

    (Click Image to Enlarge)


    Step 9:
    (Click Image to Enlarge)
    Follow the color chart for CS 5 through 8 to complete the borders and the flower.


    Step 10:
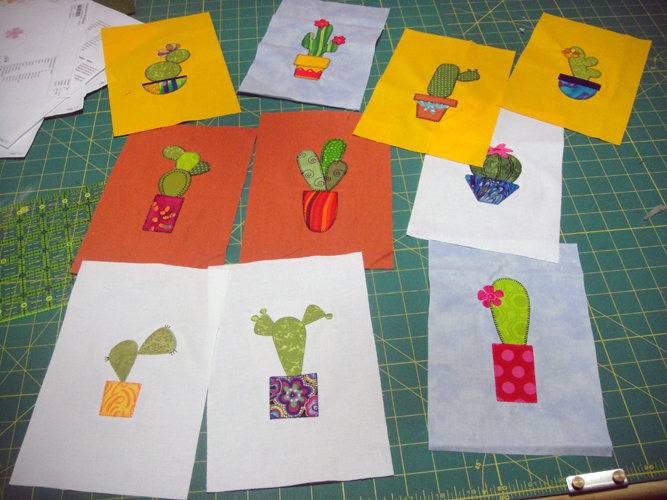
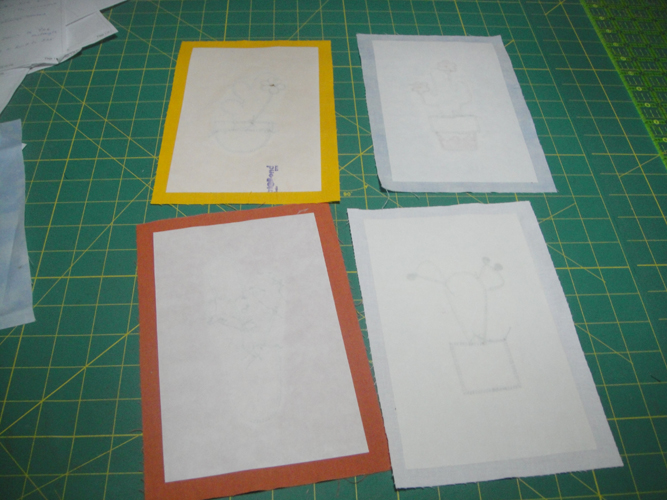
    Sew out the applique designs on various solid backgrounds for the number of placemats you wish to make.

    (Click Image to Enlarge)


    Step 11:
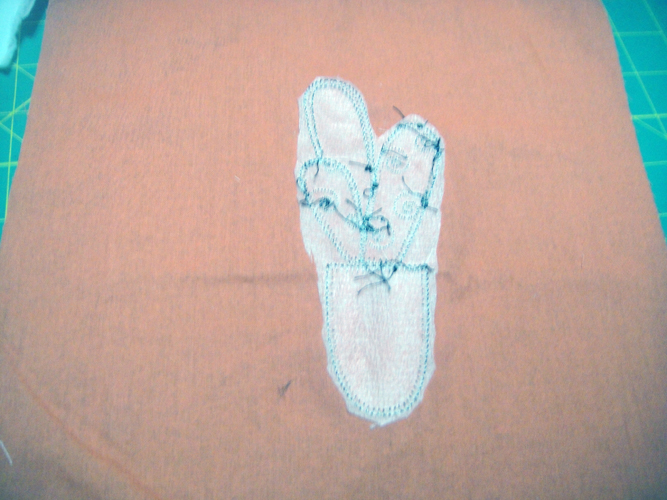
    Cut away the excess stabilizer around the back of each design.

    (Click Image to Enlarge)


    Step 12:
    Trim each rectangle of fabric down to 9” x 6” centering the applique.

    (Click Image to Enlarge)


    Step 13:
    Cut and apply a 5” x 8” rectangle of Heat N Bond Lite to the center back of each appliqued rectangle.

    (Click Image to Enlarge)


    Step 14:
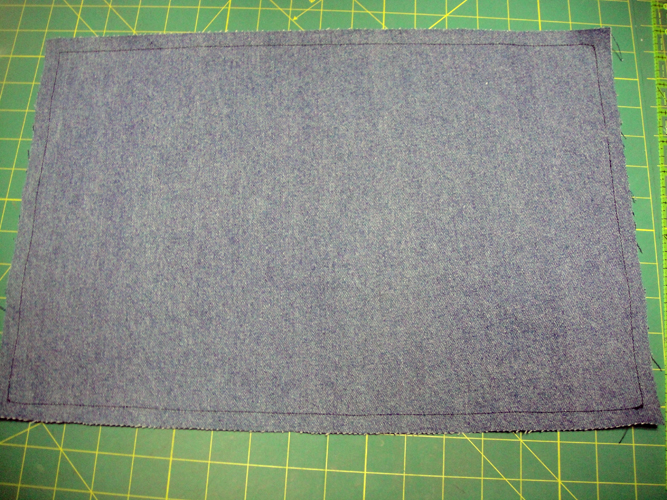
    Cut denim rectangles 13” x 19” for a finished size of 12” x 18” placemat; at your sewing machine with a short straight stitch of 2mm, stitch twice around the entire placemat ½” from the edges.

    (Click Image to Enlarge)


    Step 15:
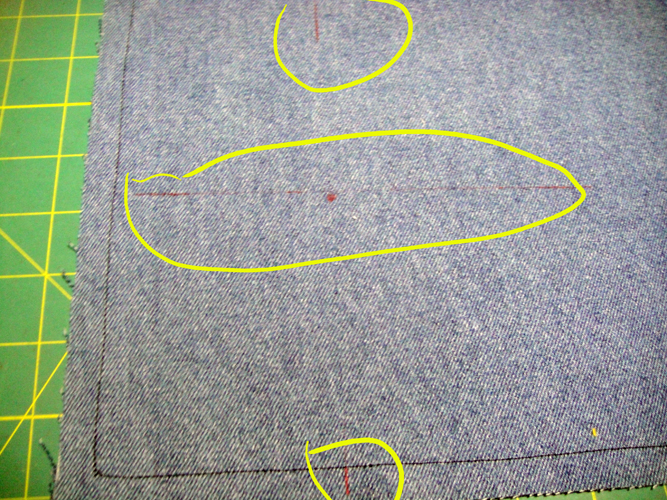
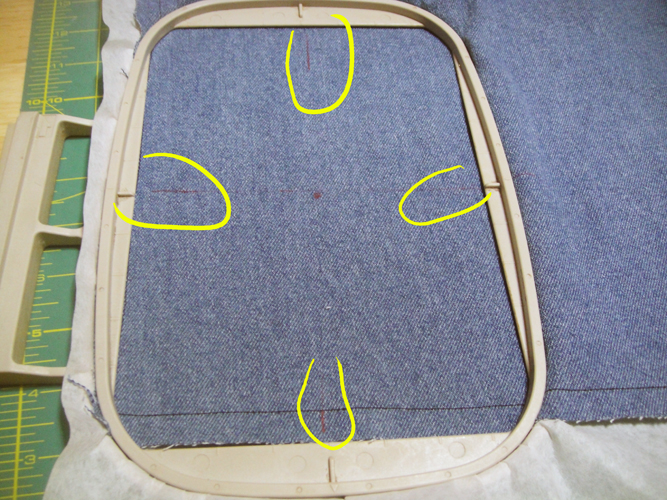
    With a fabric marking pen measure up 4.5” from the bottom of the placemat and 3.5” from the left hand edge to mark the center of the design; make additional marks to align the center and horizontal axis to assist you in hooping the placemat.

    (Click Image to Enlarge)


    Step 16:
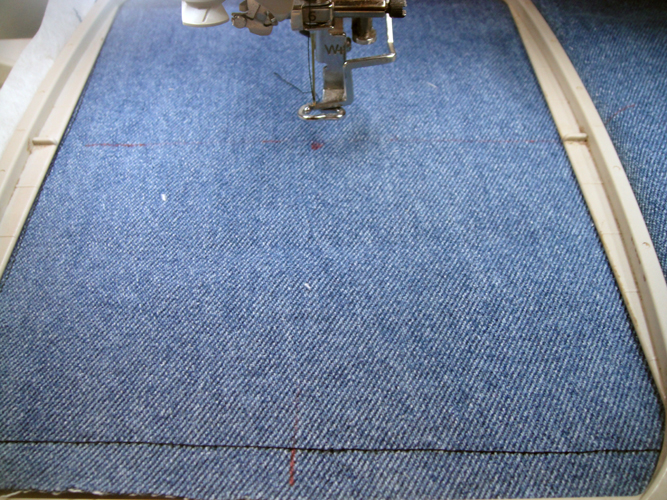
    Hoop the denim with tear away stabilizer aligning the center and horizontal marks you made on the fabric. At this placement the denim will just reach the inside bottom of the hoop and just a small amount of fabric will be in the hoop on the left, be sure the stabilizer extends further through the hoop than the fabric does.

    (Click Image to Enlarge)


    Step 17:
    Load design CACA11 into your machine; align your center point with the needle; run CS 1 for an outline for the applique in black.

    (Click Image to Enlarge)


    Step 18:
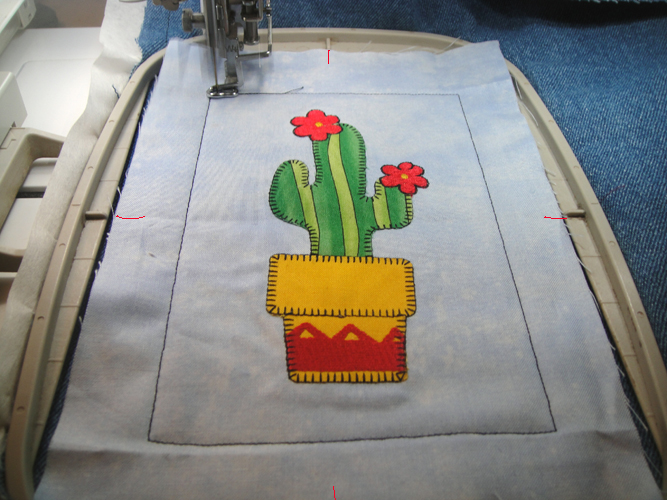
    You can add alignment marks at the center of your applique if so desired, place the applique over the outlines, do not iron down yet; you can use spray adhesive if desired, but it should stay in place if you just lay the applique on the denim; run CS 2 to tack down the applique in black.

    (Click Image to Enlarge)


    Step 19:
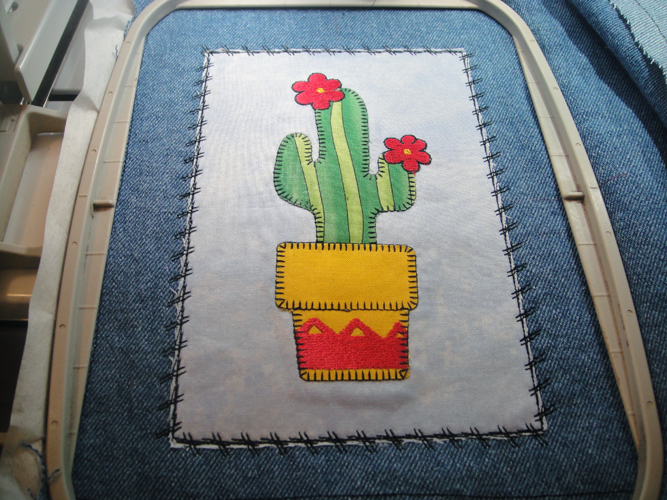
    Remove the hoop from the machine; do not unhoop; trim the applique rectangles as close as possible to the tack down stitches then iron the applique into place.

    (Click Image to Enlarge)


    Step 20:
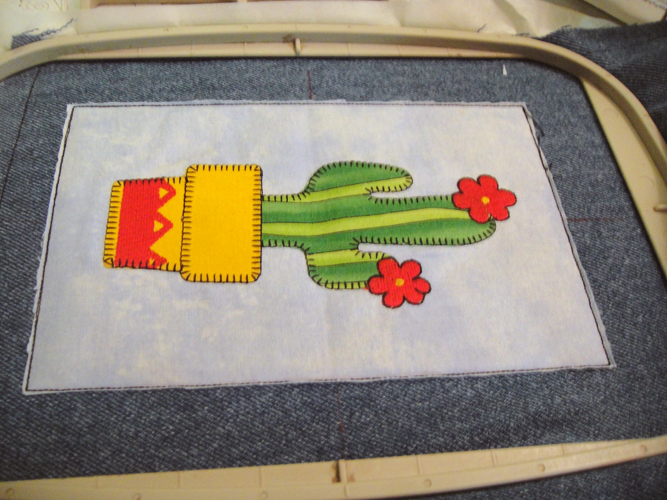
    Return the hoop to the machine and stitch the final CS in black to frame the applique; remove from the hoop and remove the tear away stabilizer.

    (Click Image to Enlarge)


    Step 21:
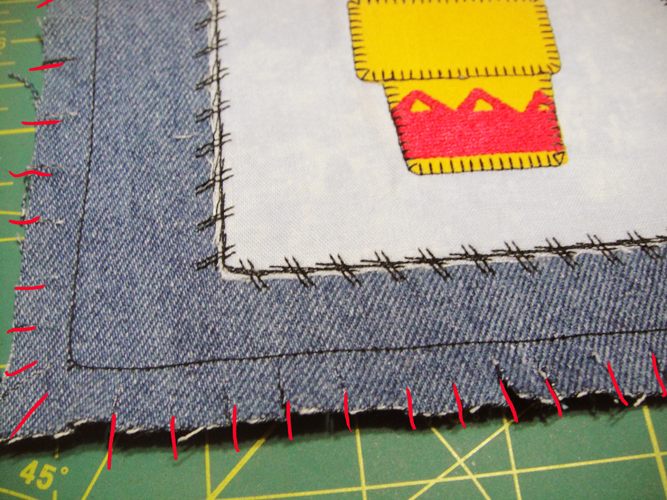
    With Rag Quilt Clippers or scissors clip from the edges of the placemat to the stitched outline, but not through the outline, every ½” or so.

    (Click Image to Enlarge)


    Step 22:
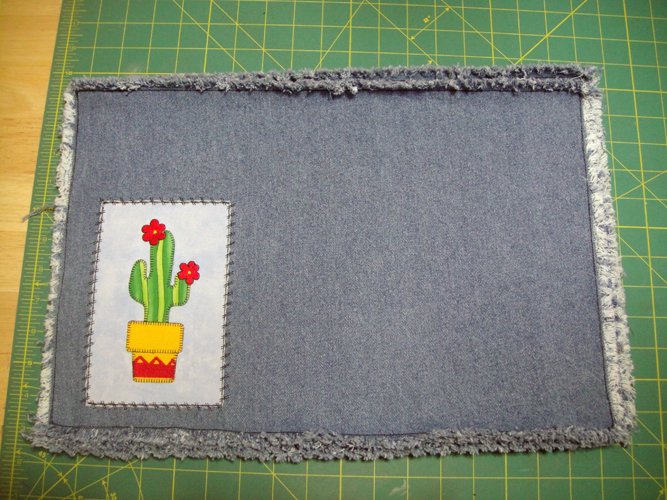
    Throw in the washer and dryer to fringe the edges. Throw an old towel into the dryer with your placemats to provide some extra tumbling action; check and clean your lint screen about every 10 minutes to avoid collecting too much lint in the dryer. Each placemat will need to be ironed slightly to have them lay flat as there is no batting or stabilizer to make them do so.

    (Click Image to Enlarge)


    Step 23:
    For the cactus appliques you will need to cut a solid piece of Kona cloth and poly mesh stabilizer to fit the 5” x 7” hoop; for the cactus appliques you will need:
    a. CACA02; 4” x 3 ½” green rectangle for the cactus and a 3” x 3” square of terra cotta for the pot.
    b. CACA03; 4” x 2 ½” rectangle of green; 4” x 2.5” rectangle of yellow print for the pot.
    c. CACA04; 4” x 4” square of green for the cactus; #” x 3” square of yellow print for the pot.
    d. CACA05; 2 ½” square for the cactus, 2 ½ x 3” rectangle of blue print for the pot.
    e. CACA06; 4” square of light olive print for the cactus; 3” square of purple print for the pot.
    f. CACA07; three different greens 3 ½” x 2 ½” for the left 2 branches of cactus; 2 ½” square for the right hand cactus and 3 ½” x 2 ½” of print for the pot.
    g. CACA08; 3 greens cut in 2” squares for the upper paddles of this cactus and one more green cut 2 ½” square; a 3” x 2 ½” print for the pot.
    h. CACA09; 4 ½” x 3” green print for the cactus; 3” square of yellow for the pot.
    i. CACA10; 3 ½” square for the cactus; 2 ½” x 3 ½” purple print for the pot.
    j. CACA11; 9” x 6” applique which is cut down from the solid background fabric that was originally cut to fit your hoop.


    Step 24:
    Congratulations! Your placemats are complete!

    For the love of embroidery…
    Pat Williams
    Meet the Author: Pat Williams
    Pat Williams
    Award winning Digitizer, Embroidery Educator, Author and a Consultant to the Industry, Pat Williams has 30 years of experience in the embroidery industry. Pat has won multiple awards for her digitizing expertise including the 2007 Impressions Awards Grand Championship, Best of Show as well as the 1st and 2nd Place Awards. Pat’s love of digitizing has afforded her the opportunity to write numerous articles for Impressions magazine in the United States and Images Magazine in Europe. In 2001 Pat was named “Embroidery Educator of the Year.” For many years Pat taught digitizing seminars at the ISS Shows in Long Beach, CA and for Compucon software. She now resides in Tucson, AZ.
    More From This Author
    Link is Broken, Please check the URL
    Exclusive Embroidery Offers!
    Copyright © {{ currentDate | date:'yyyy'}} - EmbroideryDesigns.com
    GET 50% OFF! ×