This is so “dog-gone CUTE!” That is the complement you’ll get when you stitch up this Prairie Points Tea Mat. The embroidery design is stitched on white cotton fabric, prairie points are made and stitched around the design and then then the design is finished with a hand-written label. These are so cute and fun to do you’ll want to make several for gifts. This project presumes you know how to make prairie points.
Step 1:
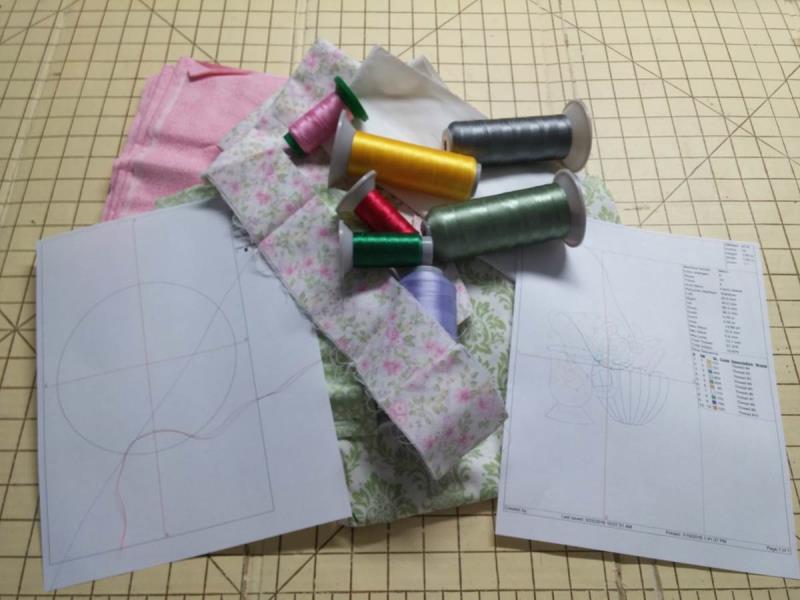
Gather the materials and read through the instructions before beginning. Print out a paper template of the design and color sequence. Choose embroidery threads that coordinate with the floral fabrics you choose.
(Click Image to Enlarge)
Step 2:
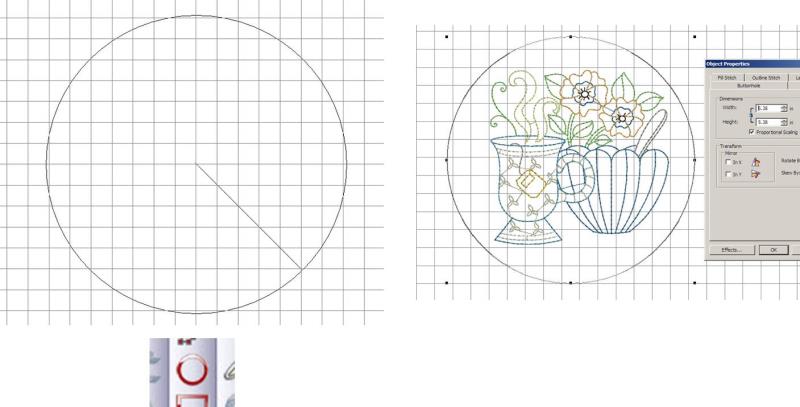
If you have embroidery digitizing software, it is easy to create a circle to print out and use a template. Using the circle tool, create a circle 5.38” in diameter. Insert the embroidery design and center it in the circle to make sure it fits while leaving space around the design. Note: if you don’t have software, use a compass and pencil to create a 5 3/8” circle on paper.
(Click Image to Enlarge)
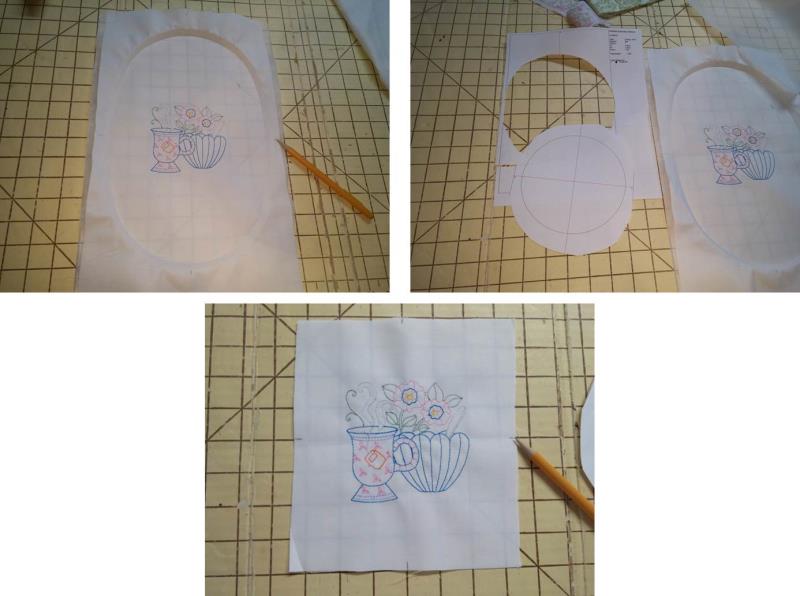
Step 3:
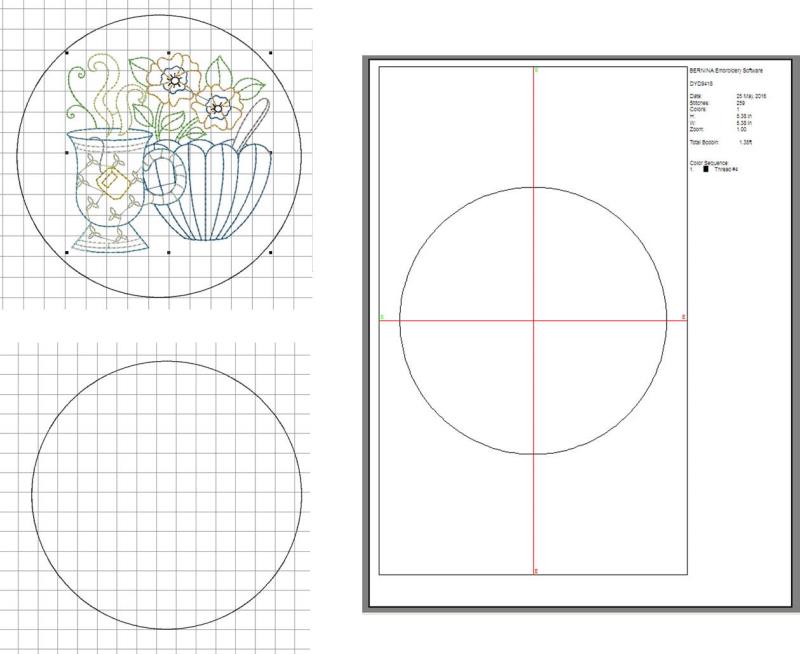
Remove the design and print a paper template of the circle.
(Click Image to Enlarge)
Step 4:
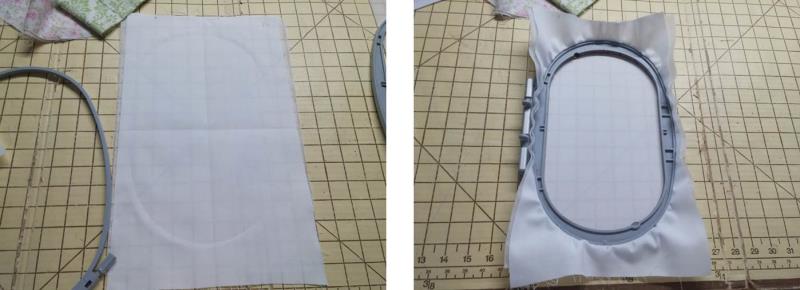
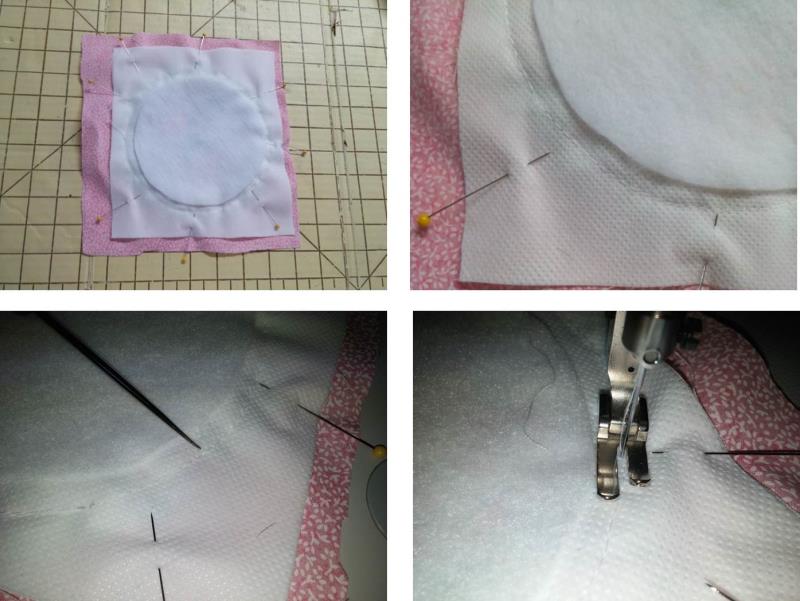
Starch and press the white fabric for hooping well. Quarter fold and lightly crease the fabric. This step is important because these fold lines will help center the circle template for aligning it to the finished embroidery. Hoop the fabric using a layer of poly mesh stabilizer.
(Click Image to Enlarge)
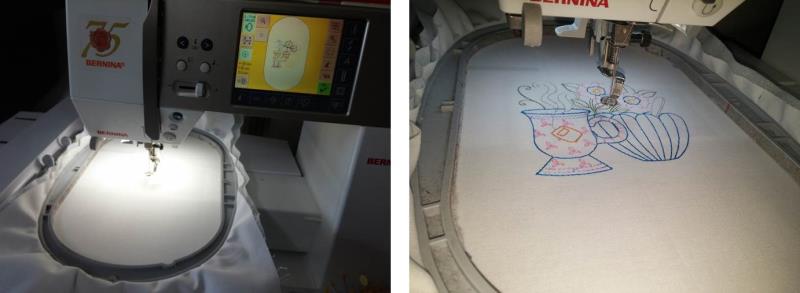
Step 5:
Load the embroidery design on the machine and stitch following the color sequence with the chosen embroidery threads.
(Click Image to Enlarge)
Step 6:
Remove the fabric from the hoop. Note: the stabilizer stays with the embroidery through the project - do not cut it away. Cut out the circle template leaving about an inch all the way around. Cut the embroidered fabric down to about 8” square, making sure the design stays centered. Use a pencil to lightly mark the four crease lines right at the cut edge of the fabric.
(Click Image to Enlarge)
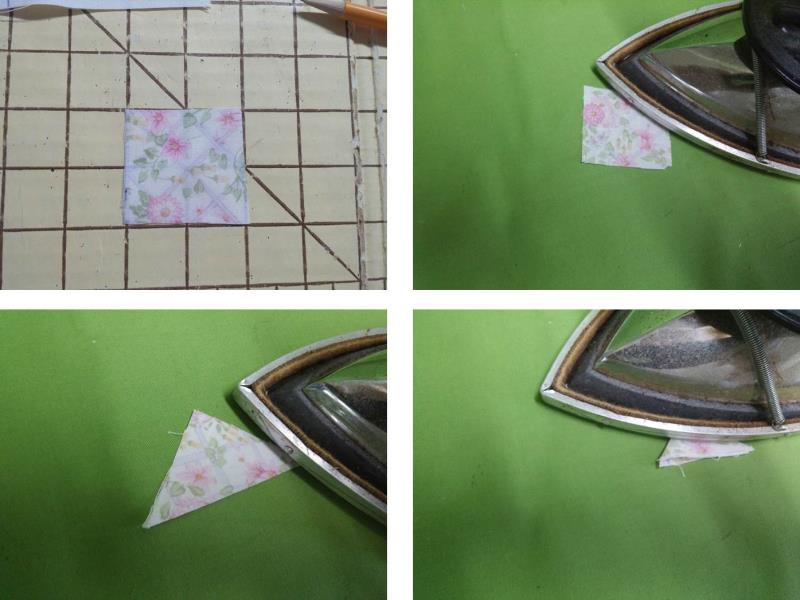
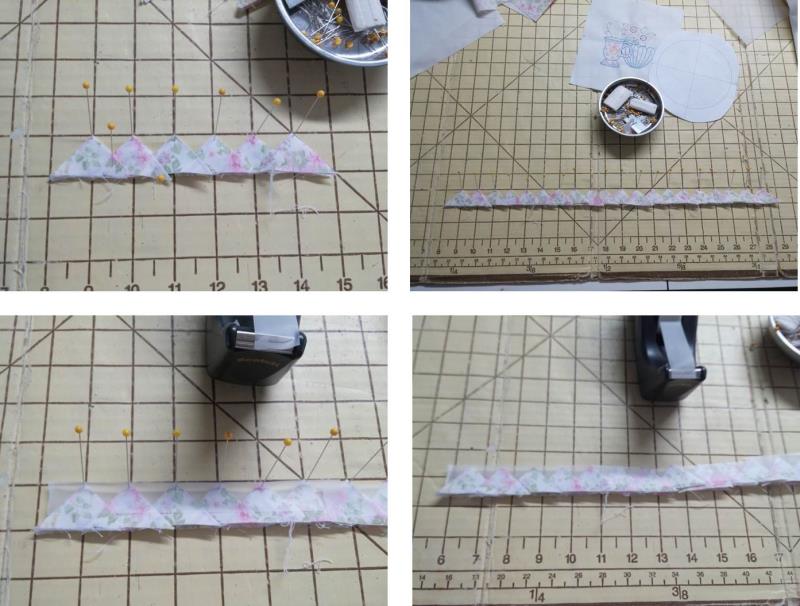
Step 7:
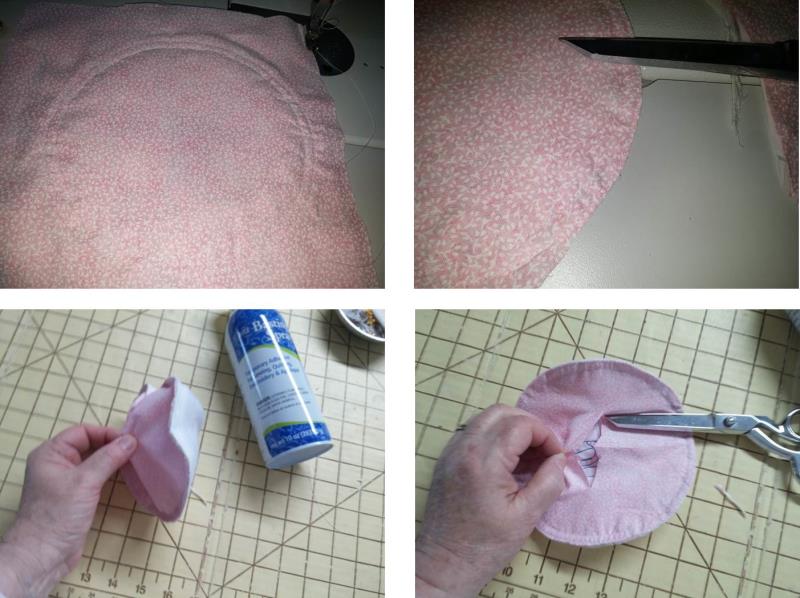
Now it is time to form the prairie points. Using the 20 2” squares of fabric form each into a prairie point by pressing the fabric flat and then folding it from corner to corner and pressing. Fold again and press.
(Click Image to Enlarge)
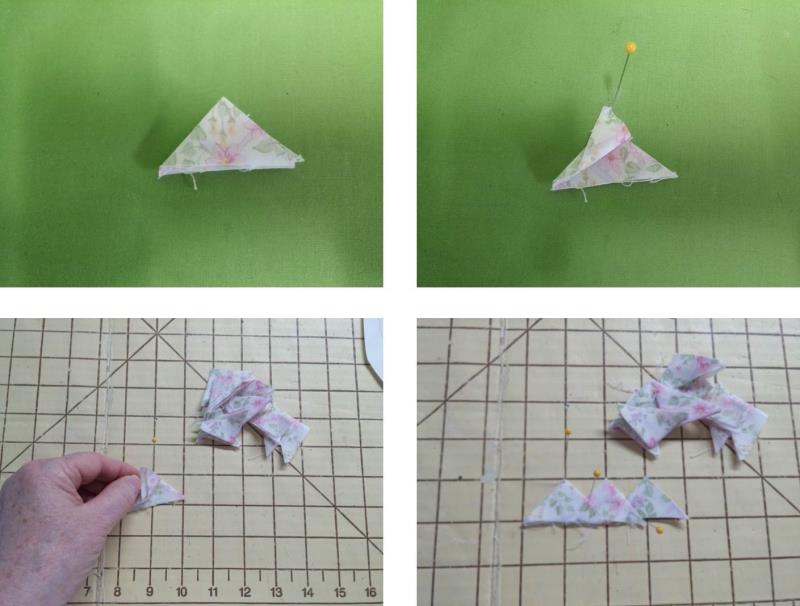
Step 8:
Repeat pressing for all 20 prairie points. Each prairie point will have a folded side on the left and an open side on the right. Use a gridded cutting board and align the prairie points in a straight line, spacing the points 1” apart by inserting the folded edge into the open edge as shown.
(Click Image to Enlarge)
Step 9:
Continue adding prairie points until all 20 are interlocked. Use lengths of cellophane tape to tape the interlocked prairie points together and then remove the pins. The tape should be along the points which will leave room at the bottom for basting the prairie points together without stitching through the tape.
(Click Image to Enlarge)
Step 10:
The tape will hold the prairie points together temporarily for basting them together. Use a basting stitch to sew the prairie points together using a scant ¼” seam. Remove the tape.
(Click Image to Enlarge)
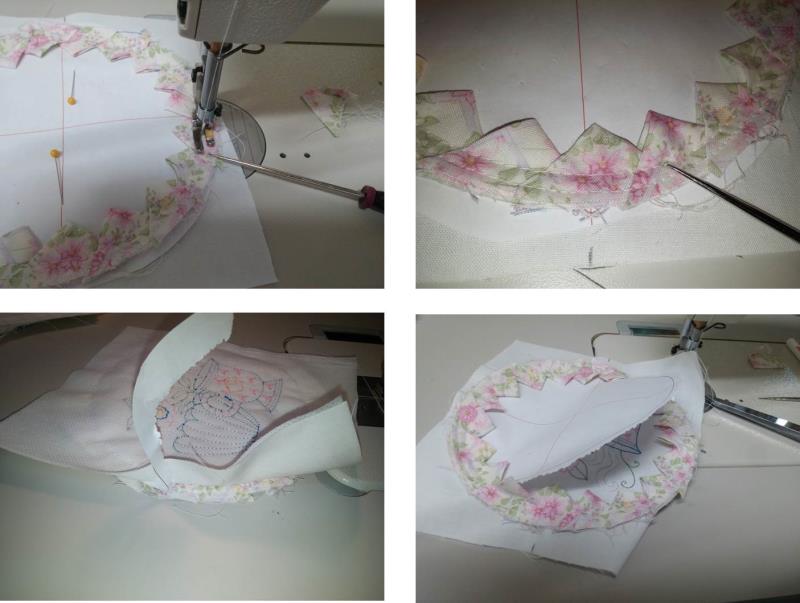
Step 11:
Using the crosshairs on the circle template, align them to the pencil marks on the embroidered piece. Place the embroidery face up on the cutting board and align the circle template over the embroidery to center it. Pin the prairie points over the line on the circle. The intersection of each point should lay right along the line of the circle. It may be easier to pin everything together or you may prefer just to pin the paper circle template to the embroidery and then form the prairie points at the machine as you baste them over the paper; I found the latter easier. Work slowly and carefully. Use the left edge of the presser foot to follow along at the circle on the paper (intersecting edges of the prairie points) and baste the prairie points in place right over the paper. You may find you have one extra prairie point than is needed (better too many than too few). If the last prairie point is not needed, simply remove the basting and the last prairie point, and then insert the last prairie point into the first to create a seamless line of prairie points around the circle.
(Click Image to Enlarge)
Step 12:
Complete the stitching all the way around. Separate the fabric pieces to expose the outer edges of the paper and remove it and then lift out the center circle of the paper. The stitching perforates the paper for easy removal.
(Click Image to Enlarge)
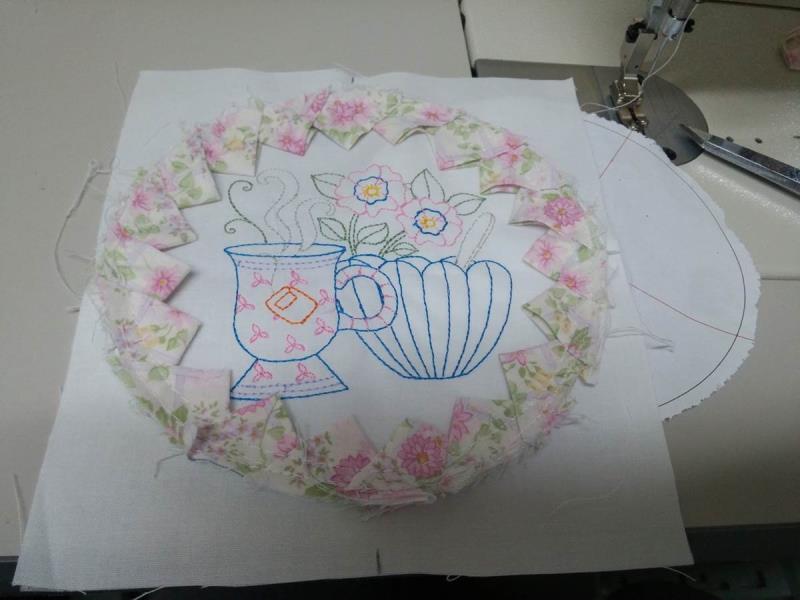
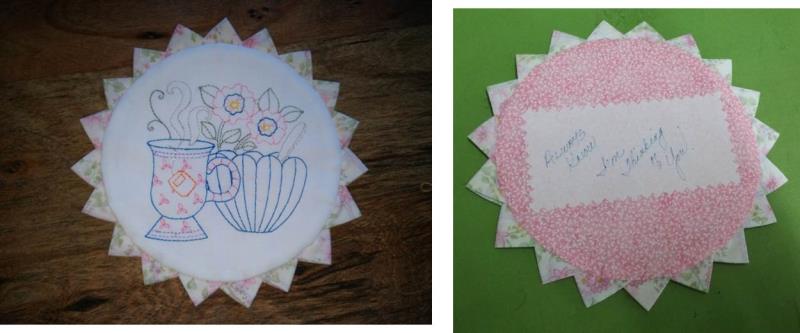
Step 13:
When the prairie points are basted on and the paper template is removed, this is what the project looks like.
(Click Image to Enlarge)
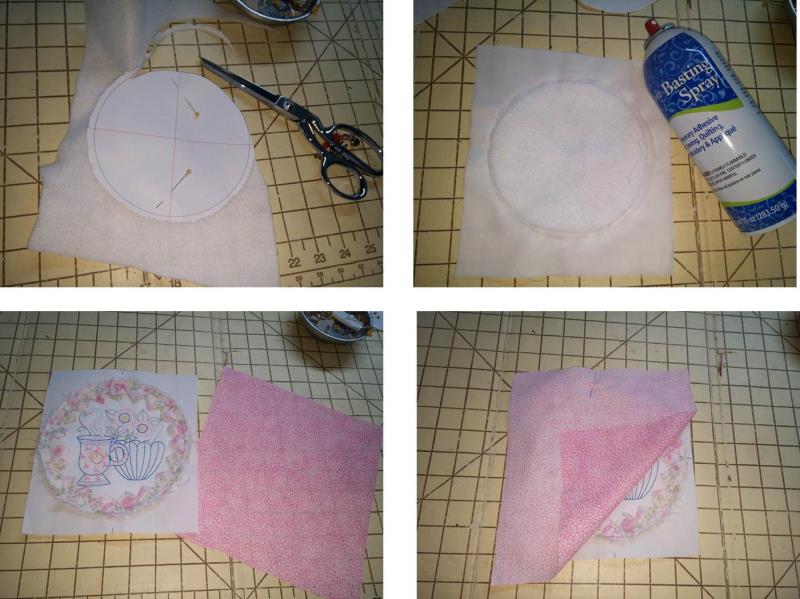
Step 14:
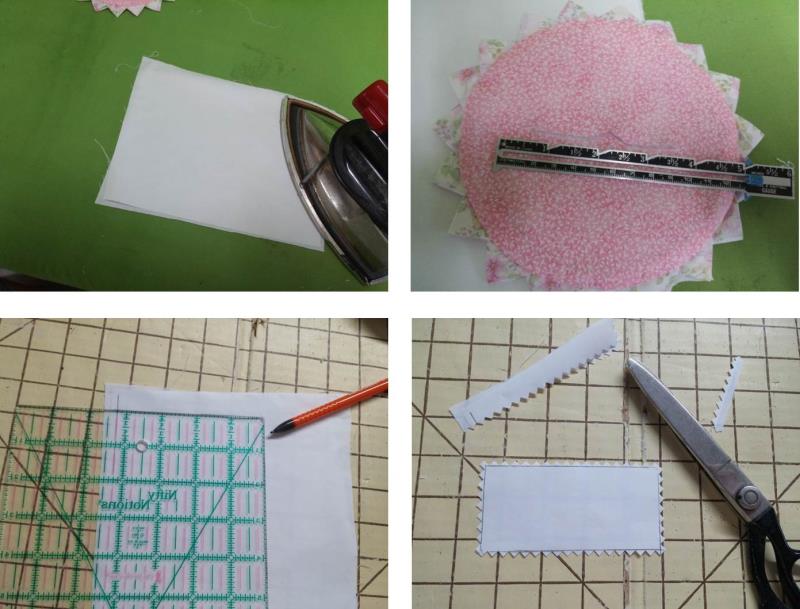
Use the circle paper template to pin to the fleece batting and cut out the batting just inside the line. Use the basting spray to center and adhere the circle of batting to the underside of the embroidery. Place the backing fabric right side over the embroidery and pin in place.
(Click Image to Enlarge)
Step 15:
Flip the piece over. The basting line (from sewing on the prairie points) will be used to sew a circle around the entire piece; the stitching will be done just to the inside of the basting line as shown by the point of the stylus. Shorten the machine stitch length to 2.0mm. Use the inside toe of the presser foot as a guide to sew a circle through all layers.
(Click Image to Enlarge)
Step 16:
Sew a second circle ¼” away from the first to create a cutting line. Use sharp shears to cut close to this second line of stitching. To turn the piece, separate the backing layer from the other layers. Cut a slit in the backing fabric only; make the slit only large enough to be able to turn the piece right side out.
(Click Image to Enlarge)
Step 17:
Turn the piece right side out through the slit, gently pulling on each prairie point to form a nice circle and expose each prairie point. From the back side, press the edge of the circle and then bring the cut edges together to meet; press.
(Click Image to Enlarge)
Step 18:
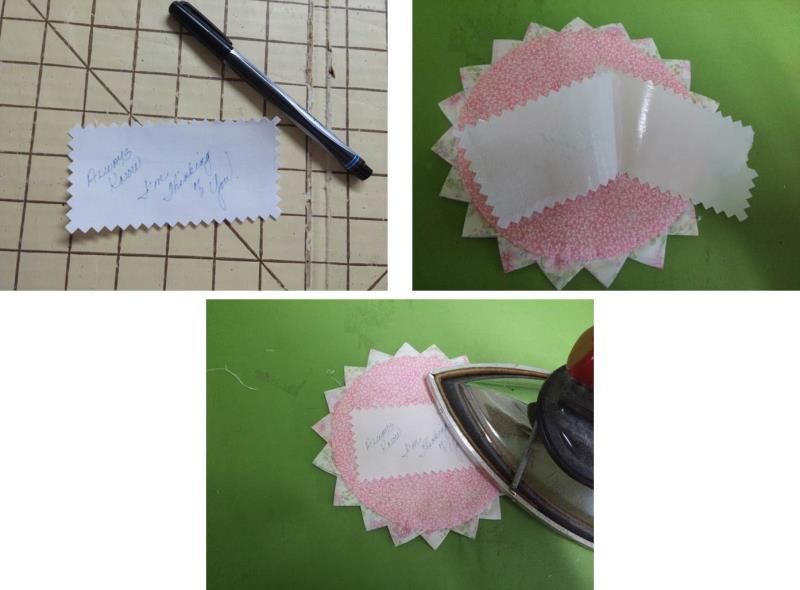
Cut a piece of Heat ‘n Bond Lite and press it to the smaller white fabric piece for the label. Measure the cut slit. Using that measurement, add about 1” and measure and cut out a label (for the project the label measured 4” x 2” and was cut out using a pinking shears). Make the label wide enough for writing your message.
(Click Image to Enlarge)
Step 19:
Use the fine point Sharpie pen to write on the label. Remove the paper backing and center and press the label to the back of the mat over the slit.
(Click Image to Enlarge)
Step 20:
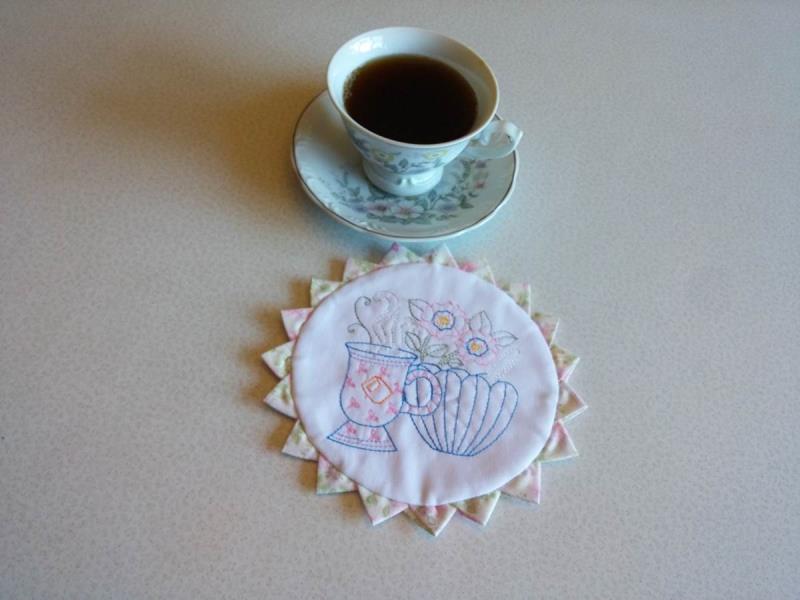
The finished Prairie Points Tea Mat from the front and back.
(Click Image to Enlarge)
Step 21:
Pour a cup of tea and enjoy your new tea mat.
(Click Image to Enlarge)
Step 22:
These are so much fun to do and are so cute when the threads and fabrics are coordinated. They give an old-fashioned look to a beautiful project. You’ll honestly want to make several so you can keep one and you can give these as gifts. Though not planned, I chose this tea cup and saucer after the project was completed and as it turned out, when the saucer and cup were placed on the tea mat, the prairie points peaked out from underneath the saucer perfectly! If you’d like this to happen for your project, you may wish to use the saucer dimension as a guide for doing the circle and number of prairie points needed - just be sure the diameter of the saucer is large enough to allow the embroidery to be centered.
Ramona Baird has been in the embroidery industry for over 23 years. She and her husband owned a commercial and retail embroidery store in Arizona for many years. She is an experienced digitizer having been mentored by award-winners Pat Williams and Lindee Goodall. Ramona is a contributor to “Creative Machine Embroidery” magazine having 5 covers to her credit. Ramona has worked for Wilcom America and served many years as Education Director for the American Sewing Guild. With a degree in fashion design, she is able to design and execute patterns which Pat Williams says are “out of the box” in creativity and application. Ramona likes to challenge the boundaries of embroidery and bring new and exciting designs, ideas, and projects to EmbroideryDesigns.com. She wants embroiderers of all levels to increase their skills and enjoyment in using their embroidery machine for gift-making and personal pleasure.