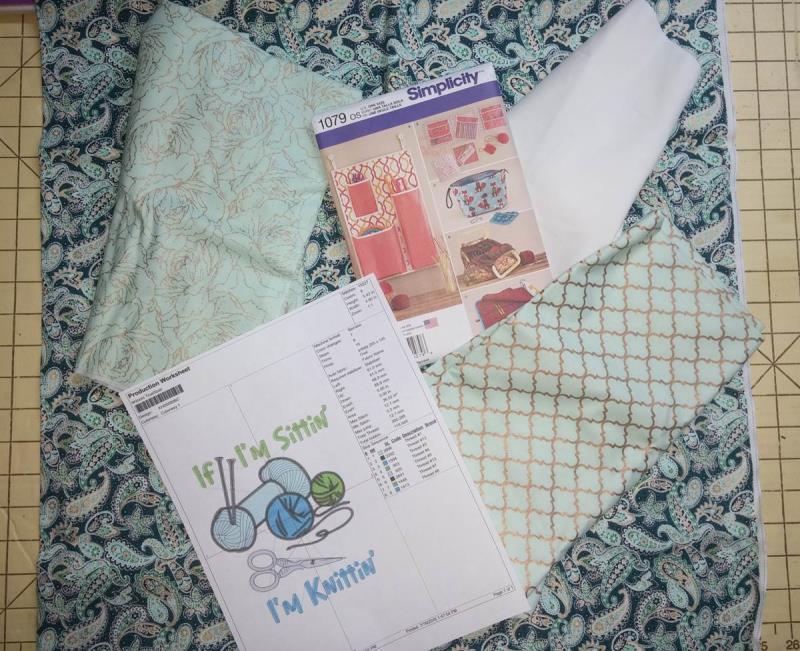
The Simplicity pattern was used as the basis for this project. Read and follow the pattern instructions for purchasing the amount of fabric needed, cutting and sewing the project. In place of fabric for pattern piece 20 (flap), a piece of fleece batting was used. The “If I’m Sittin’ I’m Knittin’” embroidery design is centered and stitched on the fleece before the piece is sewn in the project. Fleece batting was used to sandwich between the two pieces 18 (main body of the project) and quilted in place (this was not included in the pattern instructions). Also, in place of just plain elastic, a scrap of material was used to cover the elastic as you will see in the instructions. This project will make a great gift for my knitting friend!
Step 1:
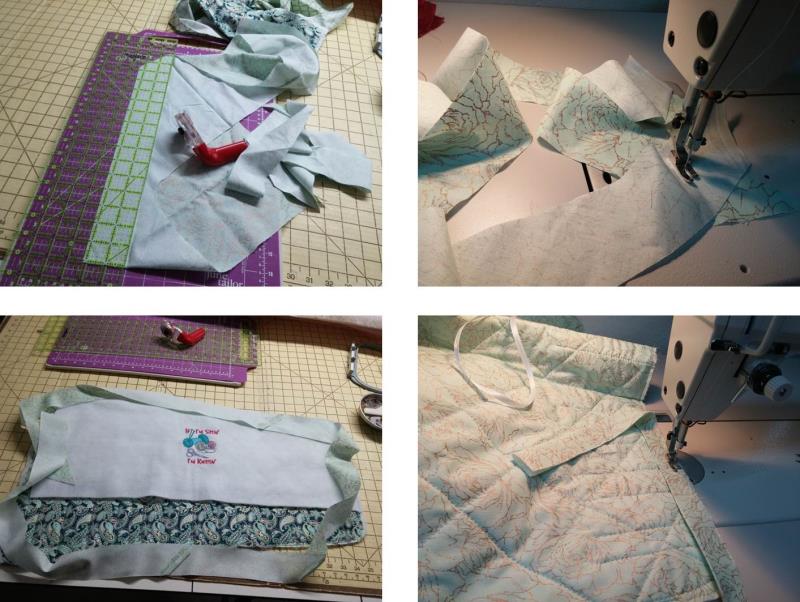
Gather the materials and read through the instructions before beginning. Print out a paper template of the design and color sequence. View D of the pattern was used for this project. For this project three coordinating fabrics were used and the embroidery threads were chosen to coordinate with the fabrics.
(Click Image to Enlarge)
Step 2:
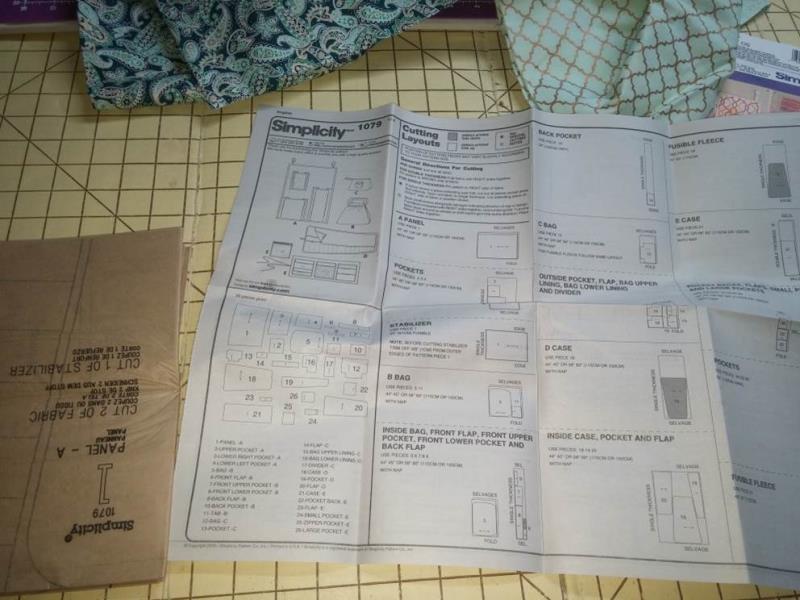
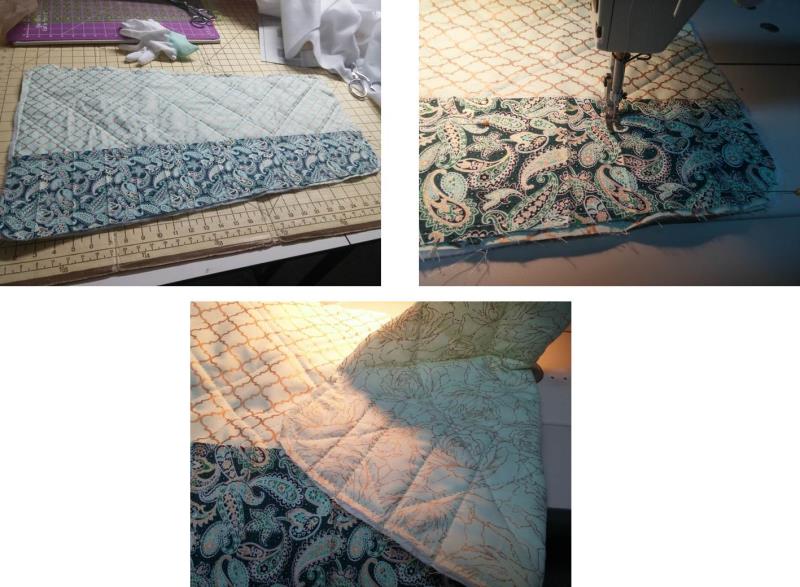
After the pattern is purchased, use the pattern guide sheet for fabric layout and cutting. Though not stated in the pattern instructions, a piece of fleece batting was cut from pattern piece 18 to sandwich between the two layers of that piece and lightly quilted.
(Click Image to Enlarge)
Step 3:
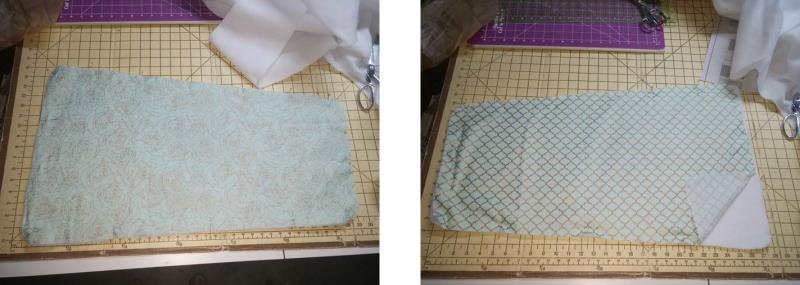
Place the batting between the two fabric 18 pieces and pin all three layers together.
(Click Image to Enlarge)
Step 4:
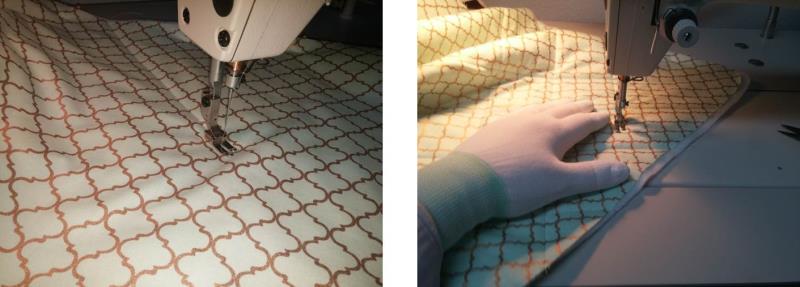
Quilt as desired. For the project, a few rows of straight line quilting were done using the grid on the fabric as a guide. Hint: use quilting gloves to aid in gripping the fabric, making the quilting easier.
(Click Image to Enlarge)
Step 5:
Follow the pattern instructions for creating and sewing the pocket onto the project. Because the layers were quilted in the project, the stitching for the pocket goes right through all the layers.
(Click Image to Enlarge)
Step 6:
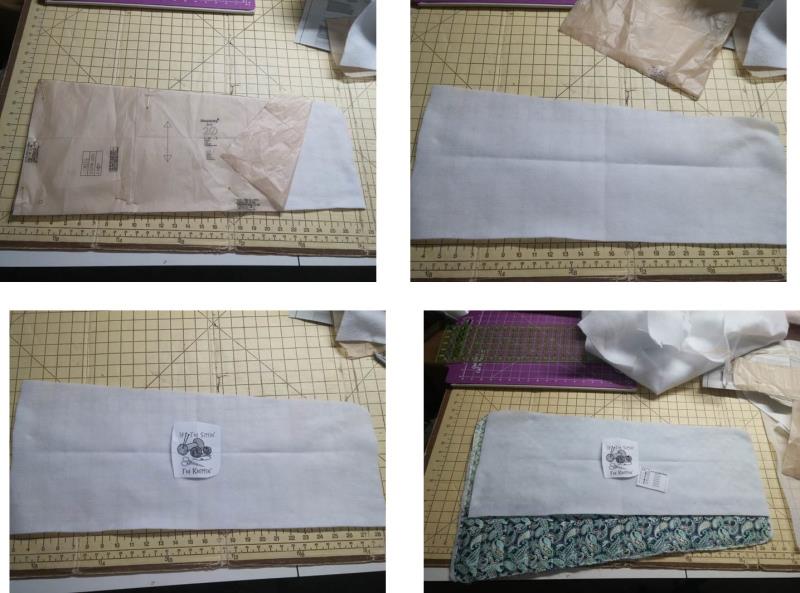
For pattern piece 20 (flap), cut a piece of fleece. Find the center of the flap and center and pin the paper template of the embroidery design in place. The lower right picture shows how the flap is placed on the project.
(Click Image to Enlarge)
Step 7:
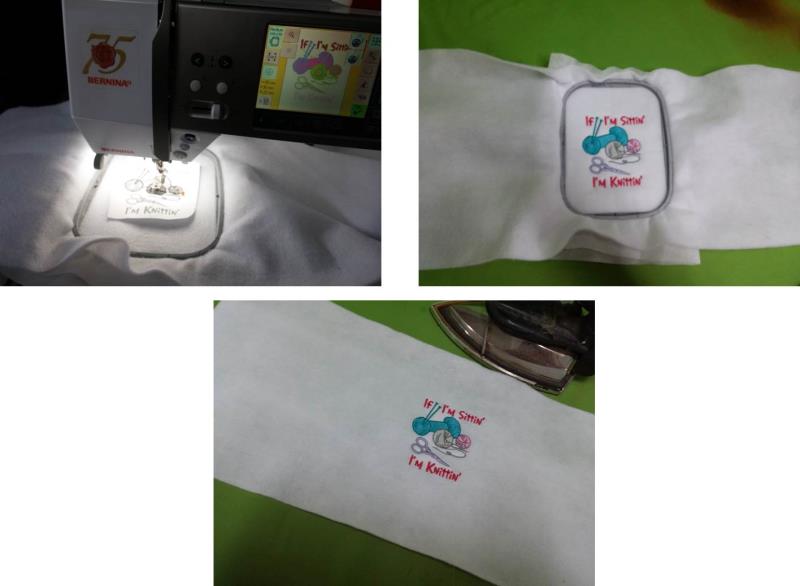
Load the embroidery design, “If I’m Sittin’ I’m Stitchin’ “ on the machine. Hoop the fleece with a layer of tearaway stabilizer. Place the hoop on the machine and center the needle over the center mark on the paper template. Stitch the design following the color sequence with the chosen embroidery thread colors. After the design has finished stitching, remove the fleece from the hoop and very carefully remove the excess stabilizer. Lightly steam the fleece (do not place the iron directly on the fleece).
(Click Image to Enlarge)
Step 8:
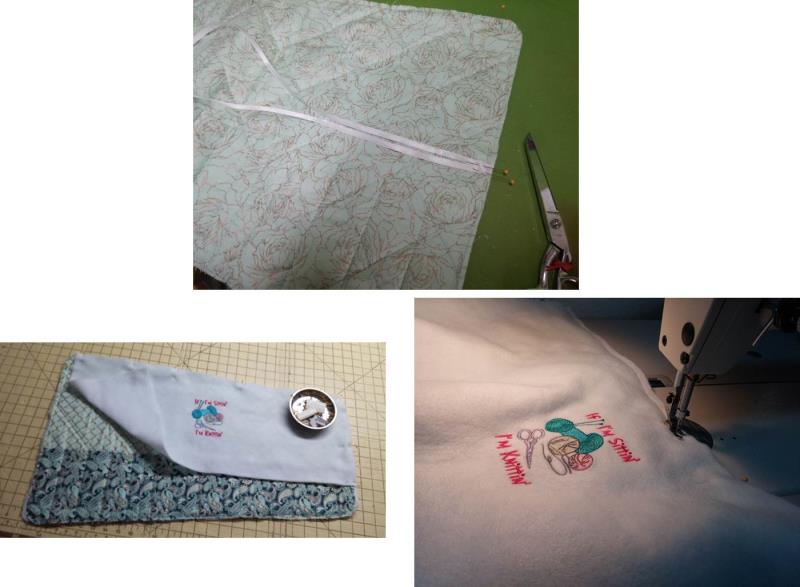
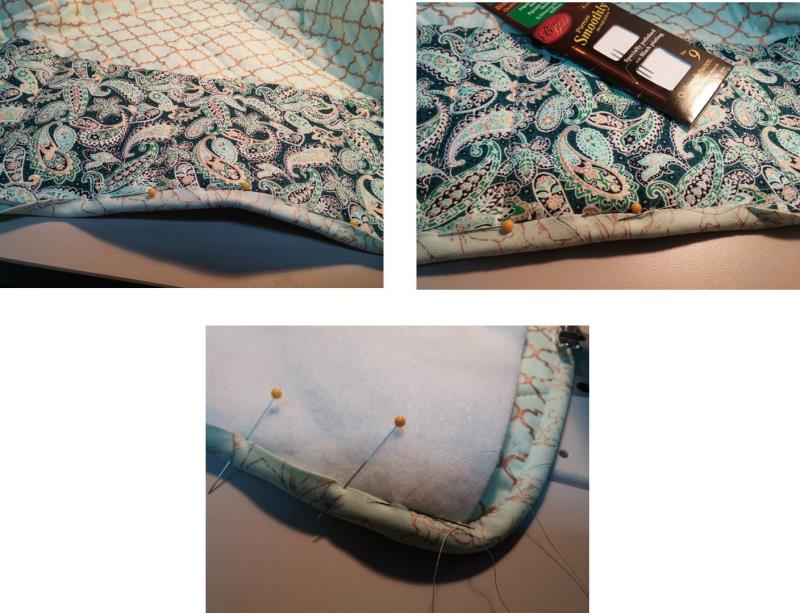
Continue following the pattern instructions for sewing the project together. For this project in place of the loop and button, the piece of ribbon was placed at the center of the longer side edge. The embroidered flap was pinned and basted in place.
(Click Image to Enlarge)
Step 9:
For this project binding, scraps of fabric were cut on the bias, sewn together, and then sewn on around all the edges from the right side.
(Click Image to Enlarge)
Step 10:
The binding was then turned to the pocket/flap side and hand sewn in place. When sewing the binding by hand around the fleece flap, be sure to catch the fabric underneath - not just the fleece.
(Click Image to Enlarge)
Step 11:
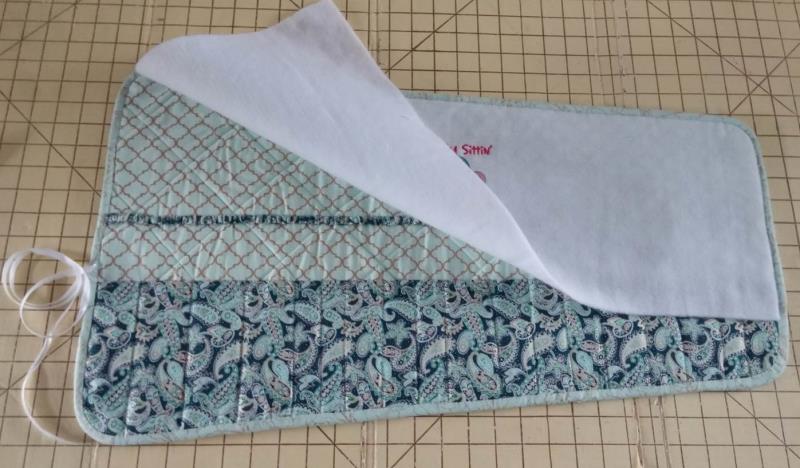
Here is the project completed. In place of just the elastic, a scrap of the pocket fabric was cut 1 ½ times the length of the pocket by 1 ¼” wide. The piece was sewn right sides together, lengthwise, using a ¼” seam, the casing turned and the elastic inserted. The covered elastic was then placed and sewn through all layers as stated in the pattern instructions.
(Click Image to Enlarge)
Step 12:
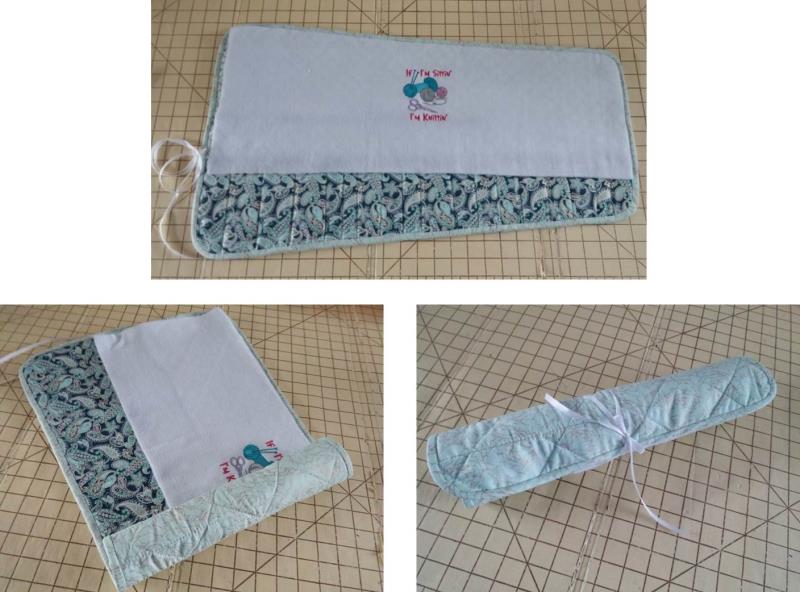
Place knitting needles, crotchet hooks, and notions in the pockets, roll everything together and tie with the ribbon.
(Click Image to Enlarge)
Step 13:
What a beautiful gift to be enjoyed by you or a friend who knits.
Ramona Baird has been in the embroidery industry for over 23 years. She and her husband owned a commercial and retail embroidery store in Arizona for many years. She is an experienced digitizer having been mentored by award-winners Pat Williams and Lindee Goodall. Ramona is a contributor to “Creative Machine Embroidery” magazine having 5 covers to her credit. Ramona has worked for Wilcom America and served many years as Education Director for the American Sewing Guild. With a degree in fashion design, she is able to design and execute patterns which Pat Williams says are “out of the box” in creativity and application. Ramona likes to challenge the boundaries of embroidery and bring new and exciting designs, ideas, and projects to EmbroideryDesigns.com. She wants embroiderers of all levels to increase their skills and enjoyment in using their embroidery machine for gift-making and personal pleasure.


.jpg)


.jpg)