These easy-to-do “ITH Quilted Coffee Potholders” have many uses and would be great sellers at craft fairs and for gifts. The center part of the design is quilted in the hoop!
Materials listed are for the larger potholder (adjust the materials list measurements if making the potholder smaller). The center quilted coffee embroidery design should remain the same, but you can adjust the borders to make the potholders the size you would like.
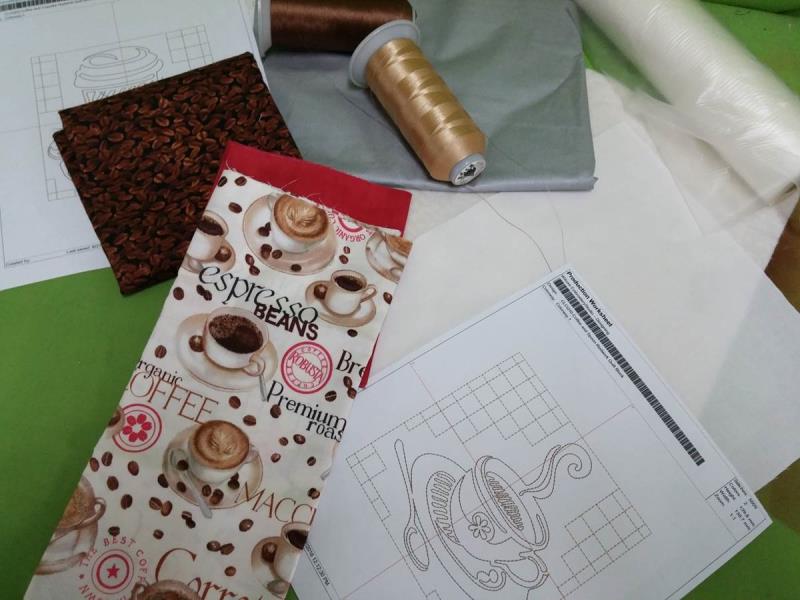
Fabrics:
1 piece of 100% white Kona cotton fabric to fit hoop
2- 1 1/2” x 6” strips red fabric (inside border left and right sides)
2- 1 ½” x 9” strips of red fabric (inside border top and bottom sides)
2- 2 ½” x 10" coffee themed fabric (outside border left and right sides)
2- 2 ½” x 13" coffee themed fabric (outside border top and bottom sides)
1- 13" square ironing board cover fabric (for back side of potholder)
Binding made from coffee bean fabric to go around potholder for final binding (or use purchased binding)
Cotton Batting:
1 piece to fit hoop (for embroidery)
1 piece 13" square (for second piece to sandwich)
1 piece water soluble stabilizer to fit hoop
Embroidery thread as stated for design (or to coordinate with coffee-themed fabric colors)
Sewing thread to coordinate with fabrics to sew on the borders and binding
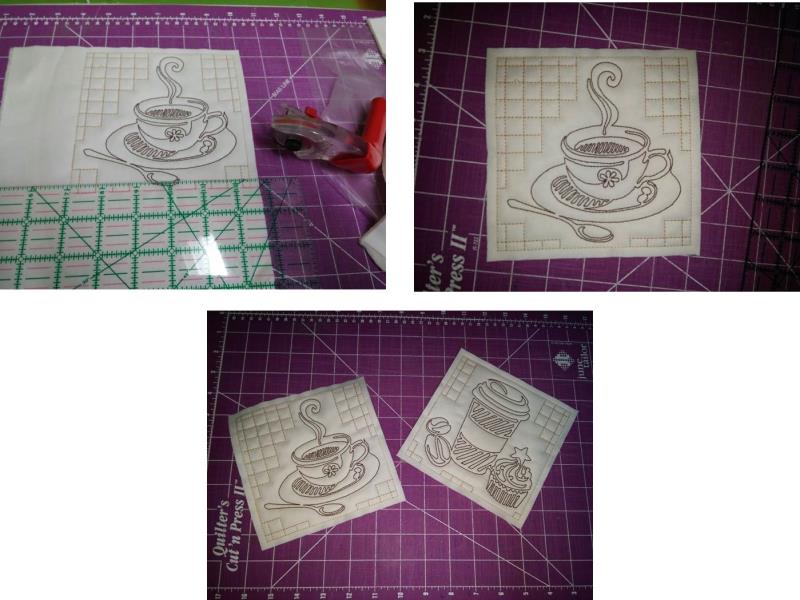
There are 10 “Quilted Coffee” designs to choose from that will work with this project. Each embroidery design quilts the center portion ITH (in-the-hoop) and takes approximately 9-12 minutes to stitch making this project fast and oh-so easy! This project presumes you know basic quilting and binding techniques. Choose fabrics to coordinate with kitchen colors; use a solid colored fabric for the inner border and coffee-themed fabric for the outer border. Adjust the border sizes to make the potholders as large or small as you wish. Be careful not to press directly on the quilting lines as this would flatten the quilted layers. Since the designs stitch up fast, buy enough fabric and do several in one afternoon!
Note: The designs were made to max out the Bernina embroidery machine "Large" hoop. Check carefully to make sure the design will fit within the hoop you have for your machine.
Step 1:
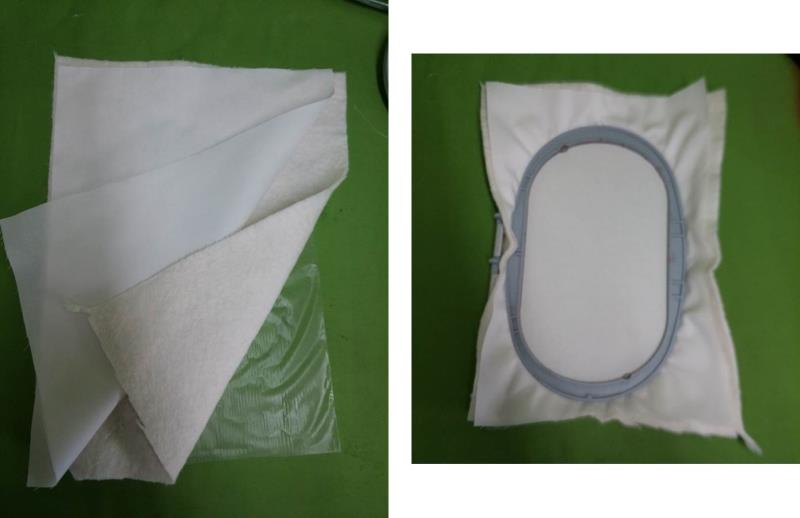
Gather the materials and read through the instructions before beginning. Print out a paper template of the design and color sequence. Make sure to use 100% cotton batting. Any polyester in batting will transfer heat through the fabric. You may also make the potholder thicker by adding one, two, or more layers of batting in the final project steps.
(Click Image to Enlarge)
Step 2:
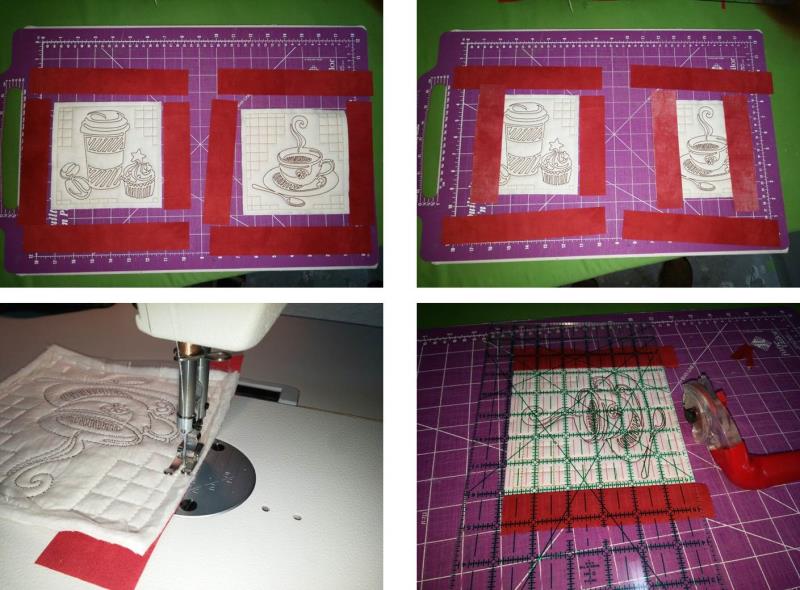
The embroidery design quilts the fabrics together ITH. Hoop the fabric in this order: bottom-water soluble stabilizer, middle-cotton batting (for hoop piece), top-white Kona cotton fabric. Hoop all the layers together. No additional stabilizer is needed. The water soluble on the bottom will make stitching easy so the batting doesn’t create lint in the bobbin case and prevent the cotton batting from catching on the throat plate while stitching.
(Click Image to Enlarge)
Step 3:
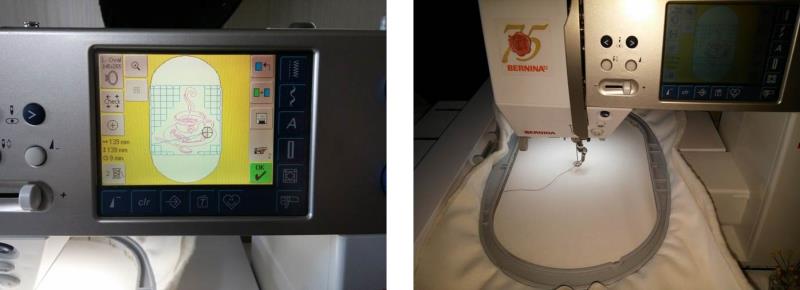
Load the chosen CLCQ “Coffee” design on the machine and load the hooped fabrics.
(Click Image to Enlarge)
Step 4:
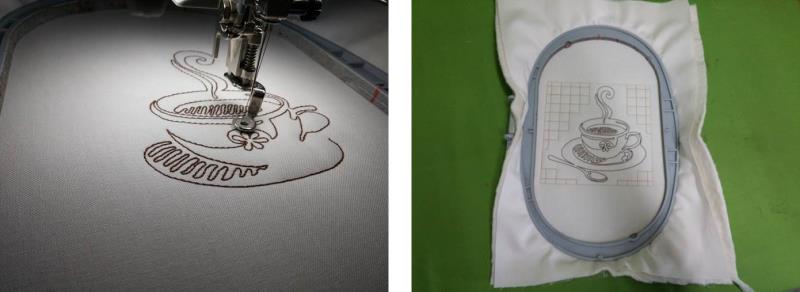
Stitch following the color sequence. The stitching quilts all the fabrics together. Remove the finished stitching from the machine.
(Click Image to Enlarge)
Step 5:
Use a ruler and rotary cutter to trim the fabric leaving ¼” seam allowances. Place the ruler at the ¼” line along the outer most stitching line of the embroidery design and trim away the excess fabric. Repeat for the remaining sides.
(Click Image to Enlarge)
Step 6:
Next will be to sew on the inside border. The fabrics are cut the width needed - but longer than needed - to make the strips easier to work with and then they are trimmed after sewing. Lay the embroidered center on the mat and then lay the inner borders as shown with the shorter ones to the left and right and the longer ones at the top and bottom. Beginning with the left and right borders, place the fabric strips right sides together over the quilted square. To sew the borders on, work from the back side of the quilted square. Stitch directly over the outer most stitching line; repeat for the other side. Use the ruler and rotary cutter to trim the excess fabric even with the top and bottom of the quilted square.
(Click Image to Enlarge)
Step 7:
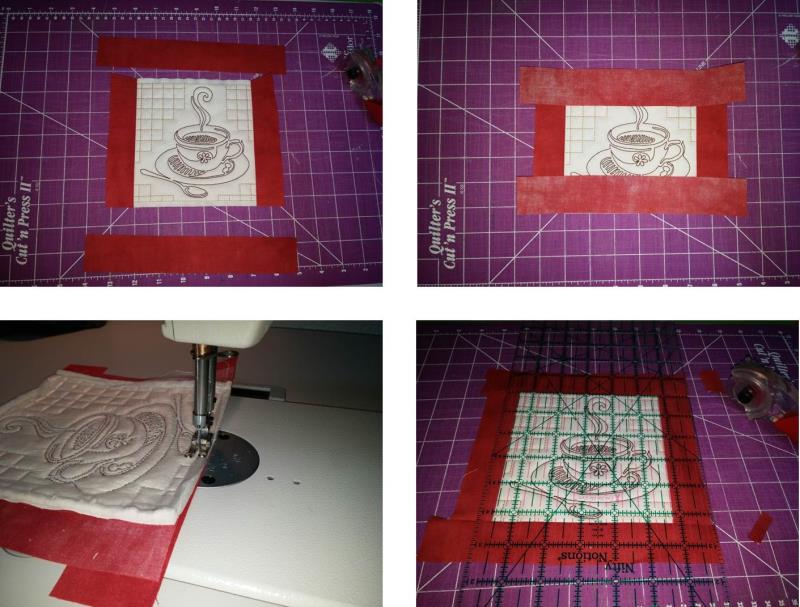
Repeat the steps above to sew on the top and bottom inner border strips, sewing them on and trimming them even with the outer edges of the inner border strips; the shorter ones will go to the sides and the longer ones to the top and bottom.
(Click Image to Enlarge)
Step 8:
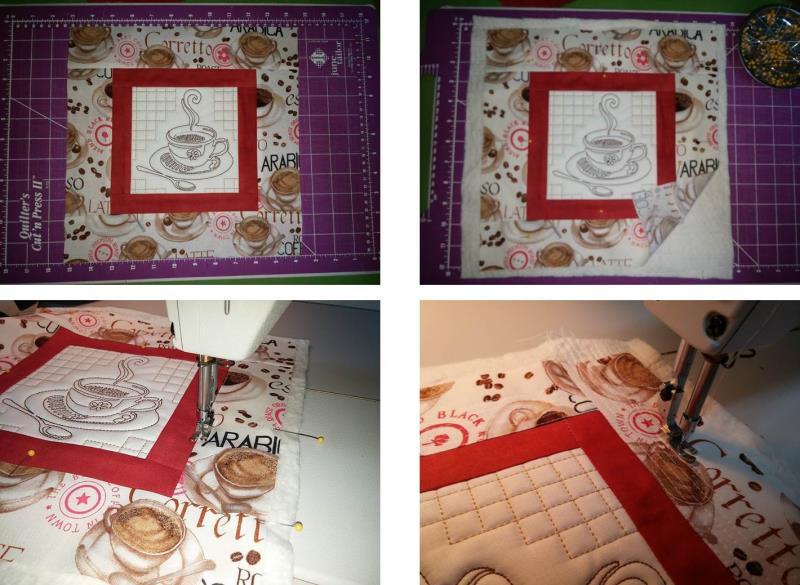
Now sew on the coffee-themed outer border strips using ¼” seam allowances; do the sides first and trim them and then sew on the top and bottom strips, and square up the pot holder top. Place the 13 square of batting behind the pot holder top and pin in place. Quilt as desired. For the project, channel stitching was done on all sides with ¼” spacing.
(Click Image to Enlarge)
Step 9:
Trim the excess batting even with the fabric, squaring up the potholder. Place the piece of ironing board fabric, silver side down, behind the potholder top. Baste the silver fabric to the potholder top and trim away the excess silver fabric.
(Click Image to Enlarge)
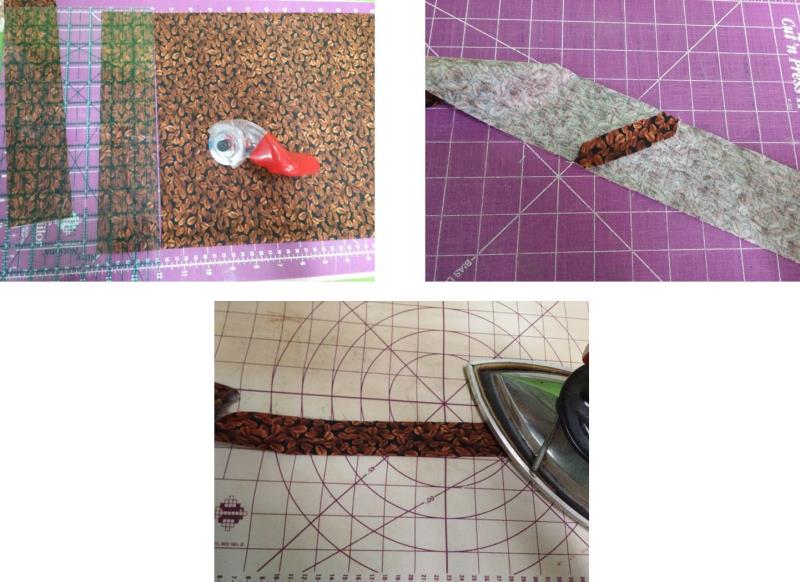
Step 10:
Use your favorite binding technique to bind the outer edge of the coffee potholder. Cut strips of coffee bean fabric sewing the strips together, pressing the binding in half lengthwise and sewing the binding to the potholder.
(Click Image to Enlarge)
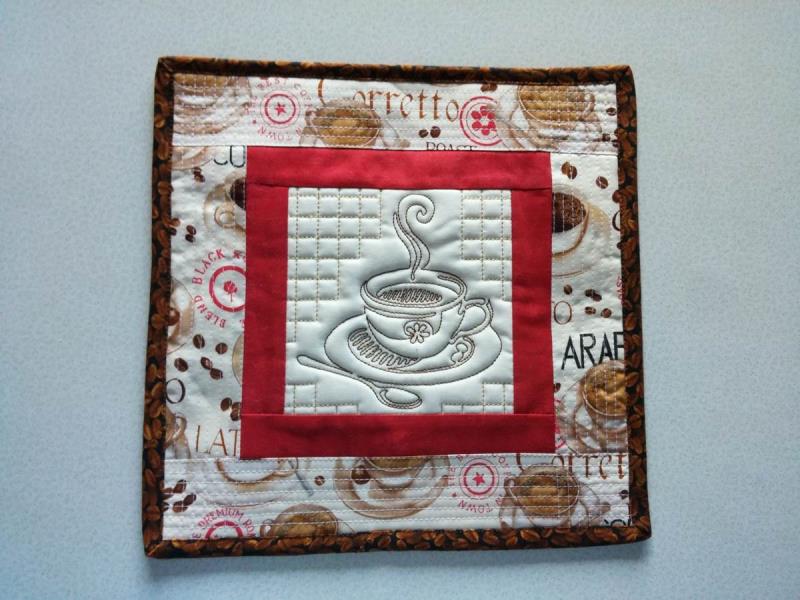
Step 11:
Congratulations on completing the ITH Quilted Coffee Potholder.
(Click Image to Enlarge)
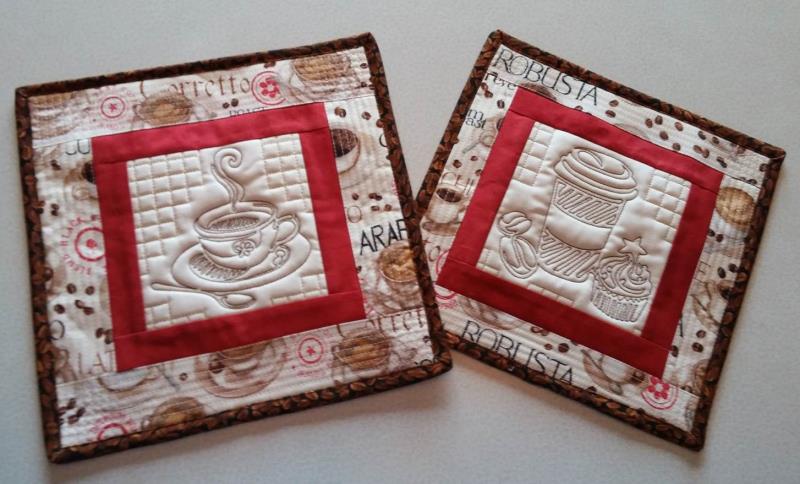
Step 12:
Make several for yourself, craft fairs, friends and family - and even to have on hand to wrap up quickly for a housewarming gift!
(Click Image to Enlarge)
Step 13:
Change the inner border fabric to coordinate with kitchen colors, and also change the border sizes to make the potholder smaller or increase the border sizes and add a couple more layers of cotton batting to make the potholder into a hot pad mat.
Ramona Baird has been in the embroidery industry for over 23 years. She and her husband owned a commercial and retail embroidery store in Arizona for many years. She is an experienced digitizer having been mentored by award-winners Pat Williams and Lindee Goodall. Ramona is a contributor to “Creative Machine Embroidery” magazine having 5 covers to her credit. Ramona has worked for Wilcom America and served many years as Education Director for the American Sewing Guild. With a degree in fashion design, she is able to design and execute patterns which Pat Williams says are “out of the box” in creativity and application. Ramona likes to challenge the boundaries of embroidery and bring new and exciting designs, ideas, and projects to EmbroideryDesigns.com. She wants embroiderers of all levels to increase their skills and enjoyment in using their embroidery machine for gift-making and personal pleasure.