


PROJECT INSTRUCTIONS


PROJECT INSTRUCTIONS

Computer Basics for the Machine Embroiderer - Part 2 Embroidery Project
By
Bonnie Landsberger
on
July 28, 2016
PROJECT DETAILS
Description
Computer Basics for the Machine Embroiderer - Part 2
Project Preview Video

QUICK VIEW
Secretary Do What?
$8.79
Circle Price: $7.91

QUICK VIEW
Customer Service
$4.99
$1.99
Circle Price: $1.99

INTERLACED HEARTS
free
Circle Price: $0.00

Embrilliance Thumbnailer Software
$39.00
Circle Price: $35.10


Computer Basics
for the Machine Embroiderer – Part 2 |
 | You don’t need to be a computer geek to work with
embroidery files, but learning how to execute a few tasks can get your design
to the machine and stitched much faster and with less stress. Computer Basics for the Machine
Embroiderer - Part 1 offers a brief explanation of the basics, and following are answers
to common questions and steps to carry out various tasks that will help you
along the way. Where’s my file? Most Internet browsers on both Mac and Windows operating systems will save your downloaded files by default to a folder named “Downloads”. On a Mac, double-click the Finder icon on the Dock bar. On Windows, click on the Libraries folder found on the Task bar, or open any folder on your computer, such as the Documents folder. |
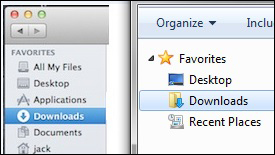 | Then look to the left hand panel and the Downloads folder
is usually located under “Favorites” at the top of the list (as seen in mage:
Mac at left, Windows at right). For those with Windows 10, you can click on the
Microsoft icon at the lower left and bring up the Start Menu; click on “File
Explorer” to open the folder where the Downloads folder is usually found near
or at the top of the list. Can I choose the folder where I want to save the design? Files downloaded from the Internet will save, by default, to a folder called “Downloads”. When downloading, your browser might offer the “Save As” option, which allows you to choose the folder or drive instead of the Downloads folder. You can also change the default settings to the location where you want your downloaded files to be stored. |
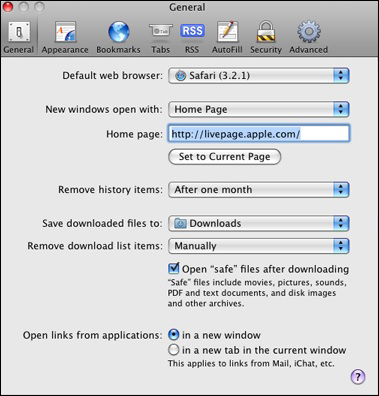 | On a Mac, using the Safari browser, you can adjust the
setting by first opening the Safari Preferences dialog box and click the
General tab. Click the “Save Downloaded Files To” to open the pop-up menu and
click “Other”. Find the location where you want the files stored and click
“Select”.
|
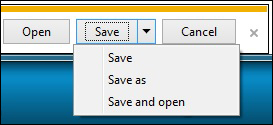 | On Windows, using Internet Explorer, you are given the
choice of where to save the file during the download as seen in this image. Click on the drop down arrow at the right of
“Save”. Click on “Save As” and a window
will open; choose the folder or drive in the top field to the right of “Save
in”. (With this option you can also
change the filename in the bottom field, but do not change the file type.) Then at the bottom right corner, click on
“Save”. The next time you download a
file, the folder that you chose the last time you downloaded will automatically
be chosen as the folder to save the new download, unless you choose to “Save
As” and choose a new folder. For changing the default folder for downloaded files on other browsers such as Firefox or Chrome, you will usually find the option to set the “Download Location” under the browser “Settings”. The file didn’t save to the Downloads folder, so where did it go? The browser settings determine where the downloaded file is saved, which by default is the Downloads folder on both Mac and Windows. If the file is not found in the Downloads folder, the default setting may have been accidentally changed. |
 | On a Mac, you can search for
the downloaded file from a Finder window, by clicking on the magnifying glass
icon at the upper right corner of the window, and then type the filename in the
Spotlight search field.
|
 | On Windows 10, type into the
Search field to the right of the Windows icon on the task bar or on earlier
Windows versions, the Search field is found at the bottom of the Start Menu.
|
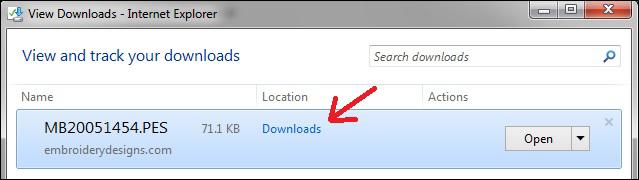 | Some browsers like Internet Explorer will offer options
of what you can do after the design is saved on the computer, such as “Open” or
“Open Folder”. (As explained in Part 1,
you should not try to open the file if you do not have embroidery design
software installed.) Version 11 of
Internet Explorer, seen in the image, brings up a window offering a link to the
location of the saved file. Click on the
link and the folder will open.
|
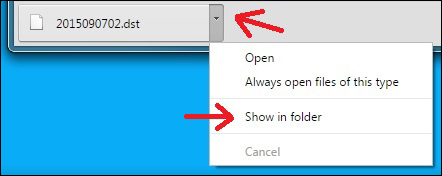 | If using the Google Chrome browser, you will find the
filenames that were downloaded at the bottom of the browser window; click on
the tiny arrow to the right of the filename, and then choose “Show in Folder”,
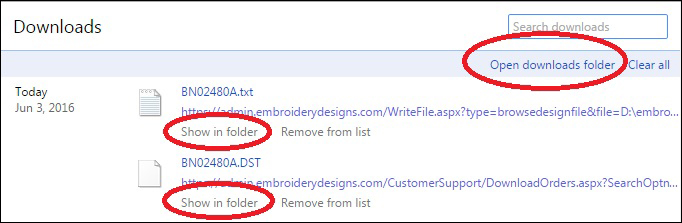
which will open the folder and highlight the filename inside the folder. After you find the file in the folder where it is saved, if you have embroidery software program installed on the computer, you can click on the highlighted filename to open the file. If you do not have embroidery software installed, copy the file from the folder to the device that runs your machine, such as a USB drive. How can I be sure the file downloaded without opening the Downloads folder? When downloading many designs in one order, sometimes it’s easy to lose track of whether a file has been downloaded or not. You can download designs from your Order History as often as you need to, but midway through downloading a large order, unzipped, you might not recall if you downloaded a particular file. |
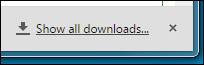 | On most browsers, you should see a message that says
“Show all downloads” or similar, as seen in this image of the Chrome
browser. This link opens the “Downloads
Manager” to reveal a list of your downloaded files with the most recent
download at the top. What can I do in the Downloads Manager? The Downloads Manager is not the same as the Downloads Folder.Even though you can open a design file from the Downloads Manager (if there is an embroidery software program installed on your computer) you cannot work with the file in this list, such as renaming it or copying it to a different folder or USB drive; if you try, you will likely copy or save only the link that will bring you back to the Downloads Manager. |
 | To work with the file, you must be in the folder where it
has been saved: check for the file in the Downloads folder or click on the
“Open Folder” or “Show in Folder” link that opens the folder where the design
has been saved to your computer. Why can’t I see the file format in the filename? If you do not see the three extension letters that indicate the machine format at the end of the filename, you can choose a different view inside the folder that reveals the file “Type”. |
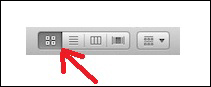 | On a Mac, to change a Finder window's view, click the
appropriate button in the toolbar, or choose as Icons, as List, as Columns, or
as Cover Flow from the View menu.
|
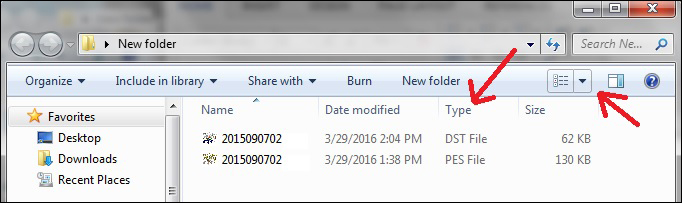 | On Windows change the folder “View” to “Tiles” or
“Content” which will then show you the “Type” next to or under the filename, or
change it to “Details View”, which will tell you the file type in a column to
the right of the filename: Left click on the drop down arrow of the “View
Preference” icon in the top menu and slide the bar to “View Details”. As well, if you are comfortable with making adjustments to your settings, you can change the Folder Option to always view the format extension on filenames. |
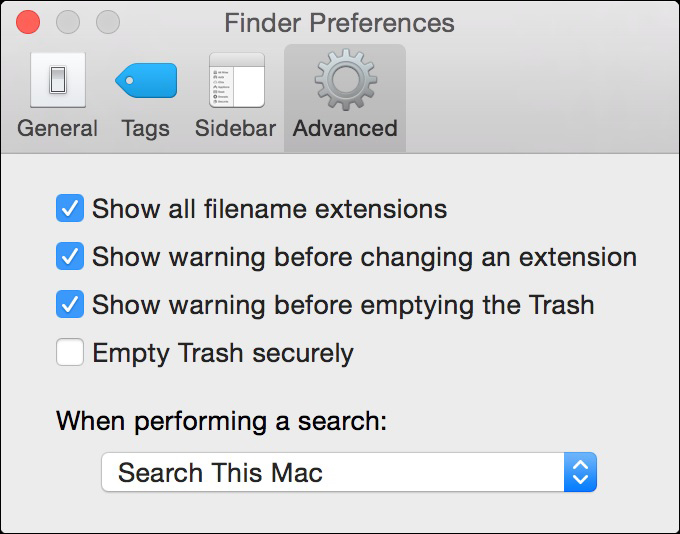 | On a Mac: in the Menu bar, go to Finder > Preferences;
Click on the Advanced tab; select the box that says “Show all filename
extensions”. If you want to hide file extensions, just uncheck the box.
|
 | On Windows: open the Control Panel, click on Folder
Options, then on the View tab; remove the check mark to the left of “Hide
extensions for known file types” and then click on OK at the lower right. Should I Right or Left click? The Right click is used to bring up available options. The Left click is used to generate a command. Although a mouse with a Right-click button has recently become available for the Mac, the standard mouse for a Mac has one button used as the Left click. Windows generally comes with a 2-button mouse with adjustable default settings; the buttons can be assigned different functions, such as when a left-handed user wishes to swap the Left click options for the Right click, but most users keep the settings at default. |
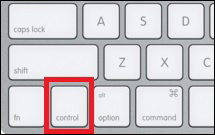 | To simulate a Right click and bring up a menu of options on the Mac
1-button mouse, press and hold the Control (Ctrl) key while you click the mouse
button, then let go of the Ctrl key and click on your choice of commands in the
menu. |
 | The Right click on a Windows mouse will bring up one of
several Options Menus, such as the one seen in this image, that contains a list
of commands from which to choose with the Left click. Right click on a file to bring up the Options
Menu and then Left click on your choice of commands. Note, if you do not see the option that you
want to choose in the list of the menu, Right click on the file again for a
different menu; this action occasionally takes several tries for the menu that
you want to appear. How do I rename a file? The design file is often named the same as its SKU number, which does not indicate what the design actually is. If you haven’t installed a cataloging program, such as BuzzExplore that helps organize files, or you haven’t installed an iconizer program such as Embrilliance Thumbnailer that shows a miniature image as the icon to the left of the filename, you can rename the first part of the filename to something that is more recognizable. Do not remove the dot and do not change the last three format letters. |
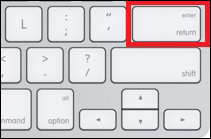 | On a Mac, rename a file or folder by selecting it and
type the “Return” key. Then type in the
new name.
|
 | On Windows, in the folder where the design has been
saved, Right click on the filename to bring up the Options Menu and then Left
click on Rename. Or you can Left click
once on the filename to highlight and then Left click again to open the name
field. Place the cursor before the
dot, backspace to delete the existing name, and then type in the preferred name
only before the dot. How do I get my files from a zipped compressed folder? |
 | On a Mac, find the zipped folder that you just saved on your computer.
Click on the file and the archive utility will automatically unzip the folder. Also, if you are using the Safari browser,
it’s possible that when you download the zipped file, Safari will automatically
unzip the folder for you.
|
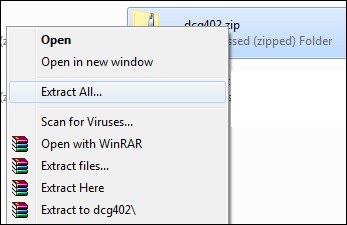 | On Windows, open the folder where the zipped compressed
folder has been saved and place your cursor over the top of the folder; and
then, Right click to bring up the Options Menu.
Left click on Extract or Extract All; whichever you see. (If you have a program like WinZip or WinRar
installed on your computer, you will also be given an option to unzip with that
program, as seen in this image that shows the WinRar icons.)
|
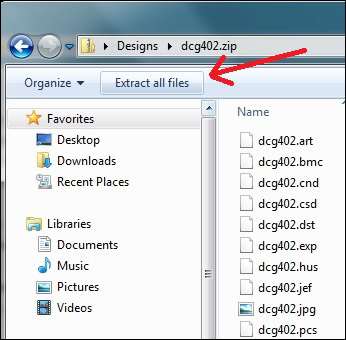 | On Windows with the most recent OS, you need only to
double-click on the compressed folder to open, and then click on “Extract all
files” at the upper left.
|
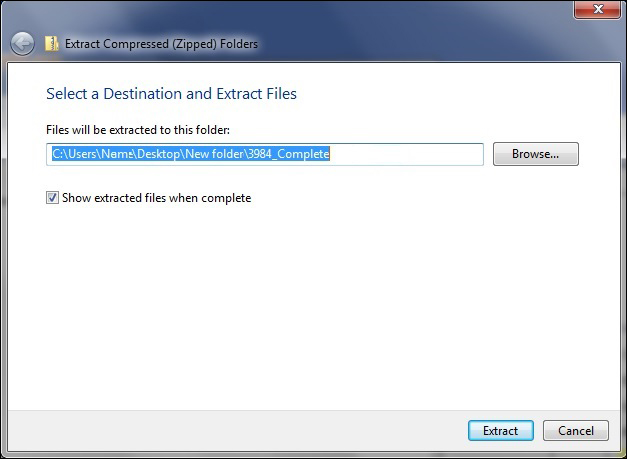 | After giving the command to extract, a Windows Wizard box
pops up and you should click on “Extract” at the bottom right of the box to
complete the process. Make sure that
“Show extracted files when complete” is checked before clicking on “Extract”,
and then the unzipped folder will open in front of you containing the multiple
files. The unzipped folder will be
stored in the same folder as the zipped folder. If preferred, after unzipping the folder, you can delete the zipped
compressed folder. How do I move my files where I want them? There are several ways to move a file from one folder or drive to another on both Mac and Windows operating systems. |
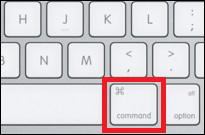 | On a Mac, to move a file to a different location, hold
down the Command (⌘) key, then drag the
file to the new folder or drive.
|
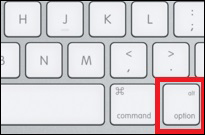 | To copy a file (or multiple files) from one Mac Finder folder to another, just hold down the [Option] key when dragging your files from one folder to another. |
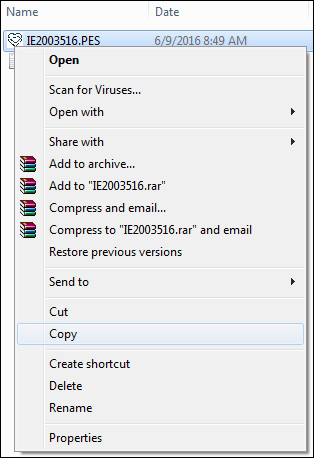 | On Windows, to keep the file in its original folder and
add it to another, you can use the copy and paste method: Right click on the
filename and Left click on “Copy”.
|
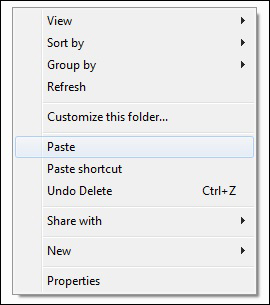 | Open the folder or drive where you want to add the file.
Right click inside of that folder to bring up the Options Menu, and then Left
click on “Paste”.
|
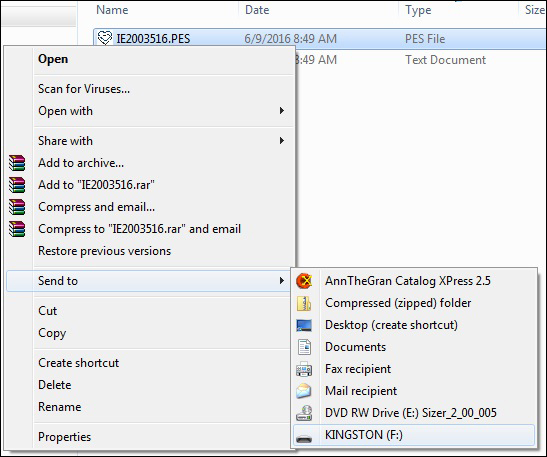 | Another option on Windows is to use the “Send To” command
that works well when copying files to a USB drive: Right click on the filename
to bring up the Options Menu and set the cursor over “Send To”. That will open a panel of places where you
can send the file; Left click on the “Removable Disk” or the letter or name of
your USB drive. (This image shows that the USB drive in the drive port (F:) is
named Kingston.) The file will copy to the drive and if there is a light on
your USB you will see it blink; if not, you will not receive a message
confirming that it copied. The process should only take a second or two,
depending on the size of the file.
|
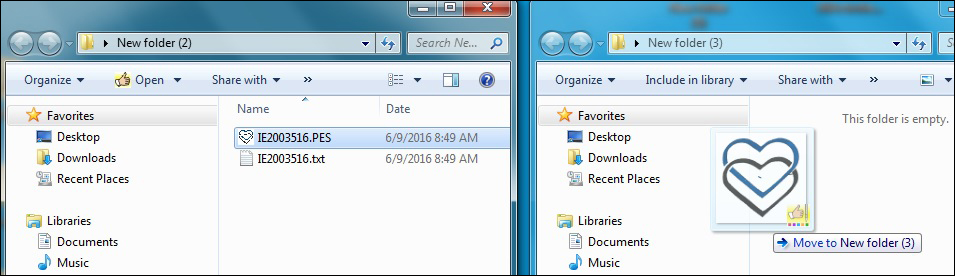 | You can also drag and drop the file from one Windows
folder to another, which will move the file without leaving a copy in the
original folder. Open the folder where
the file is saved and open the folder where you want to move the file. Adjust the size of the windows so they can sit
side by side. Hold down the Left click
key on top of the filename, and then drag the mouse over the top of the folder
where you want to move the file. Let go
of the click key. The file should move
to the new folder and no copy will remain in the original folder. Note, if you drag and drop the file from a
Windows folder to another drive like a USB drive, a copy will remain in the
original folder on the computer. How can I see what is saved on my USB drive? First open the Computer folder to see the drives on the computer. |
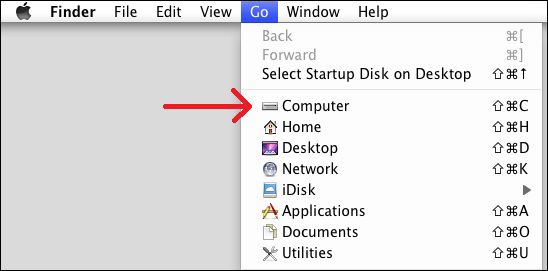 | On a Mac, to find the Computer folder, choose Go→Computer
or press Shift+Command+C. Then click on
the name of the USB drive to open and view.
|
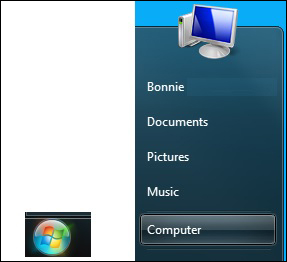 | On Windows versions 7, left
click on the globe icon (at left in image) found at the lower left of the
screen to bring up the Start Menu and then click on Computer at the right of
the Start Menu.
|
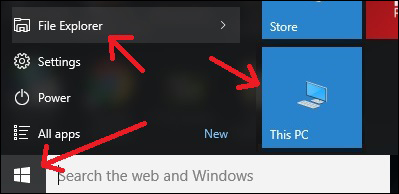 | On Windows 10, click on the
Windows icon at the lower left of the screen to bring up the Start Menu and
then click on This PC at the right of the Start Menu. If you do not see the icon for This PC at the
right of the Start Menu, then click on File Explorer at the left.
|
 | After you open the Computer folder or This PC, click on
the USB drive letter or name of the drive to open and view the files on the USB
drive. How do I make a folder for Designs? Even if you have installed a cataloging program like BuzzExplore, you might want to organize your design files so that they aren’t scattered all over your computer. You can create individual folders for various categories, such as Animals, People, Holidays, etc. First create a new folder on the Desktop or in the Documents folder and name it Designs. Then create a new folder for each category inside the Designs folder. |
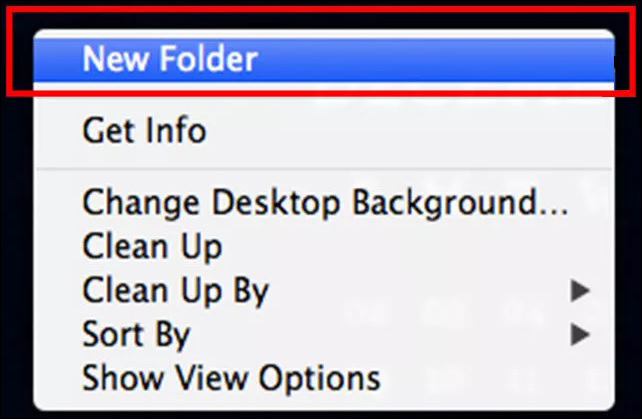 | On a Mac, click the desktop if you want to create the
folder on the desktop; otherwise, open a Finder window and navigate to where
you want to create the folder. Choose File > New Folder, or press
Shift–Command (⌘)–N. Enter a name for the folder,
then press Return.
|
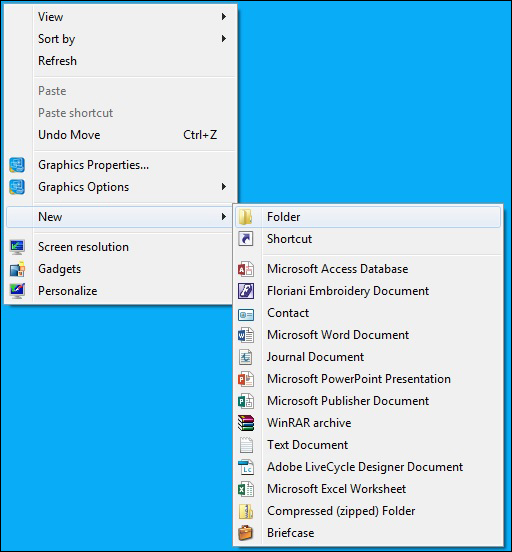 | On Windows, you can click on New Folder at the top of the
folder to create a new folder, type in a name and click on Enter. Or Right click inside of the folder or
directly on the Desktop to bring up the Options Menu; set the cursor over “New”
to open a panel of options and Left click on “Folder”. Enter a name for the
folder and click on Enter. What should I do if I still have questions? |
 | Contact our Customer Service at [email protected]
or call 1-866-451-3900 and we will be happy to assist you! |
Projects You May Like
Meet the Author:
Bonnie Landsberger

Bonnie Landsberger has been a crafter and hand embroiderer since childhood and a machine embroiderer and digitizer since 1986. She was the in-house head digitizer for a 50-head embroidery shop for 11 years and later offered custom digitizing services and stock design sales through her web site for Moonlight Design since 1993. She currently also holds a position as a customer service representative at EmbroideryDesigns.com.
Bonnie has won several awards for digitizing, including a gold medal in the 2002 Digitizing Olympics and grand prize in all categories & first place for Winter Holidays category in the Stitches Magazine Great Greeting Card Contest 2003.
Her embroidery and digitizing technical articles can be found in various trade magazines and she is currently a contributing writer and Editorial Advisory Board Member for Stitches Magazine. You can also find more of her articles online at EmbroideryDesigns.com and will continue to contribute articles to our Learning Center.
Feedback
Characters Remaining
Please Login to Submit a Feedback
Invalid Characters, Please enter a valid Comment
Please enter a valid Comment
Reviewed On
Link is Broken, Please check the URL