Do you go to potluck events where everyone asks for the recipe for the food you’ve served? This Potluck Recipe Mat provides an immediate recipe for those who would like to make and share the recipe themselves.
Project Preview Video
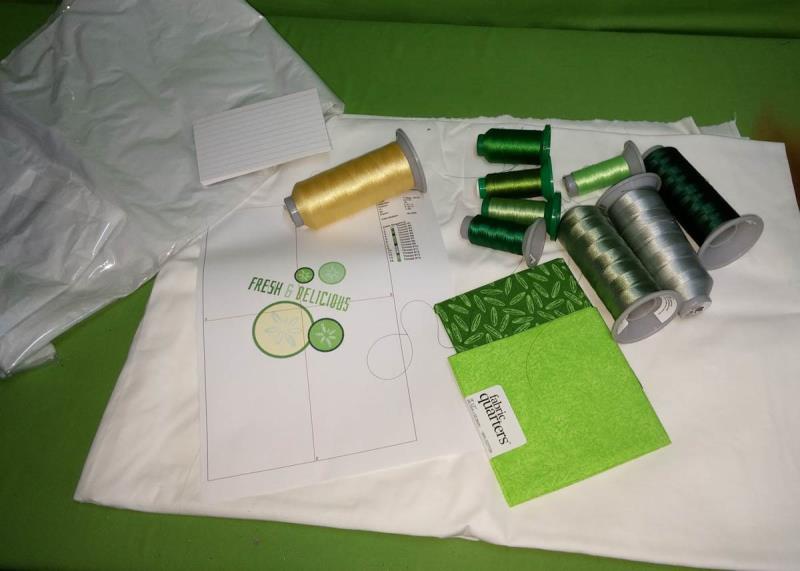
Materials
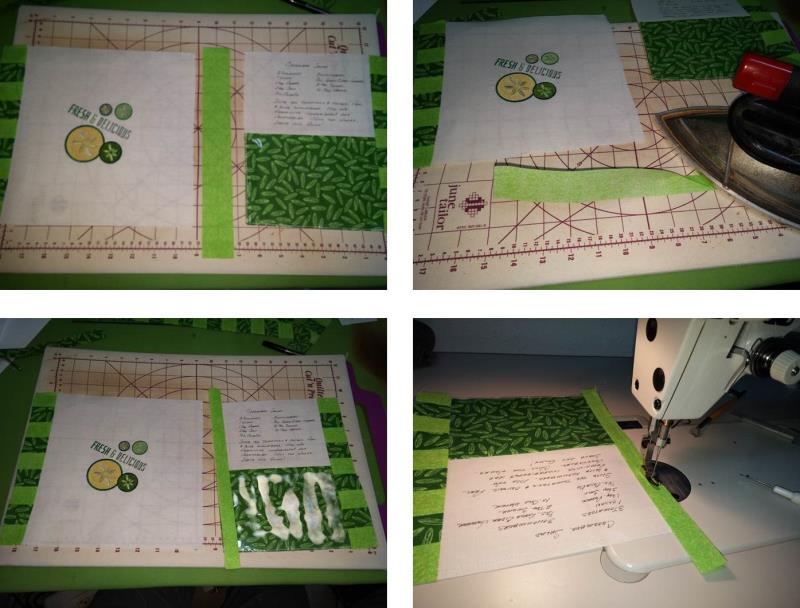
Use 100% cotton fabrics; fabrics are cut larger than needed and then cut to size to make working easier and more accurately cut after starching:
2 pieces White for front and back: 25” wide x 16” high
1-Fat quarter of cucumber themed fabric for behind recipe cards and for border segments
1-Fat quarter of lime green to coordinate with cucumber themed fabric for strip on front of mat, border segments, and label on back of mat
1-piece of vinyl 10” wide x 7” high to create a pocket to hold the index cards and pen
1-piece of cotton fleece batting 25” wide x 16” high
Small amount of Heat ‘n Bond Lite for under green front strip, closing slit in back of mat, and fusing label to back of mat
Spray starch to stiffen fabrics well
Recipe for cucumber salad - if you don’t have one, just search the internet
Small piece of vinyl to hold recipe cards
3” x 5” Index cards and Pen for guests to write on recipe cards (or pre-print cards either hand-written or cards made for a computer printer)
Embroidery thread as stated in design
Two pieces of tearaway stabilizer to fit hoop
Fine point black Sharpie marker for writing recipe on fabric
This “Potluck Recipe Mat” is a clever idea you’ll want to repeat for many dishes you bring to potluck events. Just change the recipe and choose an embroidery design that coordinates with the recipe. Adjust the measurements of the fabric to make the mat larger or smaller to fit the size dish being used to serve the food. Use different borders or eliminate them altogether - the choice is yours. This would also be a great gift idea for a house-warming or for sales at craft fairs. This project presumes you are very familiar with sewing techniques associated with quilting and creating a keyboard border.
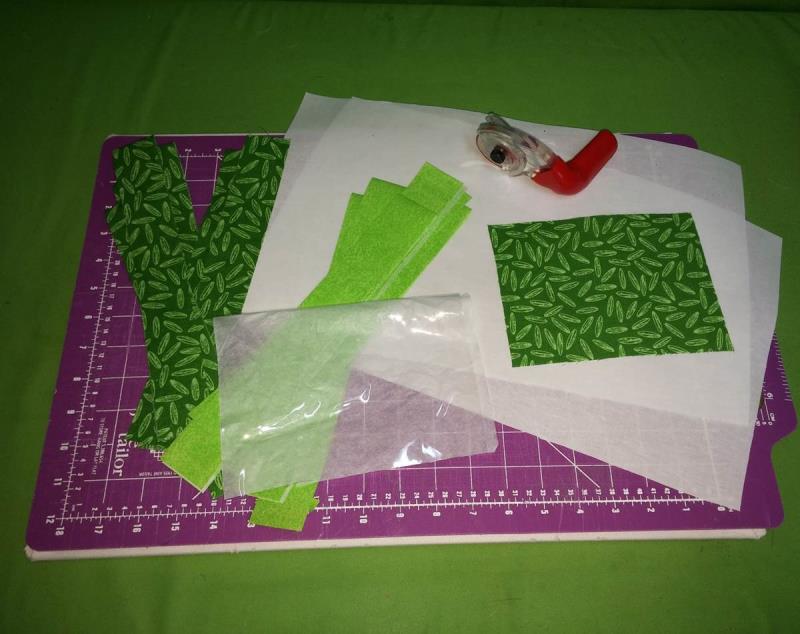
Step 1:
Gather the materials and read through the instructions before beginning. All seams are ¼”. The fabrics are cut larger than needed and then cut down which will be shown. Print a template of the embroidery design. Starch the fabrics well with 2-3 coats of starch, pressing between coats, then cut to the size needed. Be very careful when pressing near the vinyl - the vinyl will melt if the iron touches it.
(Click Image to Enlarge)
Step 2:
Starch well then cut the fabrics as follows: • Cucumber fabric: 3-1 ½” strips cut cross grain for strips and 1-7” x 5” for lower right pocket. • Lime green fabric: 4- 1 ½” strips cut cross grain for strips and 1-7” x 4” for label. • White fabric: 9” x 9 ½” for upper left embroidered section, 7” x 5” for upper right recipe section, 7” x 5” for lower right pocket section.
(Click Image to Enlarge)
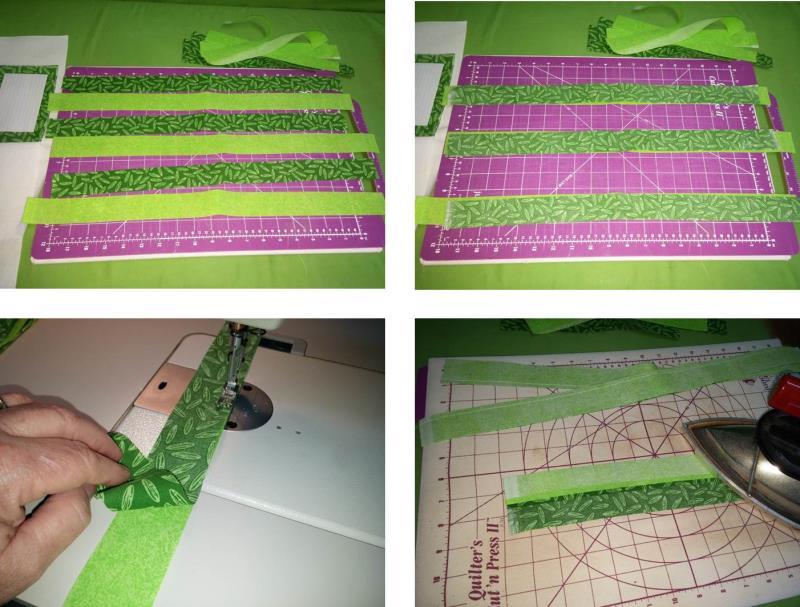
Step 3:
Begin by making strata of the strips for the border by alternating the strips beginning with the cucumber fabric. Lay the cucumber fabric over the lime green fabric creating three sets as shown. Sew the strips together and press the seams open.
(Click Image to Enlarge)
Step 4:
Now combine the strip sets. Join the first two sets together, sew the seam and press it open. Then join the last two sets to the other four to complete the strata. Straighten the end and cut the strata into 1 ½” segments. Set these aside until it is time to do the border.
(Click Image to Enlarge)
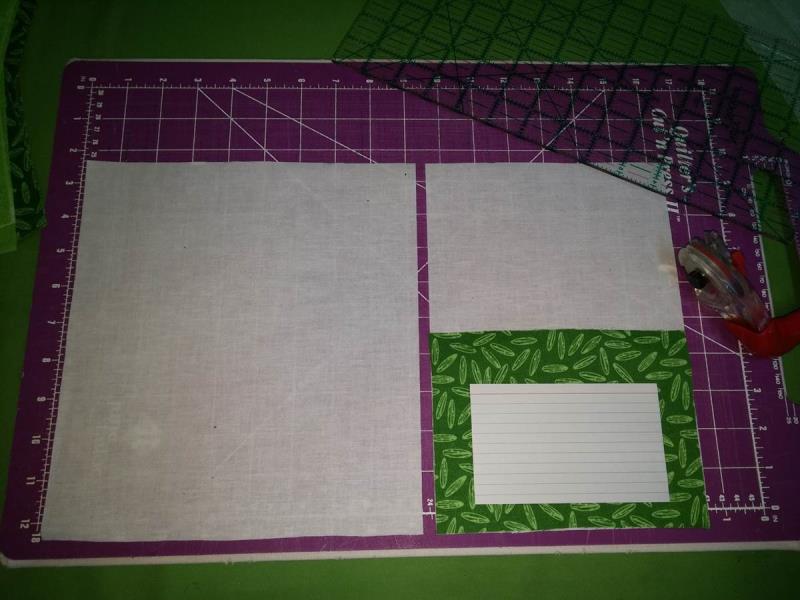
Step 5:
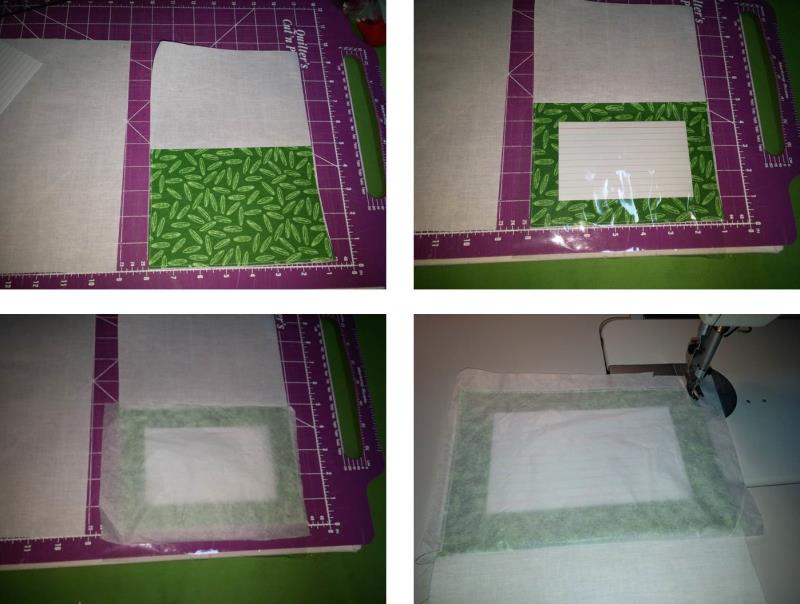
Lay the cut fabric sections out as shown for the front mat pieces.
(Click Image to Enlarge)
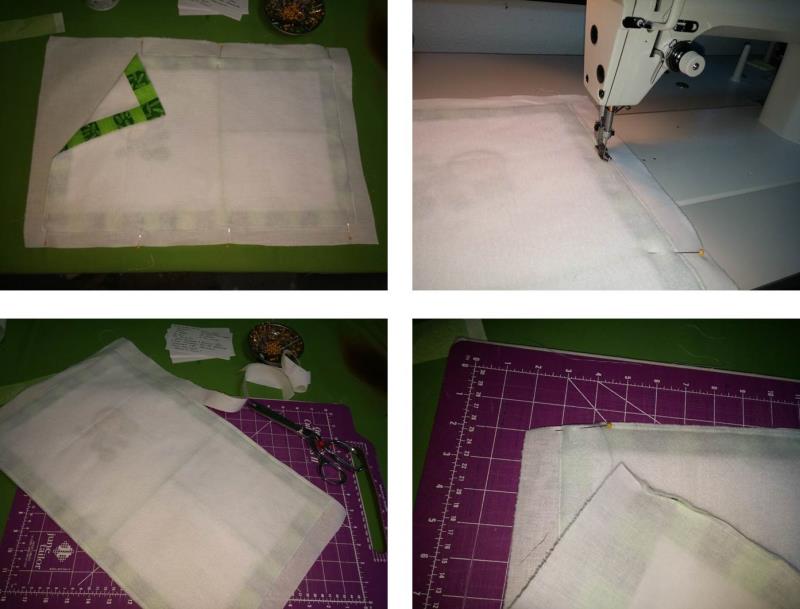
Step 6:
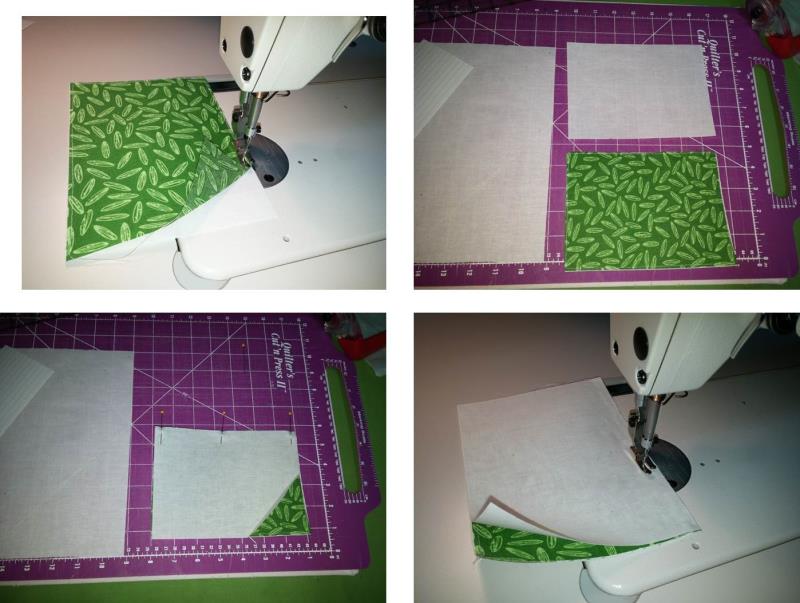
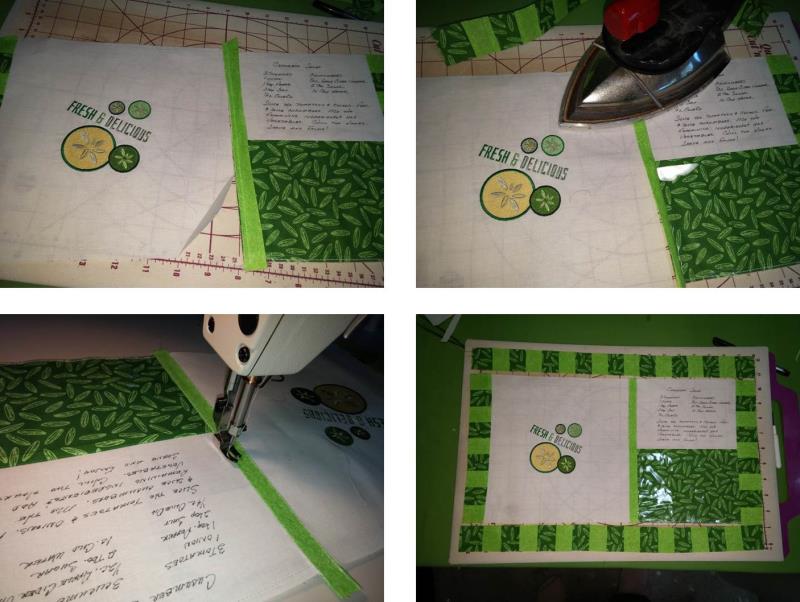
Lower right fabrics: place the cucumber fabric right side up on top of the white fabric and baste the two fabrics together using a 1/8” seam. Sew the top right to the lower right: place the top right white fabric on top of the lower right cucumber fabric, right sides together and pin. Sew the seam.
(Click Image to Enlarge)
Step 7:
Press the seam toward to cucumber fabric. Place the piece of vinyl over the cucumber fabric with the top of the vinyl about ½” below the seam line. Place a piece of white tissue paper (usually comes with the vinyl fabric) over the vinyl. Baste the vinyl to the cucumber fabric using a 1/8” seam along all sides except the top (this is where the index cards will slide into the vinyl pocket). Sew right through the tissue - you will be able to see through the tissue to baste.
(Click Image to Enlarge)
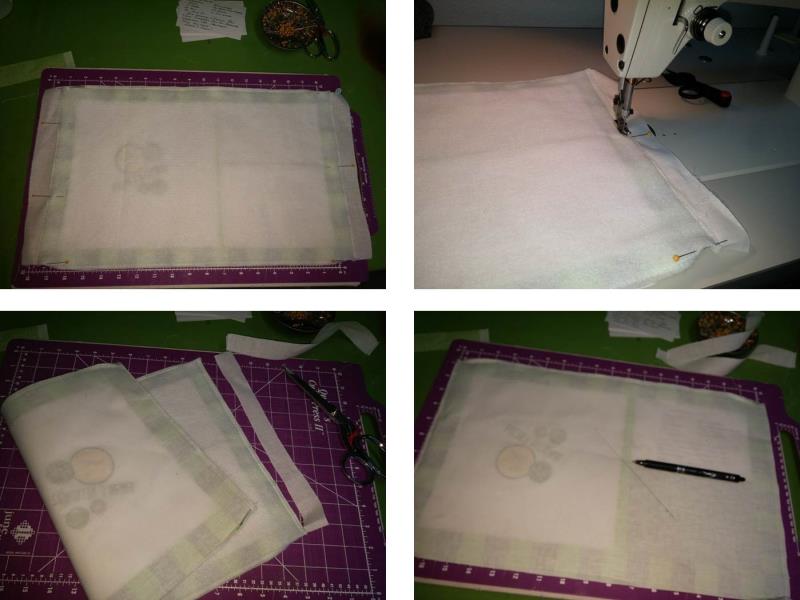
Step 8:
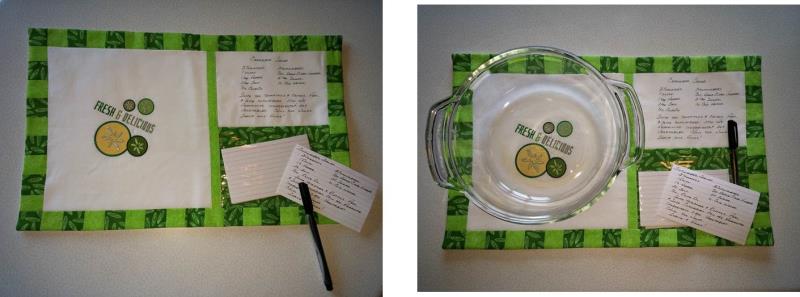
Fold the tissue edges along the stitching line and the tissue will easily rip away. Do this for all three sides. Trim the vinyl to the same size as the cucumber fabric. The index cards will now slip into the vinyl pocket. Write the recipe on the upper white fabric using the fine tip Sharpie marker. Write the recipe cards ahead of time, leave them blank and folks at the potluck can write their own cards, or even get some printer recipe cards and pre-print the cards and place them in the pocket (check the office supply store for printable recipe card stock - Avery is one company that makes these types of cards).
(Click Image to Enlarge)
Step 9:
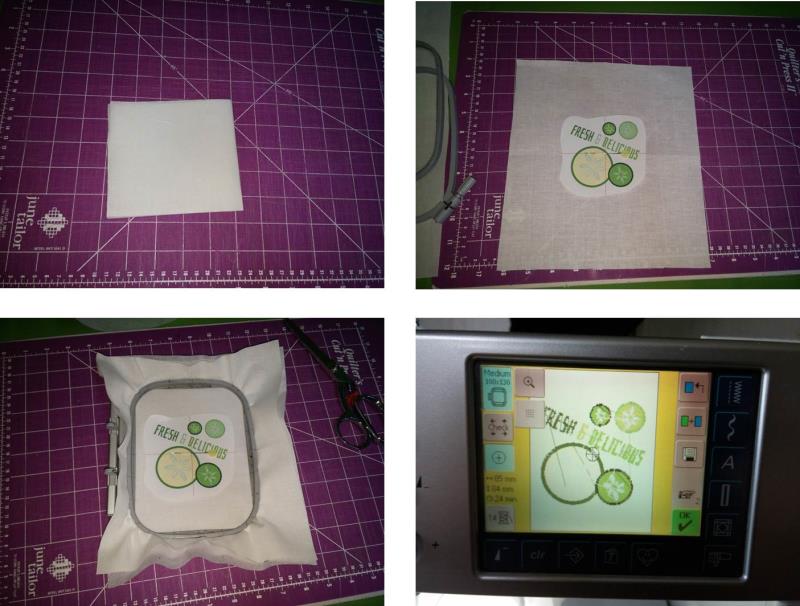
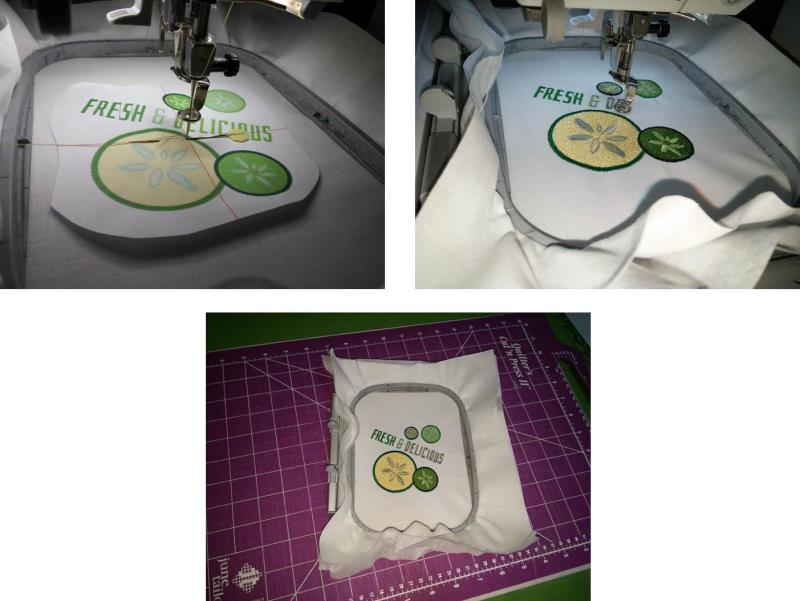
Take the piece of remaining white front fabric and quarter fold it to find the center; lightly press in the folds. Open up the fabric and place the paper template of the design over the fabric aligning center points. Hoop the fabric with two layers of tearaway stabilizer. Load the “Fresh & Delicious” embroidery design on the machine.
(Click Image to Enlarge)
Step 10:
Align the needle to the center of the template. Remove the template and stitch the embroidery design following the color sequence.
(Click Image to Enlarge)
Step 11:
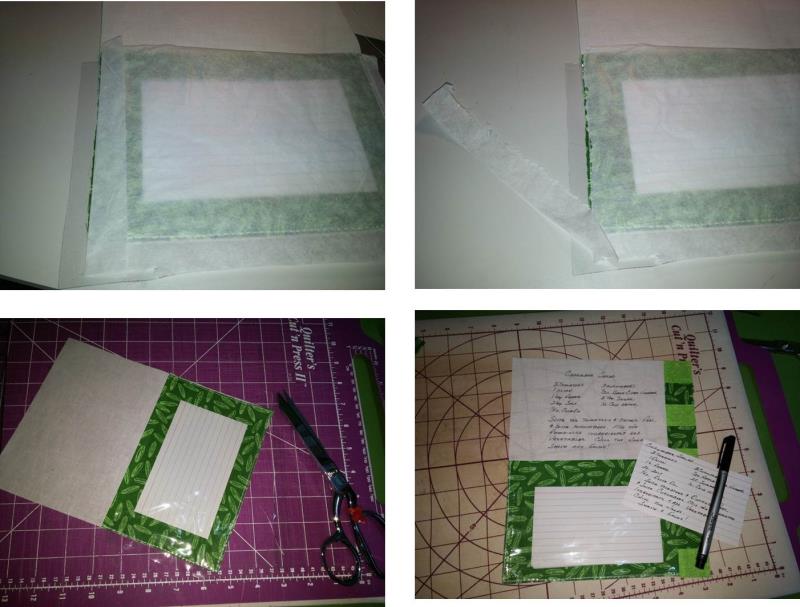
Remove the fabric from the hoop and remove the excess stabilizer; press the fabric. Take the remaining strip of lime green fabric and trim it to slightly longer than the length of the embroidered fabric. Press the strip, wrong sides together lengthwise. Place the strip over the recipe side matching the cut edges of the strip to the left cut edge of the recipe side of the fabric. Sew the strip to the recipe side of the fabric. Press the strip away from the recipe fabric set (remember to be very careful pressing near the vinyl).
(Click Image to Enlarge)
Step 12:
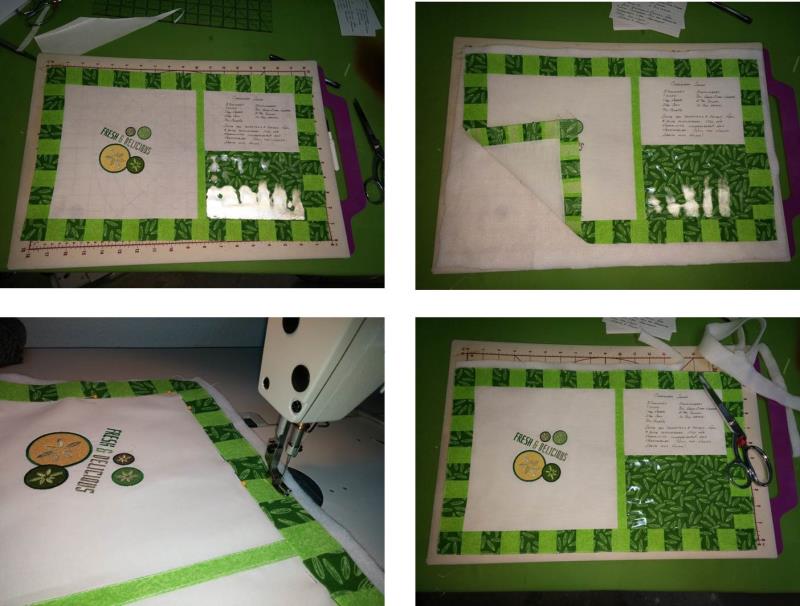
Now butt the right side of the embroidered fabric piece against the cut edges of the fabric strip sewn. Place a strip of Heat ‘n Bond Lite under the strip and press the strip’s folded edge over the right edge of the embroidered fabric. Sew along both edges of the strip and then trim the strip to even with the top and bottom of the mat edges. Now it is time to do the border. Place and join enough segments (9) together to form along each edge of the border. Do the sides first beginning and ending with the lime green color. Sew the segments together and then sew the side borders to the sides of the mat, pressing the seam toward the border. Sew segments (17) together for the top and bottom borders beginning and ending with the cucumber fabric. Sew the top and bottom borders to the mat, press the seam toward the border.
(Click Image to Enlarge)
Step 13:
Place the piece of fleece batting behind the mat top. Pin and then baste the batting to the top using a 1/8” seam. Trim the batting to the size of the mat top.
(Click Image to Enlarge)
Step 14:
To finish the mat, place the remaining piece of white fabric (this is the mat backing) on top of the right side of the mat top and smooth it in place. Pin the edges and sew along the top and bottom edges. Trim the top and bottom edges of the white fabric to match the cut edge of the mat. At each corner turn and pin the seam allowance toward the white backing fabric.
(Click Image to Enlarge)
Step 15:
Pin the sides of the backing fabric to the mat top. Sew the seams along each edge. Trim the white backing fabric to the same size as the mat. Now a slit will be created in the white backing fabric to turn the mat right side out. Use a ruler and draw about a 4” line along the bias of the fabric as shown.
(Click Image to Enlarge)
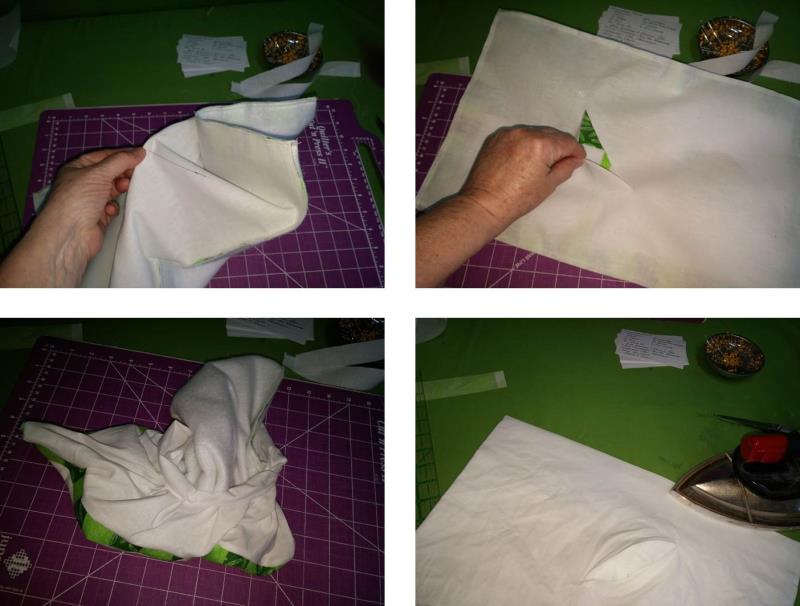
Step 16:
Grab the backing fabric along the drawn line to separate it from the mat front fabric. Cut the white backing fabric along the drawn line. Turn the mat through the slit, forming the corners well. Press the mat from the back side along all the edges.
(Click Image to Enlarge)
Step 17:
Lightly press the rest of the backing fabric bringing the cut edges of the slit together. Cut a piece of Heat ‘n Bond Lite about 1” wide and slightly longer than the slit. Place the fusible under the slit area, remove the paper, pull the cut edges together and fuse the slit closed.
(Click Image to Enlarge)
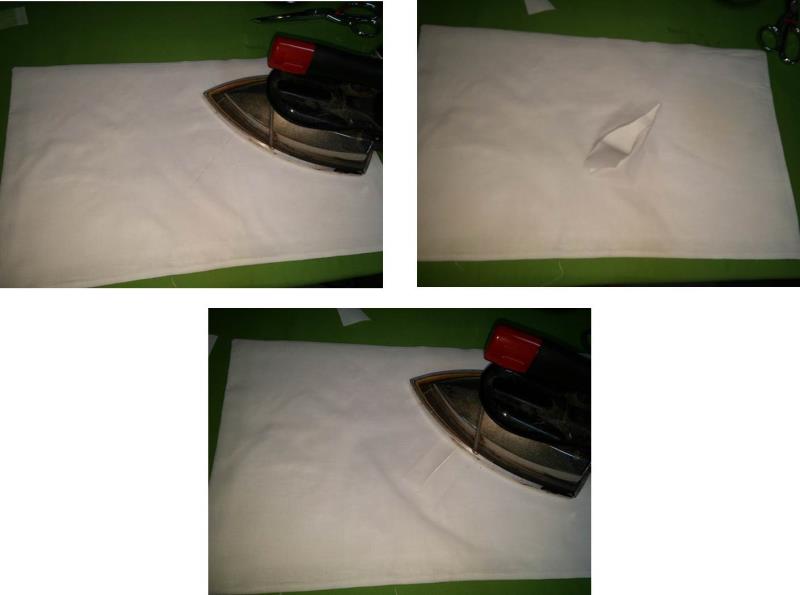
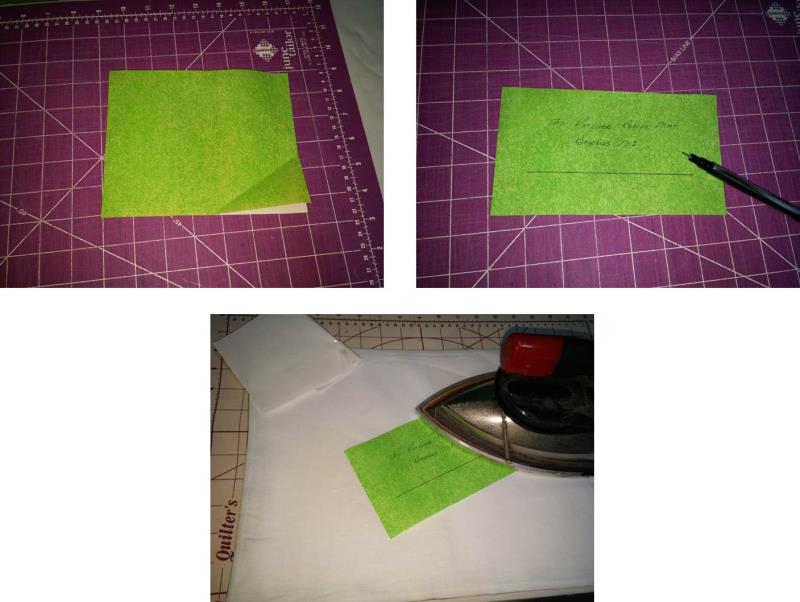
Step 18:
Cut another piece of Heat ‘n Bond Lite and fuse it to the back of a piece of the lime green fabric cut to cover the slit and large enough to write on as a label. Write on the fabric as desired. Remove the paper backing and fuse the label over the slit. Note: the edges of the label may be left cut or use a pinking shears or scalloped rotary cutting blade to make the edge fancy.
(Click Image to Enlarge)
Step 19:
The “Potluck Recipe Mat” is finished and ready to add your favorite dish.
(Click Image to Enlarge)
Step 20:
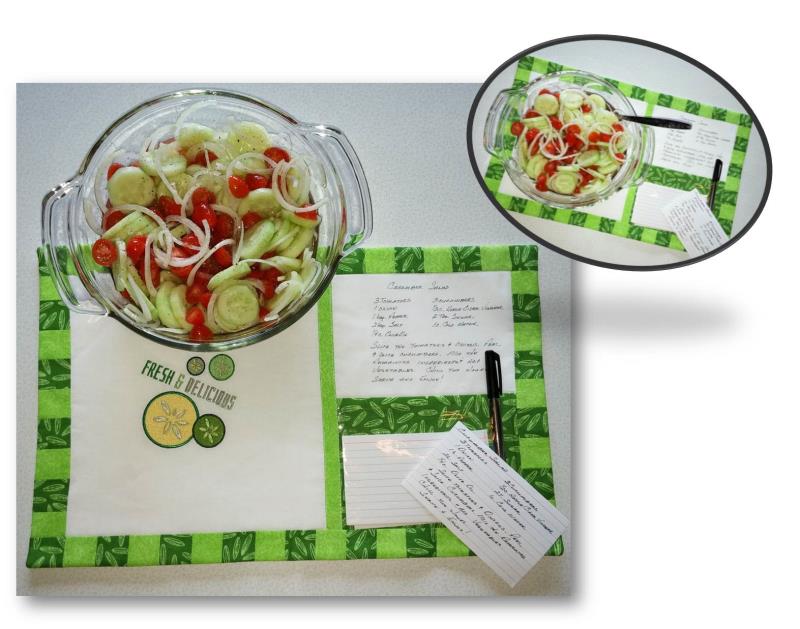
Create the recipe for the potluck dish.
(Click Image to Enlarge)
Step 21:
Guests at the potluck event will appreciate your clever serving presentation. For anyone who wants the recipe, the information is provided - along with cards for the recipe - for guests to enjoy in their own home.
Ramona Baird has been in the embroidery industry for over 23 years. She and her husband owned a commercial and retail embroidery store in Arizona for many years. She is an experienced digitizer having been mentored by award-winners Pat Williams and Lindee Goodall. Ramona is a contributor to “Creative Machine Embroidery” magazine having 5 covers to her credit. Ramona has worked for Wilcom America and served many years as Education Director for the American Sewing Guild. With a degree in fashion design, she is able to design and execute patterns which Pat Williams says are “out of the box” in creativity and application. Ramona likes to challenge the boundaries of embroidery and bring new and exciting designs, ideas, and projects to EmbroideryDesigns.com. She wants embroiderers of all levels to increase their skills and enjoyment in using their embroidery machine for gift-making and personal pleasure.