These soft plush toys make great items for your craft fair as well as gifts. Just a few hand stitches are required to close the opening left for turning and stuffing. They are available in two sizes, the small size is made in a 5” x 7” hoop and the larger size is made in a 4” x 10” or 6” x 6” hoop. A 4” x 4” hoop is used to make the feet. Steam a Seam 2 iron on adhesive backing worked well in this project as it maintained greater softness for these plush toys. There are two files to each of these softies, one to make the feet and then one to make the body in which you will insert the feet.
Step 1:
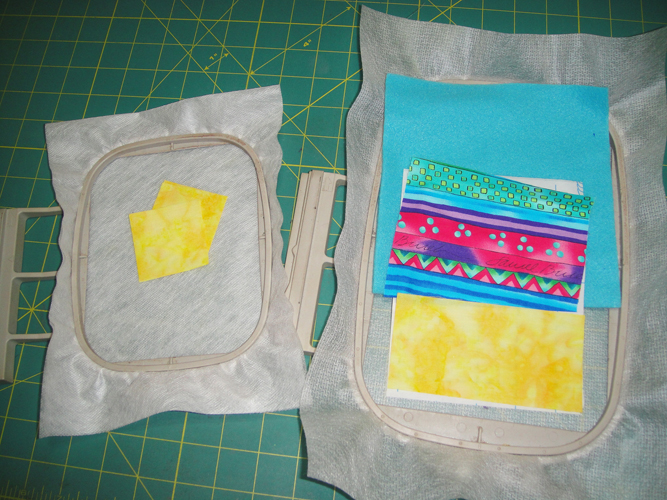
Hoop two layers of fibrous water soluble stabilizer in a 4” x 4” hoop and one layer of poly mesh stabilizer in a 5” x 7” hoop for the small owl; use a 6” x 10” or 6” x 6” hoop for the larger version. Cut materials as follows:
a. For the larger toy cut: i. 2 8” squares of fleece ii. 2 ½” x 6” rectangle of yellow fabric and Steam a Seam 2 iii. 5” x 6” rectangle of chest print and Steam a Seam 2 iv. 4 2 ½” squares of yellow fabric for feet
b. For the smaller toy cut: i. 2 6 ½” squares of fleece ii. 2 ½” x 5” rectangle of yellow fabric and Steam a Seam 2 iii. 4” x 5” rectangle of chest print and Steam a Seam 2 iv. 4 2” squares of yellow fabric for feet
(Click Image to Enlarge)
Step 2:
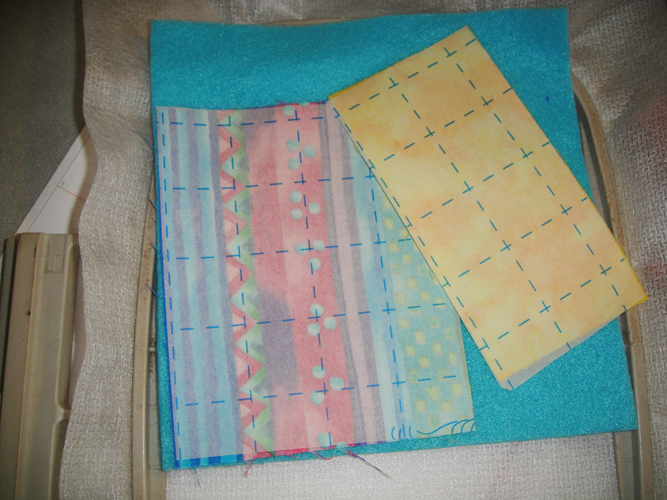
Following the manufacturer’s instructions apply the Steam a Seam 2 to the back sides of the chest and eye fabrics.
(Click Image to Enlarge)
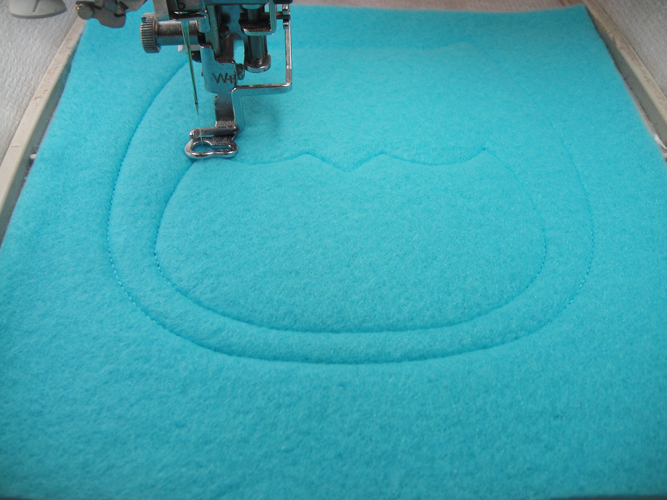
Step 3:
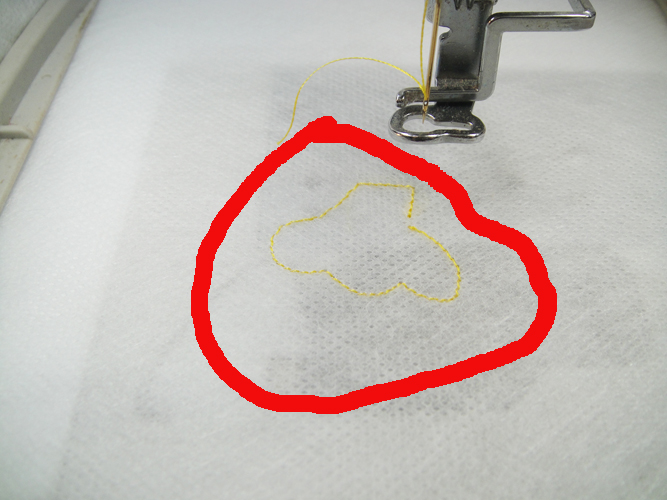
Make the feet first so that there edges can dry before inserting into the owl; Hoop two layers of fibrous water soluble stabilizer and run color stop (CS) 1 as a placement line.
(Click Image to Enlarge)
Step 4:
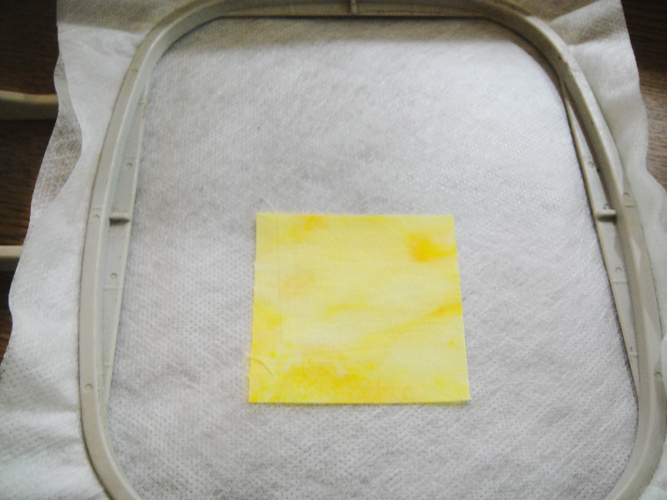
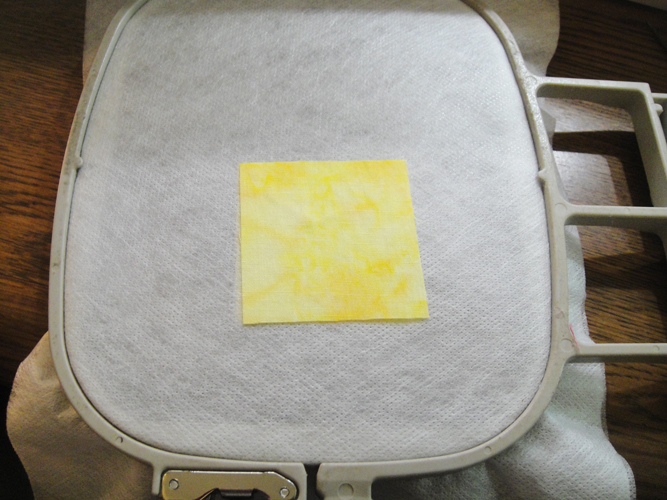
Spray adhesive on a foot square of fabric and place over the outline.
(Click Image to Enlarge)
Step 5:
Remove the hoop from the machine – do not unhoop – spray a second square of foot fabric and place over the placement lines on the back of the hoop.
(Click Image to Enlarge)
Step 6:
Return the hoop to the machine and run CS 2 to tack down the fabrics; trim the top and bottom fabrics right next to the tack down line.
(Click Image to Enlarge)
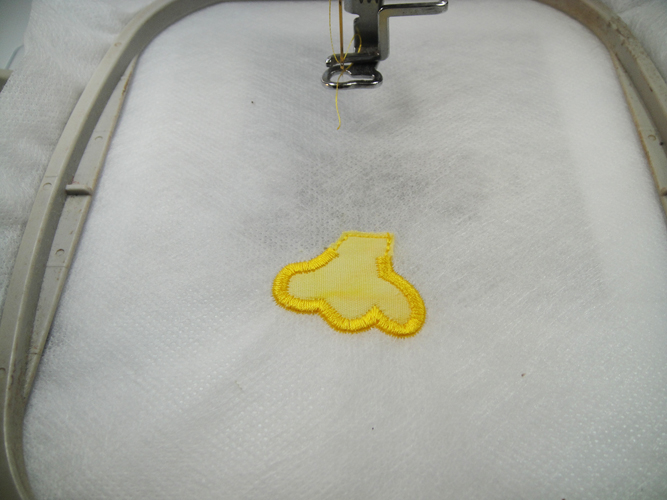
Step 7:
Run CS 3 to border the foot.
(Click Image to Enlarge)
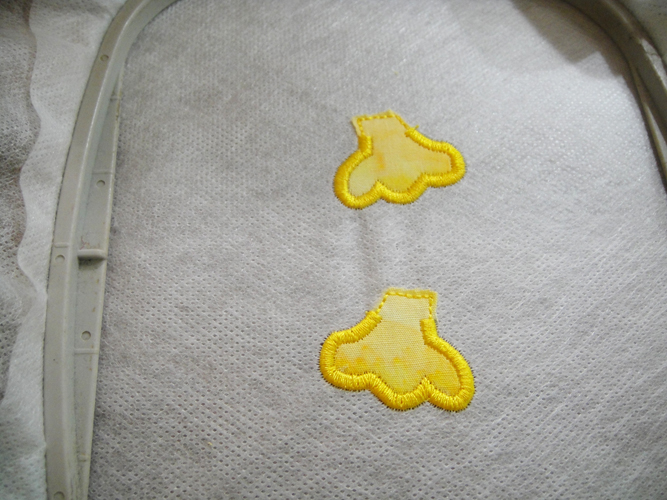
Step 8:
Run the next three color stops to make the second foot in the same manner.
(Click Image to Enlarge)
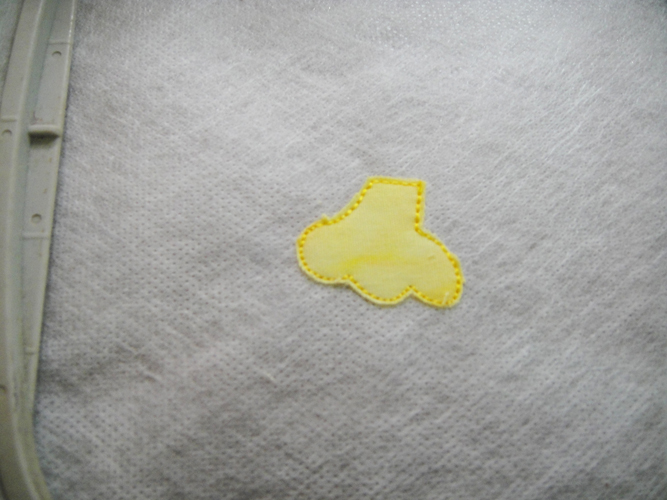
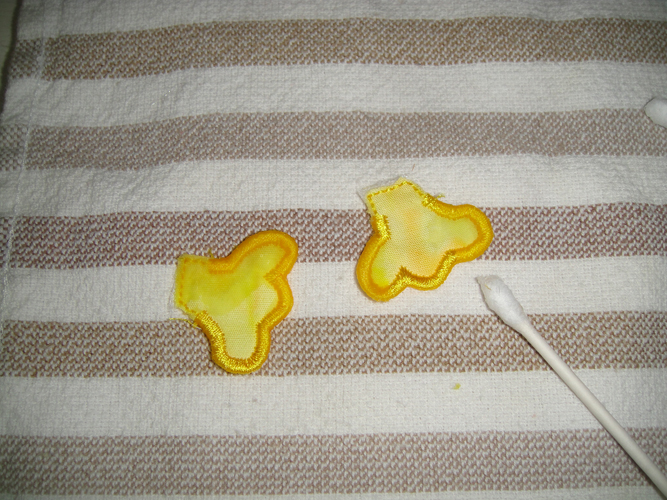
Step 9:
Trim the excess stabilizer from the two feet; use a cotton swab dampened with hot water and run around the satin border of the feet to remove the remaining stabilizer; leave on a dish towel to dry.
(Click Image to Enlarge)
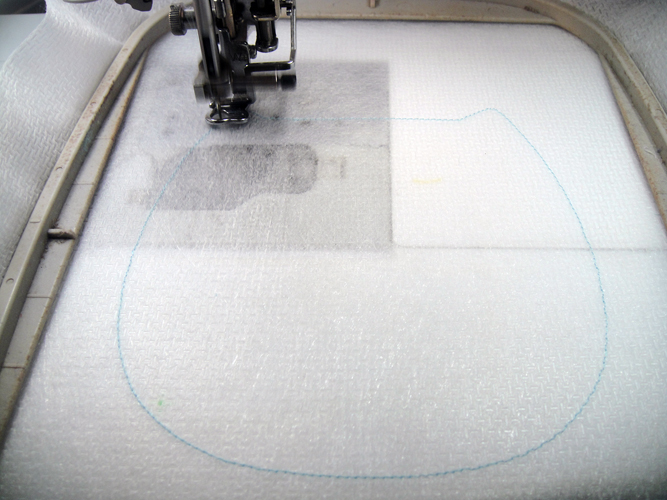
Step 10:
Load the body design into your machine; hoop poly mesh stabilizer in the hoop needed for the size owl you are making; run CS 1 as a placement line for your body fleece.
(Click Image to Enlarge)
Step 11:
Spray adhesive on the polar fleece and place over the placement line; run CS 2 as a tack down stitch for the fleece; run CS 3 as a placement line for the chest fabric.
(Click Image to Enlarge)
Step 12:
Spray adhesive on the back of the chest fabric and place over the placement line; run CS 4 to tack down the fabric; trim right next to the tack down line; press the chest fabric with an applique iron.
(Click Image to Enlarge)
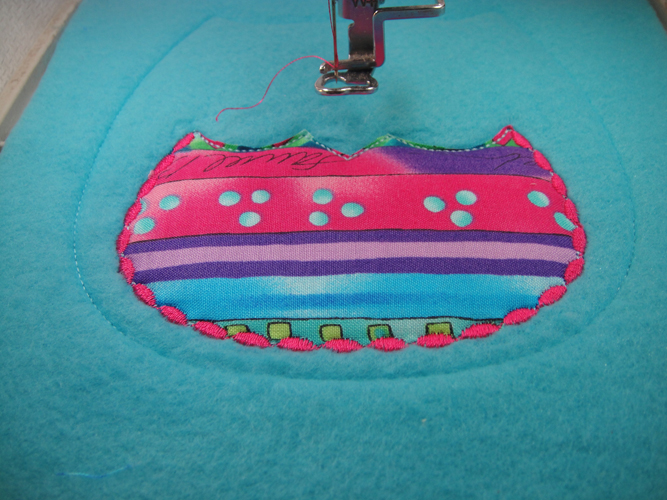
Step 13:
Change threads to a color to coordinate with your chest fabric to border the chest with CS 5.
(Click Image to Enlarge)
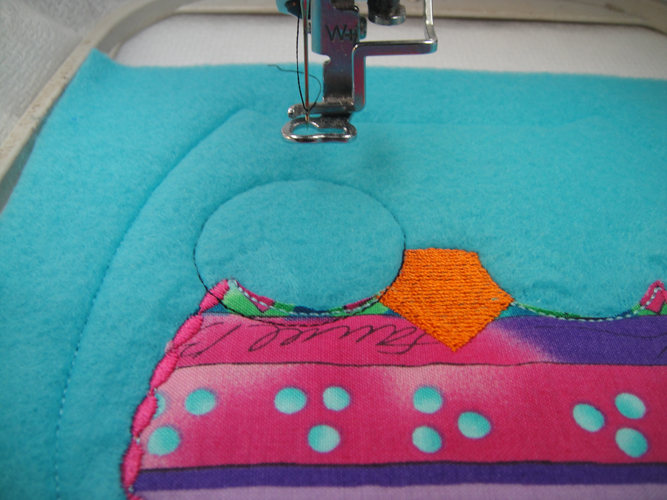
Step 14:
Run CS 6 in orange for the beak; change to black thread for CS 7 as a placement line for the eye.
(Click Image to Enlarge)
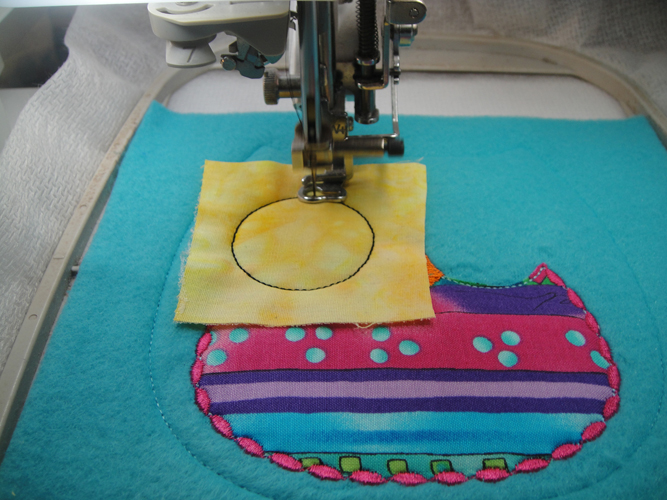
Step 15:
Cut the eye fabric with the Steam a Seam 2 applied in half; place one square over the placement line; stitch the tack down with CS 8 and trim the eye fabric right next to the tack down stitches.
(Click Image to Enlarge)
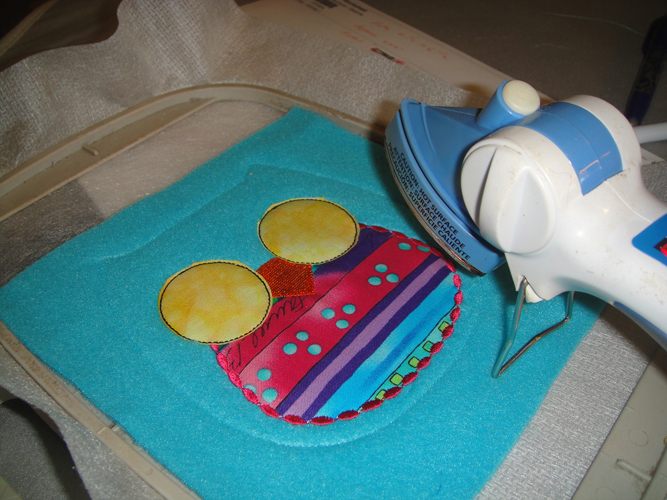
Step 16:
Run CS 9 and 10 for a placement line and tack down for the second eye; trim the second eye and iron both eyes down with an applique iron.
(Click Image to Enlarge)
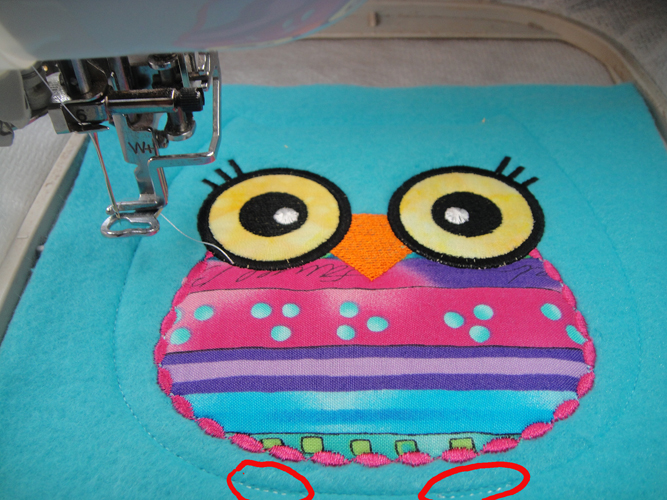
Step 17:
Run CS 11 in black to complete the eyes; Run CS 12 in any color as placement lines for the feet.
(Click Image to Enlarge)
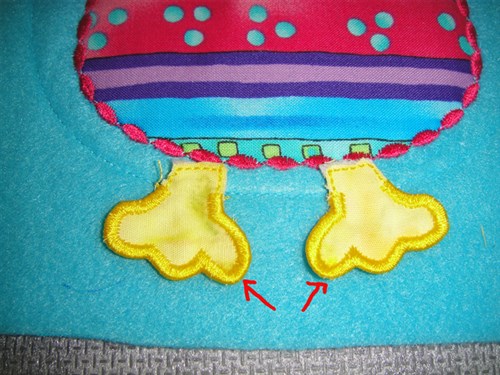
Step 18:
It is time to place the feet. The feet will be sewn so that just the satin bordered sections will show in the final product. Place the feet with the slightly longer toe to the inside of the body and the top of the satin stitches are at the placement line.
(Click Image to Enlarge)
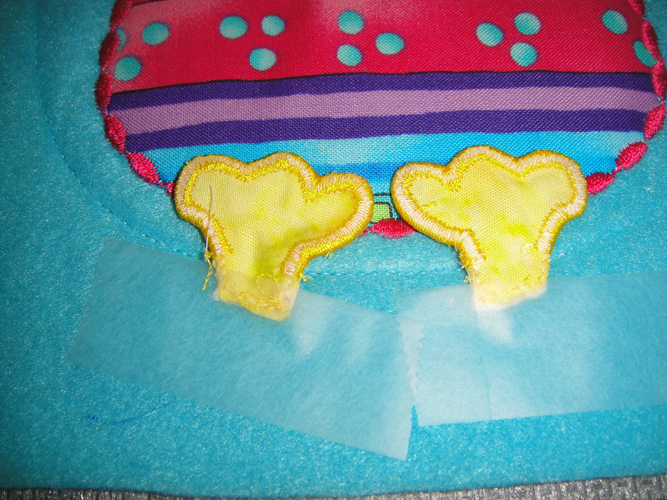
Step 19:
Flip the feet up so they are facing inside the body keeping the edge of the satin borders even with the placement line; use scotch tape below the placement line to hold the feet in place.
(Click Image to Enlarge)
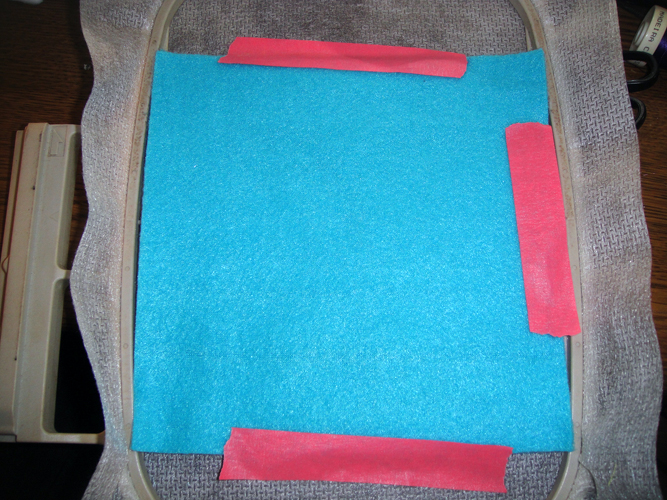
Step 20:
Lay the body back fleece fabric over the whole project; hold into place with embroidery tape; run the final CS in a color to match the fleece to complete the embroidery.
(Click Image to Enlarge)
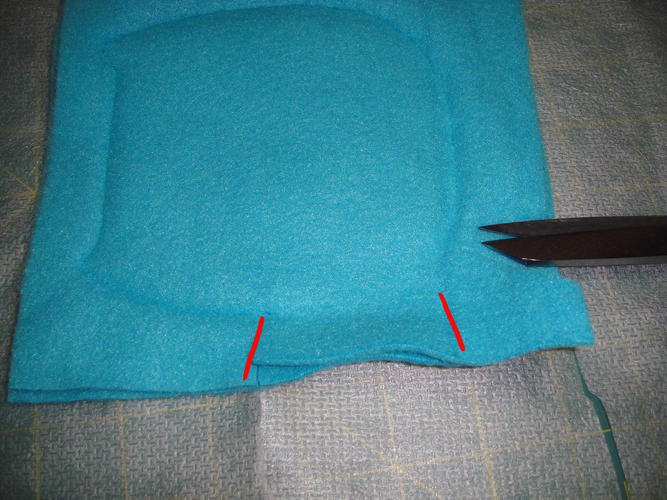
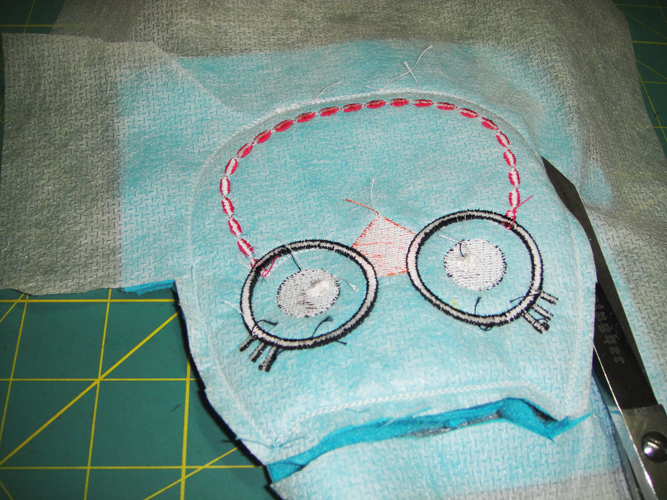
Step 21:
Cut out in a two-step process. On the back of the work it is easy to see where the opening has been left for the turning. Make a slash through the fabrics to mark that opening.
(Click Image to Enlarge)
Step 22:
Then turn the project over and trim around the project with about a ¼” seam allowance but you can now allow yourself a little extra allowance over the opening to make it easier to close later.
(Click Image to Enlarge)
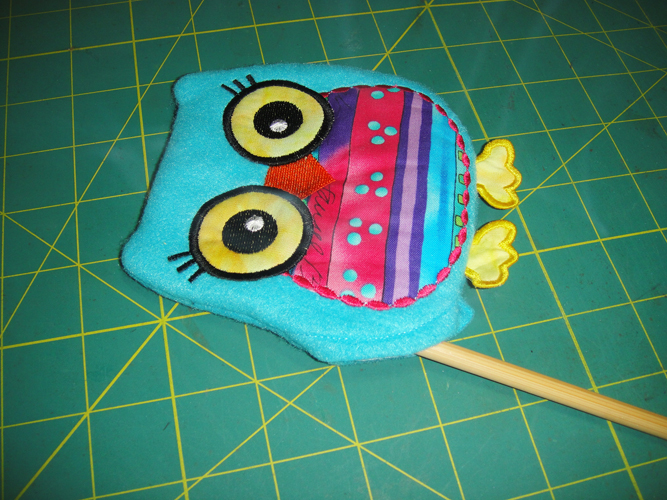
Step 23:
Your trimmed project should look like this.
(Click Image to Enlarge)
Step 24:
Turn your project right side out using a wooden stick or other tool to poke out the ears; stuff with poly fill adding a rattle or squeaker if desired.
(Click Image to Enlarge)
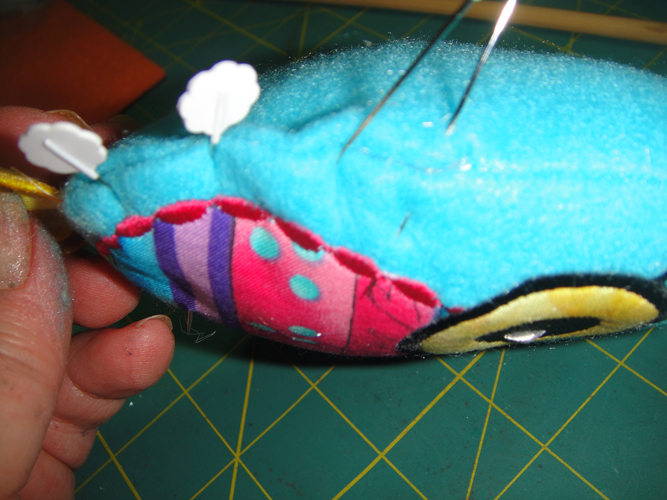
Step 25:
Fold in the seam allowances of the opening being sure to maintain the curve of the body and whip stitch closed.
(Click Image to Enlarge)
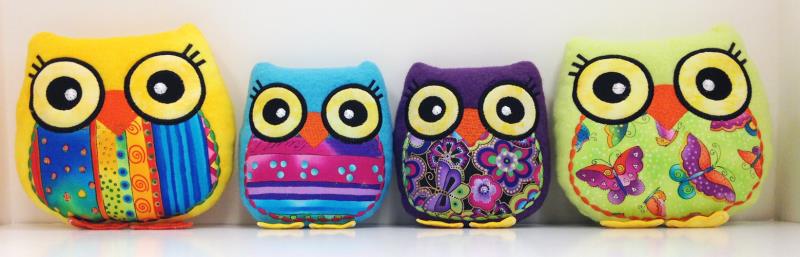
Step 26:
Congratulations your first Owl Softie is complete! Make more – they are too much fun.
Award winning Digitizer, Embroidery Educator, Author and a Consultant to the Industry, Pat Williams has 30 years of experience in the embroidery industry. Pat has won multiple awards for her digitizing expertise including the 2007 Impressions Awards Grand Championship, Best of Show as well as the 1st and 2nd Place Awards. Pat’s love of digitizing has afforded her the opportunity to write numerous articles for Impressions magazine in the United States and Images Magazine in Europe. In 2001 Pat was named “Embroidery Educator of the Year.” For many years Pat taught digitizing seminars at the ISS Shows in Long Beach, CA and for Compucon software. She now resides in Tucson, AZ.