Have fun choosing fabrics and threads from your stash to create this cute little bag. The bag front is embroidered and the embroidery paper template is used to make the pattern for the bag shape. The embroidered fabric is cut from the pattern as are the bag back and two lining pieces. The zipper is inserted at the top of the bag and then the lining pieces attached at the zipper area. To finish the bag, the lining pieces and bag pieces are sewn together, the bag turned and pressing completes the process.
Step 1:
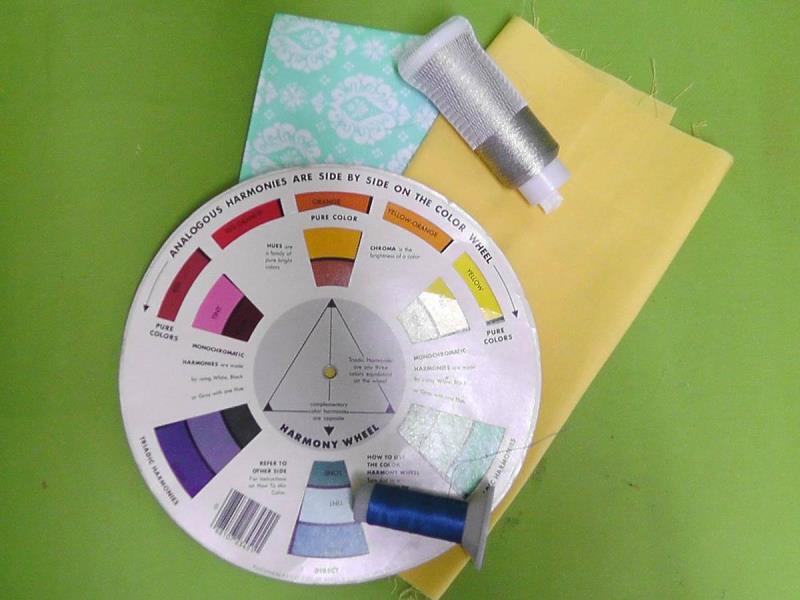
Gather the materials and read through the instructions before beginning. Try and coordinate the thread colors to the outer and lining fabrics to create some cohesiveness to the projects. For the project a variegated metallic thread was used as the first color for the bag frame and a pretty dark aqua blue was chosen to coordinate with the lining color.
(Click Image to Enlarge)
Step 2:
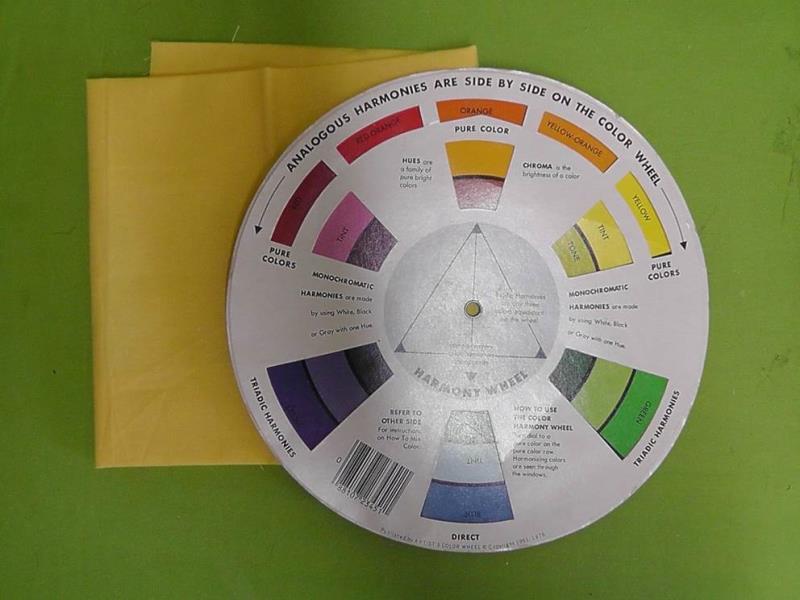
Sometimes it is hard to choose colors. A color wheel is helpful. Find the color in the wheel that most closely matches the fabric and then use the guides on the color wheel to help choose lining and thread colors.
(Click Image to Enlarge)
Step 3:
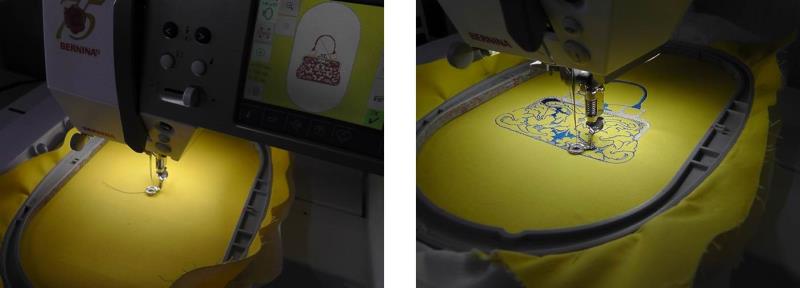
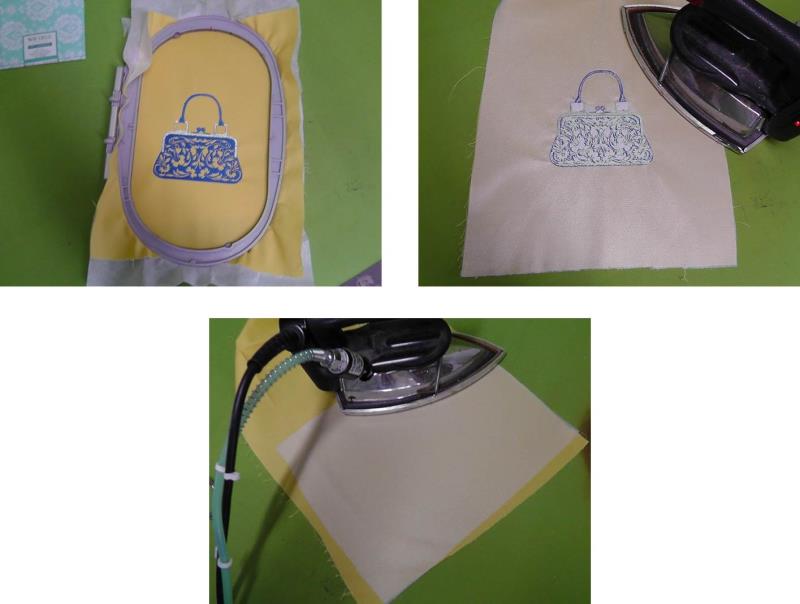
Interface the back of the fabric bag front to be embroidered. Hoop the fabric with two pieces of tearaway stabilizer.
(Click Image to Enlarge)
Step 4:
Load the embroidery design “Fancy Bag” on the machine and stitch the design following the color sequence.
(Click Image to Enlarge)
Step 5:
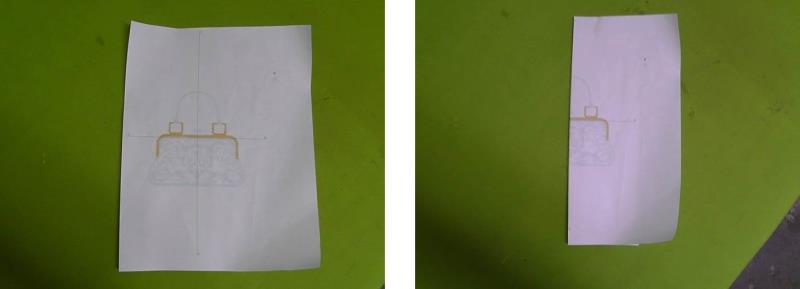
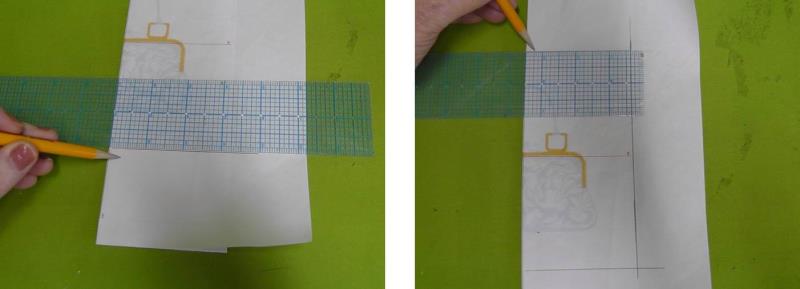
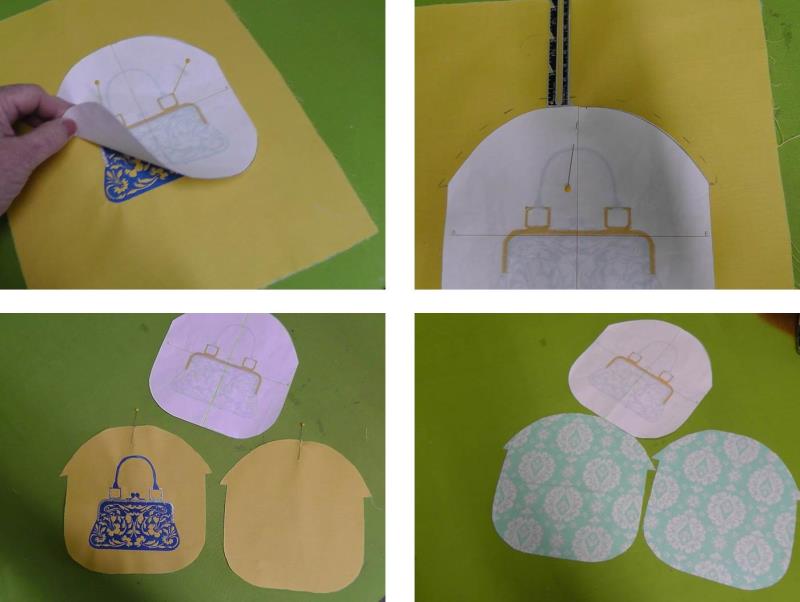
While the second color stitches, the shape of the bag can be drawn. Use the printed paper template of the design for this step. Fold the template in half along the vertical crosshair.
(Click Image to Enlarge)
Step 6:
Draw a line 1” below the bottom of the design and squared to the fold line of the paper. Repeat for the top and side and make sure the side is parallel to the fold of the paper.
(Click Image to Enlarge)
Step 7:
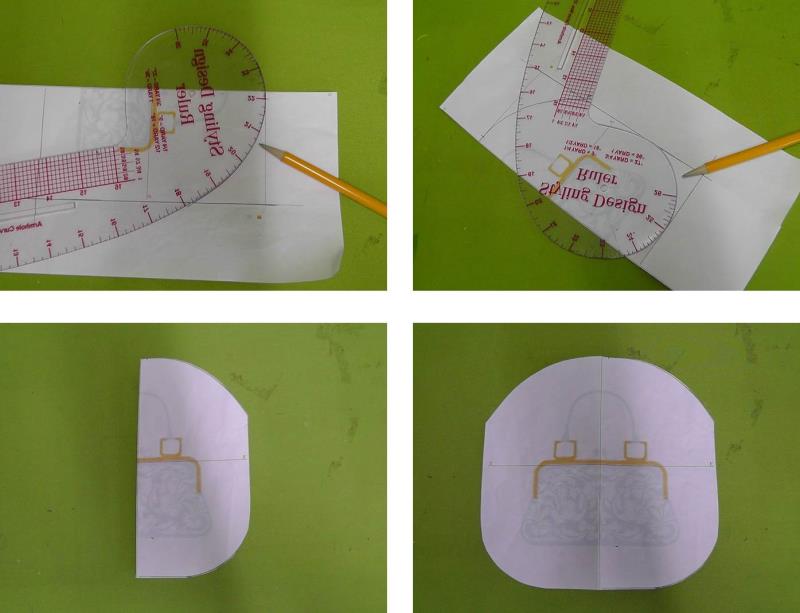
Use a French curve or other rounded object to round the top and bottom. The top should be rounded so the top ¼” is straight and then a curve smoothed to about 1/2” above the top of the frame piece at the side as shown. The bottom should be rounded at the lower corner from the side to the bottom. Cut out the template along the drawn lines. The paper pattern includes ¼” seam allowances.
(Click Image to Enlarge)
Step 8:
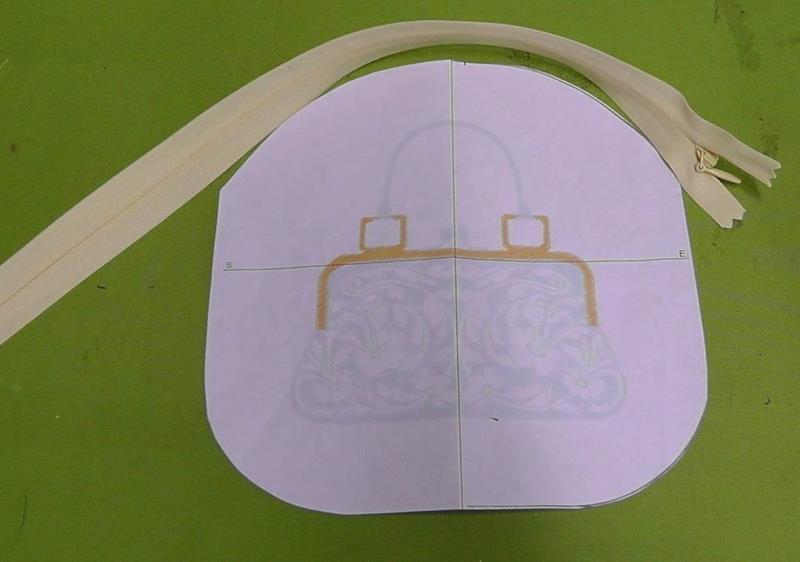
The zipper will be stitched to the top of the bag on the bag front and back first. In order to do this add an additional ¼” to the top of the bag pattern to give a ½” seam allowance for stitching in the zipper; this can be drawn on the fabric when the pattern is placed on the fabric for cutting out.
(Click Image to Enlarge)
Step 9:
After the design has finished stitching, remove the fabric from the hoop and remove the excess stabilizer. Press the fabric from the wrong side to remove any hoop marks. Also, press interfacing to the back of the bag back fabric piece.
(Click Image to Enlarge)
Step 10:
Lay the bag pattern over the top of the embroidery aligning the edges of the template to the edges of the embroidery carefully and pin the pattern in place. On the top edge only, measure out and additional ¼” on the fabric to create a ½” seam allowance for sewing in the zipper. Repeat measuring and cutting out the bag back piece and two lining pieces.
(Click Image to Enlarge)
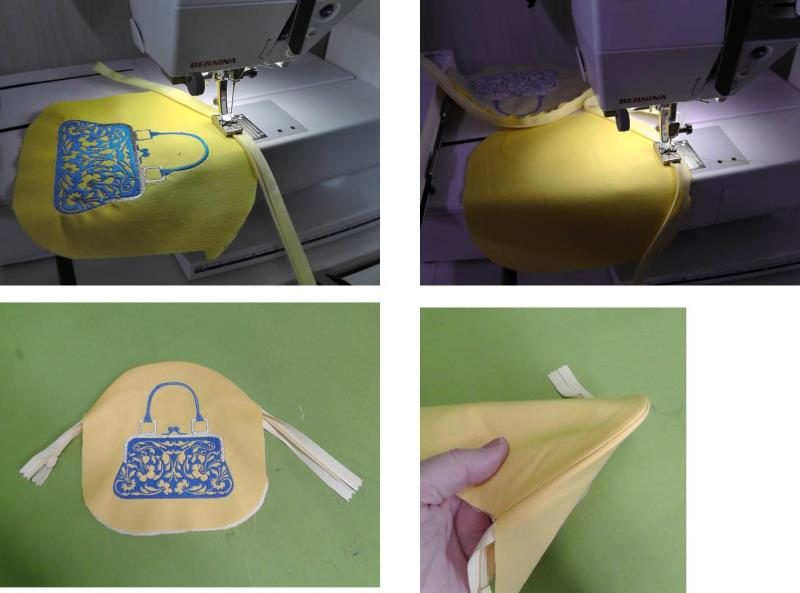
Step 11:
Sew the invisible zipper into the bag top and press well. Be sure to mark the center of the top of the bag pieces so they are matched at the same spot during zipper insertion.
(Click Image to Enlarge)
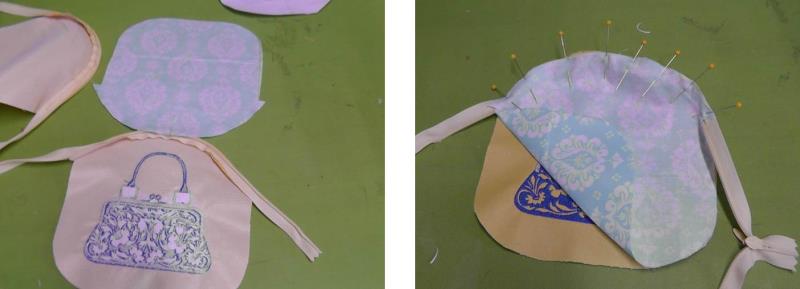
Step 12:
Find the center of the lining top pieces. Match the lining top center to the bag front top center and pin. Pin the lining in place to the zipper tape.
(Click Image to Enlarge)
Step 13:
Use the zipper foot to sew the lining to the zipper. Repeat pining and sewing the lining bag back piece to the zipper tape.
(Click Image to Enlarge)
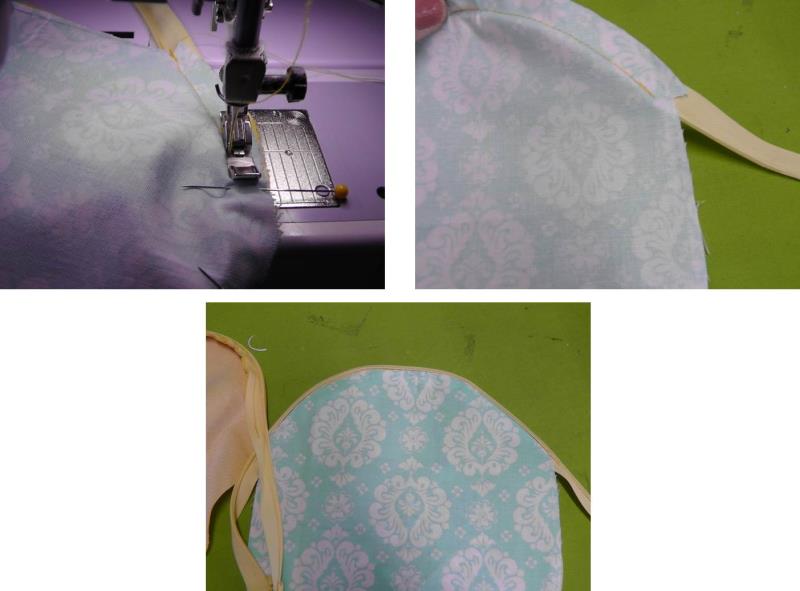
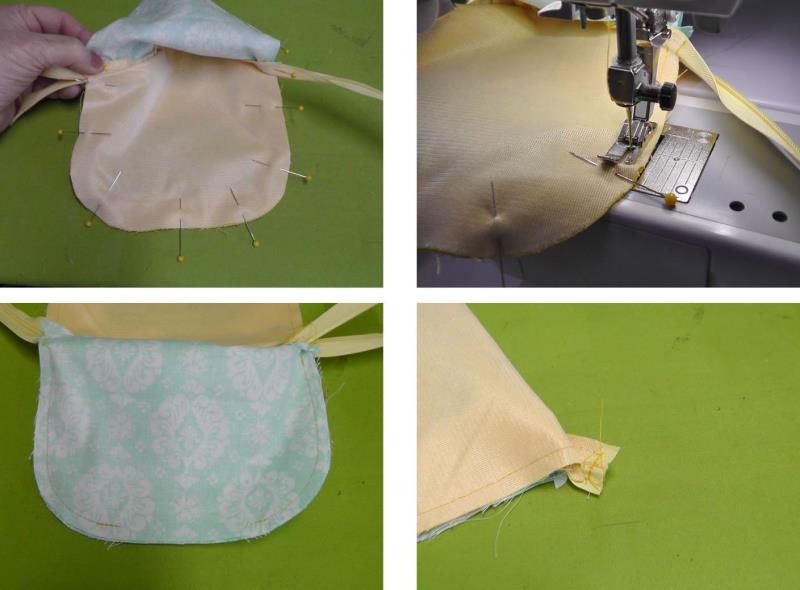
Step 14:
Next, place the bag pieces right sides together and pin the cut edges of the bag together and sew using a 1/4” seam allowance. Begin and end sewing through the zipper. Pin and sew the lining pieces right sides together leaving an opening at the bottom for turning. Begin and end sewing just below the zipper tape. About ½” beyond the seam allowances on the zipper make a bar tack and then cut off the excess zipper tape.
(Click Image to Enlarge)
Step 15:
Be sure the zipper is open and then turn the bag right side out through the opening at the bottom of the lining. Turn in the seam allowances at the bottom of the lining and pin in place. Stitch the lining closed by hand or machine. Flip the lining inside the bag.
(Click Image to Enlarge)
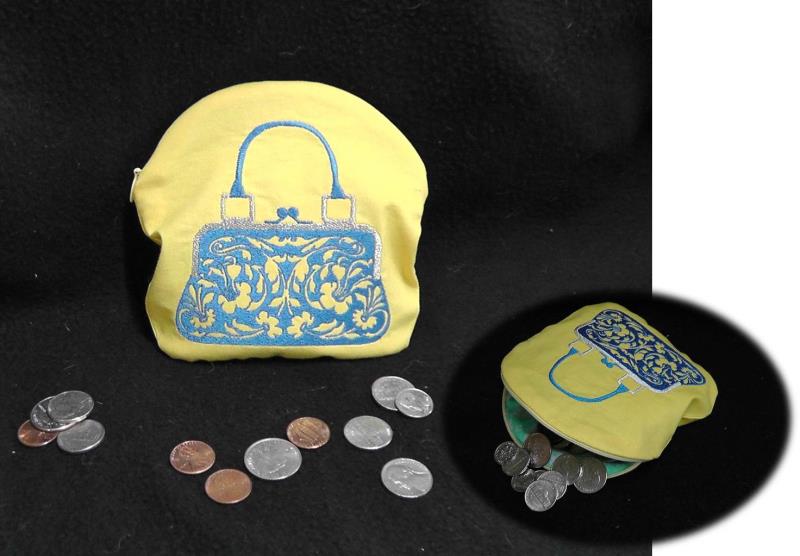
Step 16:
Give the bag a final press, add coins and enjoy the “Fancy Handbag” Coin Keeper or give it as a gift.
Ramona Baird has been in the embroidery industry for over 23 years. She and her husband owned a commercial and retail embroidery store in Arizona for many years. She is an experienced digitizer having been mentored by award-winners Pat Williams and Lindee Goodall. Ramona is a contributor to “Creative Machine Embroidery” magazine having 5 covers to her credit. Ramona has worked for Wilcom America and served many years as Education Director for the American Sewing Guild. With a degree in fashion design, she is able to design and execute patterns which Pat Williams says are “out of the box” in creativity and application. Ramona likes to challenge the boundaries of embroidery and bring new and exciting designs, ideas, and projects to EmbroideryDesigns.com. She wants embroiderers of all levels to increase their skills and enjoyment in using their embroidery machine for gift-making and personal pleasure.