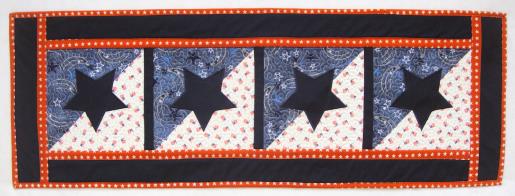
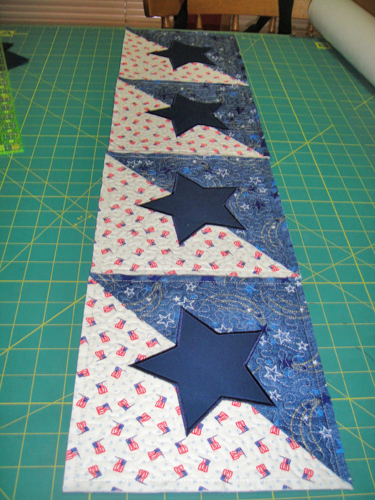
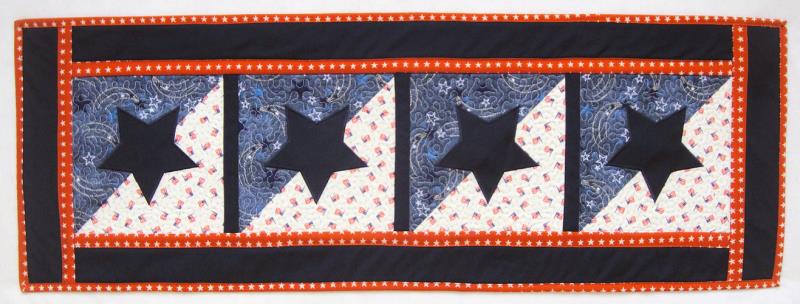
Pieced, appliqued and quilted in the hoop, the Patriotic Star blocks make a wonderful table runner for Memorial Day, Veteran’s Day, July 4th, Flag Day or just to show off your Americana decor.
The stars in this project were cut with the Scan N Cut 2®, but may also be done with the stitch and trim method. FCM, SVG and PDF files are available for cutting the appliques. To download these files be sure to check the “All file types” when downloading your designs to be able to access the cutting files. Note: Stars are not symmetrical, so mark or note where the top of the star is so that your placement of the applique will be correct.
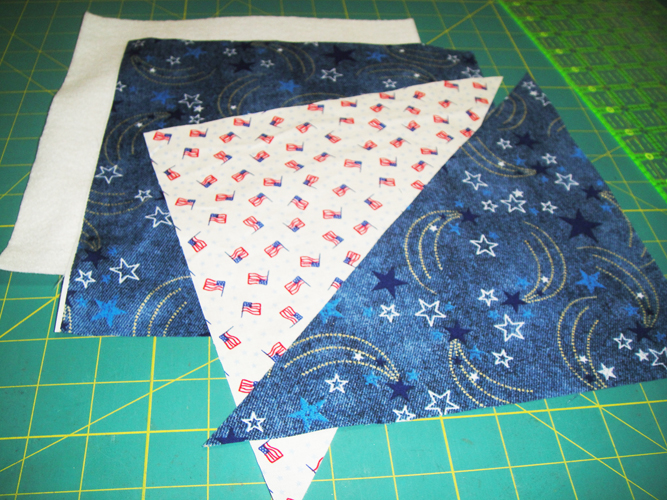
Step 1:
Cut 6 10” squares of medium blue print; sub cut 2 of those squares diagonally to get 4 triangles. Cut 2 10” squares of white/red/blue print and cut them in half diagonally to get 4 triangles. Cut 4 10” squares of Battilizer®.
(Click Image to Enlarge)
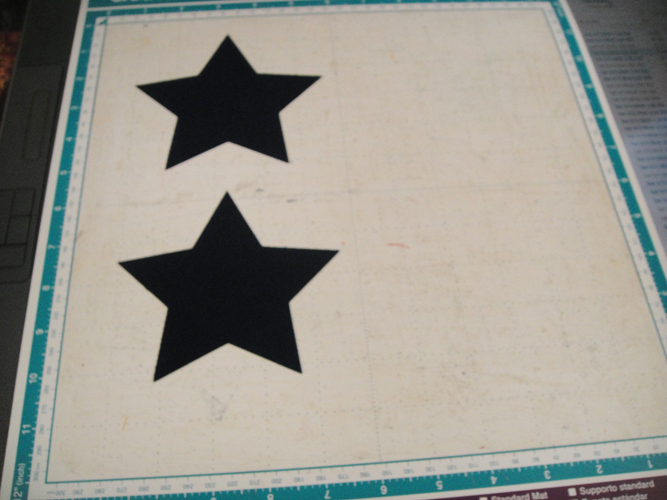
Step 2:
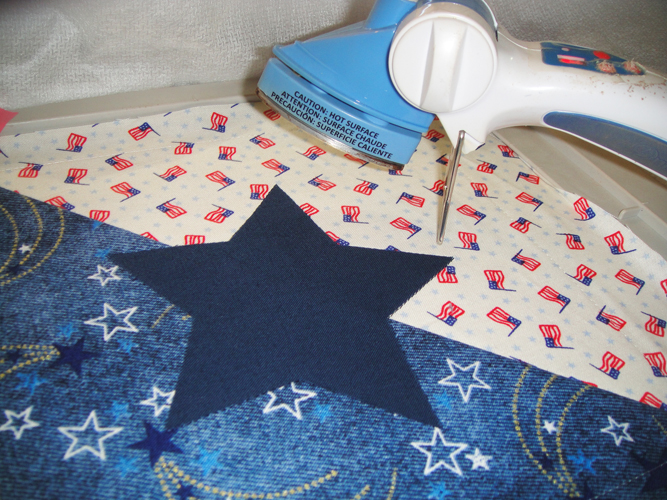
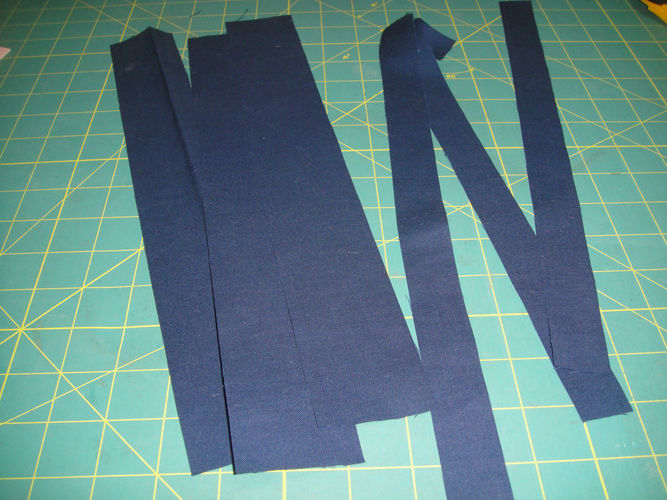
Cut a 5.5”x 24” strip of navy Kona® and press 4 times with Magic Sizing®, apply Heat N Bond Lite to the fabric and cut your appliques. Spray and press the fabrics even if you are cutting by hand or using the stitch and trim method as this keeps your appliques from fraying. Leave the stars on the board or mark the top point of the star so that your appliques will be placed properly. Cut 4 stars even though only two are shown in the picture.
(Click Image to Enlarge)
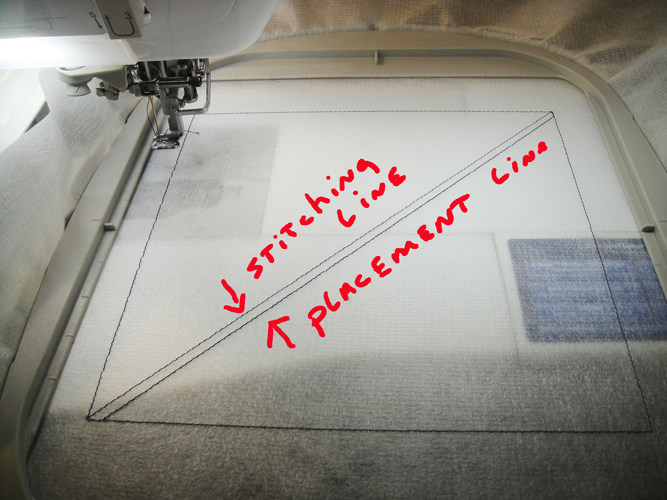
Step 3:
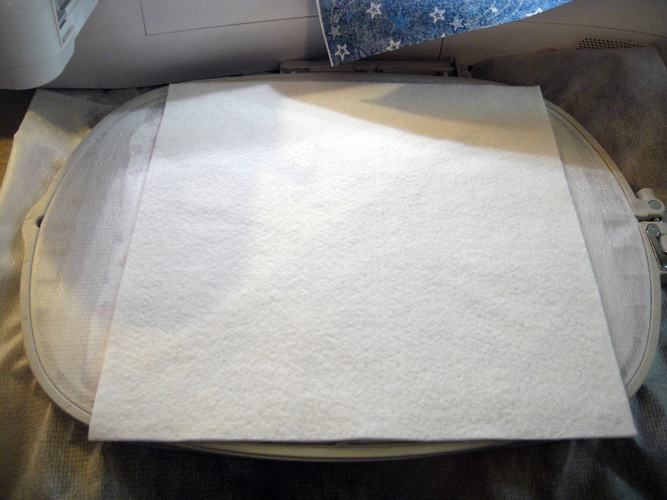
Hoop poly mesh stabilizer in your hoop and run color stop (CS 1) to outline the block and placement lines.
(Click Image to Enlarge)
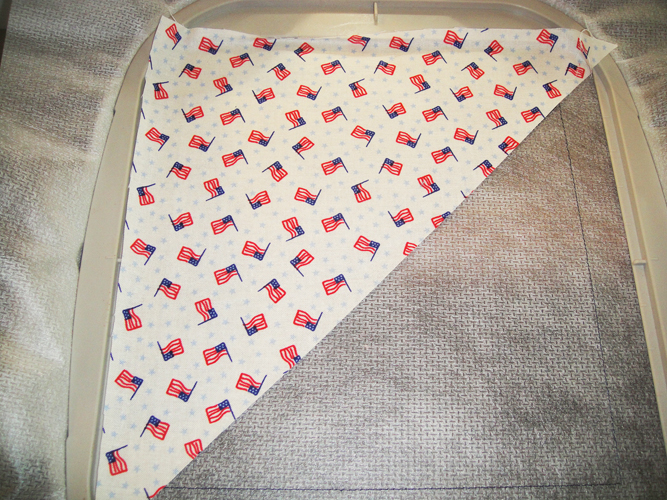
Step 4:
Spray adhesive on the wrong side of the white/red/blue fabric triangle and place over the upper right hand corner of the hoop; the long edge of the triangle should be aligned with the diagonal stitch placement line; the outer edges of the fabric should exceed the stitched block outlines by at least ½”.
(Click Image to Enlarge)
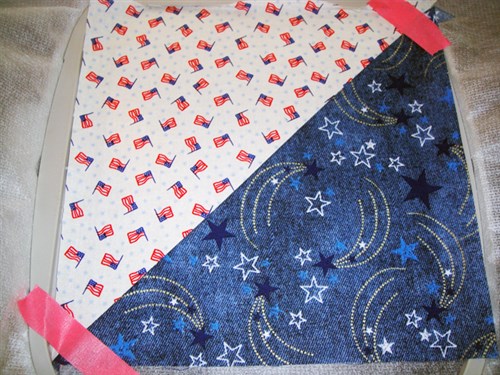
Step 5:
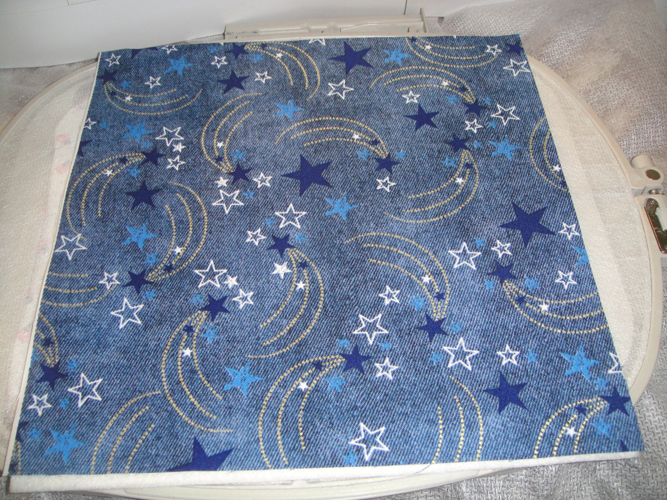
Place the medium blue fabric over the top of the white/red/blue fabric right sides together, do not spray adhesive on the medium blue fabric; hold in place with embroidery tape.
(Click Image to Enlarge)
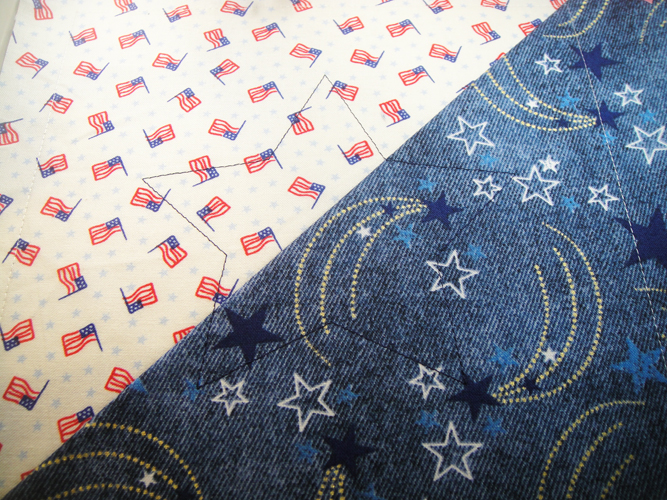
Step 6:
Run CS 2 for the seam to stitch the two triangles together.
(Click Image to Enlarge)
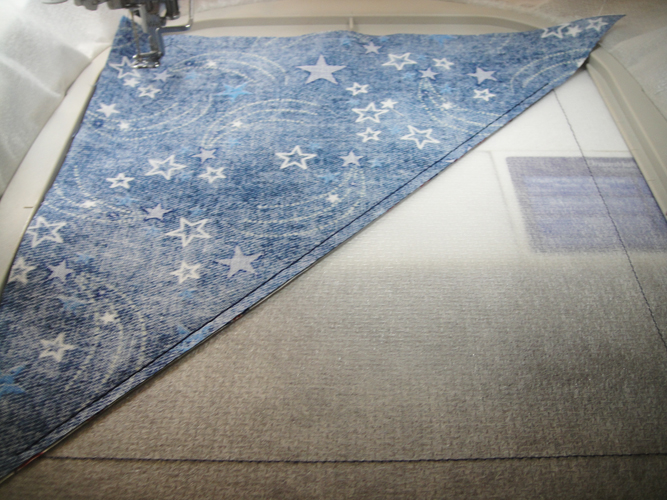
Step 7:
Remove the hoop from the machine, spray a little adhesive on the wrong side of the medium blue fabric and finger press open adhering the medium blue to the stabilizer; place a little embroidery tape on the dog ears formed at the lower left and upper right corners to prevent the dog ears from getting picked up by your presser foot. Run CS 3 in water soluble thread to tack down both triangles of the block.
(Click Image to Enlarge)
Step 8:
Run CS 4 to stitch the placement line for the star.
(Click Image to Enlarge)
Step 9:
If using precut appliques, place the star applique over the placement line and press into place with an applique iron; be sure the top of the star applique is placed at the top of the outline. If using the stitch and trim method place a 5 ½” square of fabric with Heat N Bond applied, then spray with a little adhesive, over the placement lines, do not iron yet.
(Click Image to Enlarge)
Step 10:
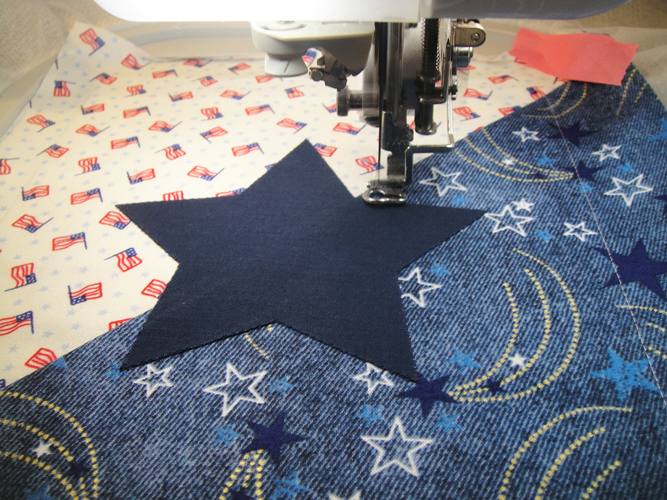
Run CS 5 in navy to tack down the star, for the precut appliques this stich just outlines the star again, but it lets you know your star is in the correct position. The stitch and trim method users need these tack down stitches to hold down their fabric. Stitch and trim users, trim your applique right up next to these tack down stitches and then press your applique into place.
(Click Image to Enlarge)
Step 11:
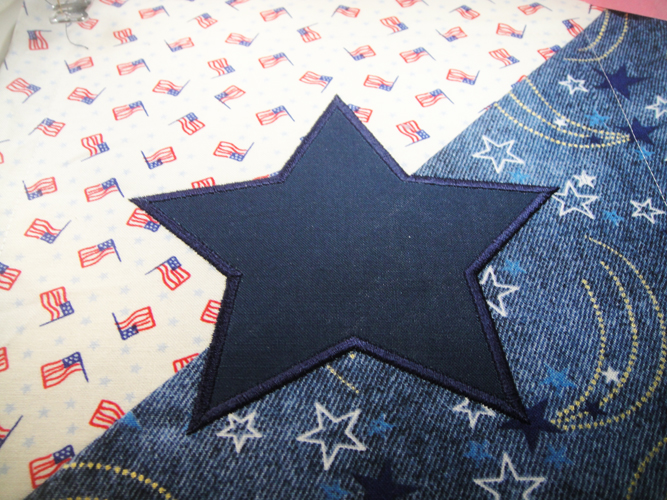
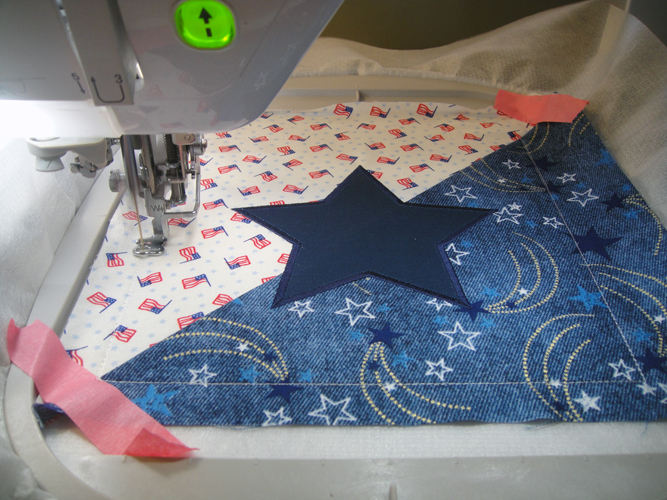
Run CS 6 in navy to border the star.
(Click Image to Enlarge)
Step 12:
Remove the hoop from the machine; do not unhoop; turn the hoop back side up.
(Click Image to Enlarge)
Step 13:
Spray adhesive on the Battilizer® and place over the block on the back of the hoop.
(Click Image to Enlarge)
Step 14:
Spray adhesive on the back fabric and place over the Battilizer® right side up.
(Click Image to Enlarge)
Step 15:
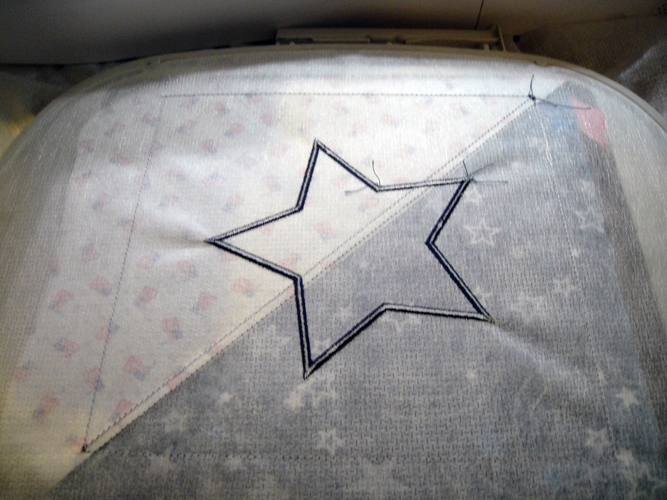
Return the hoop to the machine and run CS 7 in water soluble thread to tack down the batting and back fabric to the block. Then run CS 8 in white thread to stitch the quilting.
(Click Image to Enlarge)
Step 16:
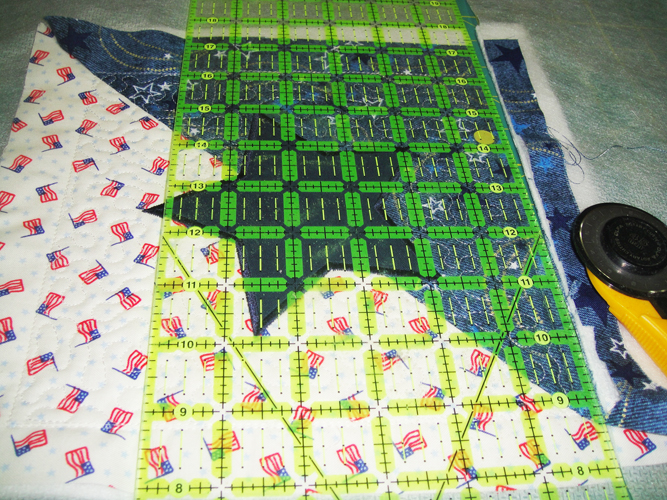
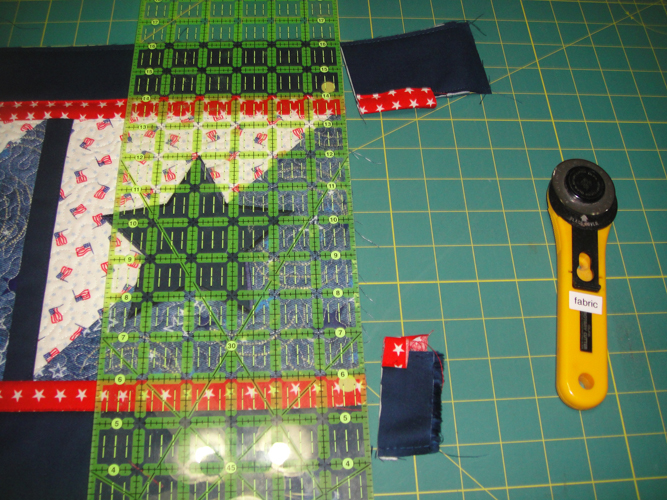
Remove the block from the hoop; lay it your cutting mat; align the ¼” make of a see through ruler with the water soluble thread outlines on the block and trim all four sides to a ¼” seam allowance.
(Click Image to Enlarge)
Step 17:
(Click Image to Enlarge)
Repeat steps 2 through 16 three times for a total of 4 blocks.
Step 18:
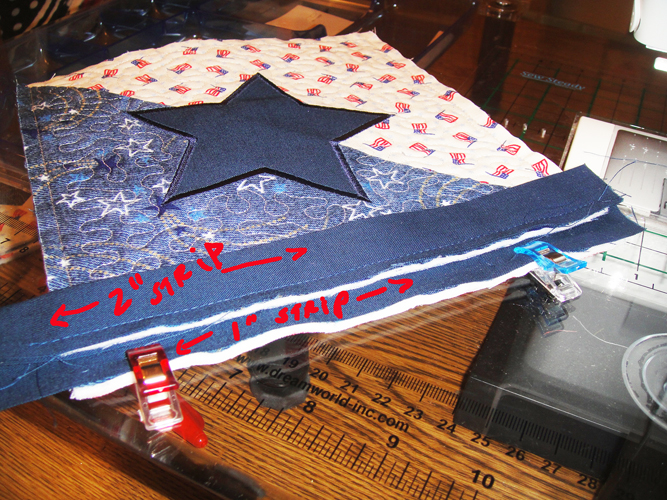
Cut 3 2”x 10” strips and 3 1”x10” strips for the sashing between the blocks.
(Click Image to Enlarge)
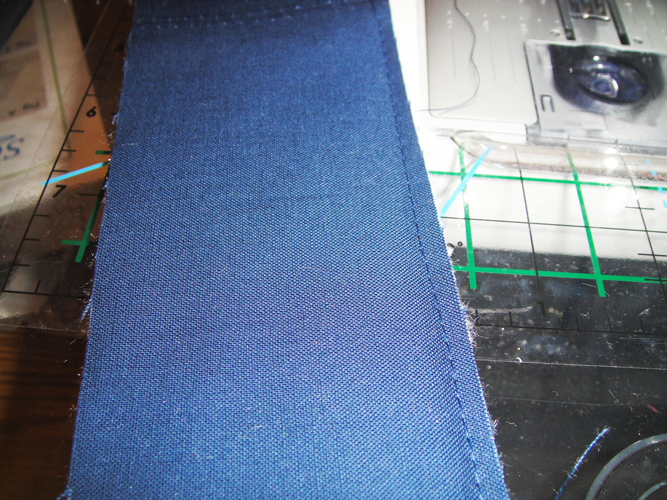
Step 19:
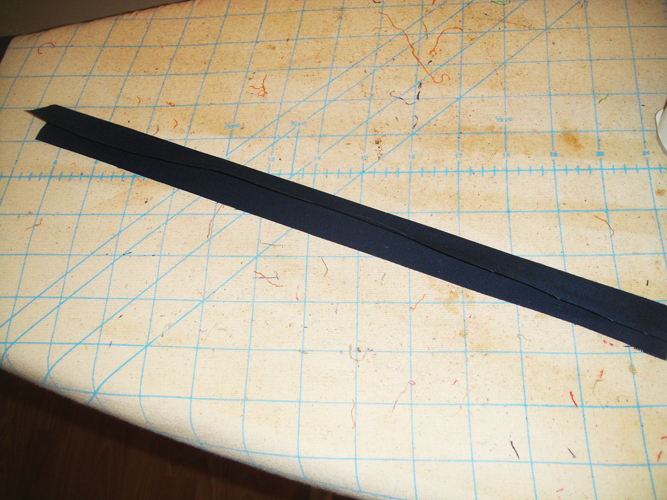
Press all of the sashing strips with Magic Sizing; fold the 2” strips in half lengthwise and press a nice straight crease down the center back. Thread your machine with thread that matches the sashing color on top and a thread that will blend well with the block backs in the bobbin. In this case navy thread was used for both.
(Click Image to Enlarge)
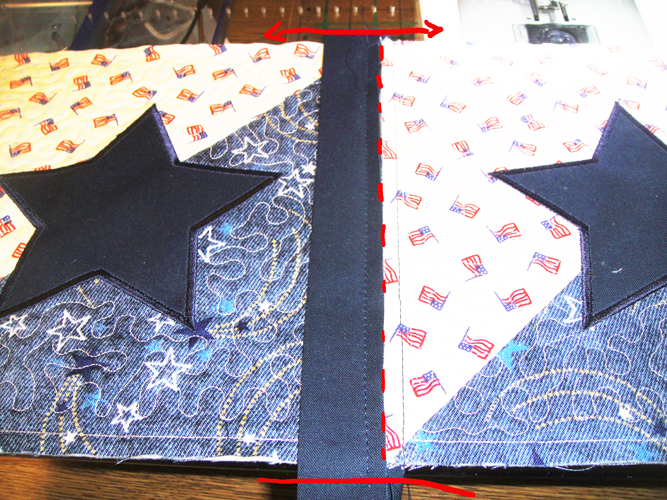
Step 20:
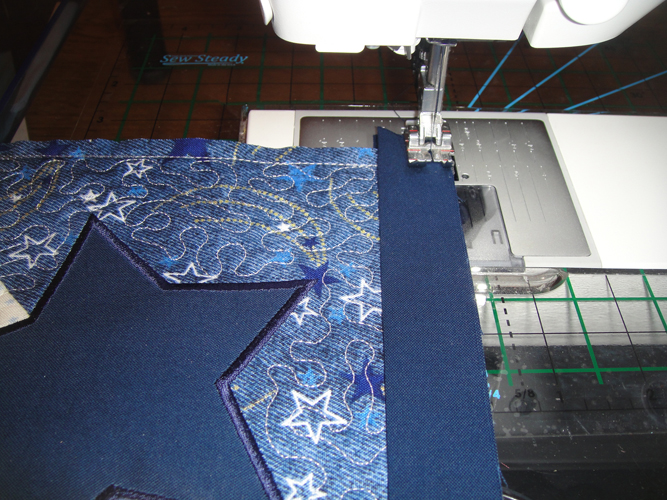
Lay a 1” strip along the medium blue edge of the block (the edge that was at the bottom of the block when it was in the hoop); lay the folded 2” strip on the top of the bottom edge of the block having the raw edges of the bottom strip, quilt block and top strip even; the sashing strips will extend beyond the edges of the quilt block.
(Click Image to Enlarge)
Step 21:
With straight stitch length of 3mm stitch an accurate ¼” seam through all three layers.
(Click Image to Enlarge)
Step 22:
Make sure you have your next block in the correct orientation – the white triangle edge will now be joined to the bottom strip of sashing; the blue triangle will have the same orientation as the first block.
(Click Image to Enlarge)
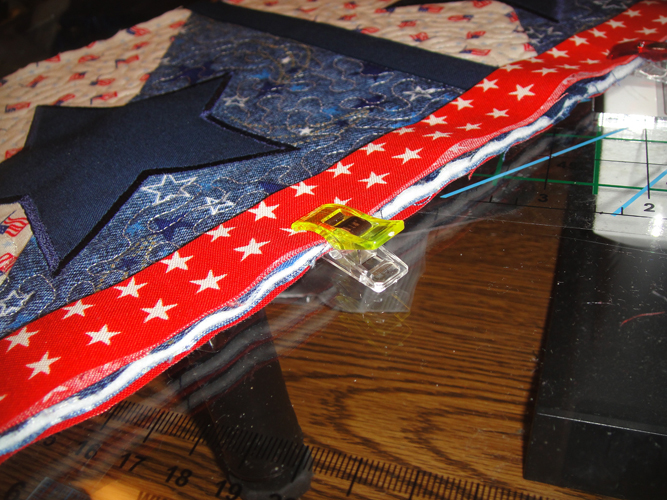
Step 23:
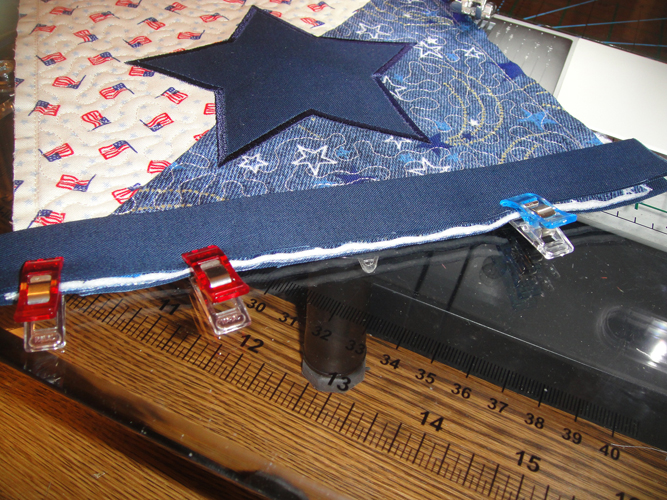
Clip the 1” strip to the back of the 2nd block; make sure your two blocks are aligned with each other so that when you fold them out the tops and bottom of the blocks will be straight.
(Click Image to Enlarge)
Step 24:
Stitch the 1” strip to the second block with an accurate ¼” seam allowance.
(Click Image to Enlarge)
Step 25:
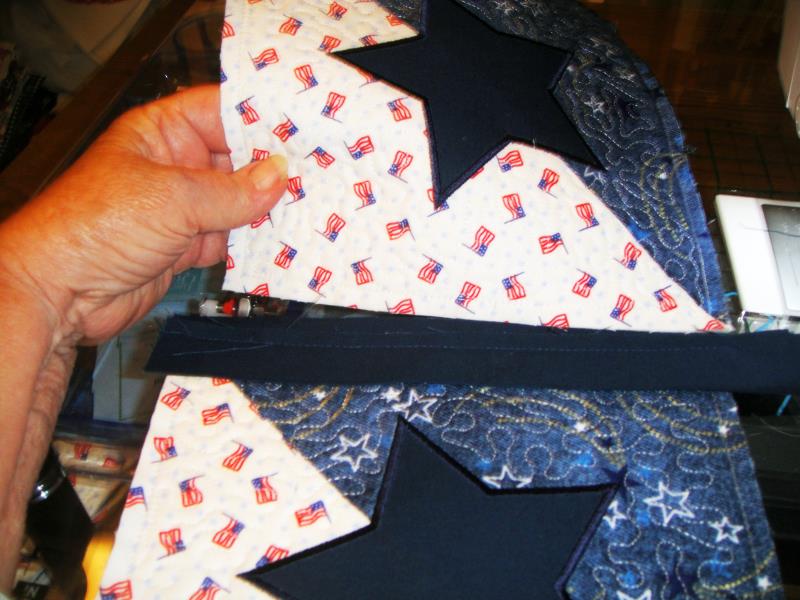
When you open the two blocks out, if you seam was accurate, the edges of the two blocks will butt together smoothly with no gaps or overlaps.
(Click Image to Enlarge)
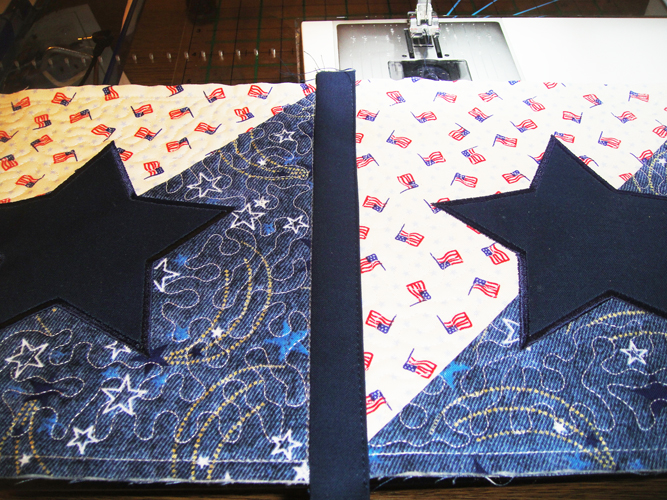
Step 26:
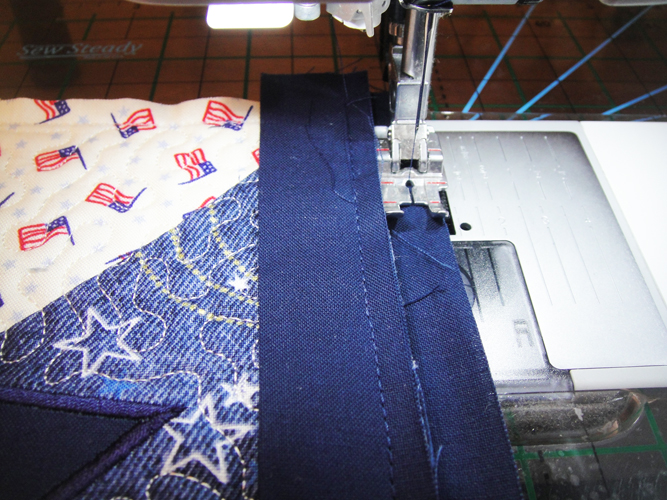
Press the folded 2” strip over towards the second block covering the butting of the seam allowances and edge stitch the folded edge to the 2nd block.
(Click Image to Enlarge)
Step 27:
(Click Image to Enlarge)
Join the last two blocks to the row using the same techniques for joining the sashing to the blocks; trim the excess sashing and square up the blocks.
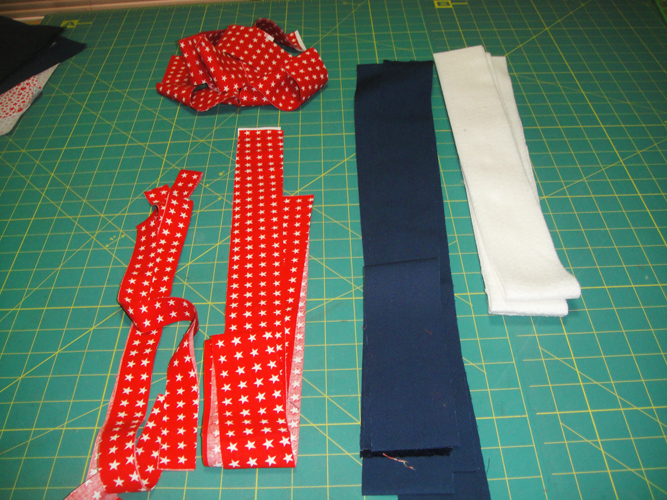
Step 28:
Cut 6 2.5” strips of navy fabric for the borders across the width of the fabric; cut 4 2 ½” by 36” strips lengthwise of the Battilizer®; cut 3 1” strips and 3 2” strips from red for the sashing; cut 3 2 ½” strips of red for binding.
(Click Image to Enlarge)
Step 29:
Make a quilt sandwich from the border strips, i.e., fabric, batting, fabric, baste together the layer down each side with a long running stitch and 1/8” seam allowance.
(Click Image to Enlarge)
Step 30:
Prepare the red sashing strips pressing with Magic Sizing and folding as you did the smaller sashing strips; place red thread in the top of your machine and leave navy in the bobbin; attach the sashing strips to the long sides of the table runner with the 1” strip on the bottom and the 2” folded strip on the top.
(Click Image to Enlarge)
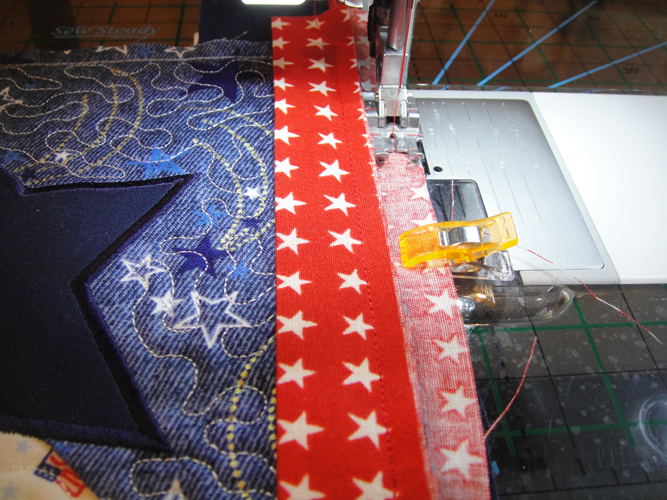
Step 31:
Stitch the 1” strip to the side border with a ¼” seam.
(Click Image to Enlarge)
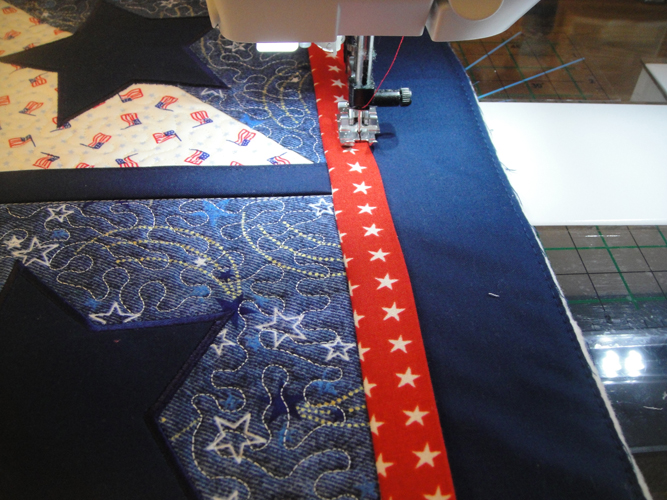
Step 32:
Fold the border out; press the top sashing over the seam and edge stitch to the border. Attach the second side border in the same manner.
(Click Image to Enlarge)
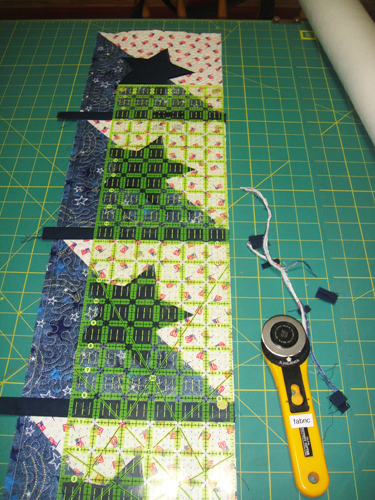
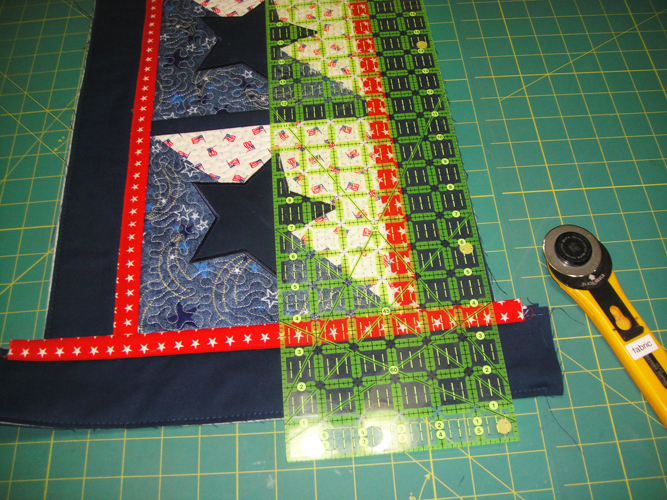
Step 33:
Trim the ends of the borders and sashing even with the top and bottom blocks of the table runner.
(Click Image to Enlarge)
Step 34:
Stitch sashing and end borders to both ends of the table runner in the same manner; trim the ends.
(Click Image to Enlarge)
Step 35:
Bind the table runner using your favorite method. Congratulations your Patriotic Table Runner is complete.
Award winning Digitizer, Embroidery Educator, Author and a Consultant to the Industry, Pat Williams has 30 years of experience in the embroidery industry. Pat has won multiple awards for her digitizing expertise including the 2007 Impressions Awards Grand Championship, Best of Show as well as the 1st and 2nd Place Awards. Pat’s love of digitizing has afforded her the opportunity to write numerous articles for Impressions magazine in the United States and Images Magazine in Europe. In 2001 Pat was named “Embroidery Educator of the Year.” For many years Pat taught digitizing seminars at the ISS Shows in Long Beach, CA and for Compucon software. She now resides in Tucson, AZ.