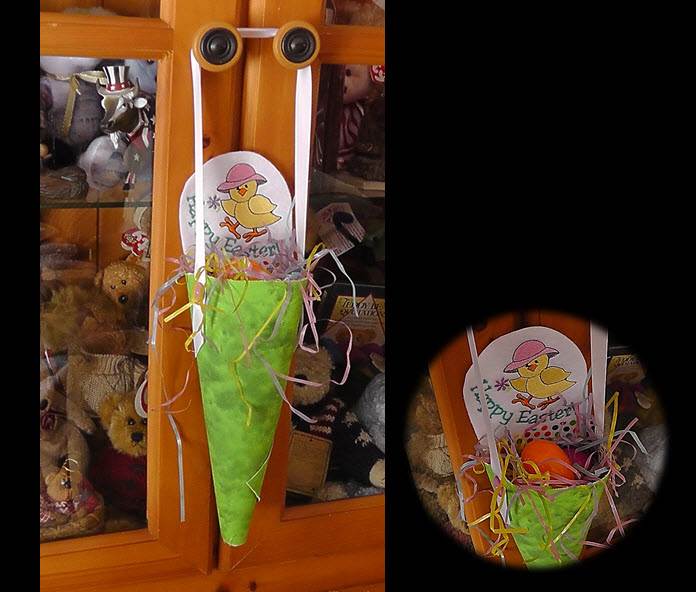
Instead of Easter baskets this year, create colorful cones stuffed with eggs filled with candy, to hang from a banister, a chair back or even a cabinet door.
Project Preview Video
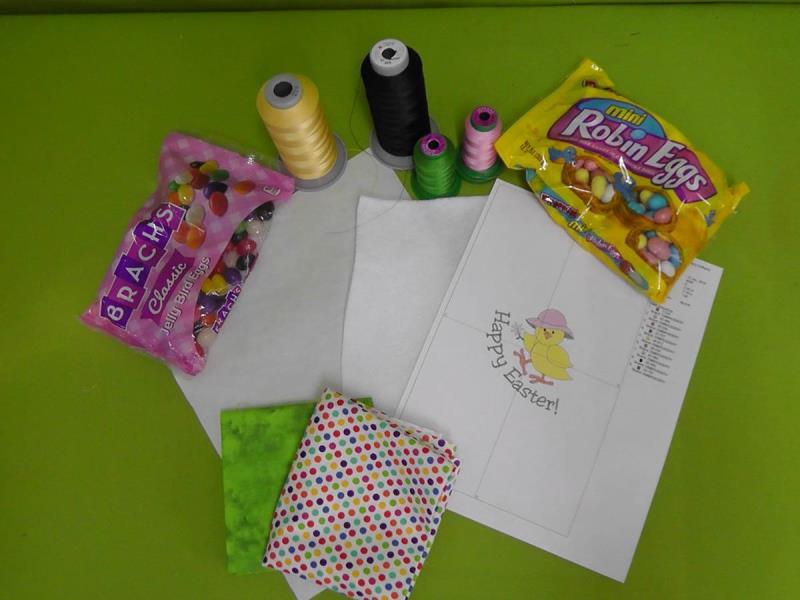
Materials
1 piece of white felt to hoop for embroidery
1 piece cutaway stabilizer
6” x 6” white cotton fabric for back of embroidery
10” x 10” green cotton fabric for outer cone
10” x 10” doted cotton fabric for inner cone
Heat ‘n Bond Lite: 1-10”x 10”, 1-6”x 6”, and one smaller piece about 3”x 2”
The embroidery is done on felt and then Heat ‘n Bond Lite is used to fuse a piece of white cotton fabric to the back. Two pieces of cotton fabric are fused together, sandwiching the embroidery between. The fabric is rolled into a cone shape and buttons are used to hold a ribbon handle to the sides of the cone. Colored grass is placed in the cone and plastic eggs are filled with candy and placed in the cone to create a decorative accent for Easter time.
Step 1:
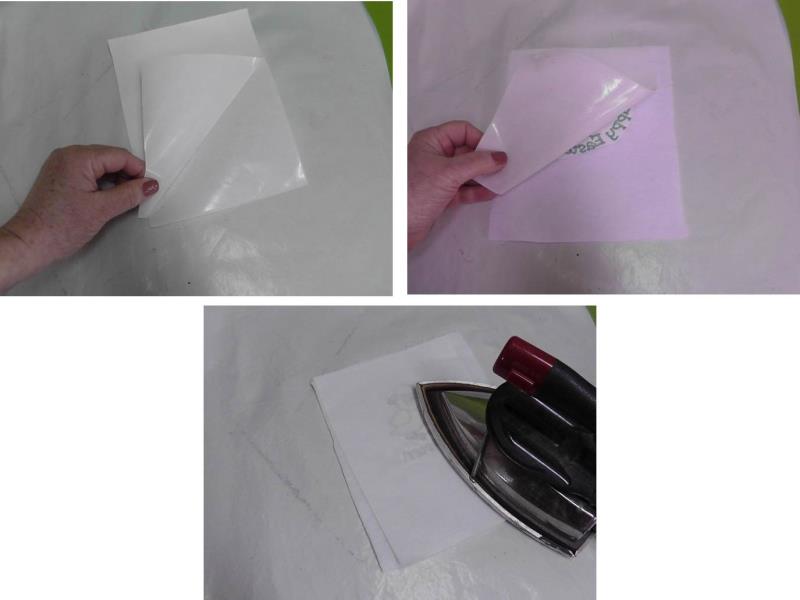
Gather the materials and read through the instructions before beginning. Print out a template of the design. Follow the manufacturer’s directions for fusing the Heat ‘n Bond to the fabrics.
(Click Image to Enlarge)
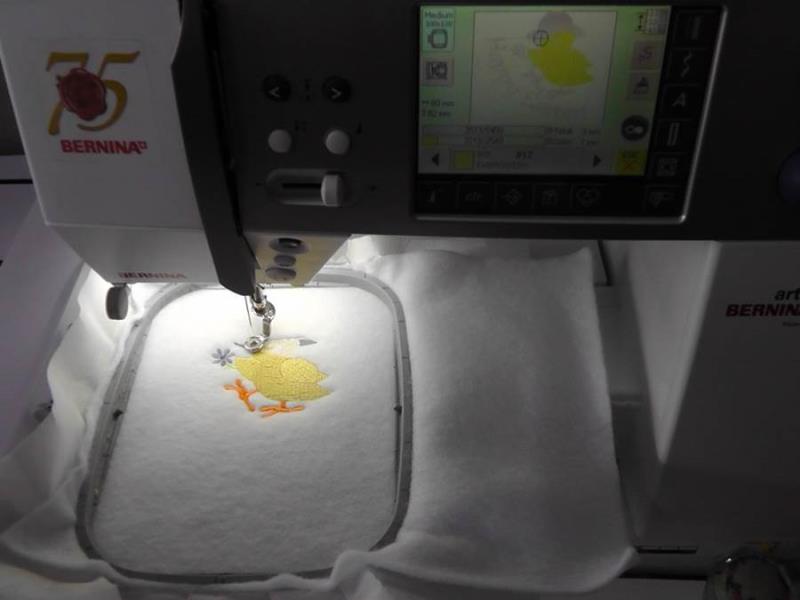
Step 2:
Load the design “Happy Easter” on the machine. Hoop the white felt with the cutaway stabilizer and stitch the design following the color sequence.
(Click Image to Enlarge)
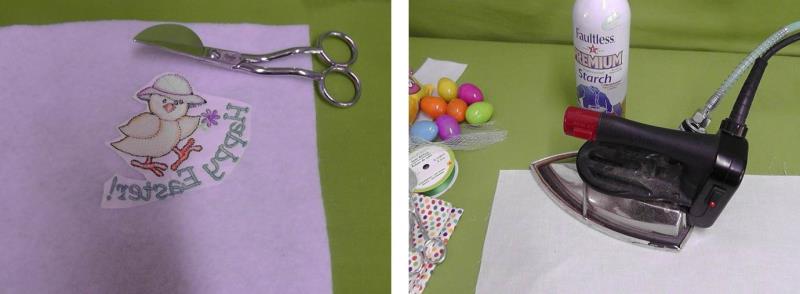
Step 3:
After the design finishes stitching, cut the excess stabilizer away. Press the white cotton fabric well.
(Click Image to Enlarge)
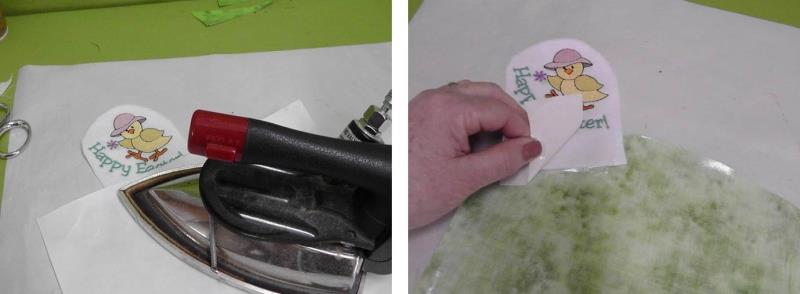
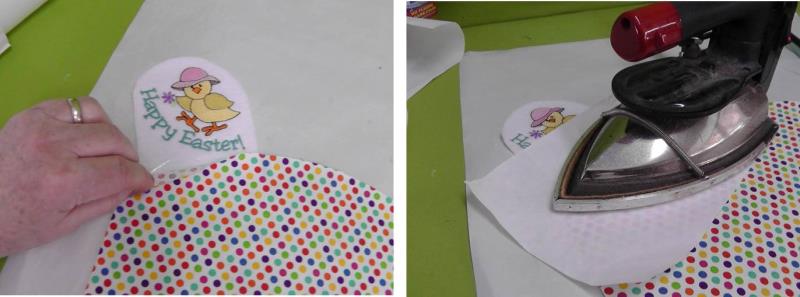
Step 4:
Use the 6” square of Heat ‘n Bond Lite to fuse the white fabric to the back of the embroidered felt. Let cool.
(Click Image to Enlarge)
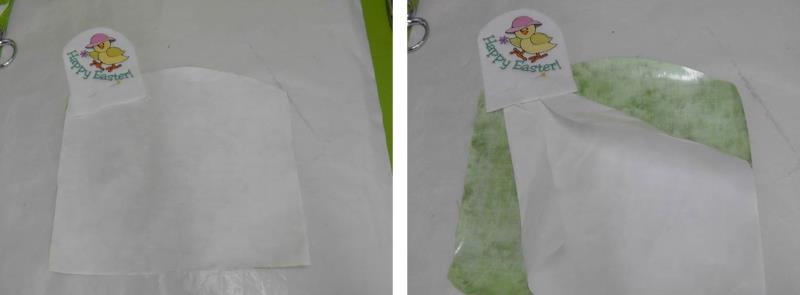
Step 5:
Remove the paper backing and place the white fabric against the back of the embroidery and fuse it in place. Let cool.
(Click Image to Enlarge)
Step 6:
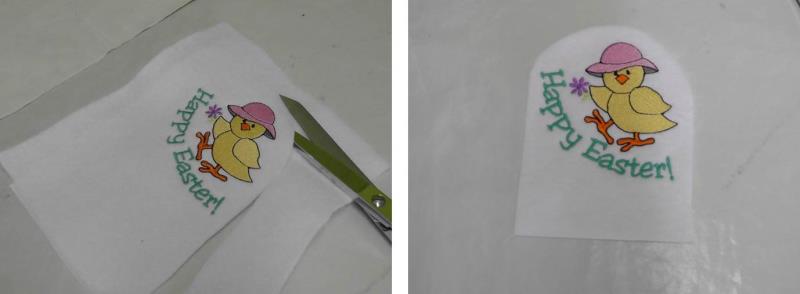
Cut the fused fabrics around the design creating an arch around the design and leave about 1 ½” at the bottom and cut the felt straight across as shown.
(Click Image to Enlarge)
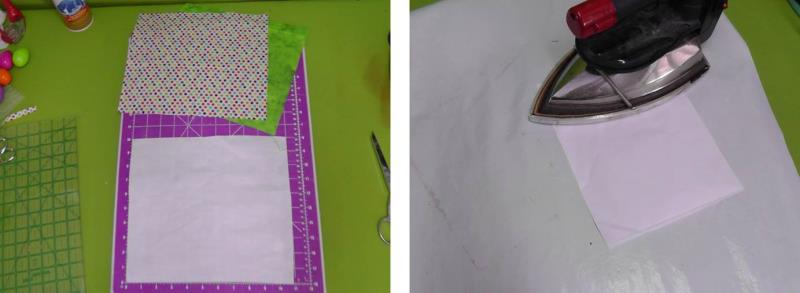
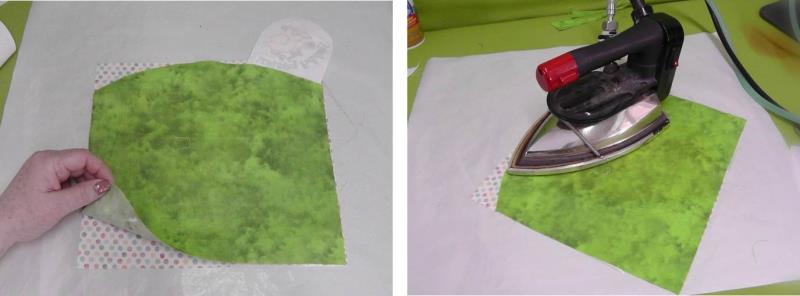
Step 7:
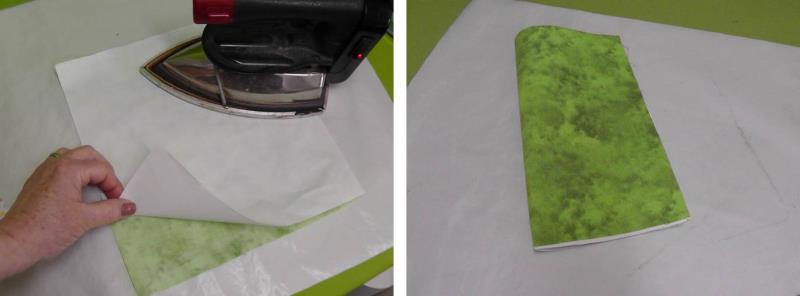
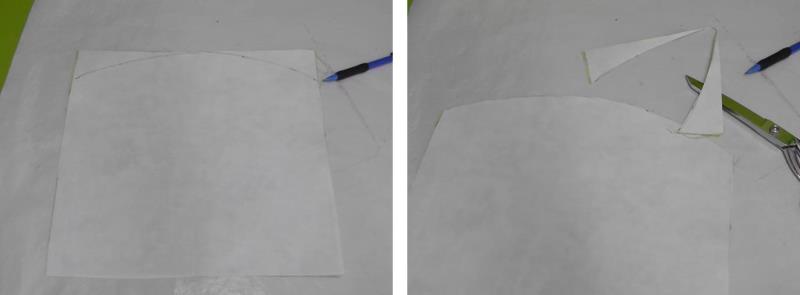
Next fuse the largest piece of Heat ‘n Bond to the back of the green fabric. Fold the fabric in half and make a small crease at that point.
(Click Image to Enlarge)
Step 8:
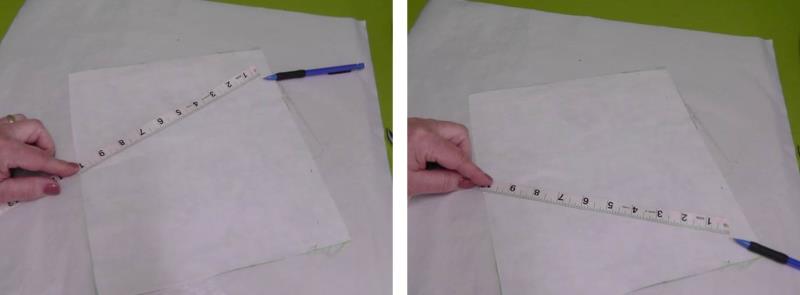
With a ruler and pencil, on the paper side mark an arch from the point 10” from side to side.
(Click Image to Enlarge)
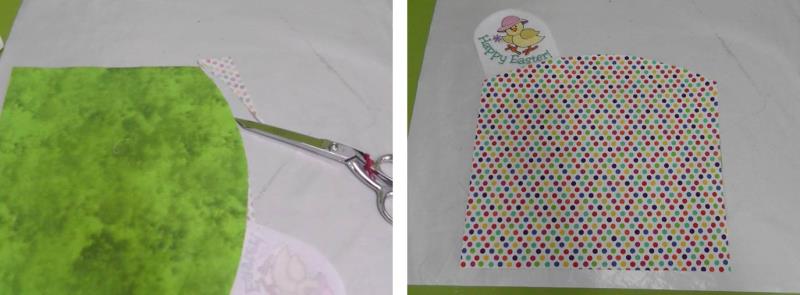
Step 9:
Cut along the arch mark.
(Click Image to Enlarge)
Step 10:
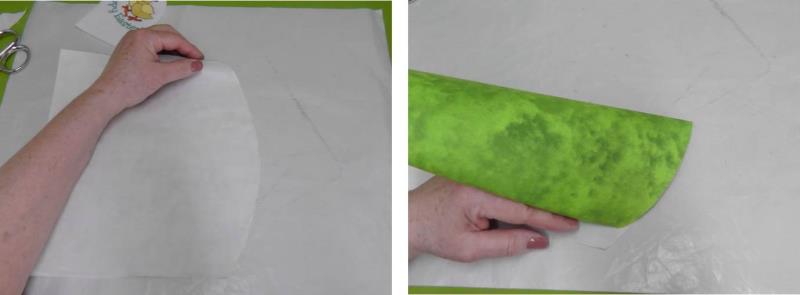
Lay the arch to the right and grab the upper corner and roll it to the other end of the arch.
(Click Image to Enlarge)
Step 11:
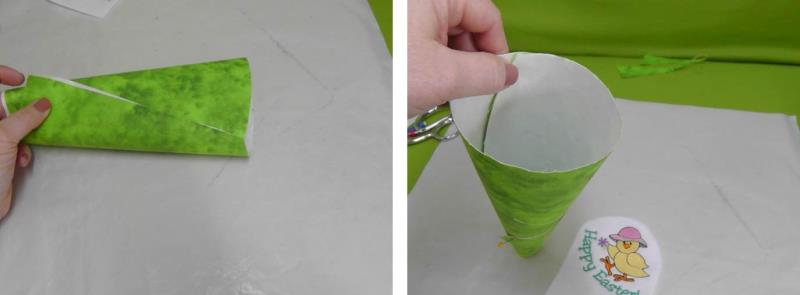
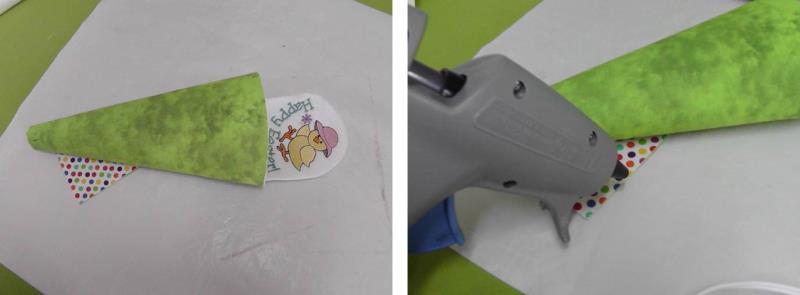
Create a cone shape by rolling in the lower edge. Hold the top joined edges together.
(Click Image to Enlarge)
Step 12:
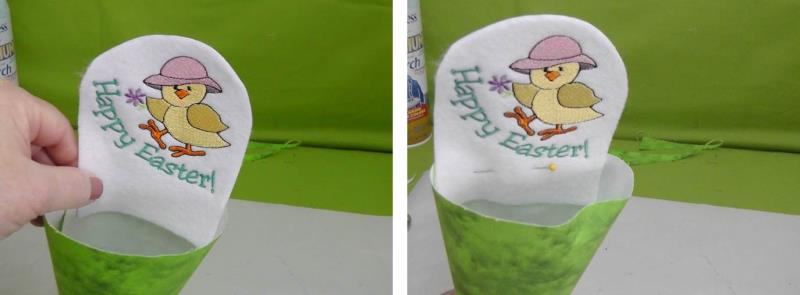
Place the bottom edge of the embroidery inside the cone and pin in place. The left edge of the embroidery should just reach the inside edge of the fabric inside the cone.
(Click Image to Enlarge)
Step 13:
Now open up the cone and remove the protective paper from the fusible.
(Click Image to Enlarge)
Step 14:
Place the protective paper back down and fuse the lower edge of the embroidered fabric just to hold it in place. Place the smallest piece of fusible over the lower edge of the embroidered fabric (do not allow the fusible to extend past the top of the cone edge).
(Click Image to Enlarge)
Step 15:
Place the green fabric over the remaining piece of fabric with wrong sides together; fuse the two fabrics together well and let the fabric cool.
(Click Image to Enlarge)
Step 16:
Trim the dotted fabric to the same shape at the top as the green fabric.
(Click Image to Enlarge)
Step 17:
Check to make sure all edges are fused well. If any areas need it, add small pieces of fusible and fuse in place.
(Click Image to Enlarge)
Step 18:
Roll the cone back into shape. Heat the hot glue gun. Use a small line of blue along the inside raw edges of the cone and hold in place until the glue sets.
(Click Image to Enlarge)
Step 19:
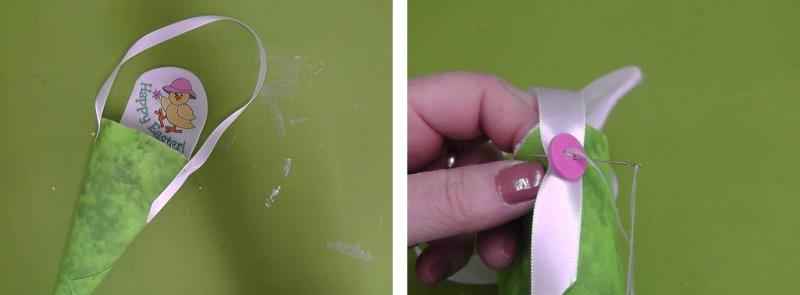
Angle cut the edges of the white ribbon and attach the ribbon to the cone top on each side, leaving about a three inch tail, and sewing the buttons over the ribbon to secure it in place.
(Click Image to Enlarge)
Step 20:
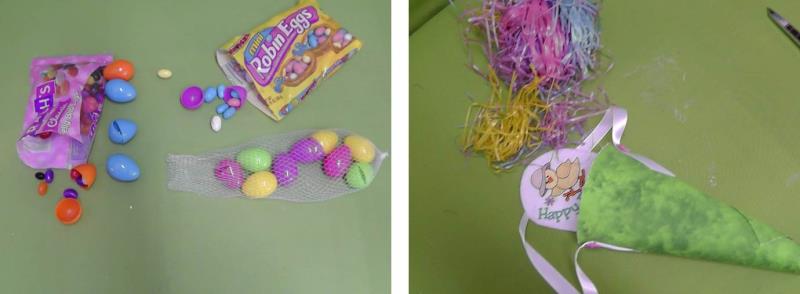
Fill the eggs with the chosen candy and fill the cone with the colored grass.
(Click Image to Enlarge)
Step 21:
Place the eggs in the cone and hang the Easter Candy Cone on door handles, a banister rail, or even a chair back. This is a nice alternative to an Easter basket for anyone of any age.
Ramona Baird has been in the embroidery industry for over 23 years. She and her husband owned a commercial and retail embroidery store in Arizona for many years. She is an experienced digitizer having been mentored by award-winners Pat Williams and Lindee Goodall. Ramona is a contributor to “Creative Machine Embroidery” magazine having 5 covers to her credit. Ramona has worked for Wilcom America and served many years as Education Director for the American Sewing Guild. With a degree in fashion design, she is able to design and execute patterns which Pat Williams says are “out of the box” in creativity and application. Ramona likes to challenge the boundaries of embroidery and bring new and exciting designs, ideas, and projects to EmbroideryDesigns.com. She wants embroiderers of all levels to increase their skills and enjoyment in using their embroidery machine for gift-making and personal pleasure.