This project is for an advanced sewer. The instructions presume you know about creating strip sets and then cutting them apart to create blocks for an Irish Chain block pattern. This project could be made larger for comforter or a bed by adding more blocks to enlarge the final size. Add a sleeve on the back for a wall hanging, or use the project as a table topper. All sewing is done using ¼” seam allowances.
Step 1:
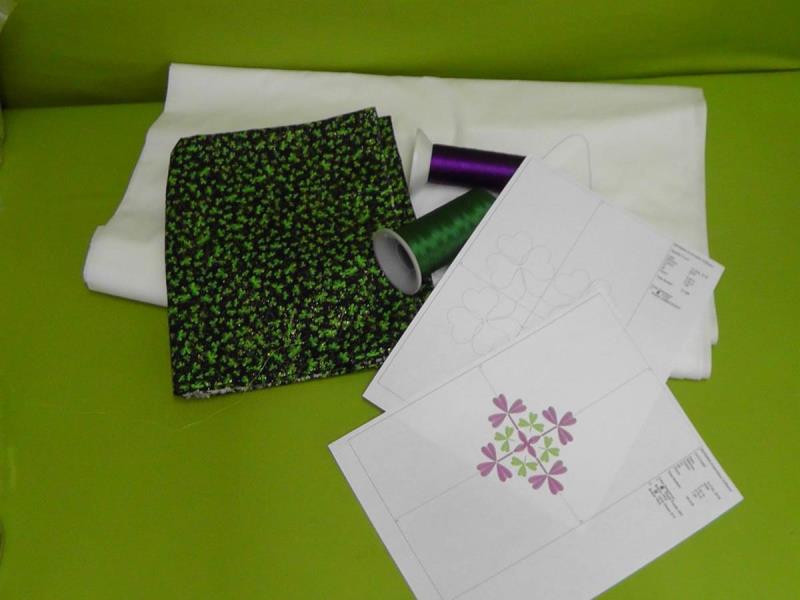
Gather the materials and read through the instructions before beginning. Print out a template of the design.
(Click Image to Enlarge)
Step 2:
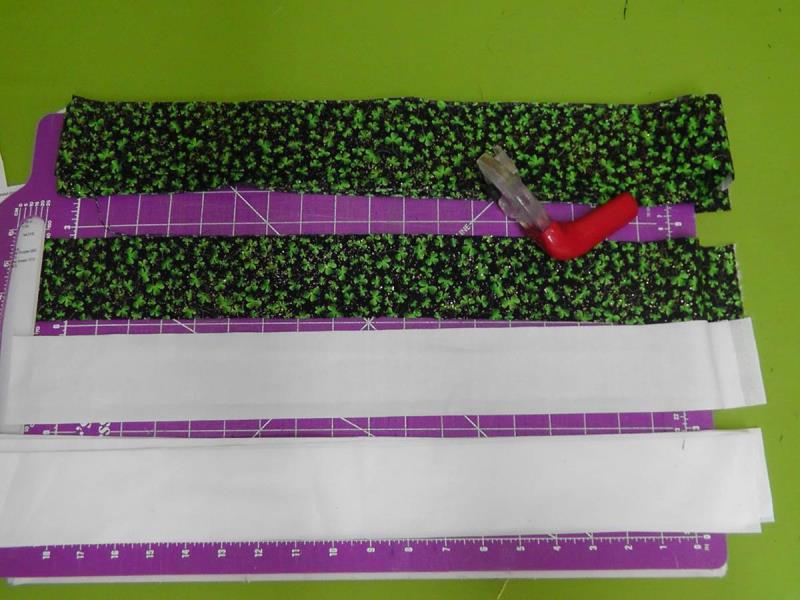
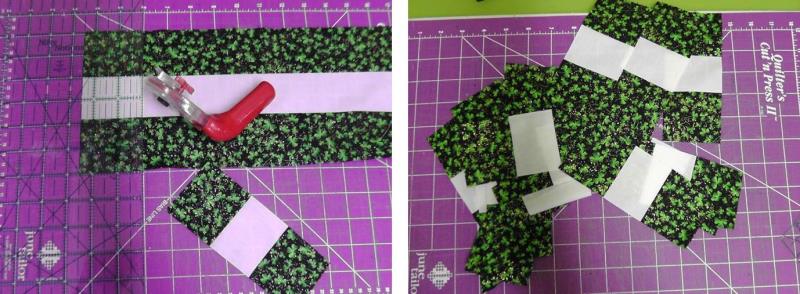
For the project, strips sets are cut 2 ½” wide. Use a rotary cutter, mat and ruler to accurately cut the strip sets needed. Cut two strips sets of Shamrock-white-Shamrock and one strip set of White-Shamrock-White. If doing a larger size, figure out and add additional strip sets as needed.
(Click Image to Enlarge)
Step 3:
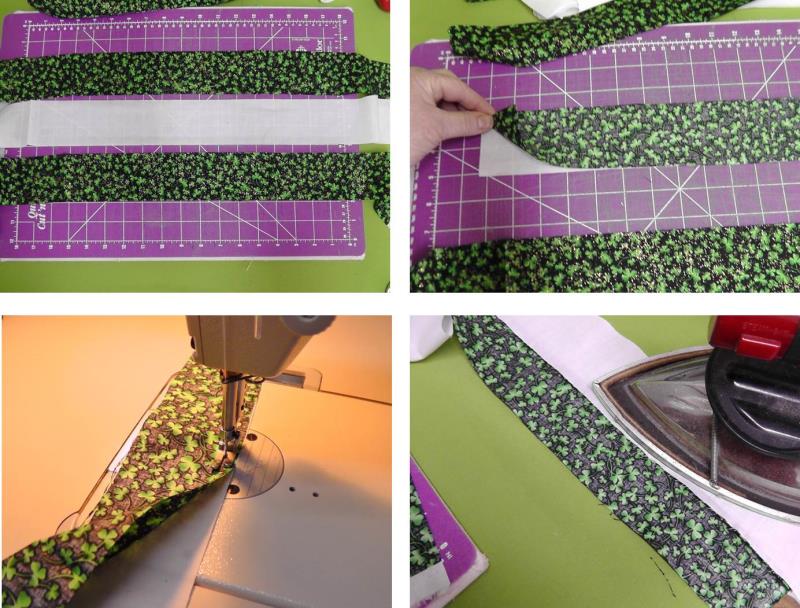
Assemble the first strip set of Shamrock-White-Shamrock and sew the strip sets together. Lay out the strip sets and place right sides together, sew ¼” seams and press the seams toward the darker fabric.
(Click Image to Enlarge)
Step 4:
Repeat for the remaining strip set of the same color sequence.
(Click Image to Enlarge)
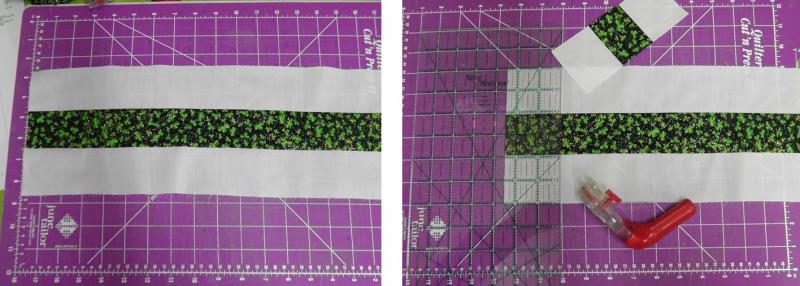
Step 5:
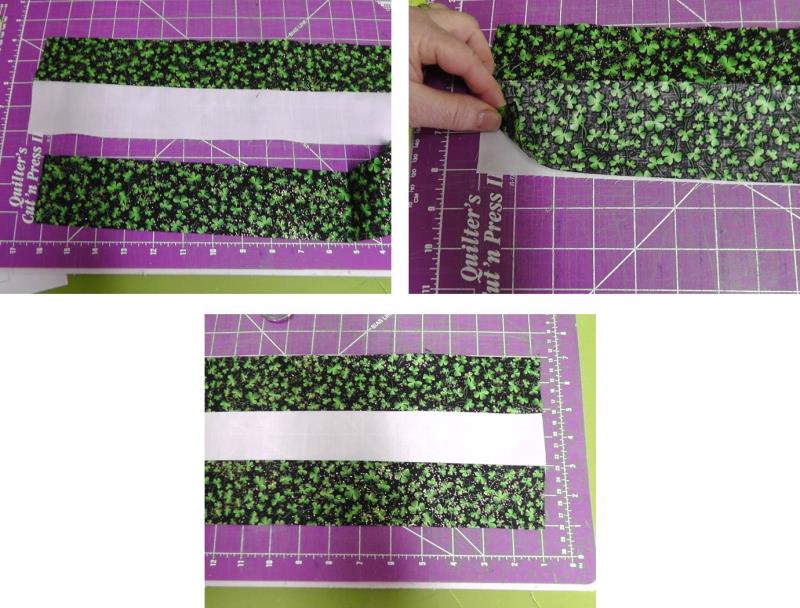
Use the rotary cutter, mat and ruler to cut each of the strip sets into 2 ½”.
(Click Image to Enlarge)
Step 6:
Use the remaining fabric strips to assemble the White-Shamrock-White strip set. Cut the strip into 2 ½” sections.
(Click Image to Enlarge)
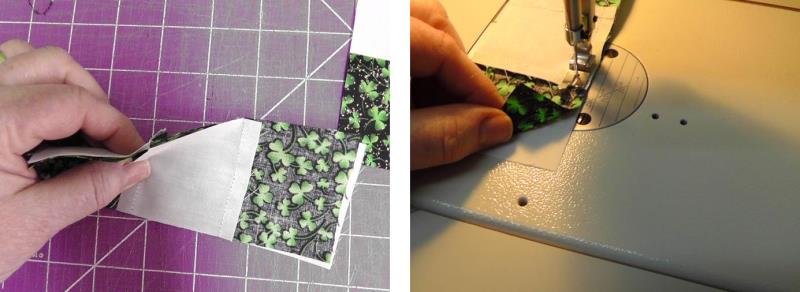
Step 7:
Next, form the smaller sections into blocks, alternating the sets as shown.
(Click Image to Enlarge)
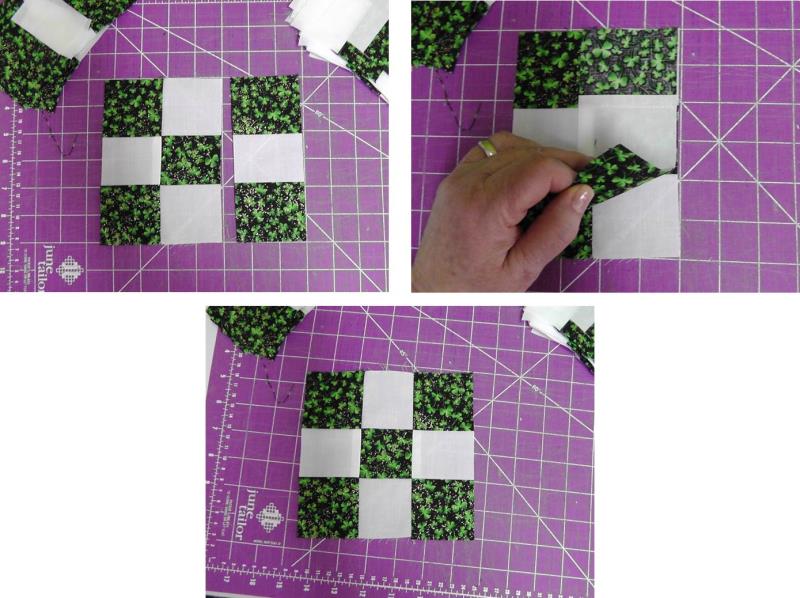
Step 8:
Join the sections together to form rows.
(Click Image to Enlarge)
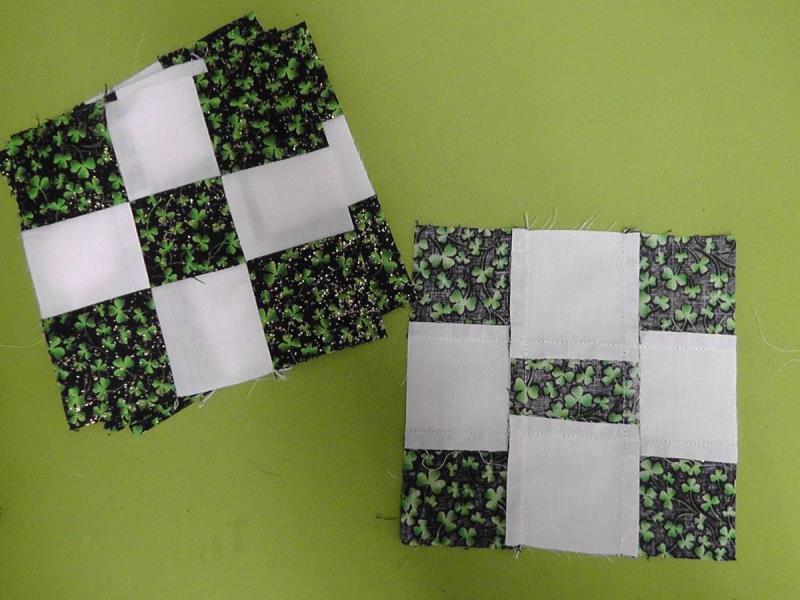
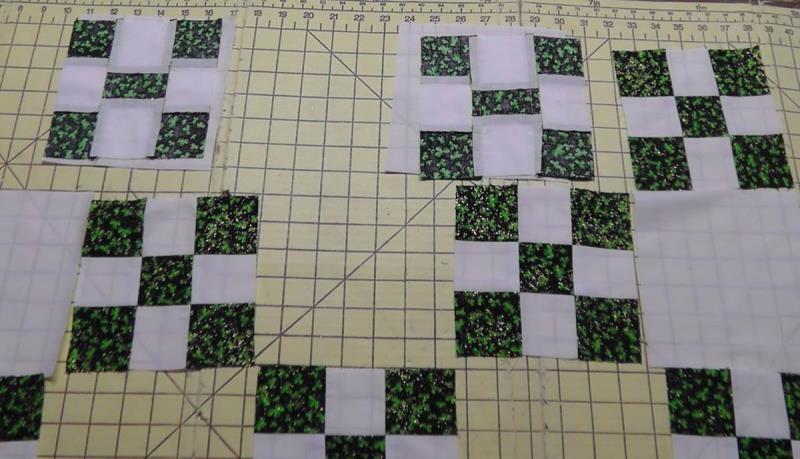
Step 9:
Sew the columns together to form a single block.
(Click Image to Enlarge)
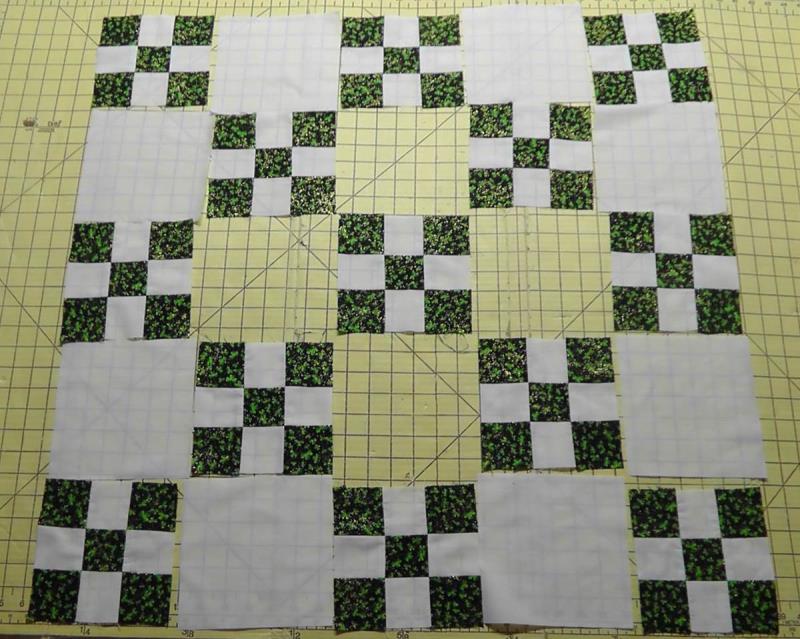
Step 10:
When all the sets are joined, there should be 13 blocks that will form the “Irish Chain” pattern for the project.
(Click Image to Enlarge)
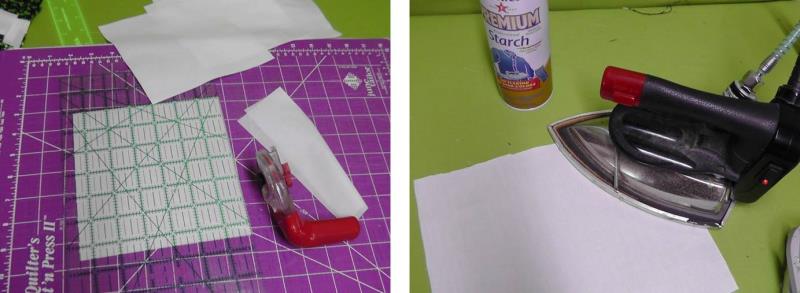
Step 11:
Prepare the four pieces of white fabric for the embroidery (size will depend upon the hoop size for the machine). Press the fabric with spray starch until it is fairly stiff.
(Click Image to Enlarge)
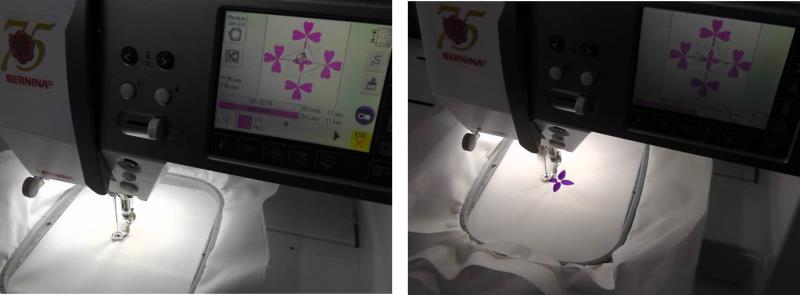
Step 12:
Load the design “Clover Pattern” on the machine. Hoop the fabric with stabilizer and place the hoop on the machine. Stitch the embroidery design following the color sequence.
(Click Image to Enlarge)
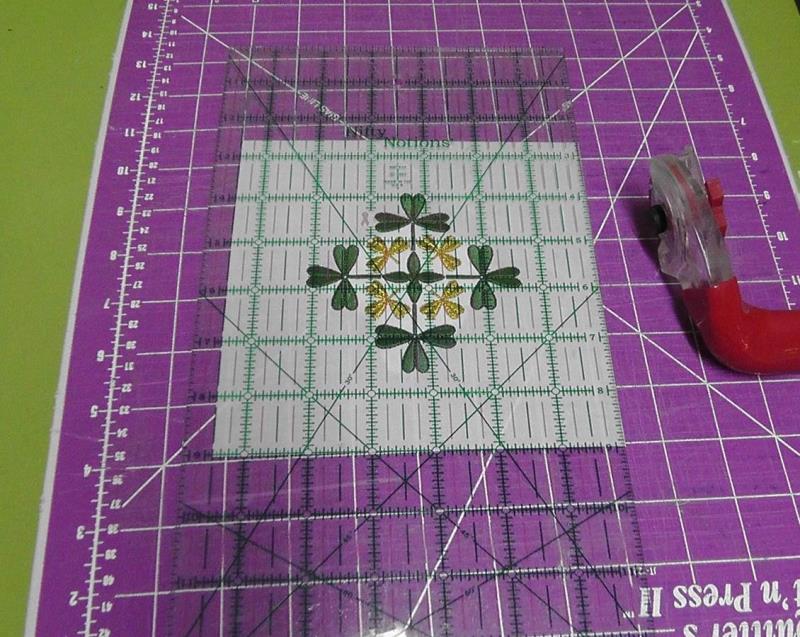
Step 13:
For the project, the interior clovers were stitched with gold metallic thread to bring out the gold metallic on the fabric.
(Click Image to Enlarge)
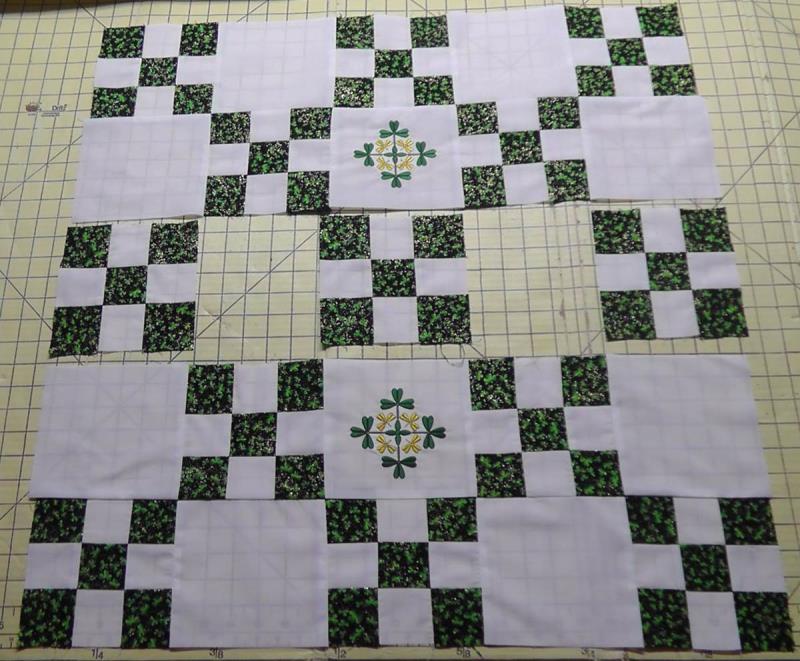
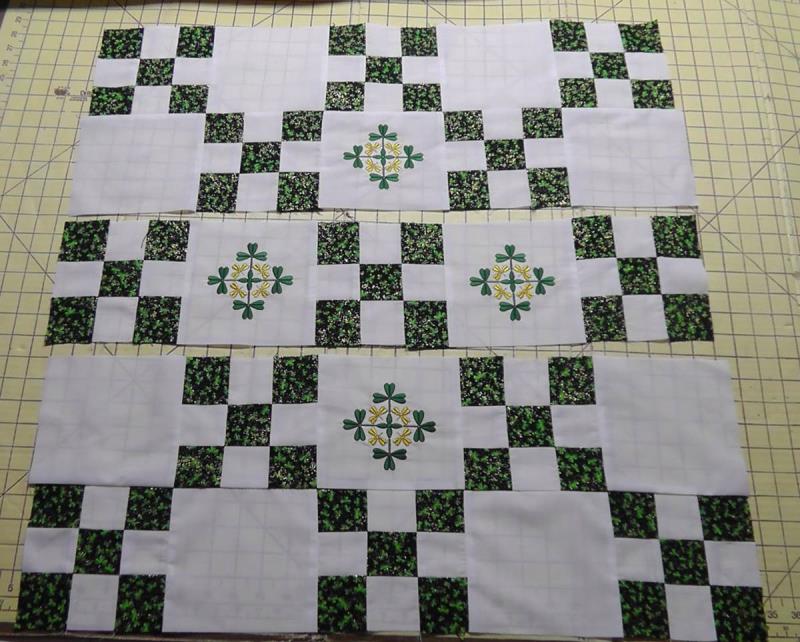
Step 14:
While the designs are stitching and if you have a second sewing machine, begin to stitch the blocks together. Lay out the white fabric blocks and the Irish Chain blocks in the order shown. The blank areas are left for the embroidered blocks.
(Click Image to Enlarge)
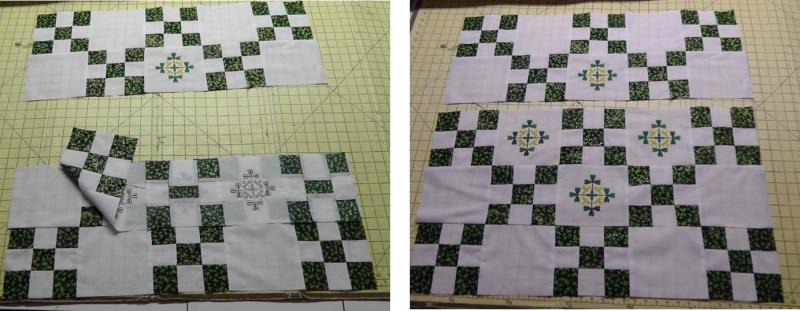
Step 15:
Form rows by placing adjoining blocks right sides together.
(Click Image to Enlarge)
Step 16:
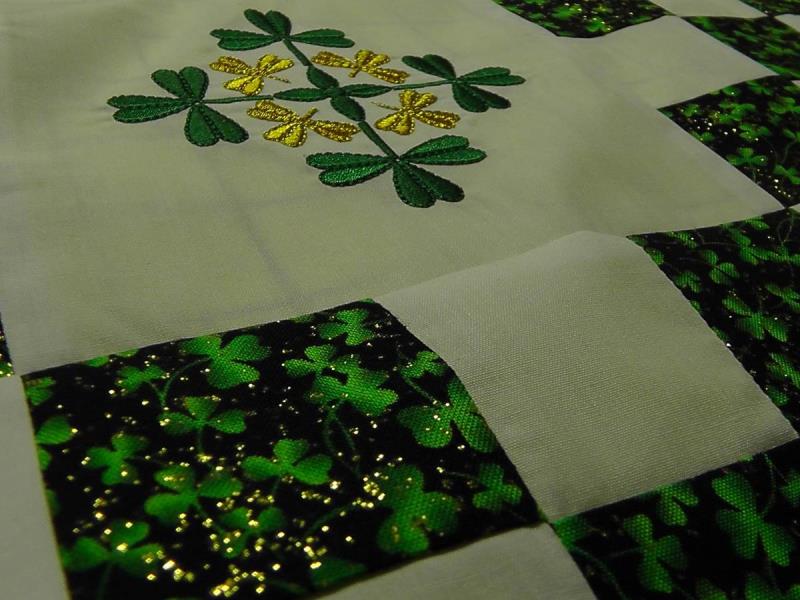
As the embroidered blocks are finished, cut them to 6.5” square, centering the embroidery design within the block.
(Click Image to Enlarge)
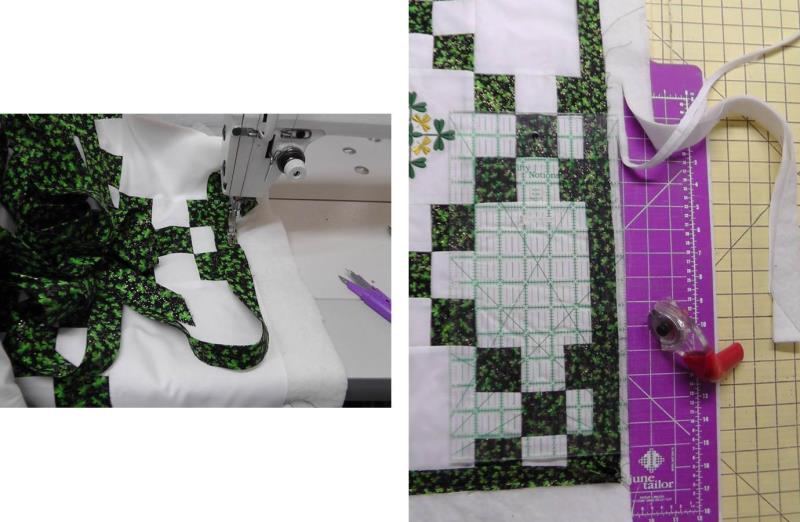
Step 17:
Position the embroidered blocks in the empty areas and join them within the rows.
(Click Image to Enlarge)
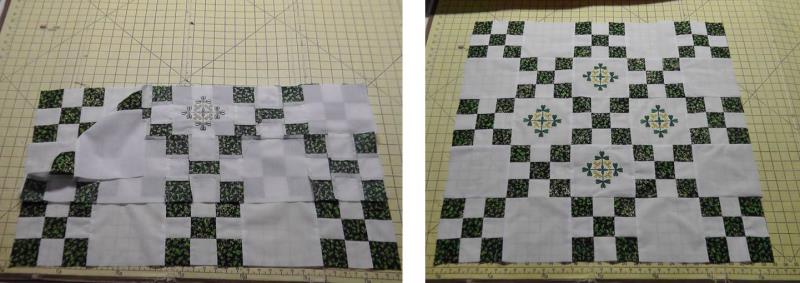
Step 18:
Complete sewing the blocks in rows.
(Click Image to Enlarge)
Step 19:
After rows of blocks are sewn together, then it is time to join the rows.
(Click Image to Enlarge)
Step 20:
Place right sides together, matching the intersecting seams well, and sew them together.
(Click Image to Enlarge)
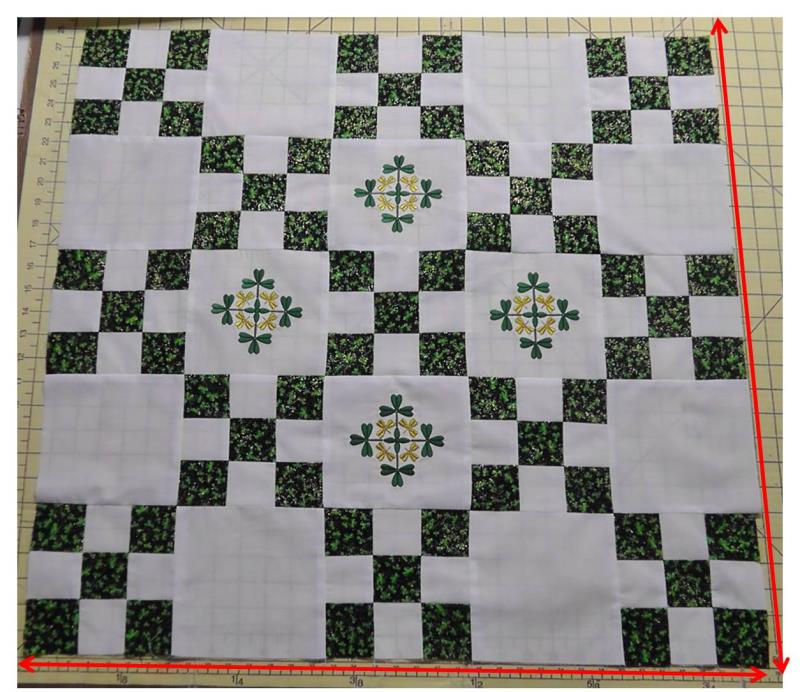
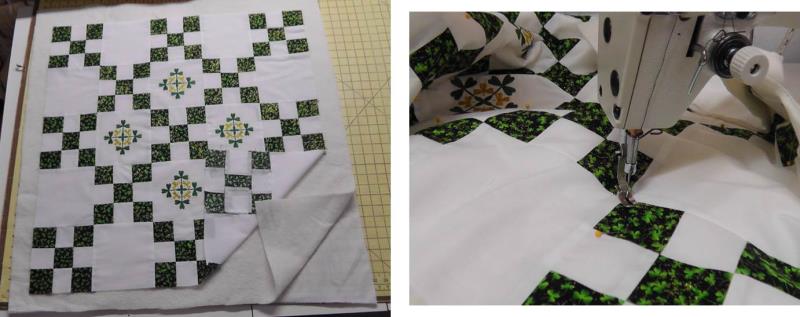
Step 21:
Square up the top and then measure the length and width. Cut a piece of batting and backing about two inches larger all the way around.
(Click Image to Enlarge)
Step 22:
Layer the backing, batting and top and pin them together. Quilt the project as you wish. For this project, straight lines of stitching were done along the “chained” quilt squares.
(Click Image to Enlarge)
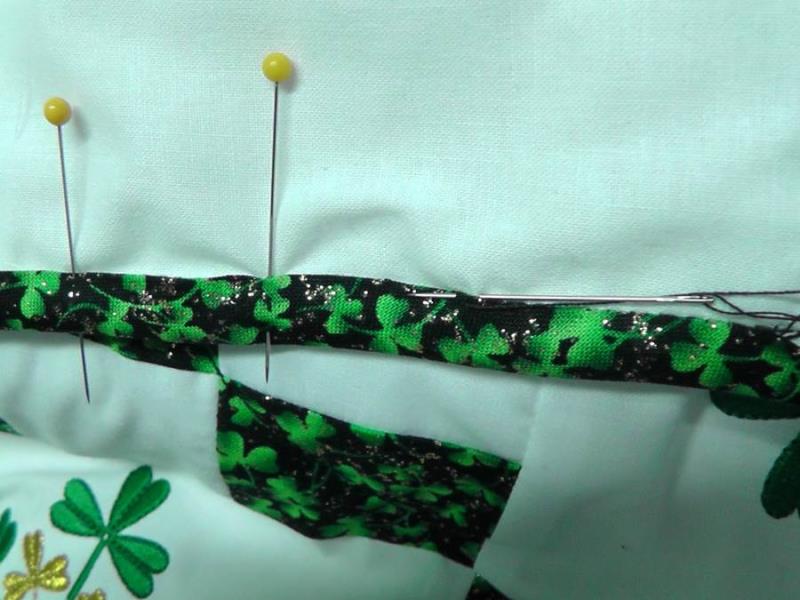
Step 23:
Cut binding strips 2 ½” wide and join them together to create enough binding to finish the edge. Fold the binding in half lengthwise and attach the binding to the edge of the quilt top, mitering the corners. Trim the backing and batting to approximately 3/8”.
(Click Image to Enlarge)
Step 24:
Roll the binding to the back, pin in place, and hand stitch the binding down.
(Click Image to Enlarge)
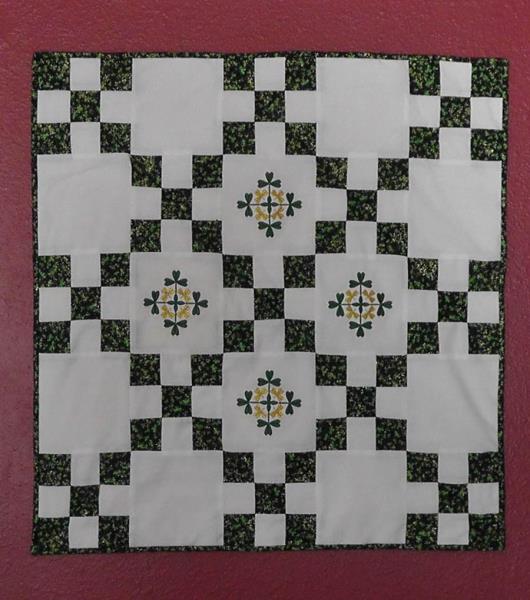
Step 25:
Add a sleeve to the back of the project for hanging or lay on a table if using as a table topper. The topper shows the beautiful “Irish Chain” quilt pattern and the embroidery adds a beautiful touch of elegance.
Ramona Baird has been in the embroidery industry for over 23 years. She and her husband owned a commercial and retail embroidery store in Arizona for many years. She is an experienced digitizer having been mentored by award-winners Pat Williams and Lindee Goodall. Ramona is a contributor to “Creative Machine Embroidery” magazine having 5 covers to her credit. Ramona has worked for Wilcom America and served many years as Education Director for the American Sewing Guild. With a degree in fashion design, she is able to design and execute patterns which Pat Williams says are “out of the box” in creativity and application. Ramona likes to challenge the boundaries of embroidery and bring new and exciting designs, ideas, and projects to EmbroideryDesigns.com. She wants embroiderers of all levels to increase their skills and enjoyment in using their embroidery machine for gift-making and personal pleasure.