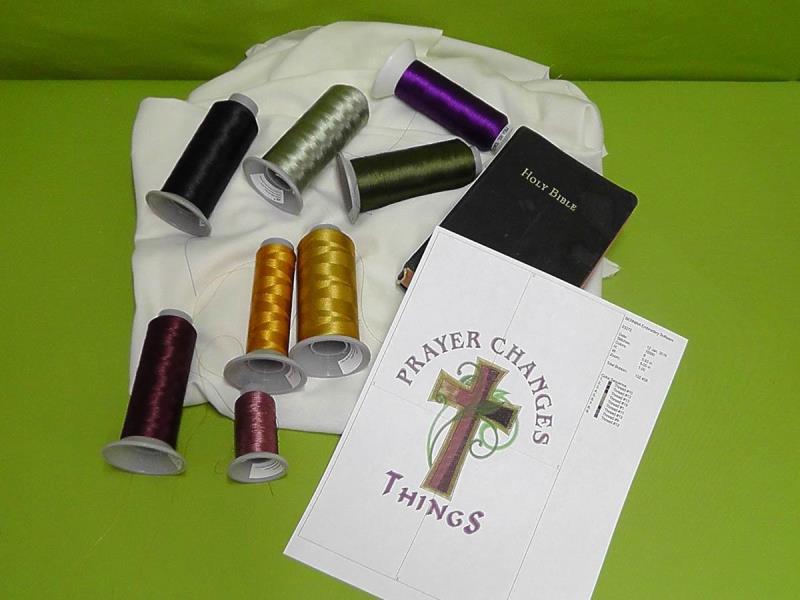
Many of us have older Bibles whose covers are becoming a bit flimsy from use. These books need to be protected from further damage. Creating an embroidered cover is a great way to still use the Bible, yet extend its life. This project is great to use up larger scraps of fabric from your stash. Use what you have on hand; even mix and match fabrics if need be. The amount of fabric and batting will depend upon the size of the Bible. The Bible used for the project measured 5” x 7” and the fabric was cut ½” larger all the way around for the cover fabric and batting. Steps will be shown how to measure, embroider, and stitch the cover together. Use the instructions to guide you, but use the measurements from the book you have to create a cover for your Bible or prayer book.
Step 1:
Read through all the steps before beginning. Gather the materials and print out the template. The design as is would have been too large for the Bible used in the project, so the embroidery design was resized to fit. Check the size of the design with the size of the book you have and adjust the design accordingly. Print out a paper template of the design.
(Click Image to Enlarge)
Step 2:
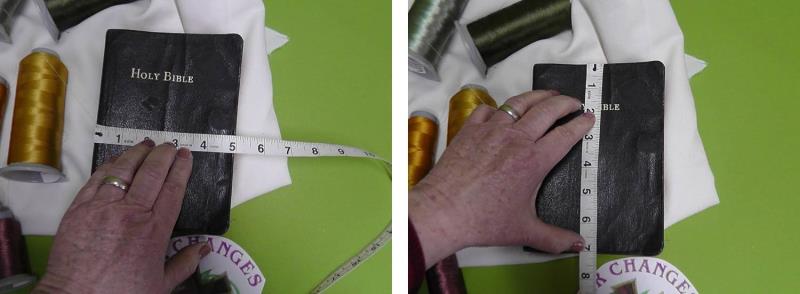
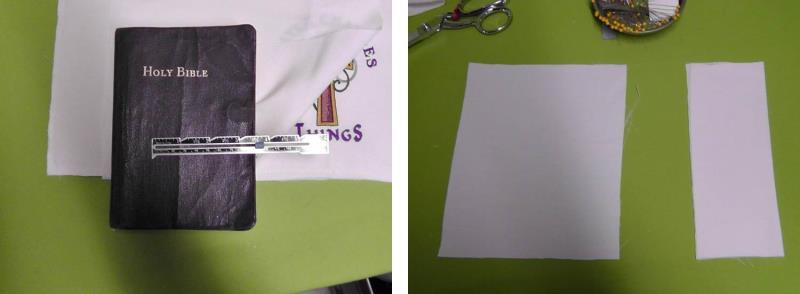
Measure the Bible or prayer book. Measure the width of the cover, the spine, and the height.
(Click Image to Enlarge)
Step 3:
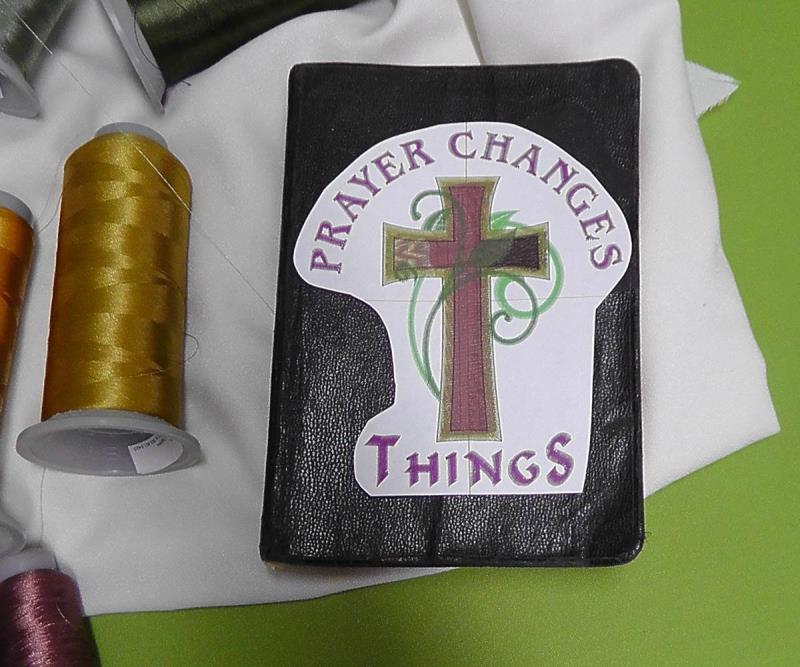
Resize the design, if needed, to fit within the front cover of the book. Print the template and cut out the design; check the fit. When centered, the design should be at least ½” inside the cover dimensions.
(Click Image to Enlarge)
Step 4:
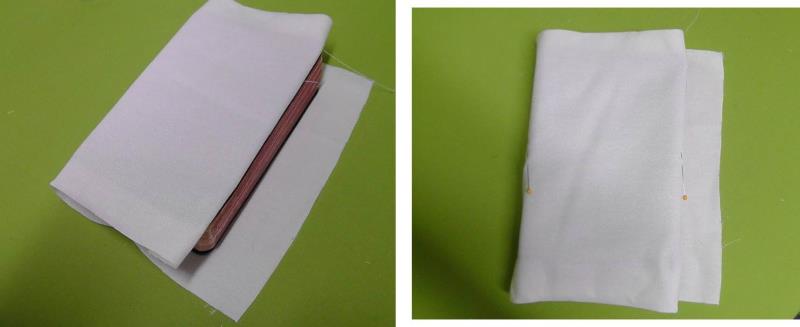
Using the dimensions of the book as a guide, cut the fabric larger than needed. For the project, the fabric was cut 3” larger in height and width to make it easier to work with the fabric. The fabric was cut to fit after the embroidery was done. Be sure there is enough height in the fabric to be able to fit it securely in the hoop. After the fabric was cut, it was wrapped around the book to be sure there was plenty to work with. Next, tuck the short cut edges inside the front and back covers. On the front cover, place a pin at the outer edge and the left hand edge; the design will be centered between these two pins.
(Click Image to Enlarge)
Step 5:
To find the center of the front cover fabric, press the fabric in half along the height and then bring the pins together to find the center of the front cover.
(Click Image to Enlarge)
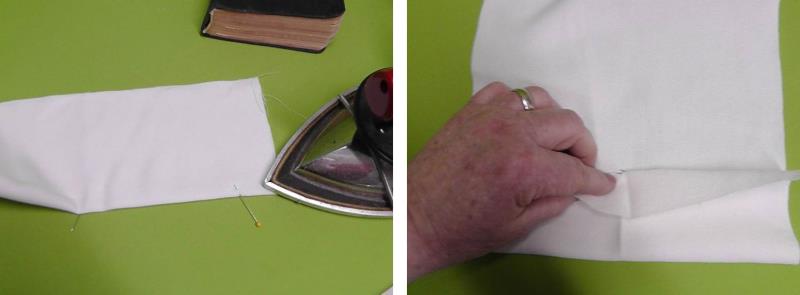
Step 6:
Press along the fold. Open up the fabric and center the template at the center of the pressed marks. Hoop the fabric with the chosen stabilizer.
(Click Image to Enlarge)
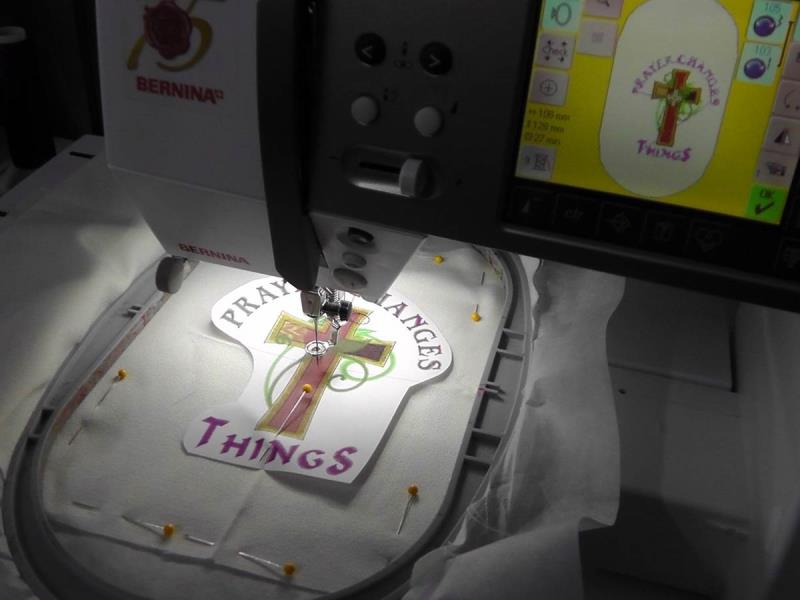
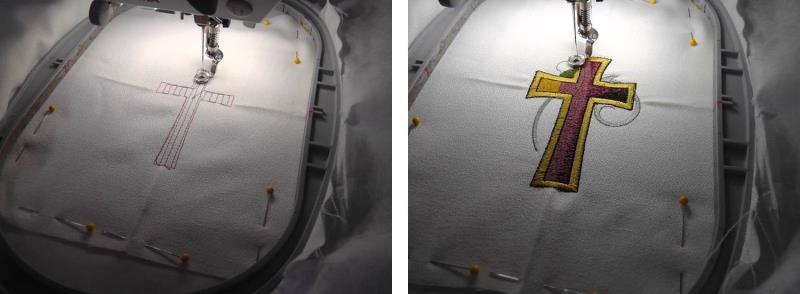
Step 7:
Load the design “Prayer Changes Things” on the machine. Center the needle over the center of the design.
(Click Image to Enlarge)
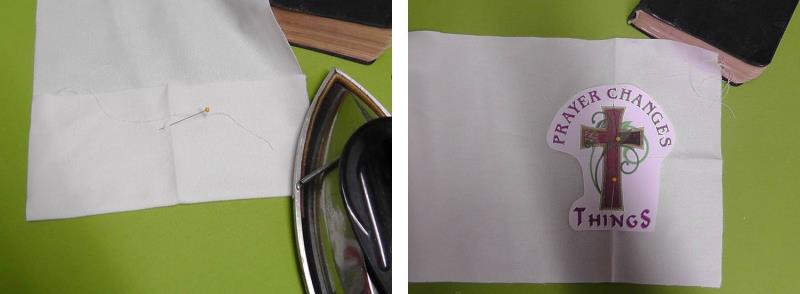
Step 8:
Stitch the design following the color sequence.
(Click Image to Enlarge)
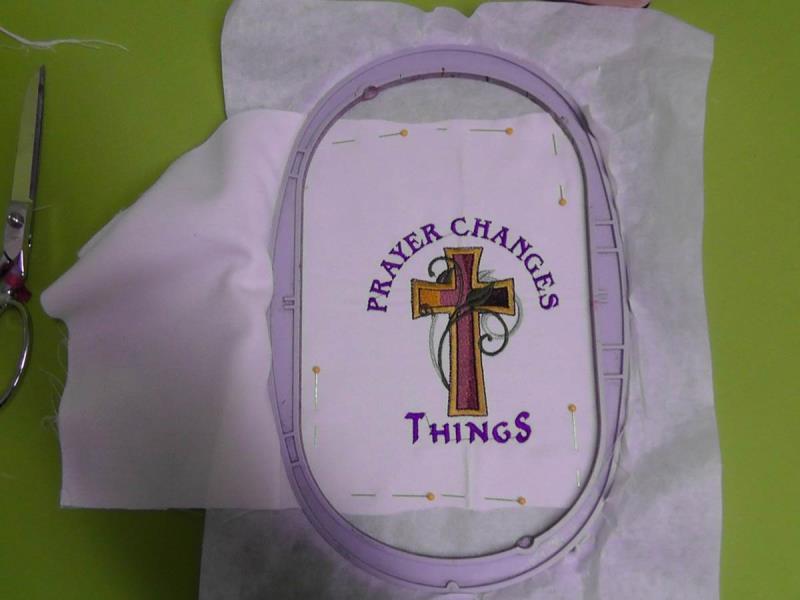
Step 9:
Trim any jump threads and then remove the fabric from the hoop and remove the excess stabilizer.
(Click Image to Enlarge)
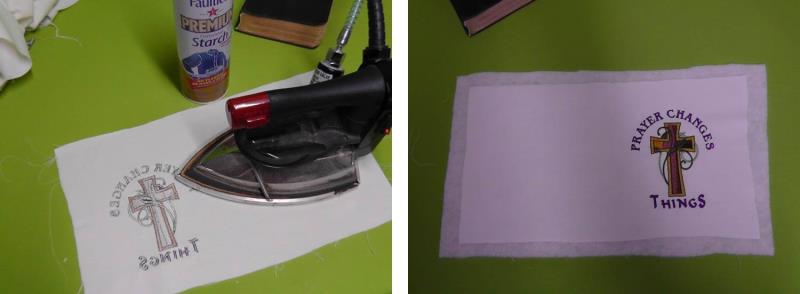
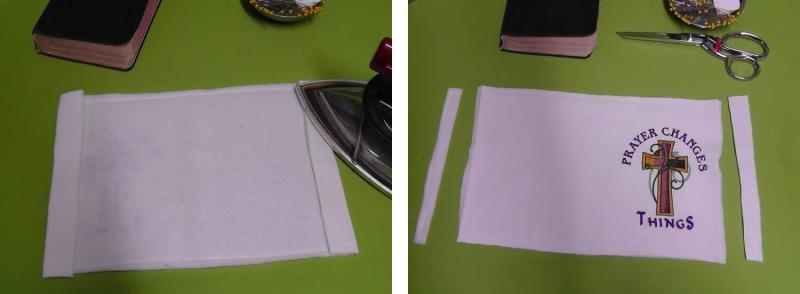
Step 10:
Press the fabric from the wrong side. Cut a piece of batting slightly larger than the embroidered fabric.
(Click Image to Enlarge)
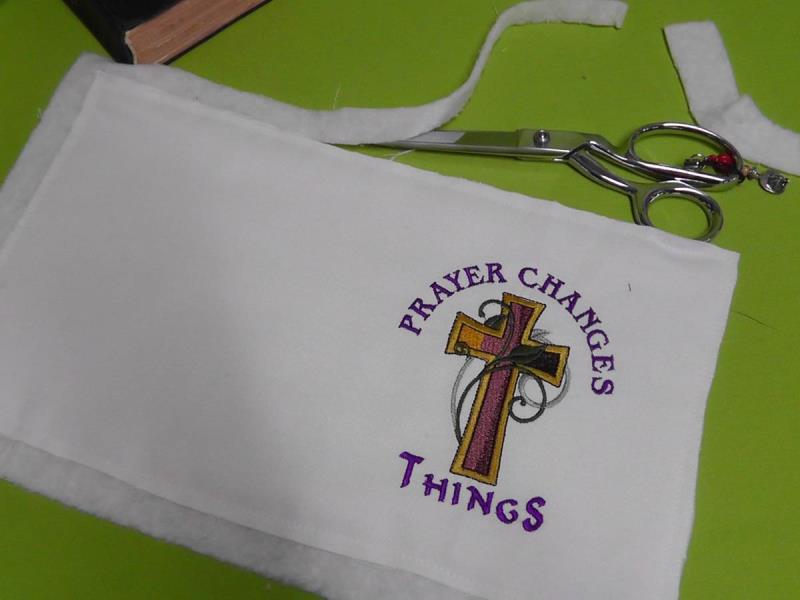
Step 11:
Baste the batting to the fabric to make it easier to work with, and then trim away the batting to match the edge of the fabric. This piece is now still larger than the finished size; it will be cut to size in step 13.
(Click Image to Enlarge)
Step 12:
Now it is time to make the inside pockets to hold the cover onto the Bible. Measure the depth of the pocket desired. For this book a 3.5” depth was used. Cut two pieces of fabric (one for the front over and one for the back cover) fabric double the depth plus seam allowances and the height plus seam allowances. Fold each piece in half along the height. For the project, two pockets were cut 7 ½” wide and 7 ½ tall.
(Click Image to Enlarge)
Step 13:
Now cut the cover to size - be sure to leave seam allowances. For the project, ¼” seam allowances were used. Center the embroidered design on the front cover and then wrap the rest of the fabric with batting around the book, tucking the edges under the covers (be sure not to make it too tight). Finger crease the fabric along the edges of the covers and top and bottom of the book.
(Click Image to Enlarge)
Step 14:
Remove the cover and press the edges evenly all the way around. From the pressed edges, add and mark seam allowances and then trim away the excess fabric.
(Click Image to Enlarge)
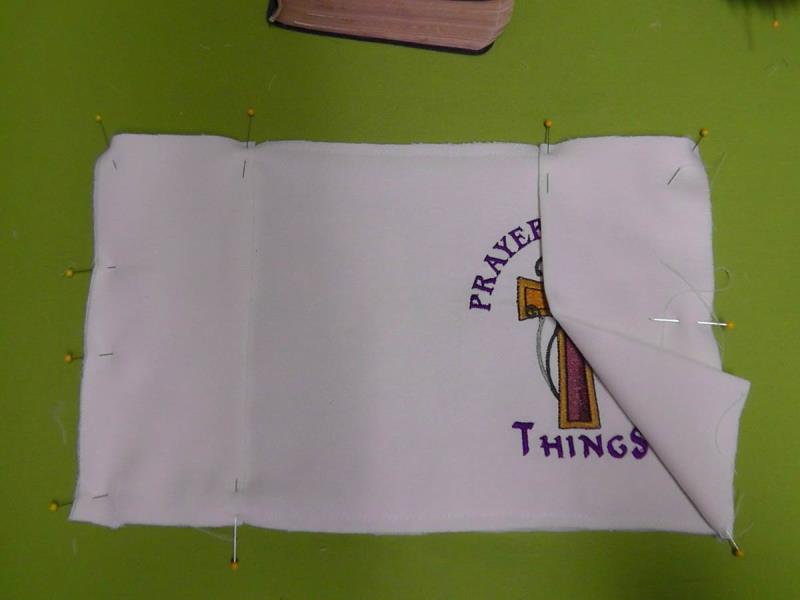
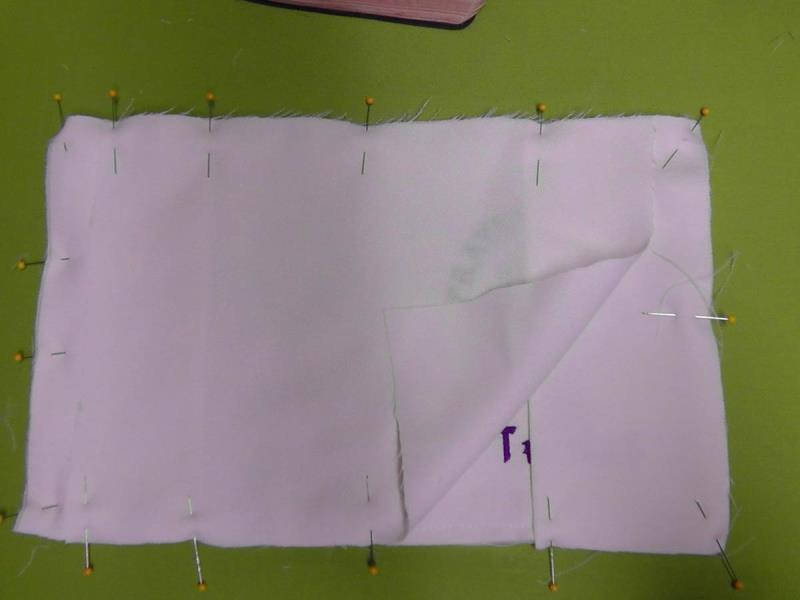
Step 15:
Lay the embroidered fabric right side up and place the pockets on the left and right side as shown, matching cut edges and pin in place.
(Click Image to Enlarge)
Step 16:
Now cut a piece of fabric the height of the main fabric and the width minus about 1 ½” on each side. Center and pin this fabric over the pockets. The left and right edges do not need to be finished, but if you wish serge or turn under the edges to finish them.
(Click Image to Enlarge)
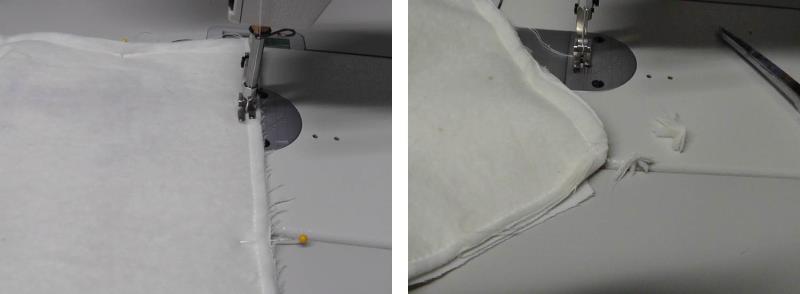
Step 17:
Stitch the fabric all the way around through all the layers; clip the corners to reduce bulk.
(Click Image to Enlarge)
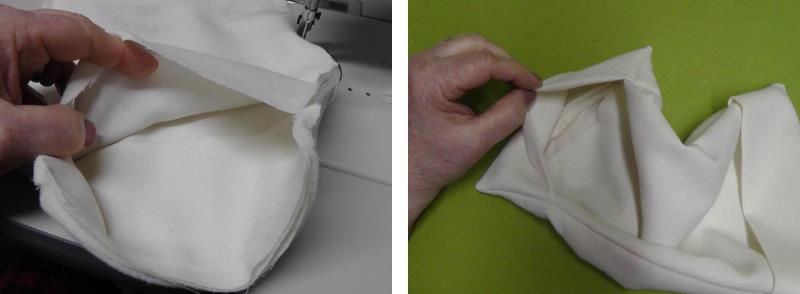
Step 18:
Reach in through one of the open ends and pull the book cover right side out and then turn the pockets to the inside. This will encase the seam allowances and raw edges of the inner layer of fabric.
(Click Image to Enlarge)
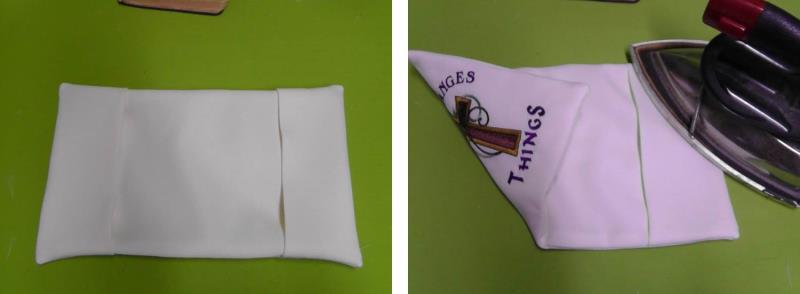
Step 19:
Press the fabric well along the sewn seam.
(Click Image to Enlarge)
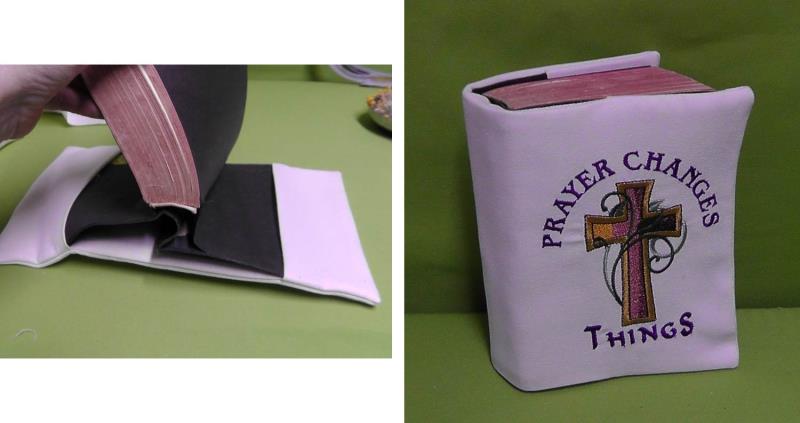
Step 20:
Insert the covers into the pockets and snug them into place. Close the book and adjust the fit.
(Click Image to Enlarge)
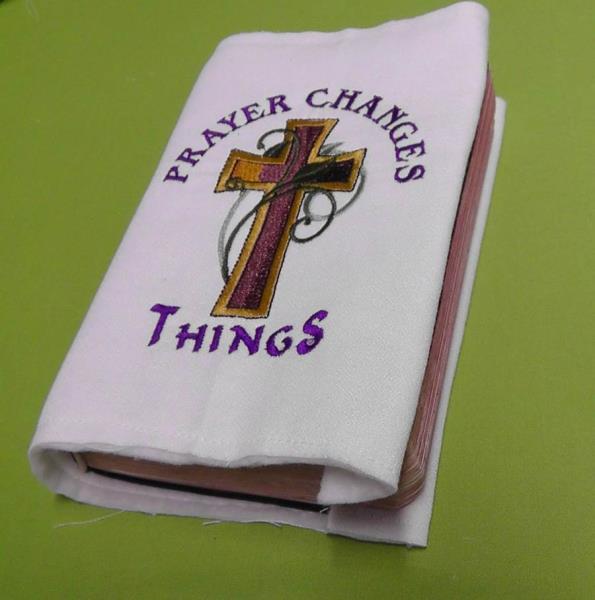
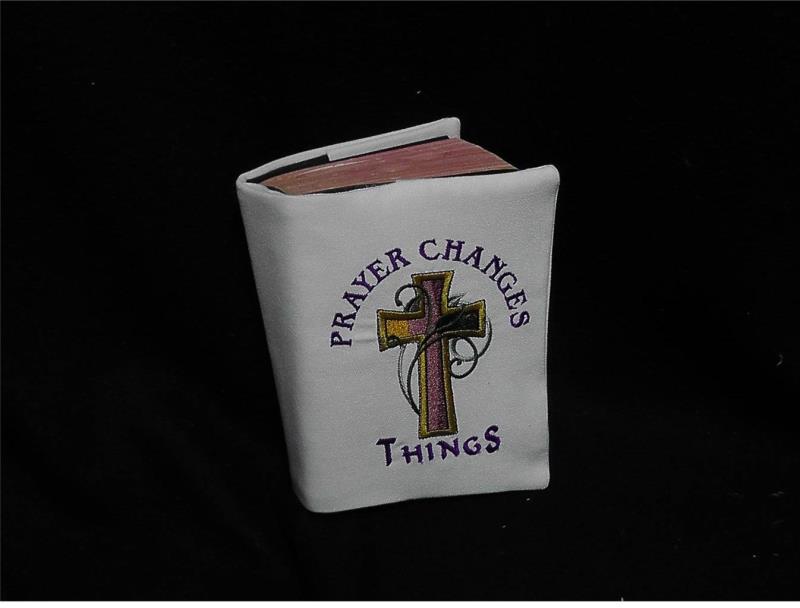
Step 21:
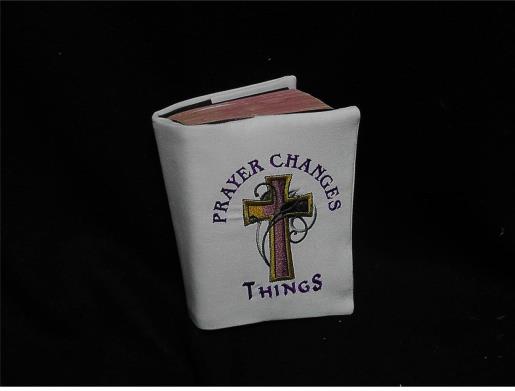
Congratulations on completing a beautiful cover with a sentimental reminder that “Prayer Changes Things”.
Ramona Baird has been in the embroidery industry for over 23 years. She and her husband owned a commercial and retail embroidery store in Arizona for many years. She is an experienced digitizer having been mentored by award-winners Pat Williams and Lindee Goodall. Ramona is a contributor to “Creative Machine Embroidery” magazine having 5 covers to her credit. Ramona has worked for Wilcom America and served many years as Education Director for the American Sewing Guild. With a degree in fashion design, she is able to design and execute patterns which Pat Williams says are “out of the box” in creativity and application. Ramona likes to challenge the boundaries of embroidery and bring new and exciting designs, ideas, and projects to EmbroideryDesigns.com. She wants embroiderers of all levels to increase their skills and enjoyment in using their embroidery machine for gift-making and personal pleasure.