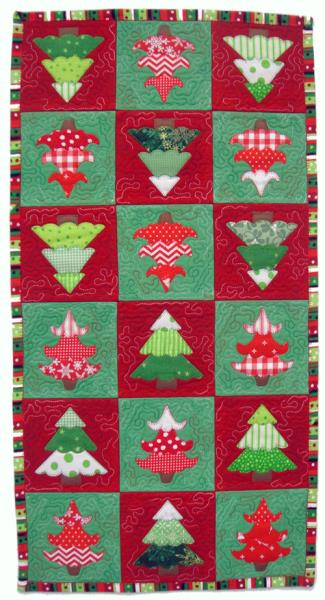
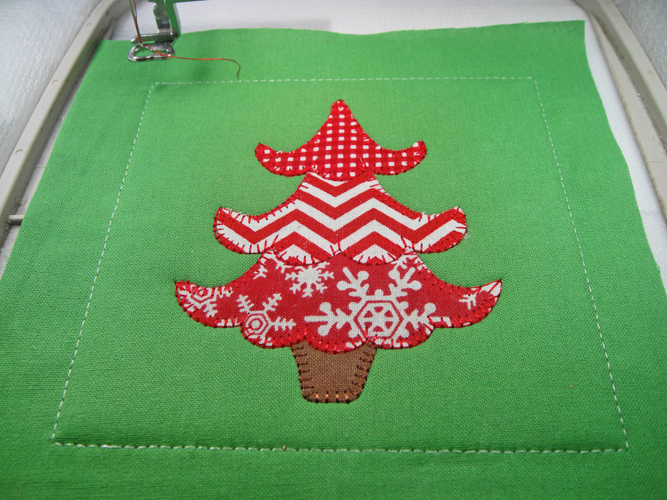
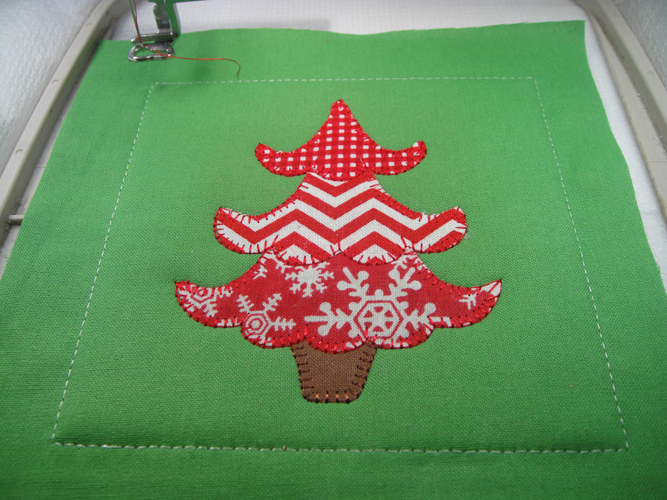
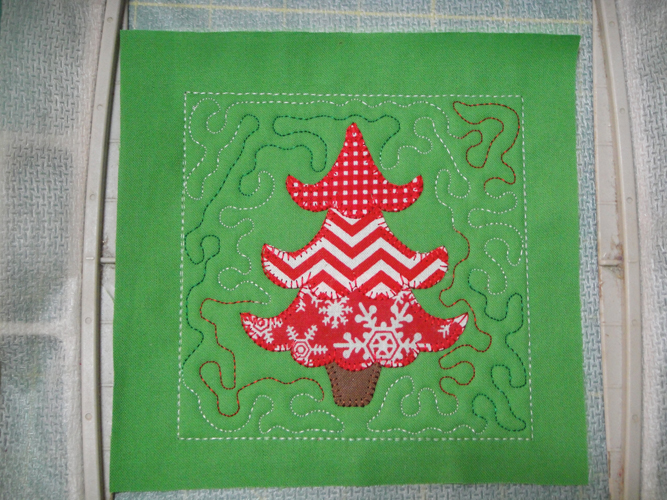
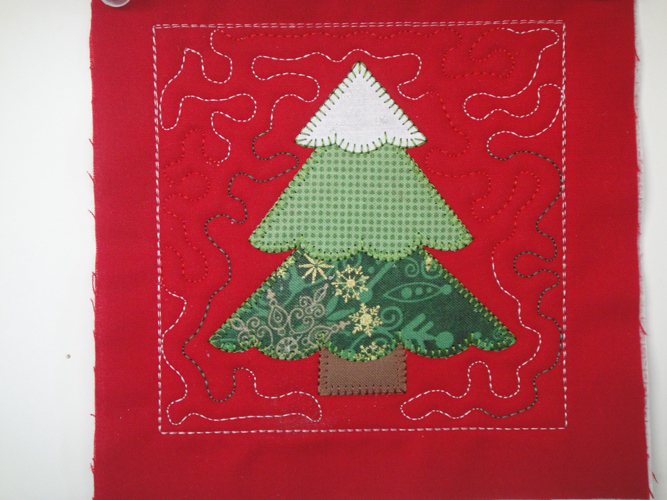
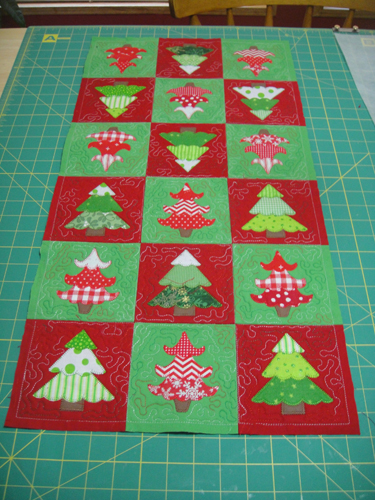
The pre-cut appliques and quilting are all done in the hoop to make up this festive table runner. The small blocks make it easy to adjust the table runner to the size you need. PDF, SVG and FCM files are included for pre-cutting the appliques.
Step
of
O’ Christmas Tree Appliqued Table Runner
By Pat Williams
As these appliques are tacked down with an E-stitch, or blanket stitch, pre-cutting the appliques is required. For those with electronic cutting machines SVG files are available when your download the embroidery designs. The appliques in this project were cut with the Scan N Cut® so FCM files are available when you download the designs. To cut the appliques by hand PDF files are also available when you download the designs.
Step 1:
(Click Image to Enlarge)
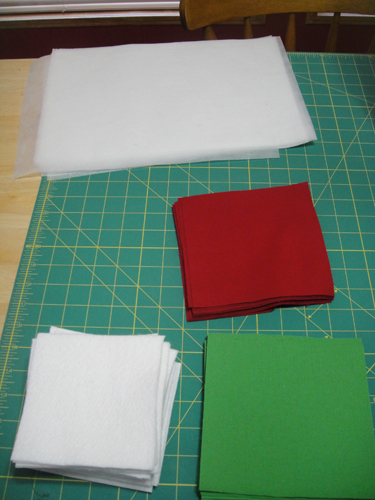
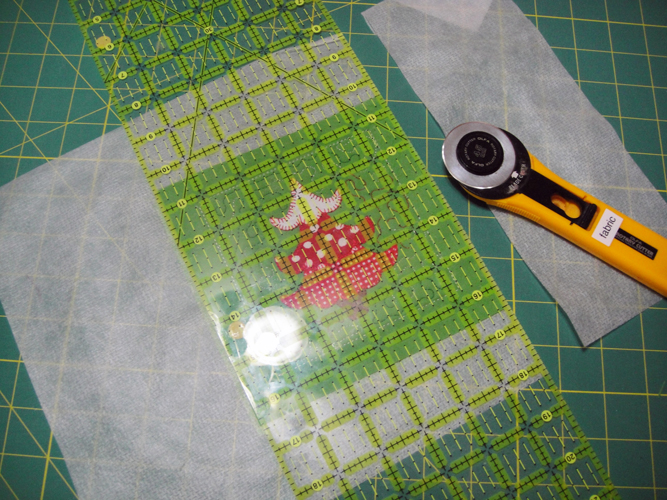
Cut 18 6” squares of solid red quilting cotton; 18 6” squares of solid green quilting cotton; 18 4.5” squares of Battilizer®; and 18 pieces of poly-mesh stabilizer to fit you 5” x 7” embroidery hoop.
Step 2:
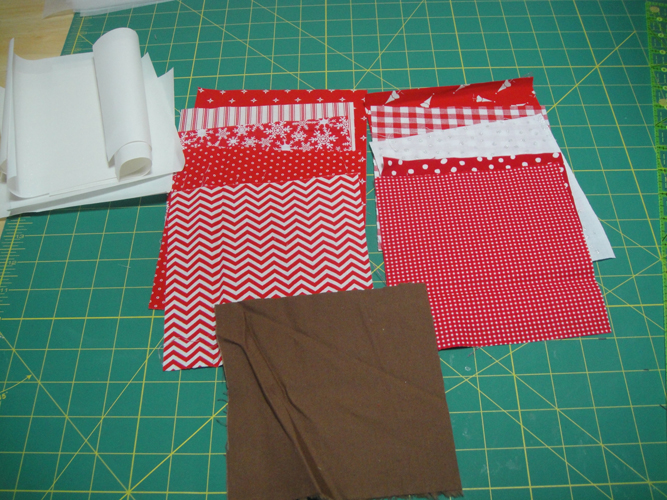
Select and cut 10 assorted prints of red and 1 brown 6” square for the 1st set of Christmas trees; cut 11 pieces of Heat N Bond Lite® just slightly under 6” square.
(Click Image to Enlarge)
Step 3:
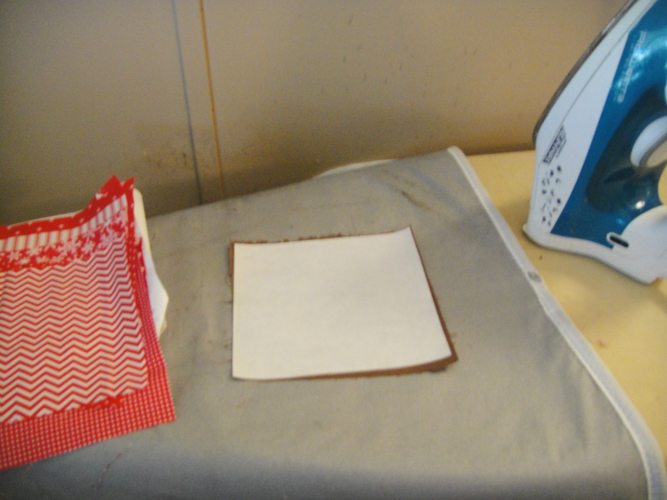
Spray and iron each piece of fabric 3 or 4 times with Magic Sizing, this prevents fraying of the appliques and makes them easier to cut; iron a piece of Heat N Bond Lite® to the back of each of the fabric pieces.
(Click Image to Enlarge)
Step 4:
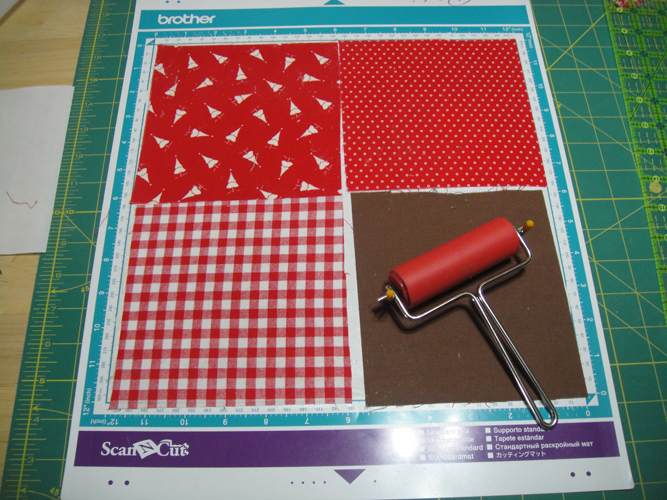
If cutting by hand print out copies of the PDF files at 100% ; using just a little spray adhesive place the pattern pieces on the front of the fabric and cut out 3 of each tree piece from the various fabrics and 9 of the tree trunk from the brown. There will be 3 extra pieces because you are using red prints, but this will help “mix” up the fabrics. If using a Scan N Cut® remove the paper backing and place three red prints and the brown fabric and smooth onto your cutting mat with a brayer.
(Click Image to Enlarge)
Step 5:
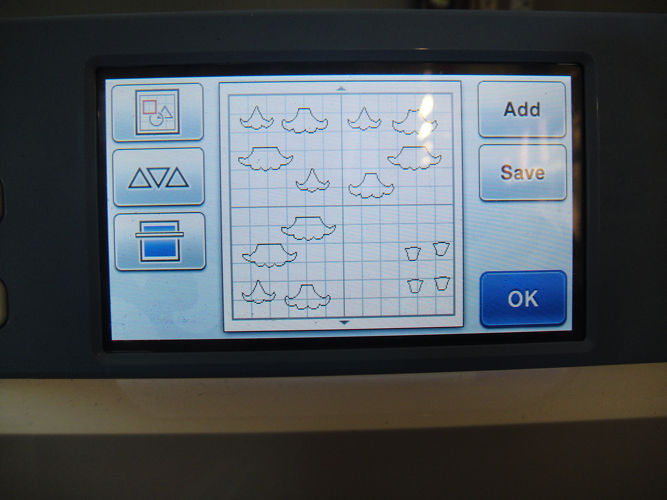
Open up multiple copies (4) of the fcm file in the Scan N Cut. Do this by opening the fcm file then click add to open the additional copies. They will open on top of each other so as you add each additional copy move the pieces around to a new location otherwise you will get multiple cuts over one section.
(Click Image to Enlarge)
Step 6:
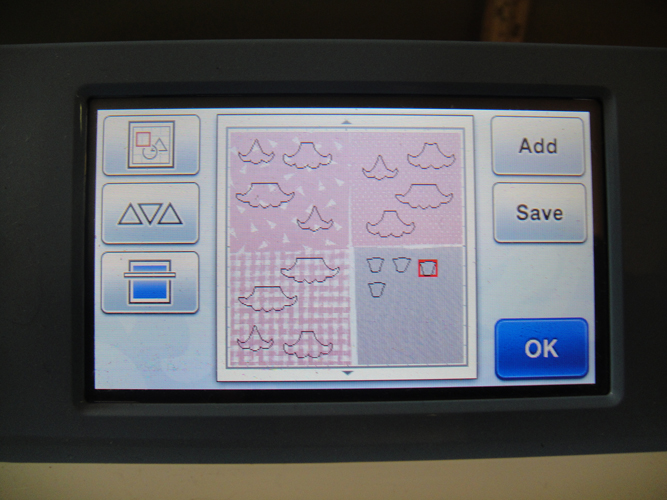
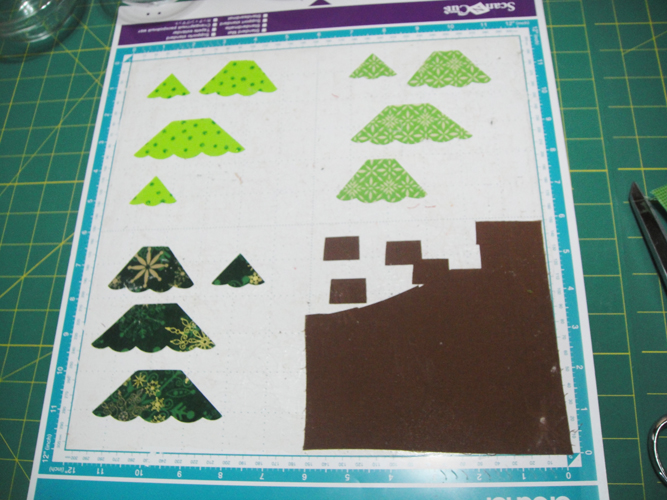
Scan in your fabrics on the mat; move all the trunks down to the brown fabric and place the tree branches on the other fabrics. To randomize the fabrics cut more tree tops of one color, more middle sections from another.
(Click Image to Enlarge)
Step 7:
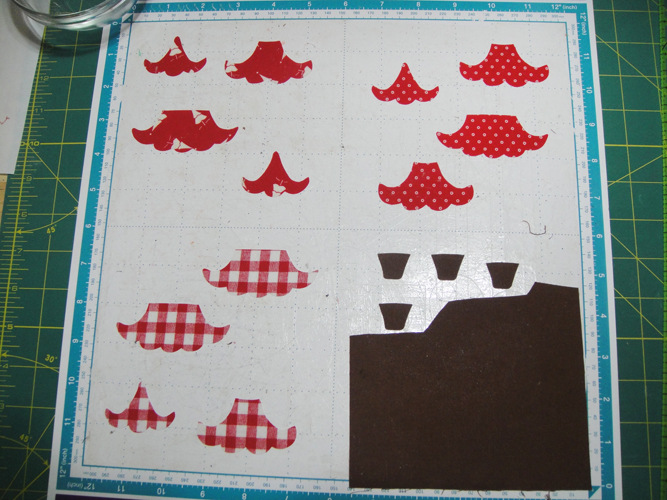
All machines may vary, but the samples were cut with a blade depth of 4, cut pressure of 4 and cut speed of 4. It only took 2 minutes to cut all of these pieces. Reload three red fabrics on the mat and cut 3 more times; the one piece of brown fabric can stay on the mat through all four times to cut all the trunks from that one piece.
(Click Image to Enlarge)
Step 8:
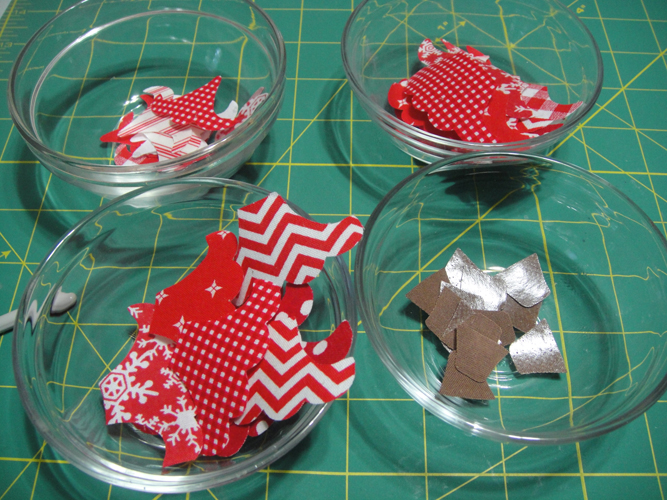
Place all the trunks, top, middle and bottom branch appliques in little bowls to be able access them easily when you are at your machine.
(Click Image to Enlarge)
Step 9:
Repeat the above steps to cut out the green tree pieces and place them in separate bowls as the shapes of the trunks and branches are different.
(Click Image to Enlarge)
Step 10:
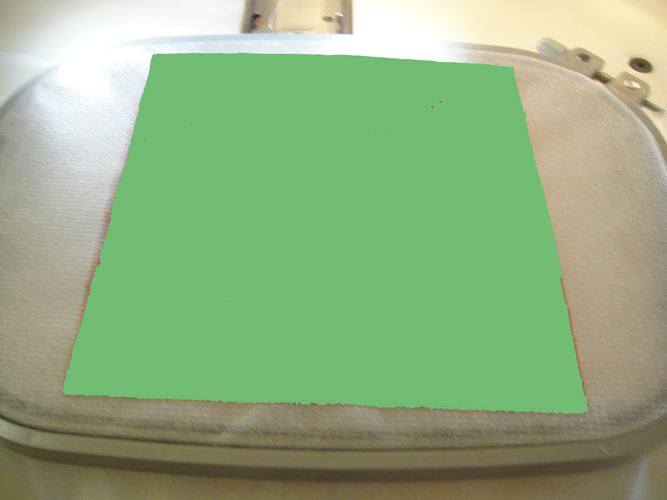
Load design HSCT2S into your embroidery machine; hoop the soft mesh stabilizer in your embroidery hoop; select the four applique pieces needed for your tree.
(Click Image to Enlarge)
Step 11:
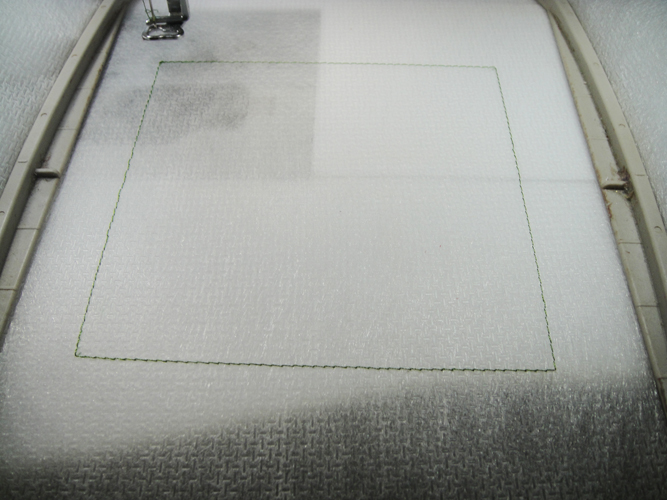
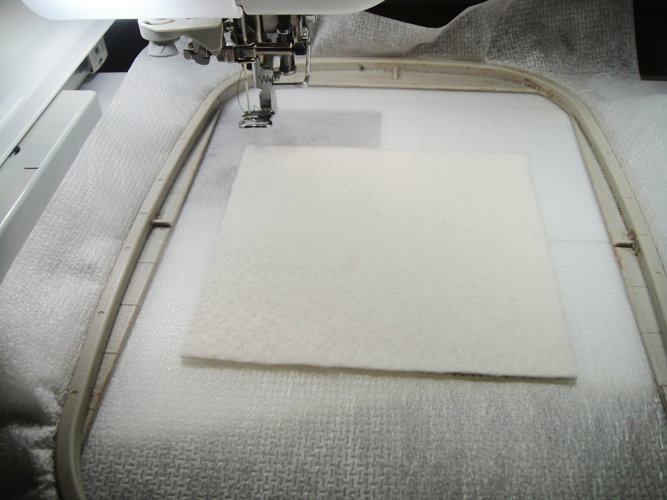
Run the 1st CS (color stop) in green thread as a placement line for the Battilizer®.
(Click Image to Enlarge)
Step 12:
Spray adhesive on the Battilizer® and place exactly inside in placement line.
(Click Image to Enlarge)
Step 13:
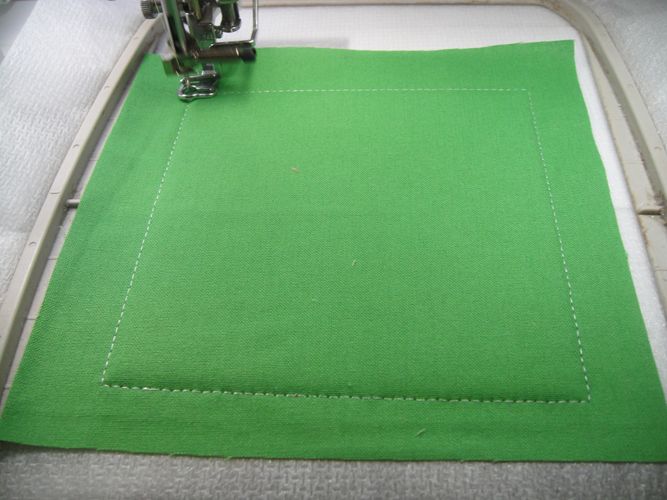
Spray adhesive on a green 6” cotton square and place over the Battilizer® making sure that the green fabric exceeds the border of the Battilizer® by ½” on all sides; run the 2nd CS in water soluble thread to tack down.
(Click Image to Enlarge)
Step 14:
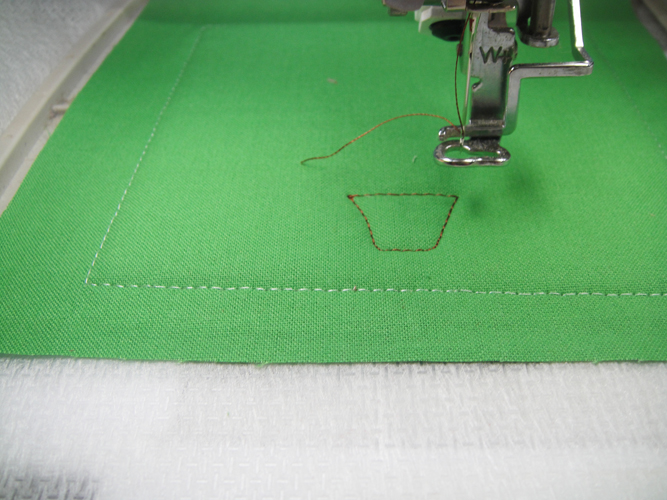
Run CS 3 in Caramel thread as a placement line for the tree trunk.
(Click Image to Enlarge)
Step 15:
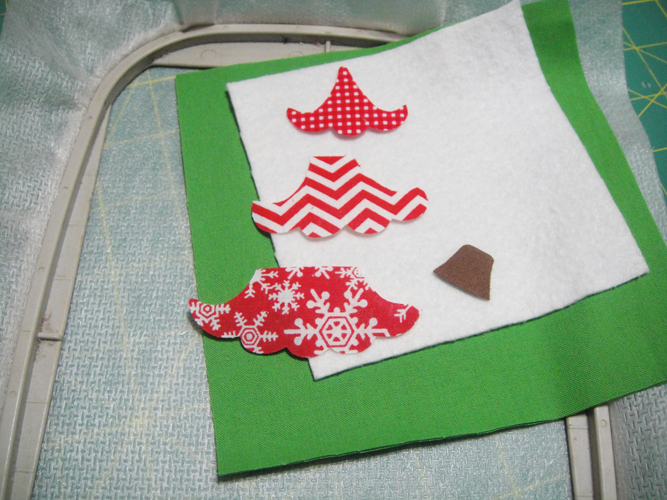
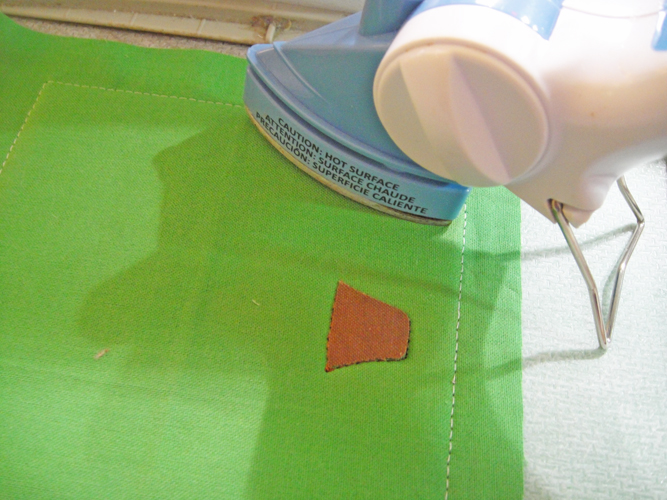
Place the trunk applique and adhere with an applique iron.
(Click Image to Enlarge)
Step 16:
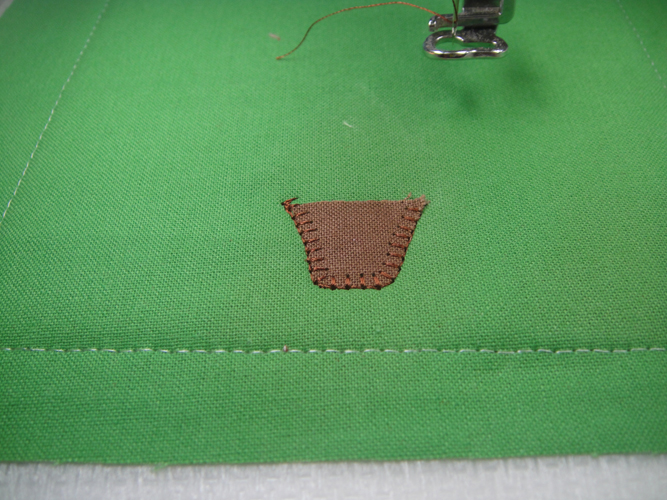
Stitch the E-stitch border with Caramel thread.
(Click Image to Enlarge)
Step 17:
Apply the three layers of the branches with the next 6 color stops with red thread sewing first the placement line; ironing the corresponding fabric into place; and then run the E-stitch border for each piece.
(Click Image to Enlarge)
Step 18:
Remove the hoop from the machine; do not unhoop; turn the hoop over; spray a green fabric square with adhesive and place over the back of the embroidery aligning it with the square of fabric on the front.
(Click Image to Enlarge)
Step 19:
Return the hoop to the machine and run CS 11 in water soluble thread to tack down the back fabric.
(Click Image to Enlarge)
Step 20:
For the final CS # 12 load variegated red, white and green thread to sew the quilting stitches.
(Click Image to Enlarge)
Step 21:
Trim all sides of the block to ½” from the outside water soluble thread lines; make 8 more green blocks.
(Click Image to Enlarge)
Step 22:
Load design HSCT1S and make 9 red blocks with green trees following Steps 11 through 21.
(Click Image to Enlarge)
Step 23:
(Click Image to Enlarge)
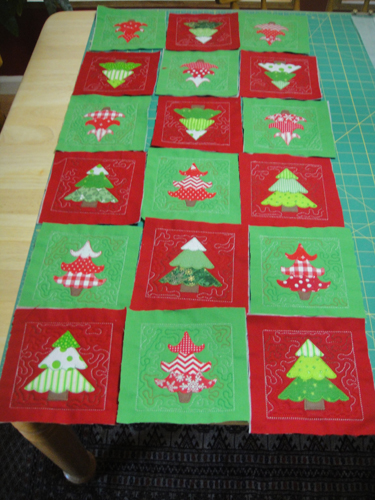
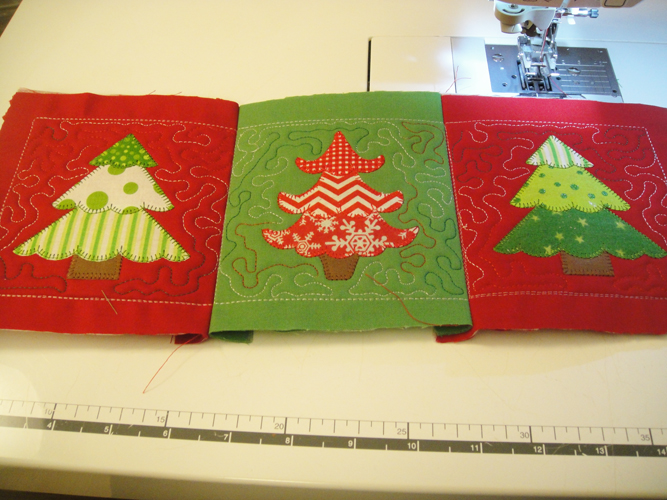
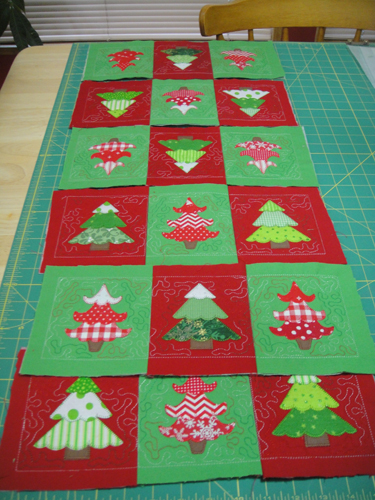
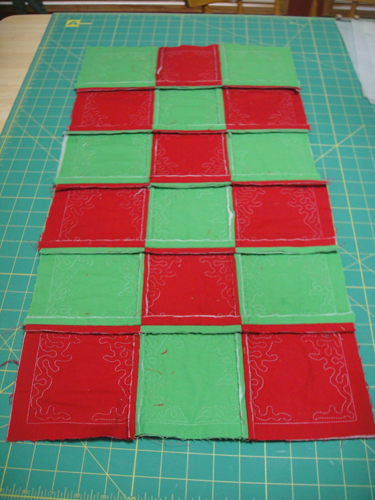
Lay out your blocks in a checkered board pattern alternating red and green blocks in each row.
Step 24:
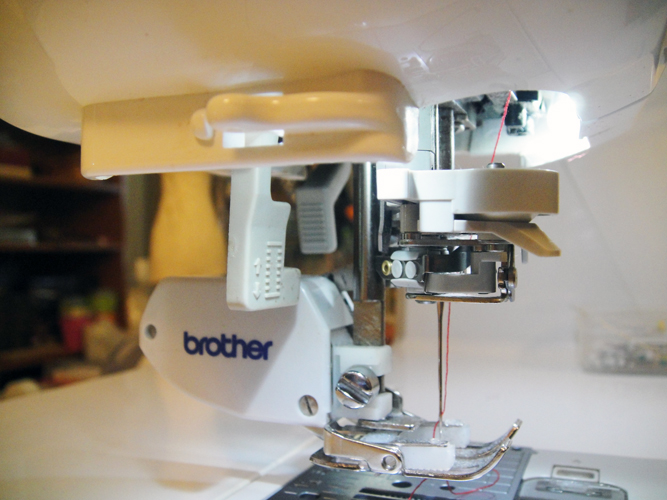
Place a walking foot on your machine as we will be sewing through multiple layers of fabric and place regular red or green sewing thread in the top and bobbin of your machine.
(Click Image to Enlarge)
Step 25:
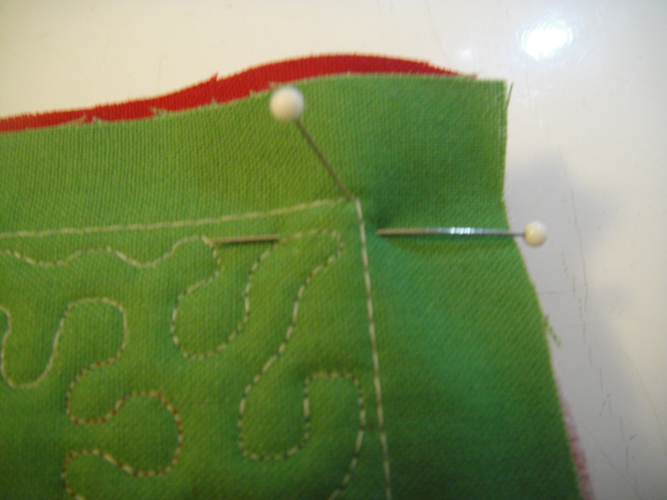
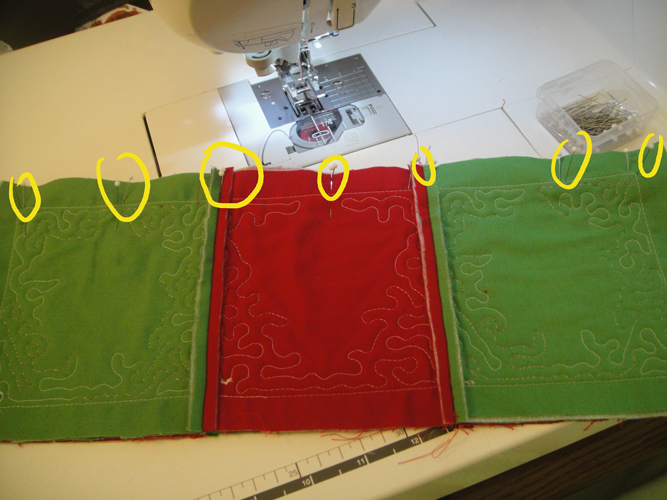
For accurate alignment use the two pin method for pinning the blocks together; place two blocks right sides together; stick a pin vertically through the corner of the top water soluble thread stitching and vertically through the corner stitching of the second block; then place a horizontal pin in to hold the two blocks together; repeat the two pin method in the second corner; then come back to the middle and vertically place a pin through the water soluble thread stitching on both of the blocks.
(Click Image to Enlarge)
Step 26:
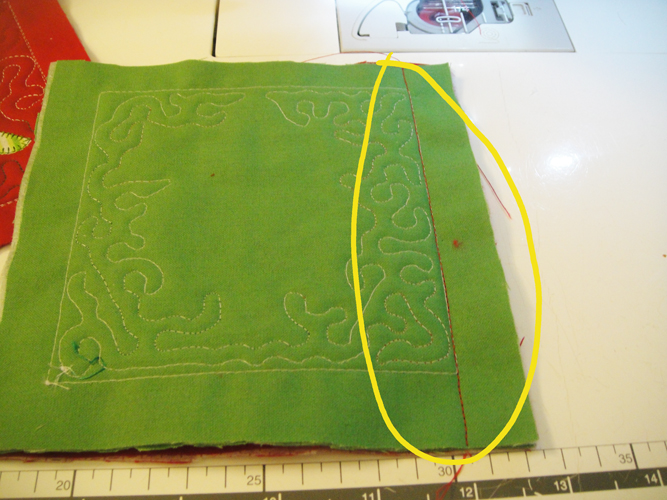
Stitch the two blocks together right on top of the water soluble thread.
(Click Image to Enlarge)
Step 27:
Add the 3rd block to the row in the same manner.
(Click Image to Enlarge)
Step 28:
Press the seam flat and then open with a steam iron.
(Click Image to Enlarge)
Step 29:
Trim the seam allowances to a scant 3/8th “.
(Click Image to Enlarge)
Step 30:
(Click Image to Enlarge)
Repeat Steps 25 through 28 for all other rows of blocks and lay them out in the desired arrangement again.
Step 31:
To ensure proper alignment use the two pin method again to join the rows together in order by placing the pins right through the opened seams; at the corners’ and in the middle of the blocks. In the sample three rows of blocks were joined with the trees facing in one direction and three rows of trees are facing the opposite direction at the other end so that from each end of the table the trees will be facing the middle of the table.
(Click Image to Enlarge)
Step 32:
(Click Image to Enlarge)
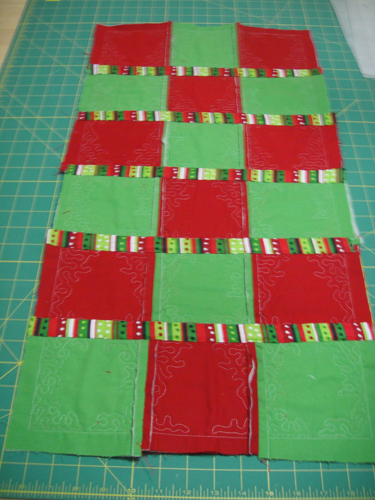
This is what the back of your table runner will now look like; trim the horizontal seams to a scant 3/8th”.
Step 33:
(Click Image to Enlarge)
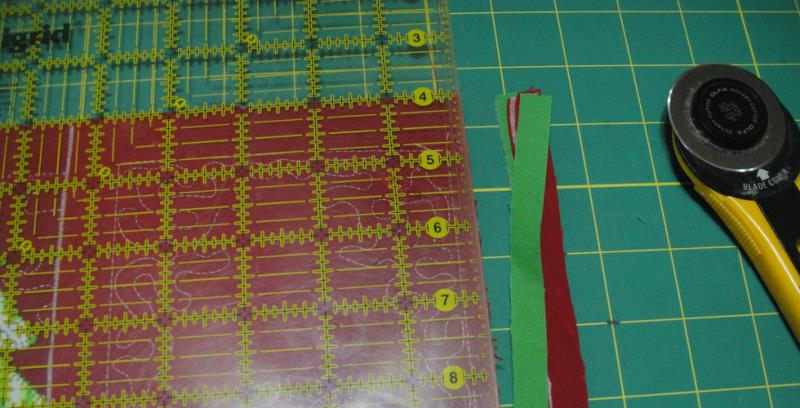
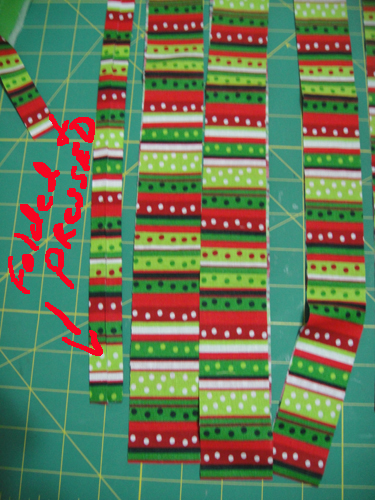
Cut three 1 ¾” strips crosswise of striped Christmas print for sashing; cut 3 strips 2.5 wide for binding. Press both sides of the sashing strips into the middle to form the sashing.
Step 34:
(Click Image to Enlarge)
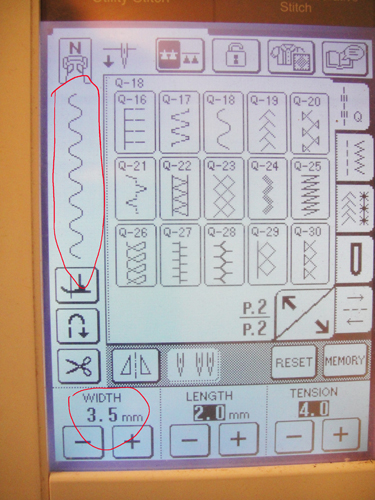
Load YLI invisible thread into the top and bobbin of your sewing machine. I specify YLI as it seems to perform better in most machines. Select a Serpentine stitch; I moved mine down to a 3.5mm width its default is 5.5 mm. If you don’t have a Serpentine stitch select a light stitch that is not straight.
Step 35:
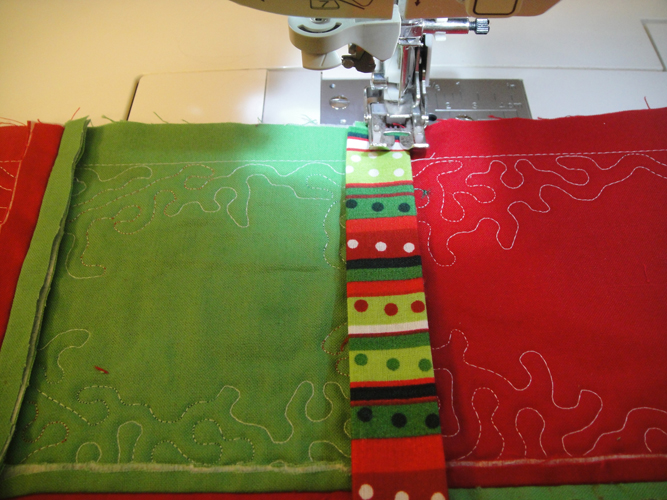
Center the sashing across the horizontal seams and stitch down both sides of the sashing with the Serpentine stitch; having the stitches cross over the outside edges of the sashing strip.
(Click Image to Enlarge)
Step 36:
(Click Image to Enlarge)
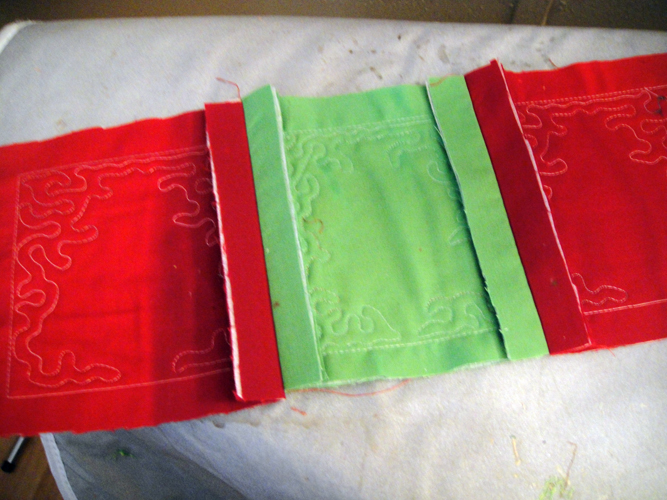
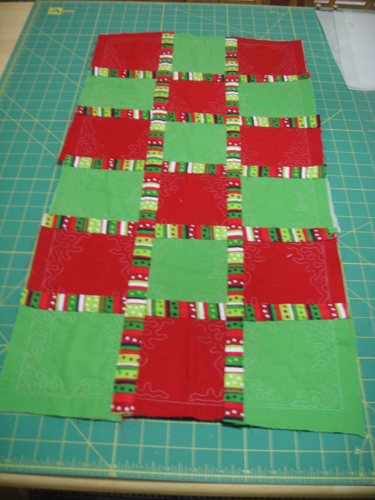
The back of your table runner will now look like this.
Step 37:
(Click Image to Enlarge)
Apply sashing over the vertical seams in the same manner and your table runner back will look like this.
Step 38:
(Click Image to Enlarge)
Trim all edges of the table runner to ½” from the water soluble thread tack down stitches.
Step 39:
(Click Image to Enlarge)
Add binding using your favorite binding method. Wash and dry the table runner to remove the water soluble thread and excess sizing used to prepare the fabrics. Congratulations your O’ Christmas Tree Table Runner is complete!
Award winning Digitizer, Embroidery Educator, Author and a Consultant to the Industry, Pat Williams has 30 years of experience in the embroidery industry. Pat has won multiple awards for her digitizing expertise including the 2007 Impressions Awards Grand Championship, Best of Show as well as the 1st and 2nd Place Awards. Pat’s love of digitizing has afforded her the opportunity to write numerous articles for Impressions magazine in the United States and Images Magazine in Europe. In 2001 Pat was named “Embroidery Educator of the Year.” For many years Pat taught digitizing seminars at the ISS Shows in Long Beach, CA and for Compucon software. She now resides in Tucson, AZ.