This is a project that takes about 10 hours to sew, but it so simple to sew all in one color that you don’t have to sit and watch every stitch. The time does not include drying time as most parts of your tree will dry while the rest of the design is being stitched. Several design files are sewn multiple times to stitch the required number of branches. Please pay attention to the directions below to stitch the required branches to create a tree as show in the pictures. To create a different looking tree you can omit the large branches and sew out additional repeats of the smallest or medium sized branches. 156 branches are needed to cover the base. I gave this an Experience skill level due to the complexity of assembly, the files are actually very easy to sew out. Following the instructions carefully for the assembly I think all skill levels will be able to make this beautiful tree.
Step 1:
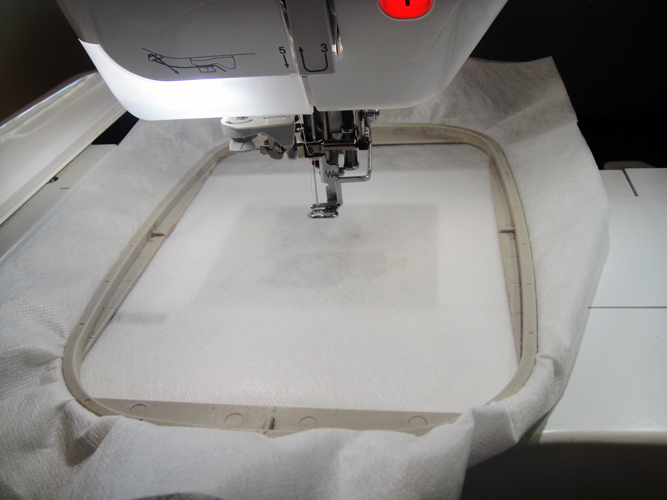
Tautly hoop two layers of fibrous water soluble stabilizer as the first step for all of the design files. Do not use the film type of water soluble stabilizers. Load white polyester thread in the top and bobbin of your machine; rayon thread will be too soft for this project.
(Click Image to Enlarge)
Step 2:
(Click Image to Enlarge)
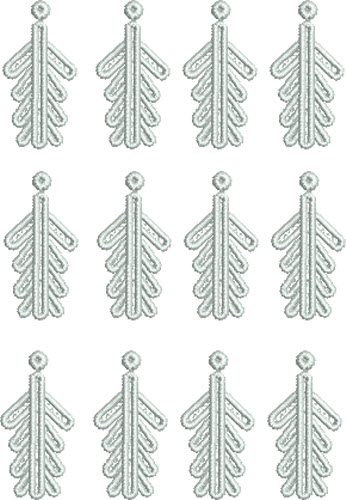
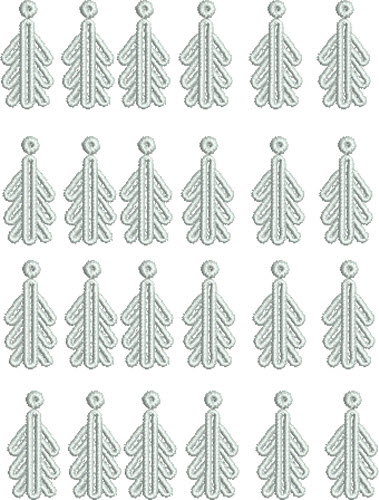
Load design file FSLCT01 into your machine; stitch this file twice; these are the largest branches.
Step 3:
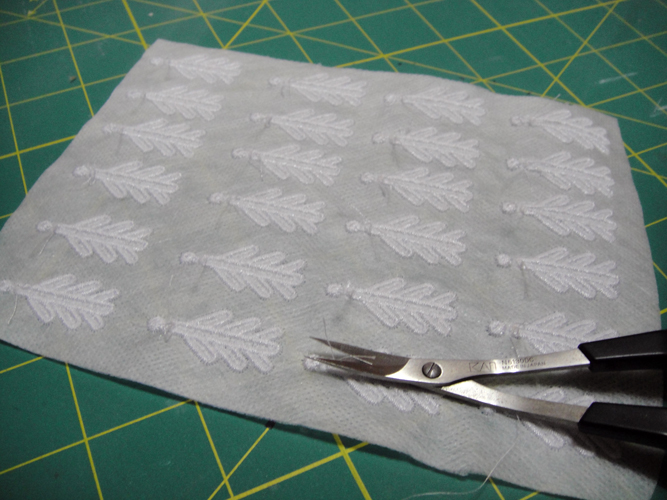
Trim the thread tails from the back of the embroidery as we do not want to get them wet and have them stitch to the branches when drying.
(Click Image to Enlarge)
Step 4:
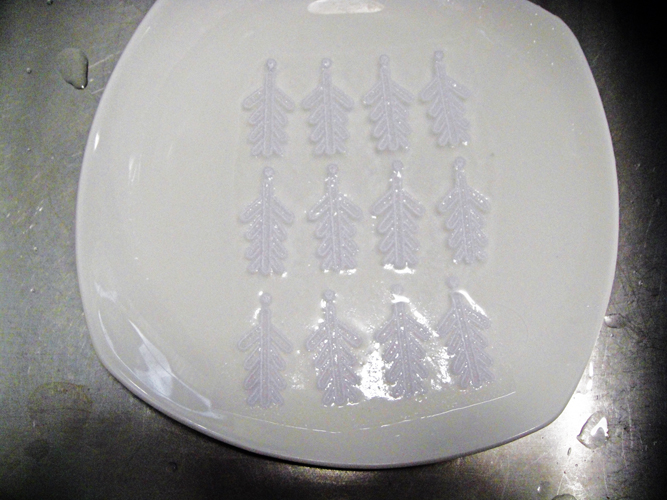
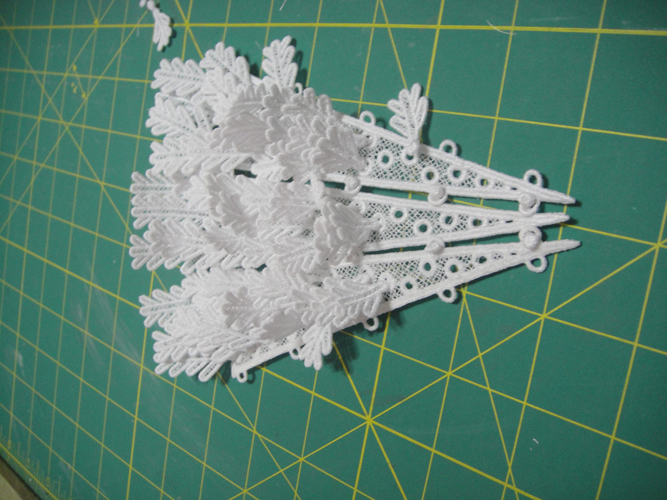
After stitching cut away the excess stabilizer around the whole set of branches. Place a stopper in your sink so that none of your branches wash down the drain; fill a plate or dish with hot water and drop the whole sheet of branches on to the plate for just a moment we want to leave a lot of stabilizer in the branches to help make them stiff.
(Click Image to Enlarge)
Step 5:
Place the individual branches on a smooth cotton dishtowel to dry. Usually we are trying to get FSL pieces to lie flat on the towel; in this case we want to encourage the branches to curl a little to give a life like appearance to the tree; so do not press them too flat.
Step 6:
(Click Image to Enlarge)
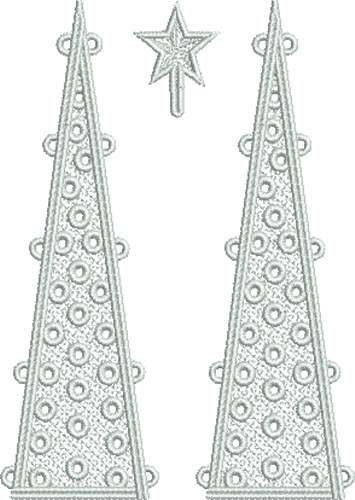
Load design file FSLCT02 into your machine; stitch this file once; this is one 3rd of the base and the star for the top of the tree; rinse out the stabilizer and place these items to dry flat on the towel.
Step 7:
(Click Image to Enlarge)
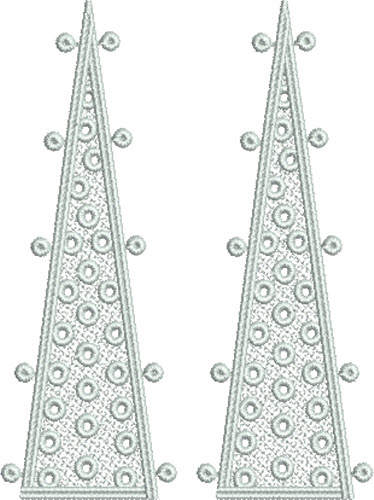
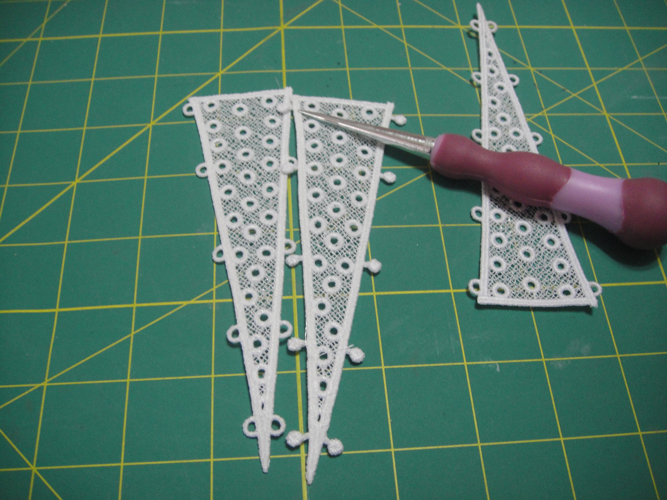
Load design file FSLCT03 into your machine; stitch this files once; this is one third of the base; stitch; rinse; lie flat on the towel to dry.
Step 8:
(Click Image to Enlarge)
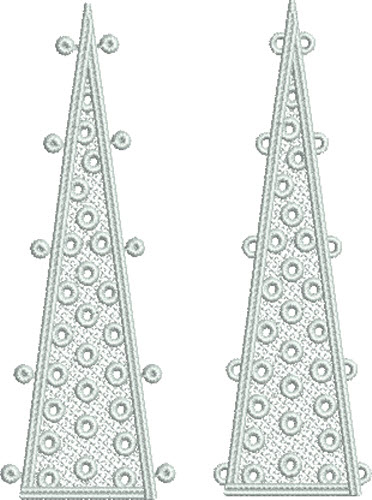
Load design file FSLCT04 into your machine; stitch this file once; this is the final 3rd of the base; stitch; rinse; lie flat on the towel to dry.
Step 9:
(Click Image to Enlarge)
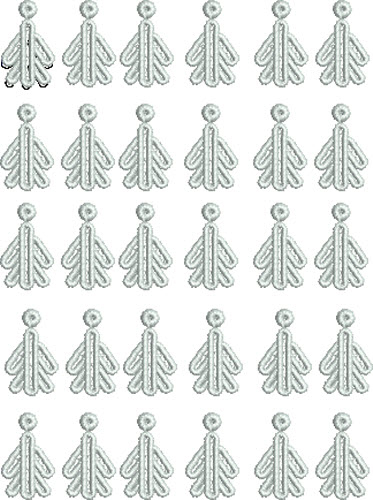
Load design file FSLCT05 into your machine; stitch this file twice; these are the medium branches; stitch; rinse; and lie on the towel allowing them to curl slightly.
Step 10:
(Click Image to Enlarge)
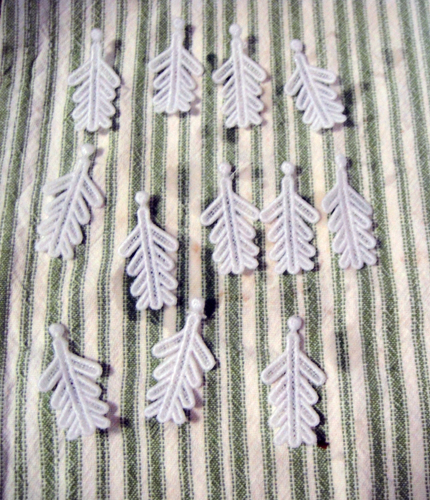
Load design file FSLCT06 into your machine; stitch this file three times; these are the smallest branches; stitch; rinse; and lie on the towel allowing them to curl slightly.
Step 11:
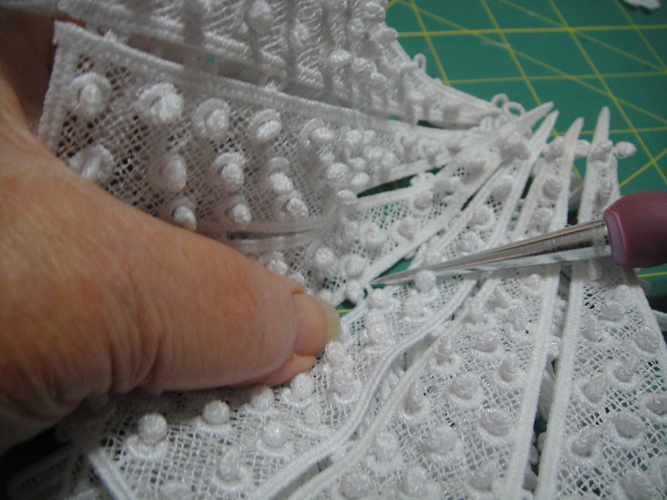
Place two sections of the base on a protected work surface right sides down; Push the buttons through the corresponding loops with an awl. Do this by placing the button over the eyelet and while pushing on it with the awl lift the lower section of the base with the other hand to allow space for the eyelet to go through.
(Click Image to Enlarge)
Step 12:
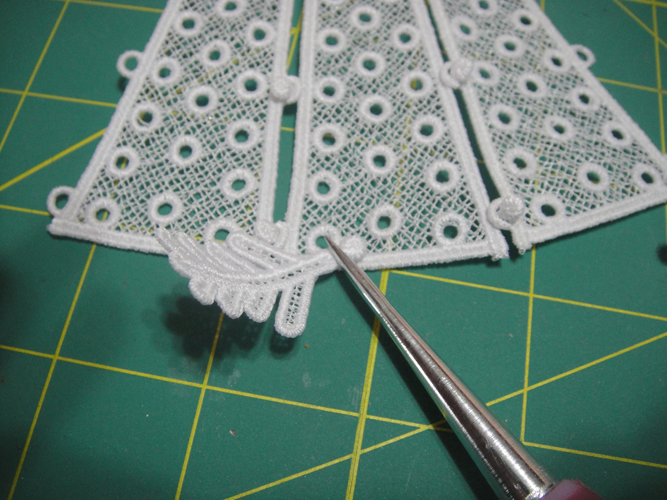
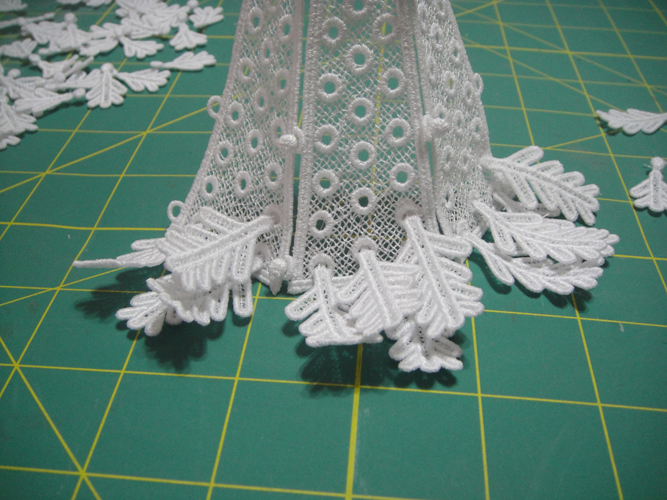
Join three sections of the base together as in Step 11; then starting at the bottom insert 12 of the largest branches into the eyelet across all three sections of the tree. Feel free to stretch any eyelets with your awl if necessary to insert the buttons.
(Click Image to Enlarge)
Step 13:
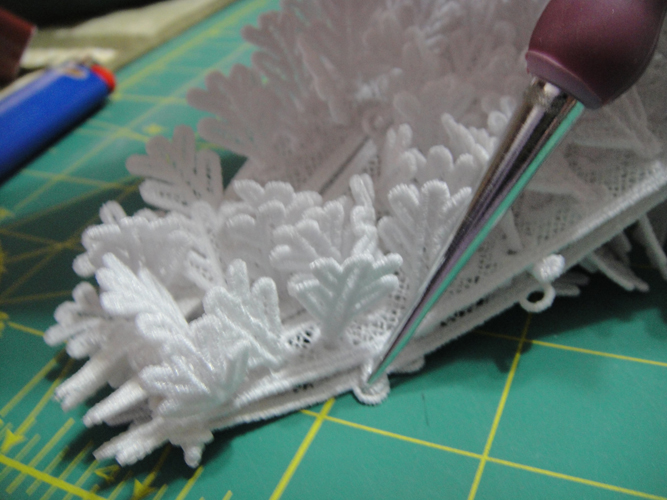
Your tree will now look like this photo. The branches will twist and turn as you are working your way up the tree so do not worry about turning them all right side up until you are done.
(Click Image to Enlarge)
Step 14:
Working your way up the tree; insert 24 medium size buttons into the eyelets.
(Click Image to Enlarge)
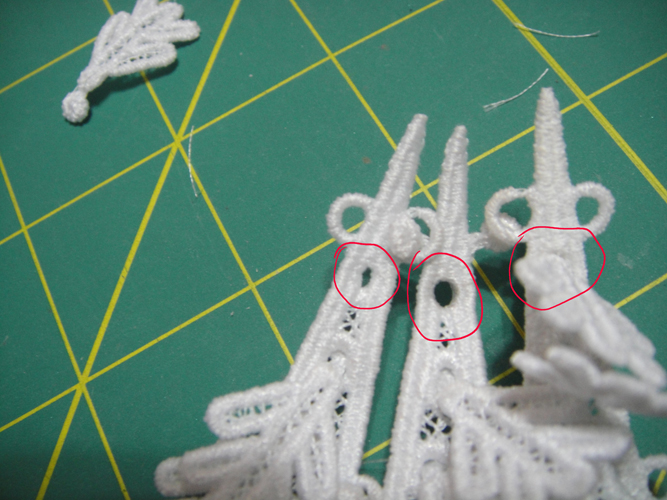
Step 15:
Insert the small branches in the eyelets to the top of the tree. Note the eyelets at the very top of the tree do want to close up during the stitching process – stretch them out with your awl.
(Click Image to Enlarge)
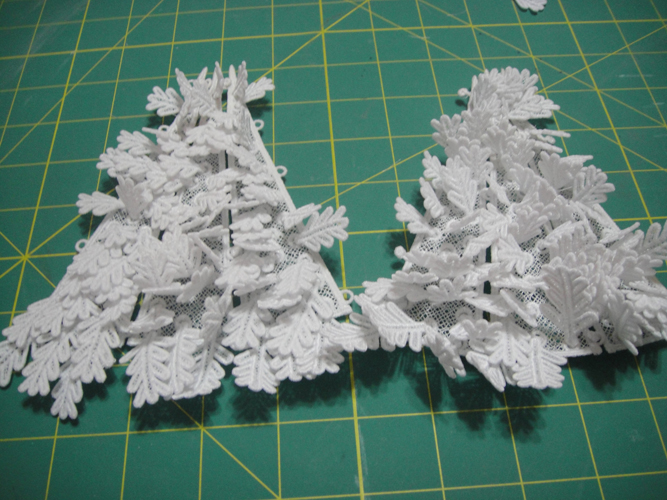
Step 16:
Repeat Steps 11 through 15 to complete the second half of the tree.
(Click Image to Enlarge)
Step 17:
Lay the two sections of the tree together face down and join the side loops and buttons.
(Click Image to Enlarge)
Step 18:
You have to join the final side of the tree with the branches facing out. Lay the loop side of the tree on the work surface and push the buttons as far as possible into the loop; but then pick the outer edge of the loop up with the awl and bring it over the top of the button.
(Click Image to Enlarge)
Step 19:
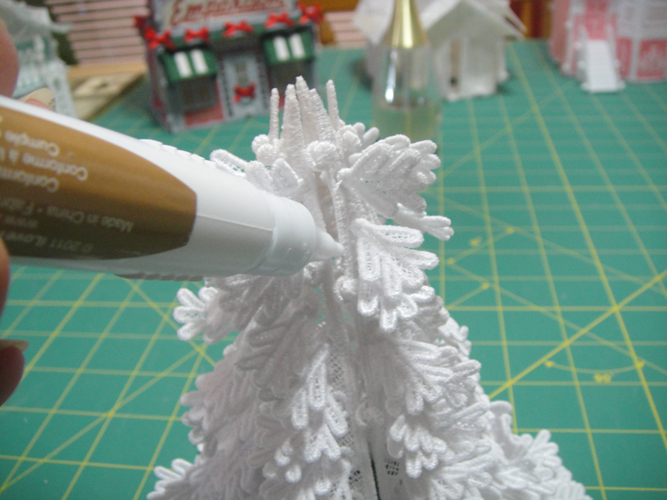
To help the tree retain its shape put a little glue down the insides of the seams and hold together a few moments to close the gap. Do this to all the seams below the loops and buttons at the top of the tree.
(Click Image to Enlarge)
Step 20:
At the base of the tree overlap the innermost little branch of the longest branches that are on either side of a seam; place a drop a glue and hold together until they stick together.
(Click Image to Enlarge)
Step 21:
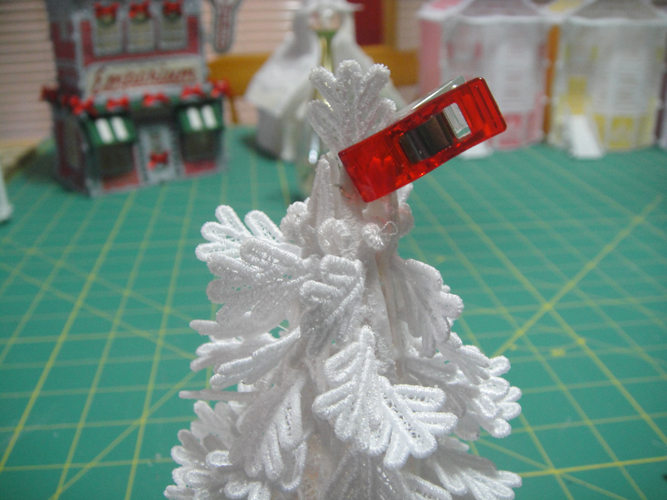
Randomly glue a couple of branches together that are on either side of a seam, if desired, just to make the joins in the base not so obvious; you can hold these together with a small clip until they dry.
(Click Image to Enlarge)
Step 22:
Insert a small branch or the star between the prongs at the top of the tree; this works best if you glue the star or branch to two opposing prongs and then glue the other prongs together after that first gluing sets.
(Click Image to Enlarge)
Step 23:
This is how the tree looks with a small branch at the top; remember you can change how the whole tree looks based upon the length of branches inserted. You can also add glue on crystals if desired.
Step 24:
(Click Image to Enlarge)
Set the tree over a flameless tea light to add a gentle glow to your village. Congratulations your FSL Christmas Tree is complete!
Award winning Digitizer, Embroidery Educator, Author and a Consultant to the Industry, Pat Williams has 30 years of experience in the embroidery industry. Pat has won multiple awards for her digitizing expertise including the 2007 Impressions Awards Grand Championship, Best of Show as well as the 1st and 2nd Place Awards. Pat’s love of digitizing has afforded her the opportunity to write numerous articles for Impressions magazine in the United States and Images Magazine in Europe. In 2001 Pat was named “Embroidery Educator of the Year.” For many years Pat taught digitizing seminars at the ISS Shows in Long Beach, CA and for Compucon software. She now resides in Tucson, AZ.