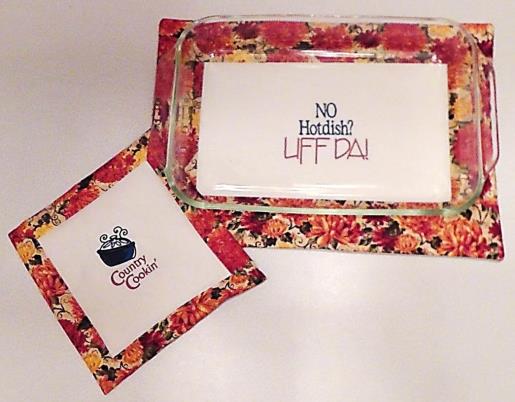
Any size clear glass casserole dish can be used for this project. The instructions will show how to measure the casserole dish and determine how to cut the fabrics. For the project an 11” x 13” casserole dish was used. When measuring be sure to add ¼” seam allowances. The smaller hot pad can also be used as a potholder. Directions will show how to use the back fabric piece to form mitered borders for the front. Determine the dish to be used, measure for fabric, cut, embroider, and then construct the project pieces. Do not use polyester batting for this project. As for the saying, if you don’t know what “UFF DA!” means, just ask a Norwegian!
Step 1:
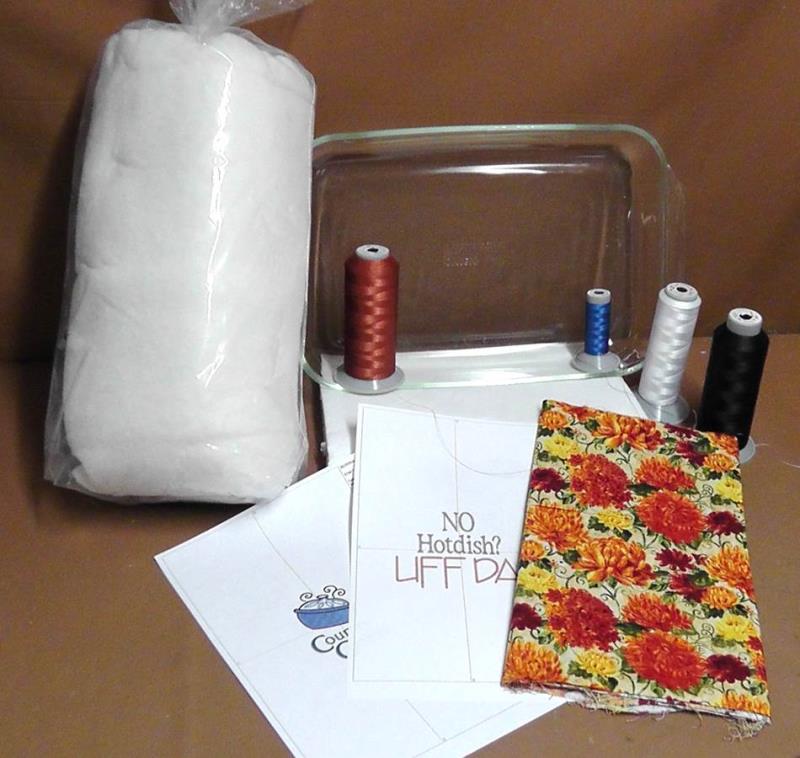
Gather the materials and read through the instructions before beginning to determine the amount of fabric that will be needed for the project. Be sure to use 100% cotton batting for this project. Print out paper templates of the embroidery designs.
(Click Image to Enlarge)
Step 2:
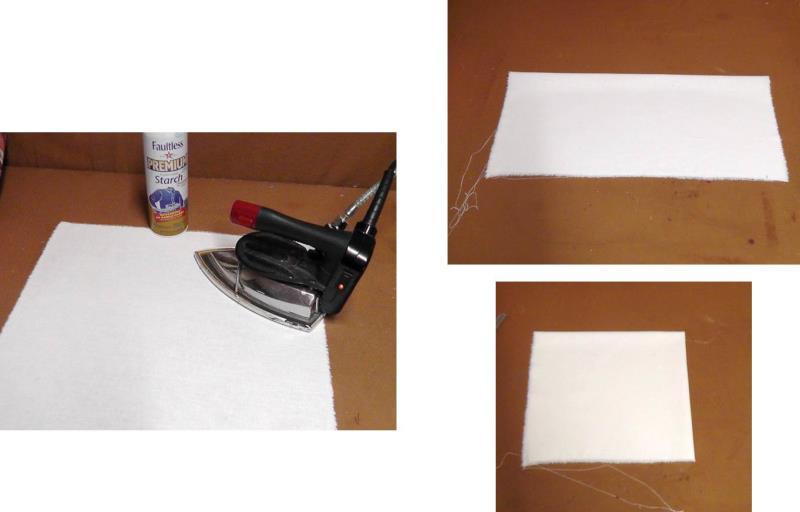
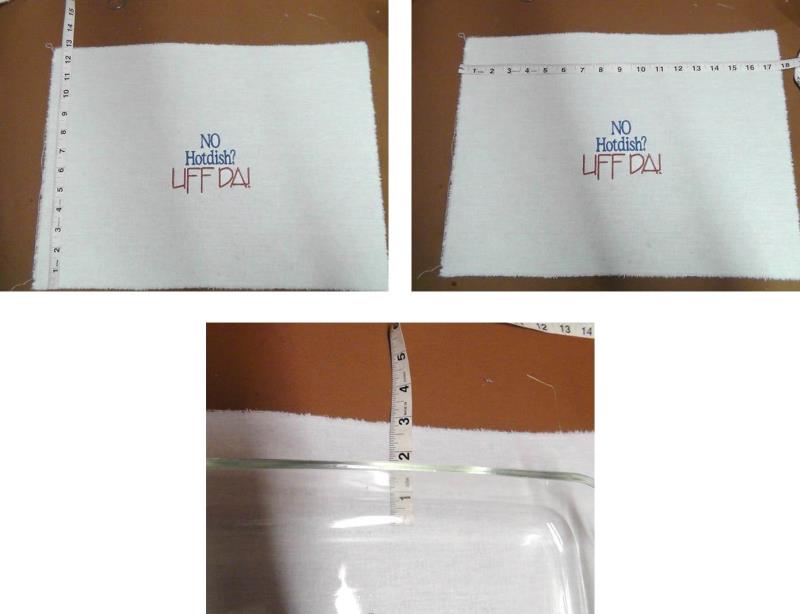
Measure the length, width and depth of the casserole dish and cut a piece of white fabric larger than needed. Press the fabric well with spray starch. Quarter fold the fabric to find the center point for embroidery alignment.
(Click Image to Enlarge)
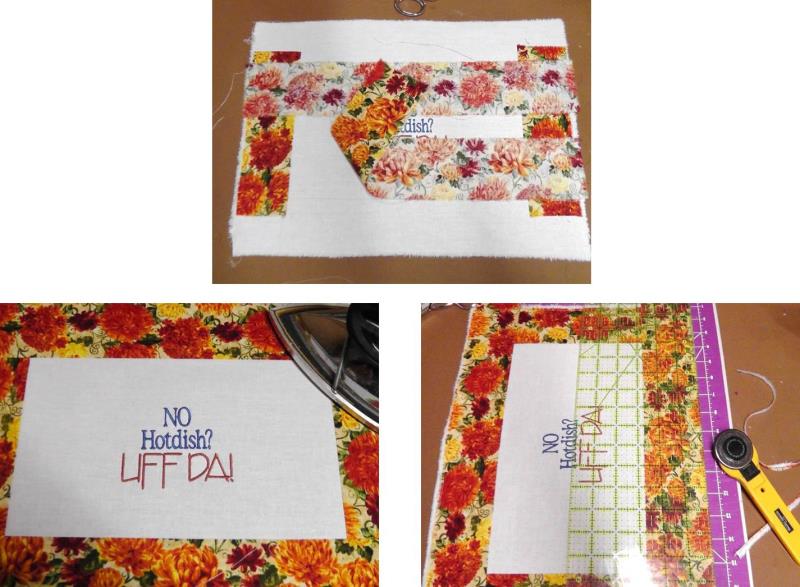
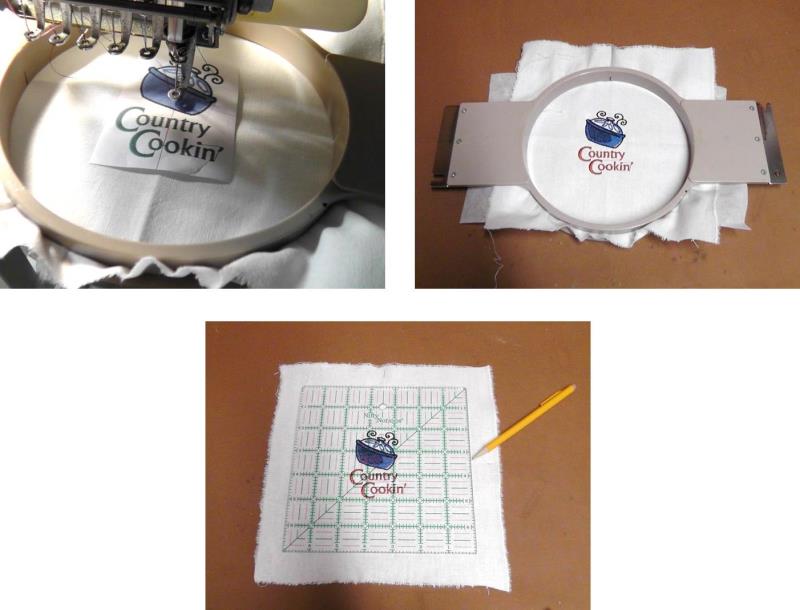
Step 3:
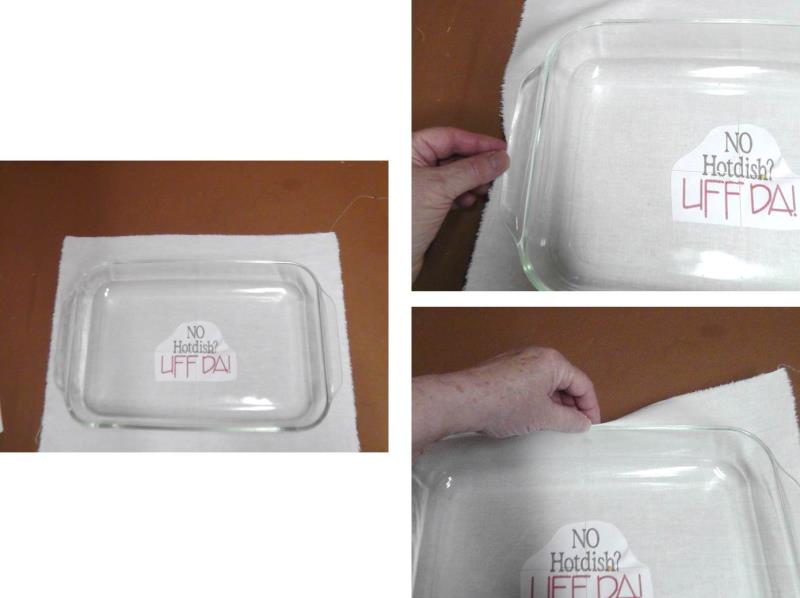
Cut around and pin the embroidery template to the fabric aligning center marks. Center the casserole dish over the center of the fabric. Bring the fabric up to the edges and trim the fabric to this measurement (this could be done after the fabric is embroidered as well).
(Click Image to Enlarge)
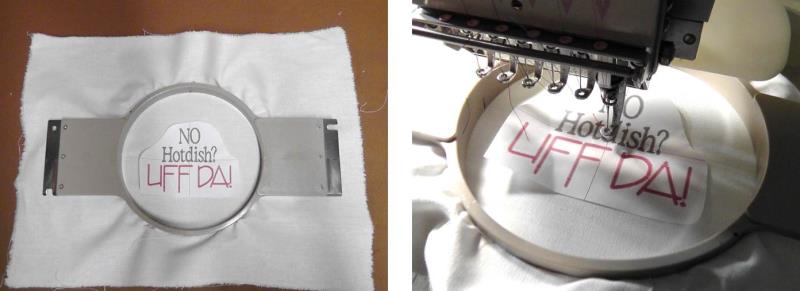
Step 4:
Hoop the fabric with one layer of tearaway stabilizer. Load the design "Country Cookin" on the machine. Align the needle to the center point of the paper template.
(Click Image to Enlarge)
Step 5:
To cut the fabric borders, measure the trimmed fabric height, width and determine the depth of the borders desired (for the project 3” strips of fabric were cut).
(Click Image to Enlarge)
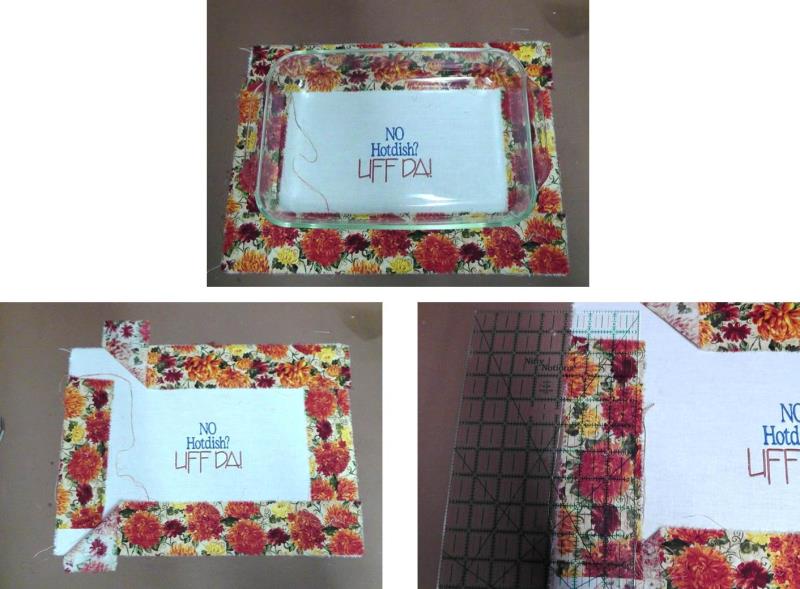
Step 6:
Cut the border strips: two for the left and right sides (which can be shorter because the will be tucked under the top and bottom border pieces) , and two for the top and bottom border pieces.
(Click Image to Enlarge)
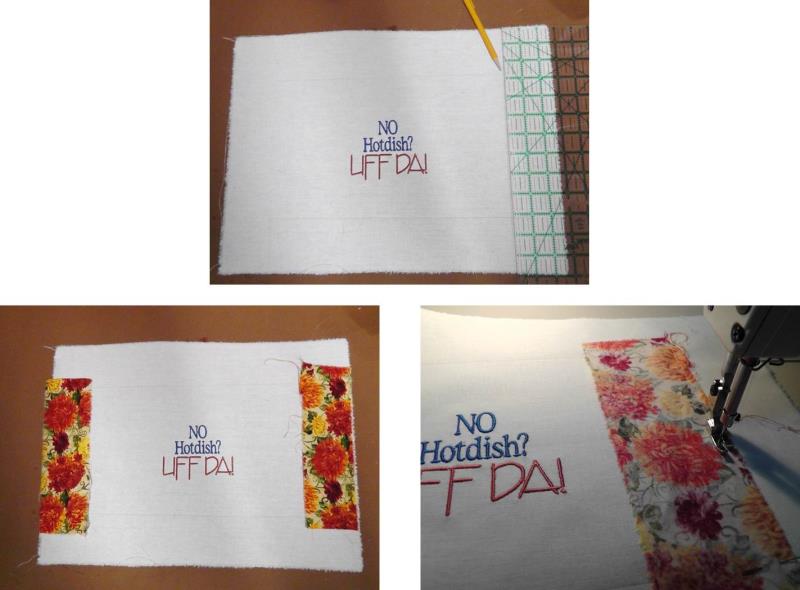
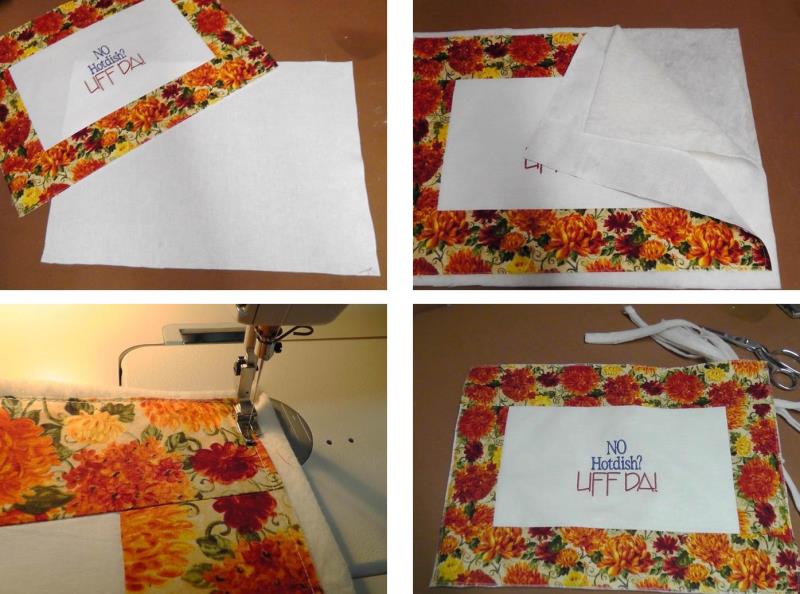
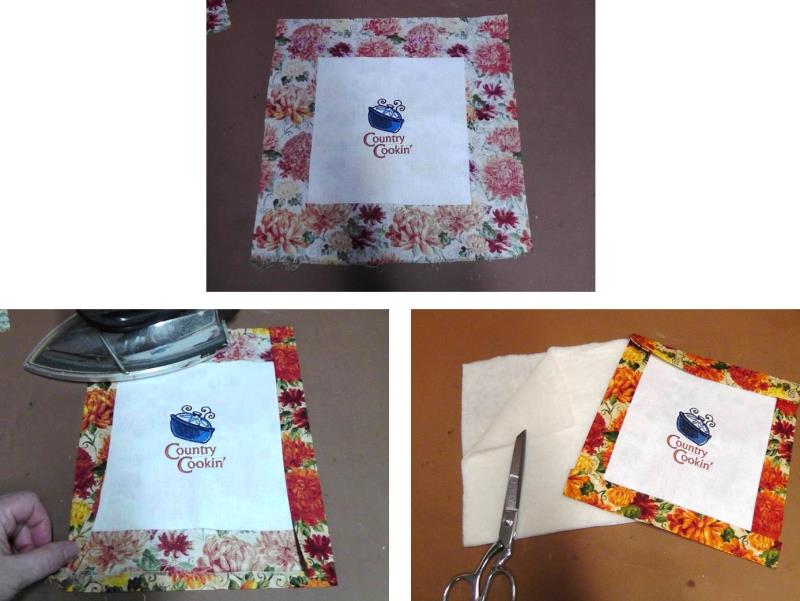
Step 7:
To accurately sew the borders on, measure and mark the embroidered fabric ½” less than the border width. Begin with the shorter side pieces and center them on the sides as shown. Flip each and align the cut edge to the pencil line drawn. Sew on each side border using a ¼” seam allowance.
(Click Image to Enlarge)
Step 8:
Press the side borders. Repeat the steps of aligning the top and bottom border pieces to the pencil line and sew on the borders using a ¼” seam. Press the borders into position and then square up and trim the borders and base fabric.
(Click Image to Enlarge)
Step 9:
Measure and cut a piece of backing fabric the same measurement as the top. Also cut two pieces of cotton batting slightly larger than those measurements. Center and place the top right side up on the batting pieces and baste the three layers together; trim the batting to the cut edge of the embroidered top.
(Click Image to Enlarge)
Step 10:
Now place the backing fabric right sides together over the basted top, meeting cut edges, and pin together. Sew around all edges leaving an opening for turning, using a ¼” seam allowance. Turn the piece right side out through the opening, forming the corners, and then press all the edges and hand stitch the opening closed.
(Click Image to Enlarge)
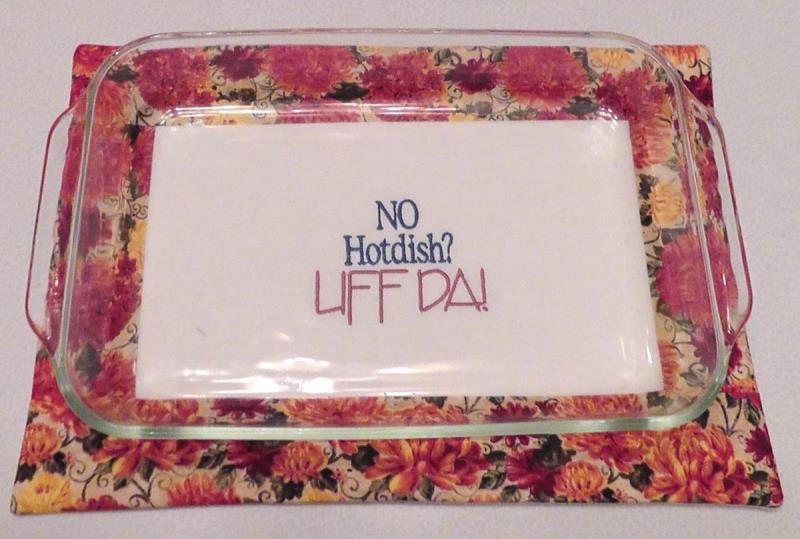
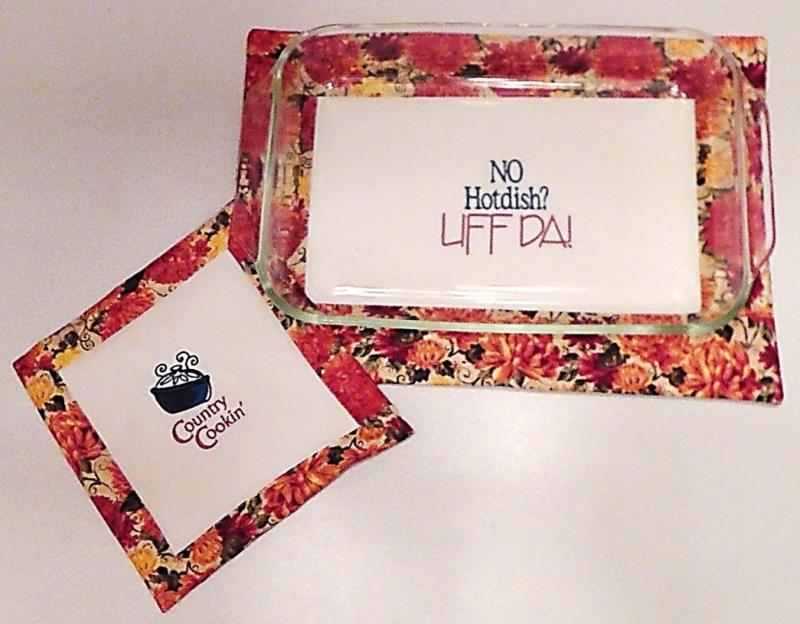
Step 11:
The hot pad is completed.
(Click Image to Enlarge)
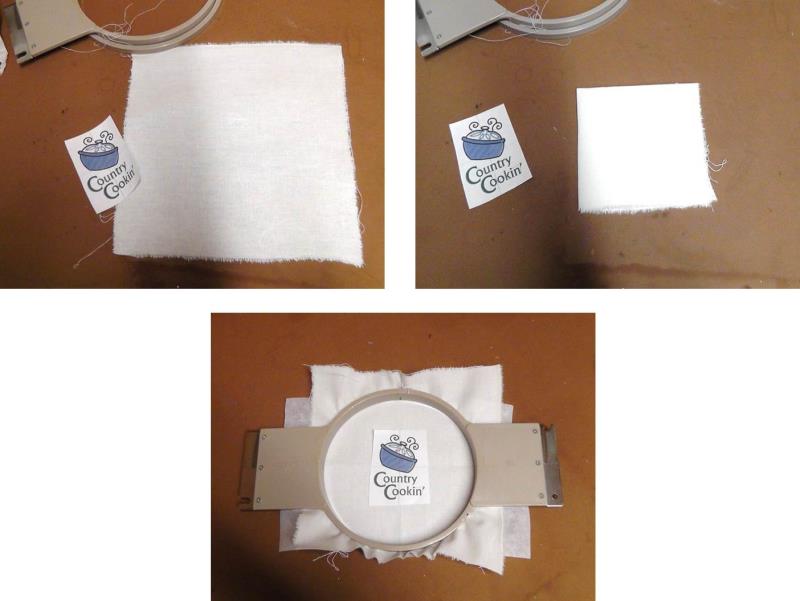
Step 12:
To create the smaller hot pad (potholder), cut a piece of white fabric (project used 8” square), press it well with spray starch, quarter fold it to find the center and align the paper template to the center of the fabric. Hoop the fabric with one layer of tearaway stabilizer.
(Click Image to Enlarge)
Step 13:
Load the design “Country Cookin” in the machine and align the needle to the center of the template. Stitch the design following the color sequence. Trim the fabric to the finished size desired to insert into the borders (project cut to 6” square).
(Click Image to Enlarge)
Step 14:
Next cut a piece of fabric large enough for the back with borders and seam allowances included (for project the fabric was cut 12.5” square: 6” square as back, 1.5” borders, and ¼” seam allowances). Turn under ¼” around all edges and press. To form the borders, bring the folded edge over the embroidered piece to form the border the desired amount. Measure the final size and cut two piece of cotton batting just slightly smaller than the measurements.
(Click Image to Enlarge)
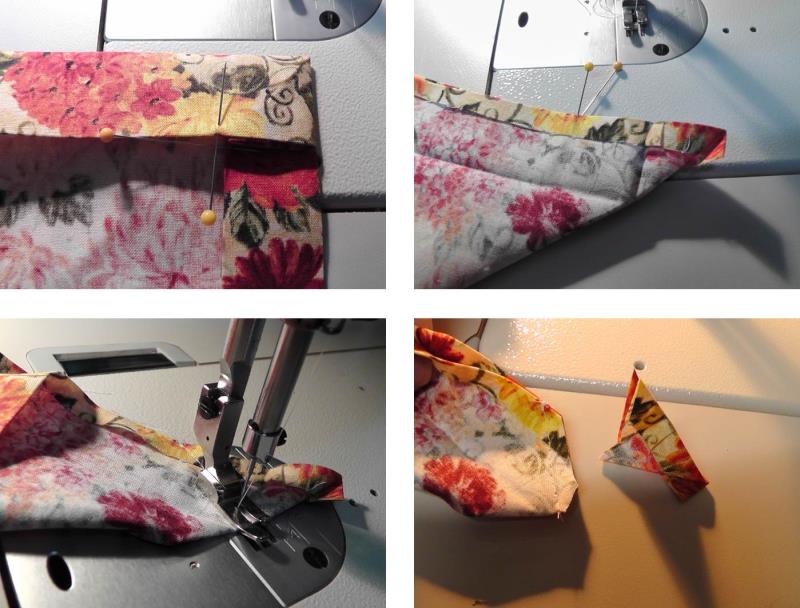
Step 15:
To miter the corners, place pins in opposite sides of where the folded corners intersect. With right sides together, bring the pins together and stitch from the pin to the corner back stitching at each end (keep the edges folded under and stitch them in the seam). Trim the fabric to a ¼” seam allowance and clip across the corner to eliminate bulk.
(Click Image to Enlarge)
Step 16:
Finger press open the seam allowance. Repeat for the remaining three corners. Press the piece well. Tuck the two pieces of batting inside the borders and then center and tuck the embroidered fabric inside the border edges.
(Click Image to Enlarge)
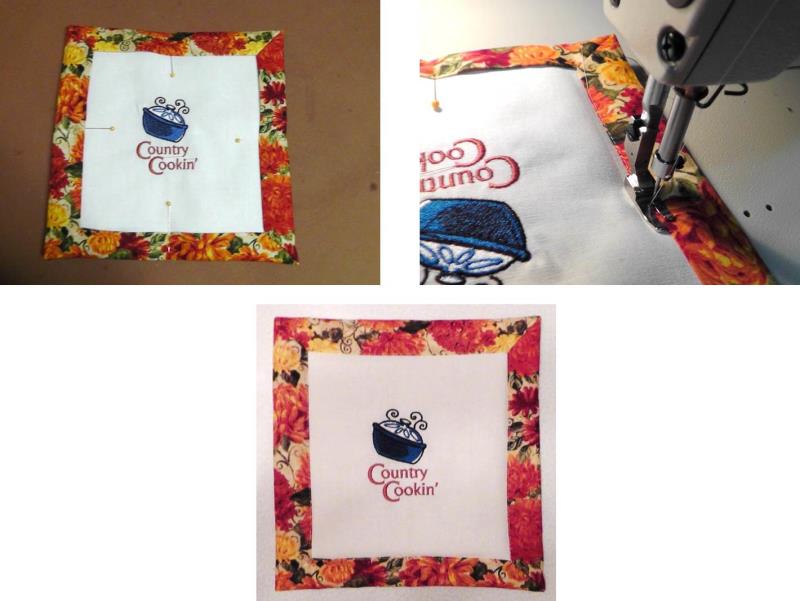
Step 17:
Pin all the layers together at the folded border. At the sewing machine, edge stitch sewing all the layers together. The small hot pad is completed; this can also be used as a pot holder.
(Click Image to Enlarge)
Step 18:
Congratulations on completing the “Casserole Hot Pad Set”. Your guests will be amused when the casserole is gone and the humorous saying is exposed at the bottom of the dish. If anyone is Scandinavian, they’ll say “Uff Da!”
Ramona Baird has been in the embroidery industry for over 23 years. She and her husband owned a commercial and retail embroidery store in Arizona for many years. She is an experienced digitizer having been mentored by award-winners Pat Williams and Lindee Goodall. Ramona is a contributor to “Creative Machine Embroidery” magazine having 5 covers to her credit. Ramona has worked for Wilcom America and served many years as Education Director for the American Sewing Guild. With a degree in fashion design, she is able to design and execute patterns which Pat Williams says are “out of the box” in creativity and application. Ramona likes to challenge the boundaries of embroidery and bring new and exciting designs, ideas, and projects to EmbroideryDesigns.com. She wants embroiderers of all levels to increase their skills and enjoyment in using their embroidery machine for gift-making and personal pleasure.