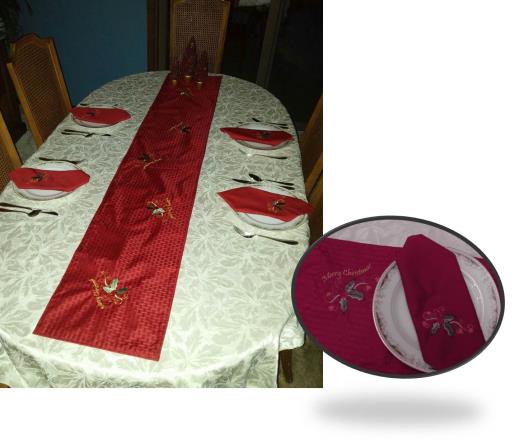
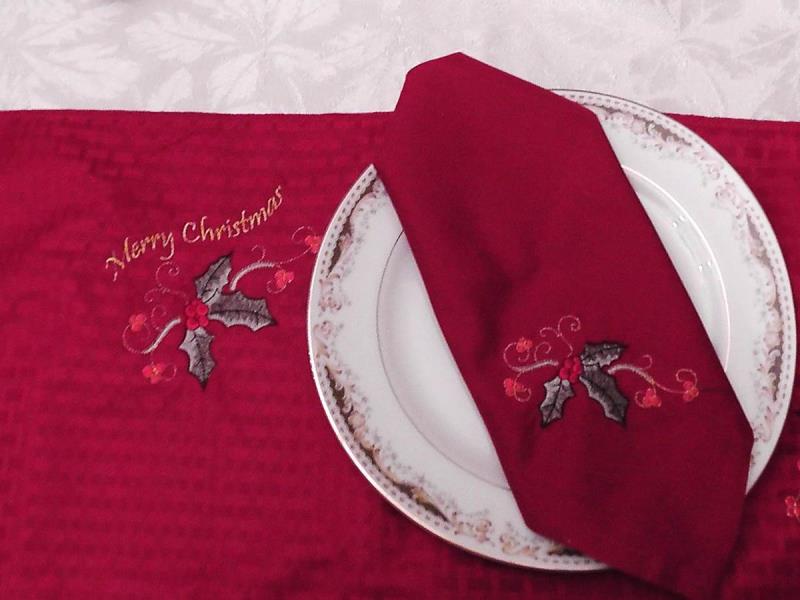
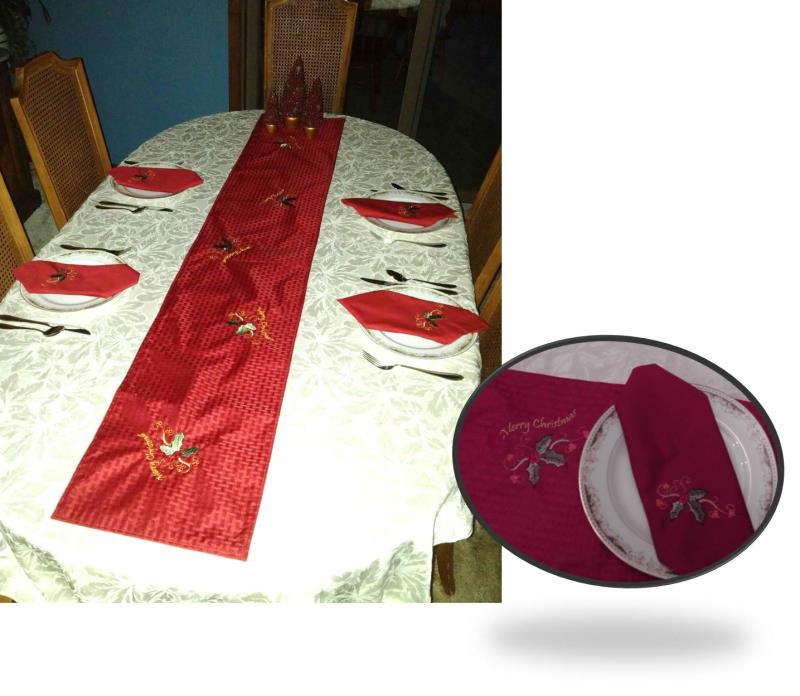
A purchased table runner and napkins are used as the basis for this project. The designs are stitched through both layers of the table runner. The back of the design will show through on both the table runner and napkins. If this is not to your liking, then use fabric to either line the table runner and napkins, or sew them yourself after the designs have been stitched on the fabric. Gold metallic thread was used as the last color in the design to add some glimmer to the table setting.
Step 1:
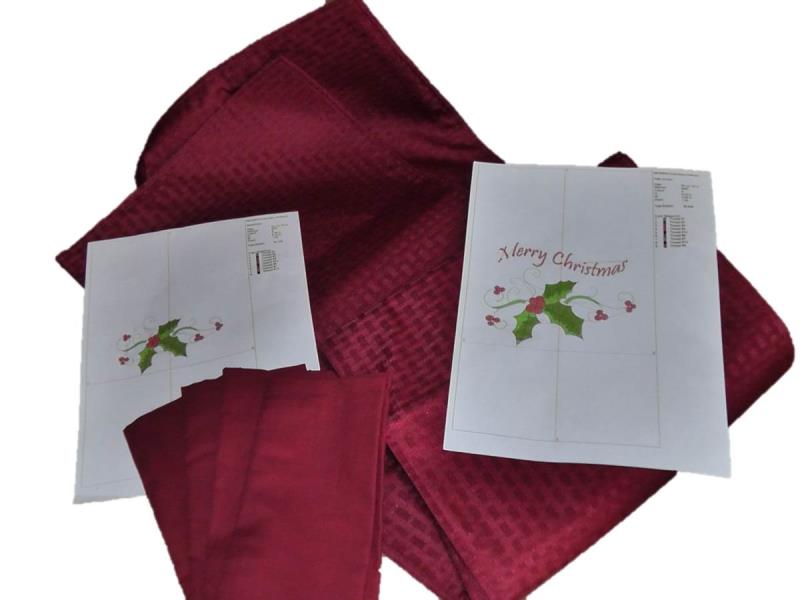
Gather the materials and read through the directions before beginning. Print paper templates of the designs to aid in placement.
(Click Image to Enlarge)
Step 2:
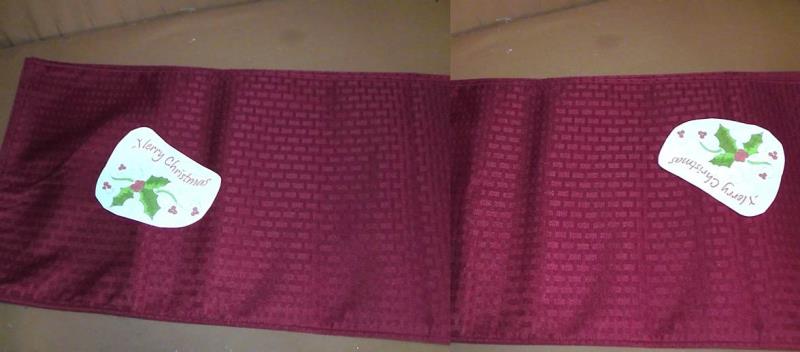
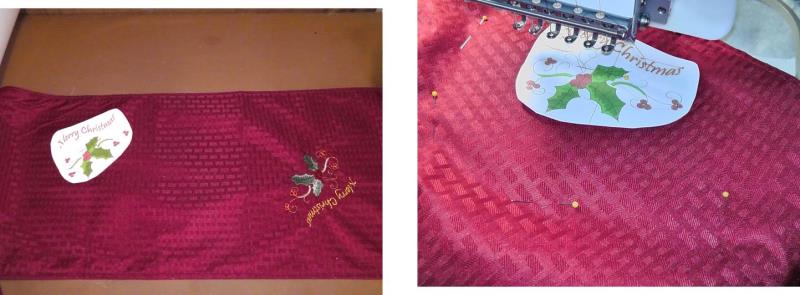
Cut out the paper templates and plan the design placement for the “Merry Christmas” design on the table runner. For the project five designs were placed on the table runner spaced approximately 9” apart. They were rotated up and down in a random manner.
(Click Image to Enlarge)
Step 3:
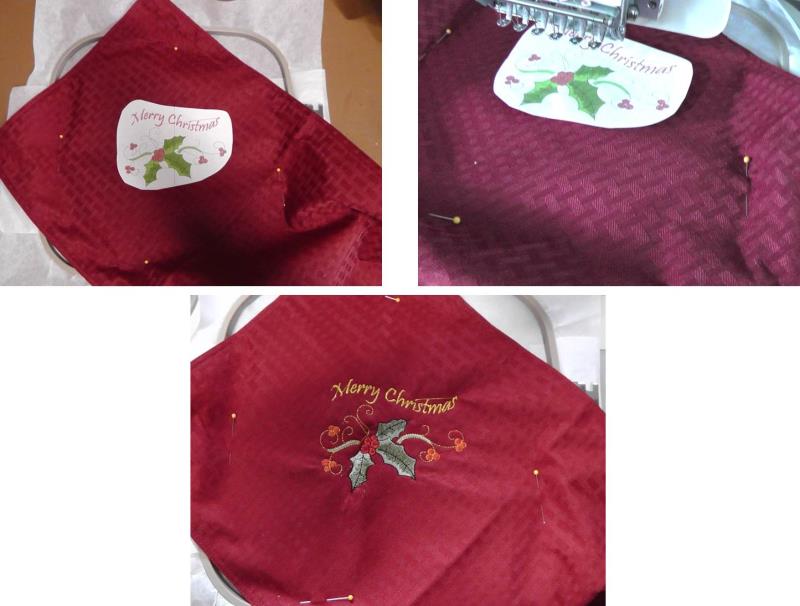
For each design, hoop the runner with tearaway stabilizer. Because the runner was relatively thick for the hoop, it was pinned to the stabilizer with the pins well out of the way of the stitching area. Place the hoop on the machine and align the needle to the center of the design. Stitch the design following the color sequence. Remove the runner from the hoop and remove the excess stabilizer.
(Click Image to Enlarge)
Step 4:
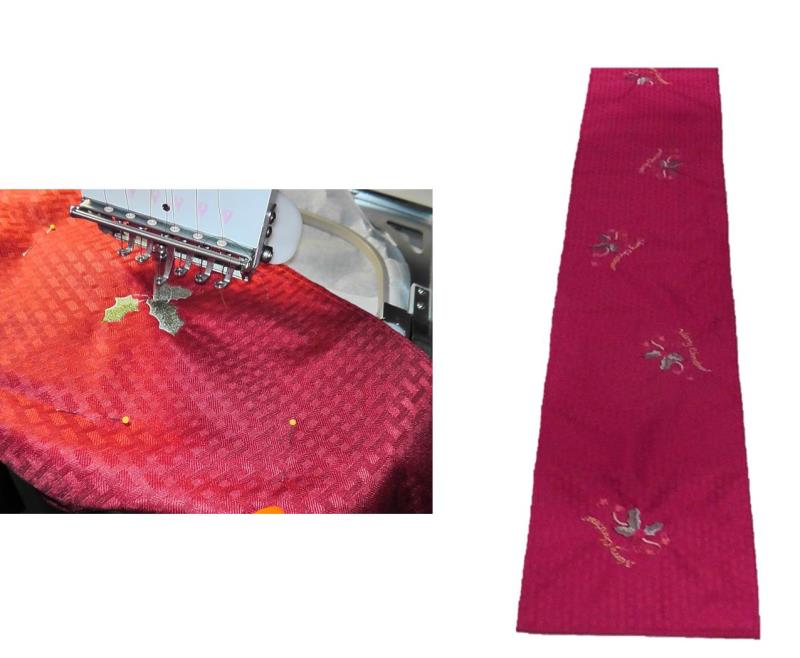
Repeat the steps of hooping, aligning and stitching for the remaining designs on the table runner.
(Click Image to Enlarge)
Step 5:
Add as many designs as you’d like for your table runner. The table runner looks a little wrinkled because the top fabric was slightly larger on this pre-made table runner than the back of the fabric. By the time a centerpiece, candles, and dishes of food are set on the table runner those won’t even be noticed.
(Click Image to Enlarge)
Step 6:
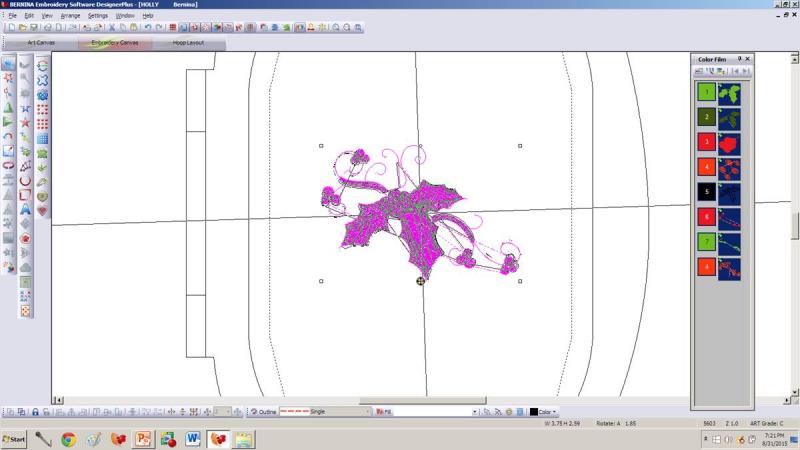
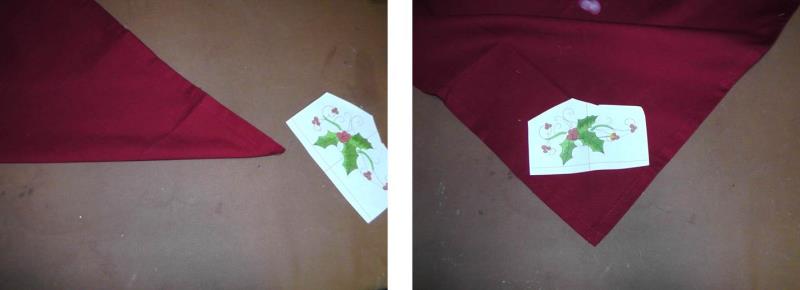
Now it is time to stitch the napkins. For the project the design was rotated in embroidery software so the point of the middle leaf would point to the corner of the napkin. If you don’t have embroidery editing software this step can be done at the machine.
(Click Image to Enlarge)
Step 7:
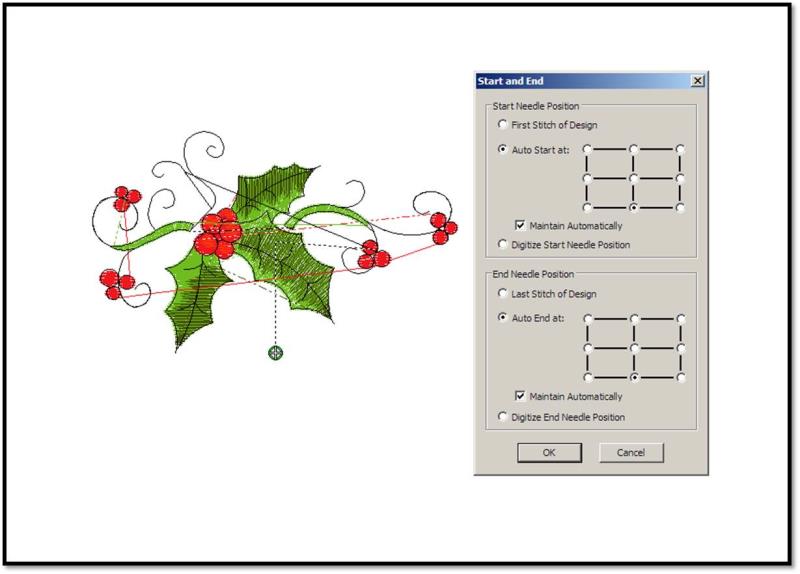
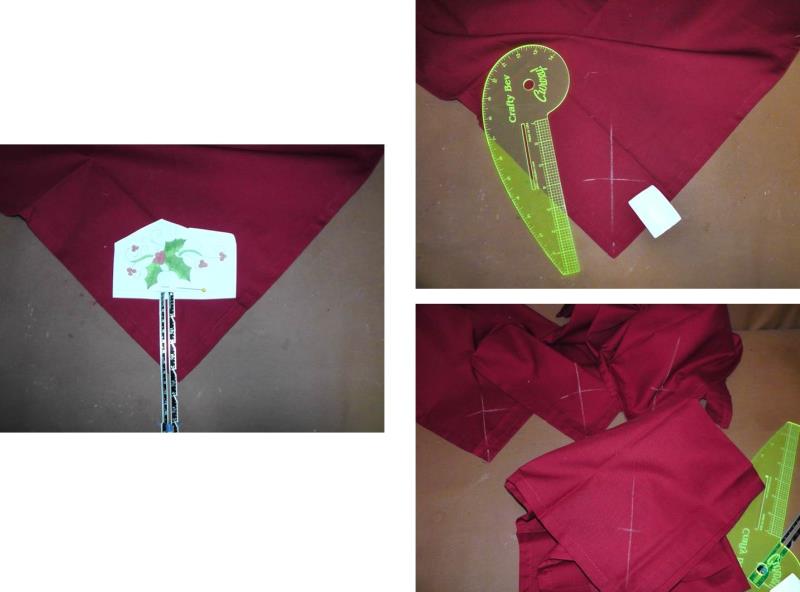
The alignment point of the design was placed at the lower middle to easily aid in aligning the design on the napkin as you will see.
(Click Image to Enlarge)
Step 8:
Fold the napkin in half along the corner desired for the design. Plan the placement pointing the vertical axis to the corner of the napkin as shown.
(Click Image to Enlarge)
Step 9:
Measure from the point of the napkin to the horizontal axis line; this will be the depth for the alignment point. Mark the alignment point on each napkin to be embroidered.
(Click Image to Enlarge)
Step 10:
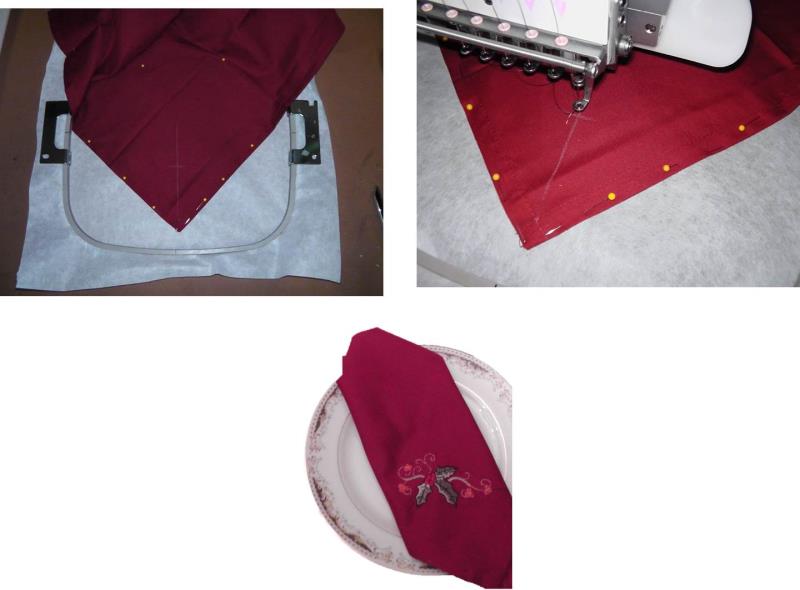
Hoop the napkin with tearaway stabilizer and having the point of the napkin pointing to the center of the hoop. Pins again were used to stabilize the napkin to the stabilizer. Load the “Holly Decoration” design on the machine. Align the needle of the machine to the alignment point marked on the napkin. Stitch the napkin design following the color sequence. Repeat the steps of hooping, aligning and stitching for the remaining napkins.
(Click Image to Enlarge)
Step 11:
Give each napkin and the table runner a final pressing. Fold the napkins for presentation on the plate.
(Click Image to Enlarge)
Step 12:
The table runner and napkins will add a delightful presentation for your Christmas meals.
Ramona Baird has been in the embroidery industry for over 23 years. She and her husband owned a commercial and retail embroidery store in Arizona for many years. She is an experienced digitizer having been mentored by award-winners Pat Williams and Lindee Goodall. Ramona is a contributor to “Creative Machine Embroidery” magazine having 5 covers to her credit. Ramona has worked for Wilcom America and served many years as Education Director for the American Sewing Guild. With a degree in fashion design, she is able to design and execute patterns which Pat Williams says are “out of the box” in creativity and application. Ramona likes to challenge the boundaries of embroidery and bring new and exciting designs, ideas, and projects to EmbroideryDesigns.com. She wants embroiderers of all levels to increase their skills and enjoyment in using their embroidery machine for gift-making and personal pleasure.