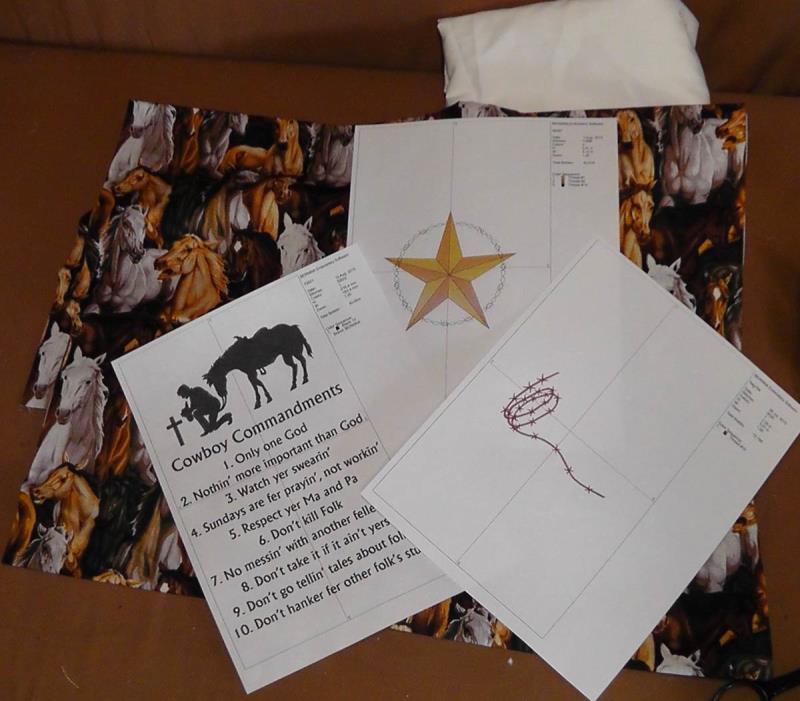
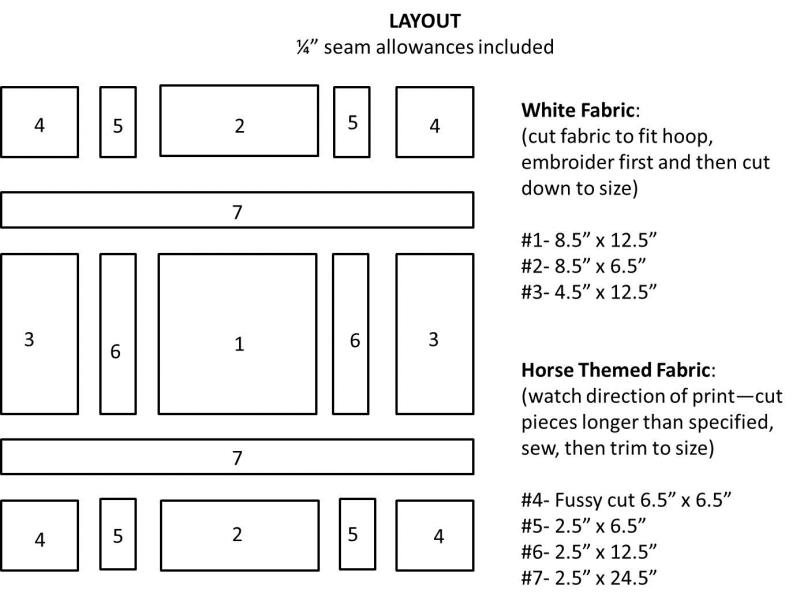
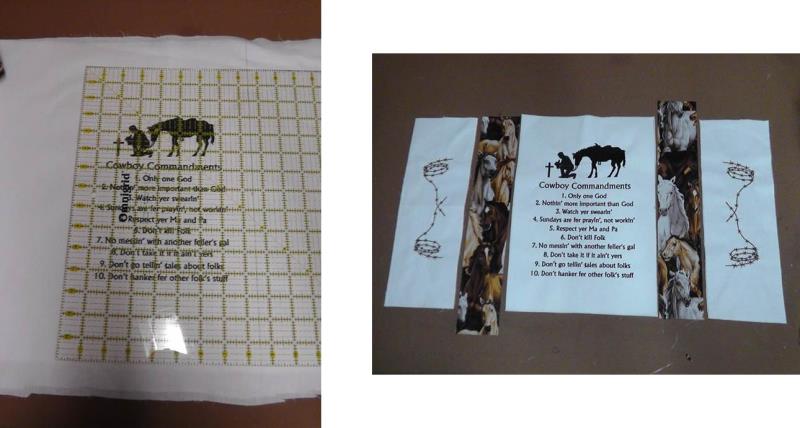
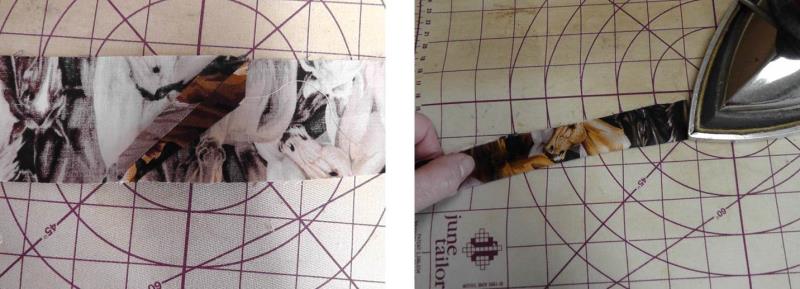
This wall hanging can be completed in a weekend. The “Cowboy Commandments” embroidery design is large, so please be sure it will fit within a hoop that you have for your machine (or choose a different center design for the hoop size your machine has).The fabric needs to be marked for embroidery and cut larger than needed so all the fabric will fit within the hoop for embroidery. After the embroidery is completed the fabric is cut to the size needed, centering the embroidery designs. The four outside corners were fussy-cut taking advantage of the horse motifs in the fabric and the strips were cut so all the horses were running up and down on the strips. The strips were cut 2.5” wide, sewn on to the respective part of the quilt and then trimmed to size. Step 2 shows a picture of the final cut sizes of the pieces. ¼” seam allowances are used throughout the quilt.
Step 1:
Gather the materials, read through the Preface and all instructions before beginning. Print templates of the embroidery designs.
(Click Image to Enlarge)
Step 2:
Here is a layout of the cut size of the pieces. The sizes of the cut pieces should be drawn onto the white fabric and the fabric cut larger than needed so the entire piece of fabric can fit in the hoop for embroidery. After the embroidery is finished, then the fabric pieces should be cut to the size indicated making sure the embroidery is centered. Piece #4 on each outer corner is fussy-cut to make best use of the horse motifs. The 2.5” strips should be cut so all the horses are facing in the proper direction.
(Click Image to Enlarge)
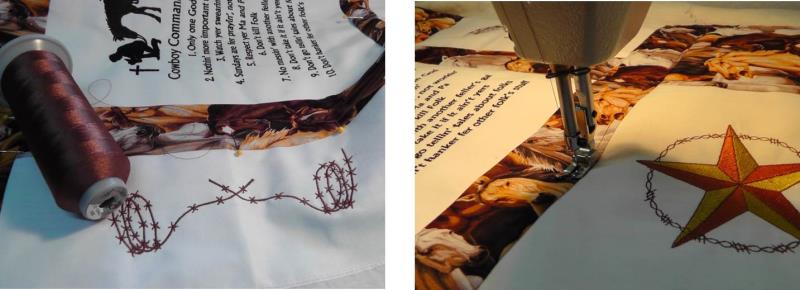
Step 3:
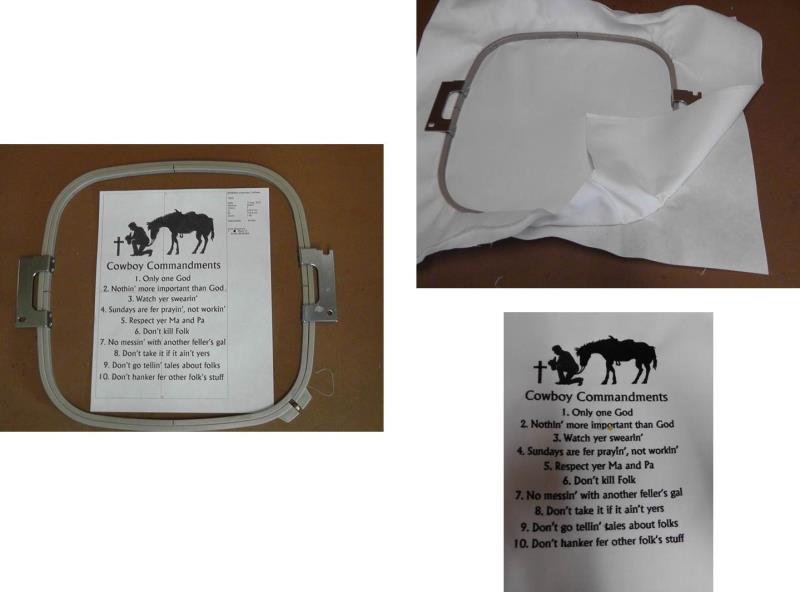
Begin with the “Cowboy Commandments” embroidery design. Be sure there is a hoop large enough to accommodate this design. Cut the fabric larger than needed and hoop with the chosen stabilizer (cutaway was used for the project). Embroider the design. When the embroidery is finished, remove the fabric from the hoop but leave the stabilizer in tact.
(Click Image to Enlarge)
Step 4:
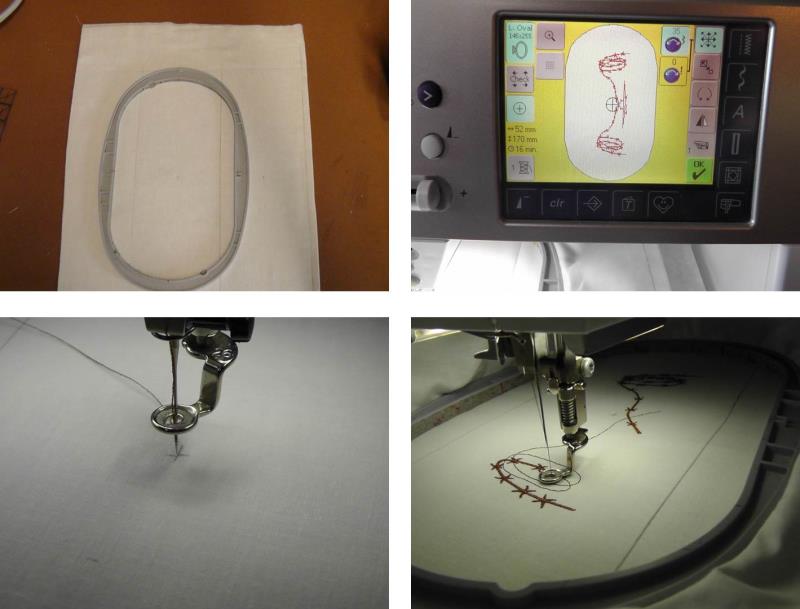
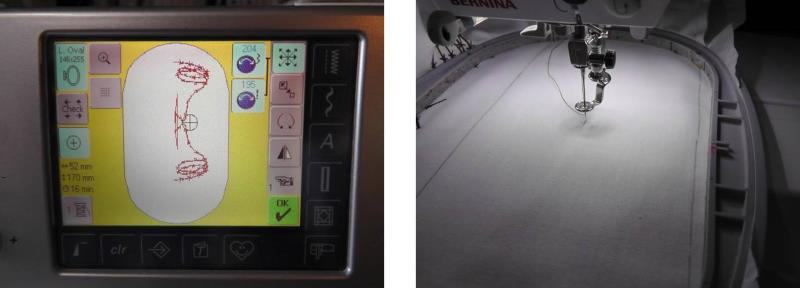
Draw the dimensions for both the middle-row side pieces to be embroidered with the barbed wire on the fabric, marking the centers with an air-soluble marker. Hoop the left section of the drawn fabric with the chosen stabilizer (tearaway was used for the project). Load the “Barbed Wire” embroidery design on the machine. Add a second copy of the same design and mirror it. Move the second design to intersect with the first so the tail ends meet as shown. Rotate the entire design if needed to fit the hoop. Align the needle to the first center mark and stitch the embroidery design.
(Click Image to Enlarge)
Step 5:
Re-hoop the fabric with stabilizer for the right fabric section, mirror the design so it faces the opposite direction as shown, align the needle to the mark on the fabric, and stitch the design.
(Click Image to Enlarge)
Step 6:
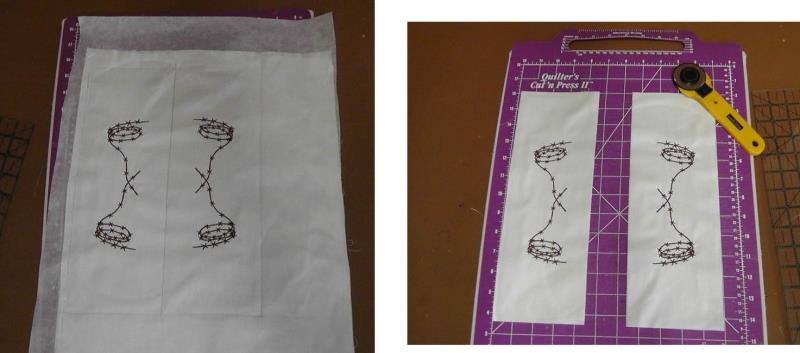
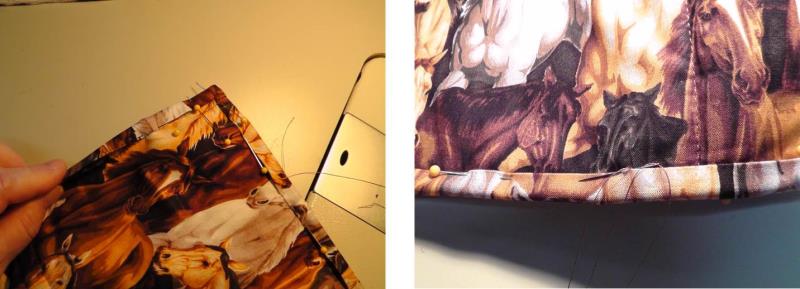
Remove the fabric from the hoop and cut along the drawn lines. The stabilizer may be removed, but for the project it was kept behind the fabric in the project.
(Click Image to Enlarge)
Step 7:
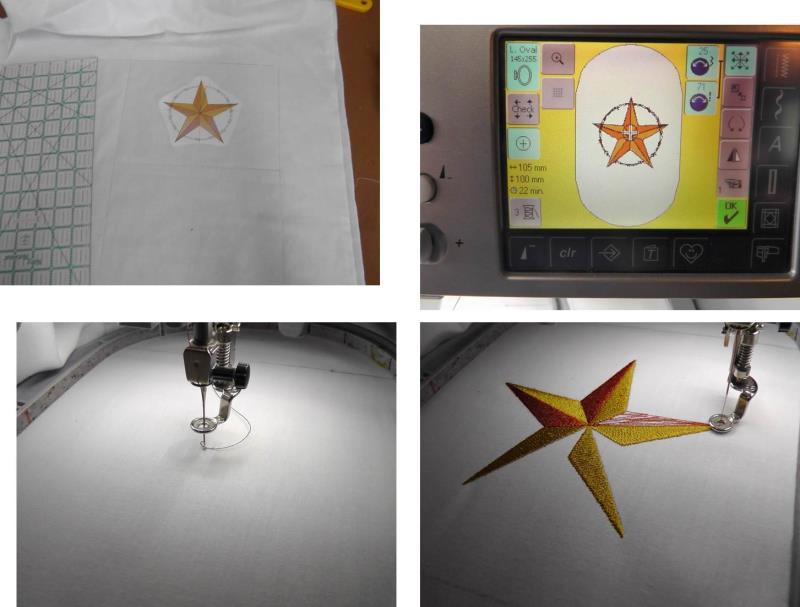
Repeat the same steps of drawing the dimensions and marking the centers on the white fabric for the top and bottom star pieces, load the design “Western Star and Barbed Wire”, hoop the fabric with stabilizer (cutaway was used for the project) align the needle and stitch following the color sequence. Re-hoop and stitch for the second star design needed.
(Click Image to Enlarge)
Step 8:
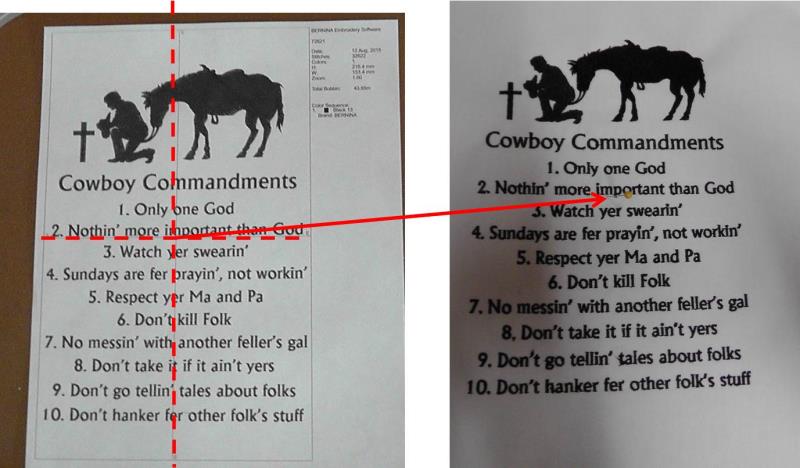
Find the center on the “Cowboy Commandments” embroidered piece using the paper template as a guide.
(Click Image to Enlarge)
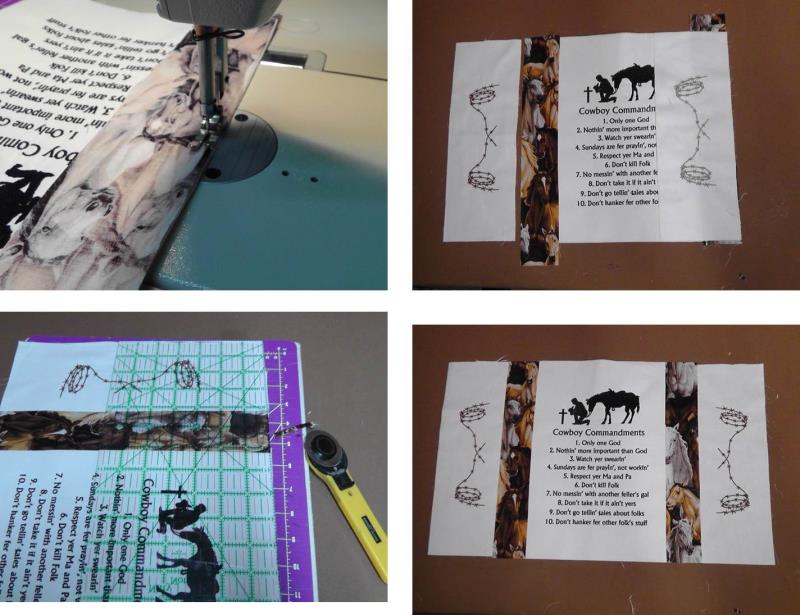
Step 9:
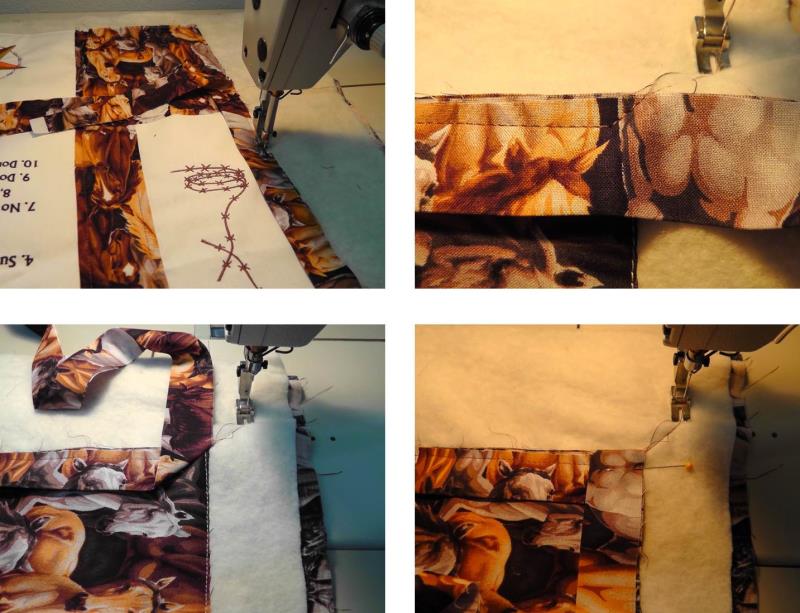
Trim the center embroidery design to fit the dimensions in Step 2 (make sure the embroidery stays centered). Place the barbed wire and center pieces on a flat surface and then place 2.5” strips between them as shown.
(Click Image to Enlarge)
Step 10:
Sew the strips to the embroidered pieces and then trim the strips to the correct length to align with the embroidered pieces.
(Click Image to Enlarge)
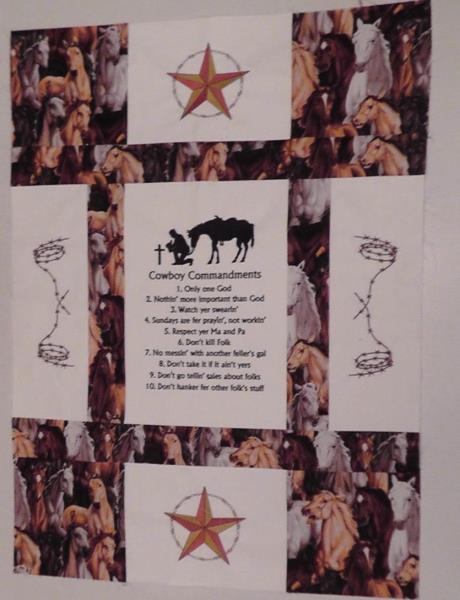
Step 11:
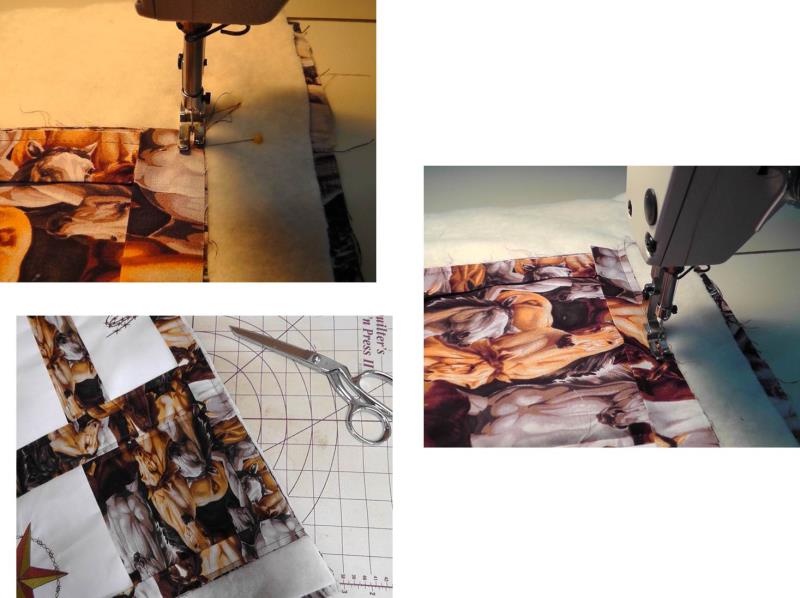
Fussy cut the outer corners (a fussy-cut ruler is handy for this step if you have one). Place 2.5” strips on each side of the top star row and sew them to each side of the star embroidered piece, then sew a fussy cut square on each side of the strip. Place and sew a long strip between the top and middle rows, sewing the rows to the strip. Repeat for the bottom row of the wall hanging. Trim and square up the excess strips.
(Click Image to Enlarge)
Step 12:
The finished top should look like this.
(Click Image to Enlarge)
Step 13:
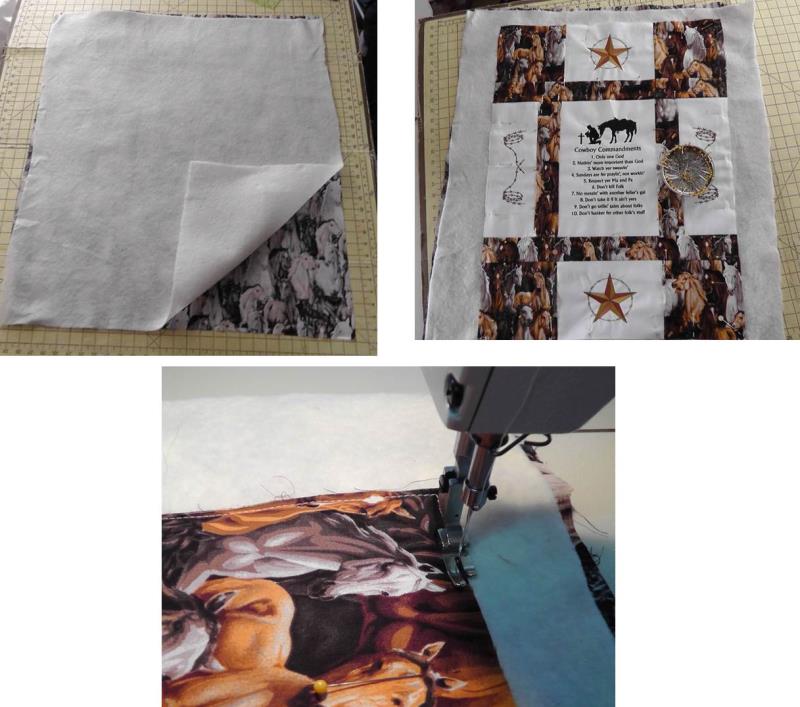
Measure the quilt top and cut a piece of back and batting two inches larger all around. Place the backing right side down on the table (keep the horse print running top to bottom), place the batting on top of the fabric, then center the wall hanging top over both. Pin the layers together. Sew around all outer edges to secure all the layers together.
(Click Image to Enlarge)
Step 14:
Quilt the wall hanging through all layers as desired. For the project, the embroidery thread used for the barbed wire embroidery was used to stitch around the themed fabric ¼”.
(Click Image to Enlarge)
Step 15:
Measure the perimeter of the wall hanging and cut 2.25” strips of fabric for the binding, piecing as needed. Fold the strip in half lengthwise and press.
(Click Image to Enlarge)
Step 16:
Sew the binding to the outer edges of the wall hanging, mitering each corner and leaving tails at the beginning and end for finishing the binding.
(Click Image to Enlarge)
Step 17:
Continue mitering all corners and finishing the ends of the binding using your favorite method. Trim away the excess batting and backing.
(Click Image to Enlarge)
Step 18:
Roll the binding to the back side of the quilt, forming miters at the corners and pinning in place. Hand-stitch the binding to the back of the wall hanging.
(Click Image to Enlarge)
Step 19:
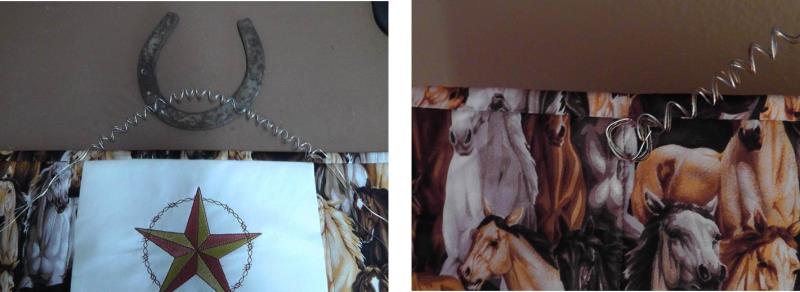
To make the hanger, choose a wire that looks old and is about an 18 ga. (I couldn’t find exactly what I wanted. The silver wire was the correct ga. but too shiny so I added a gold wire and flat grey wire that were thin and worked the three together as one.) Cut about a yard of wire, wrap it around a pencil. Slide the pencil out and then slightly stretch out the wire coil.
(Click Image to Enlarge)
Step 20:
Align the coil behind the binding and centered on the top star block. Flip the wall hanging over, create a circle with each end of the wire and sew the circle through the back layer and batting to secure it.
(Click Image to Enlarge)
Step 21:
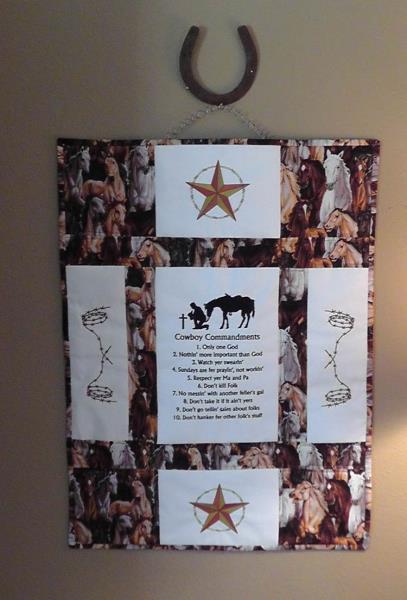
Hang the old horse shoe on the wall and then hang the wall hanging with the wire at the bottom of the horse shoe. This wall hanging is sure to get tons of compliments!
Ramona Baird has been in the embroidery industry for over 23 years. She and her husband owned a commercial and retail embroidery store in Arizona for many years. She is an experienced digitizer having been mentored by award-winners Pat Williams and Lindee Goodall. Ramona is a contributor to “Creative Machine Embroidery” magazine having 5 covers to her credit. Ramona has worked for Wilcom America and served many years as Education Director for the American Sewing Guild. With a degree in fashion design, she is able to design and execute patterns which Pat Williams says are “out of the box” in creativity and application. Ramona likes to challenge the boundaries of embroidery and bring new and exciting designs, ideas, and projects to EmbroideryDesigns.com. She wants embroiderers of all levels to increase their skills and enjoyment in using their embroidery machine for gift-making and personal pleasure.