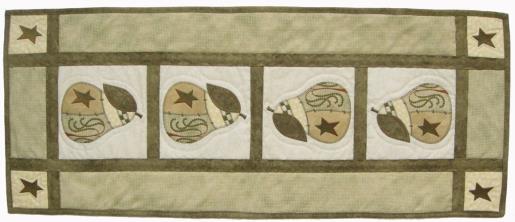
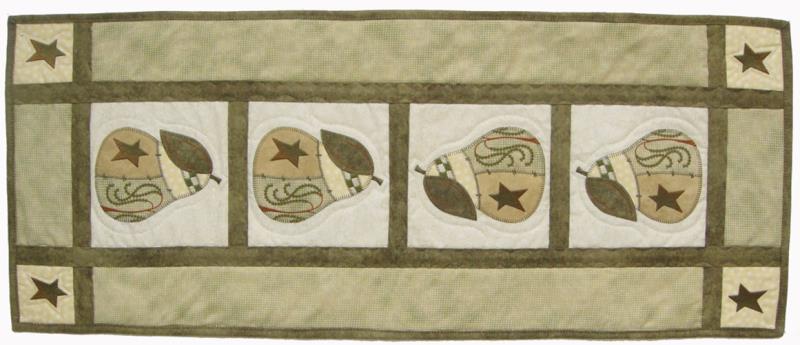
A small table runner that is just perfect for the center of the table. Its fusible applique Prim Pear center blocks are just perfect for any time of year. SVG, FCM and PDF files are included for cutting the appliques.
Greyed greens and golds add to the primitive country feel of this little table runner which leaves you room to use placemats all around the table. The fusible applique method is used, so you will need to precut your appliques. PDF files are included for those cutting by hand. SVG and FCM files are included for those using electronic cutters. The Scan N Cut® was used to make the sample.
Step 1:
(Click Image to Enlarge)
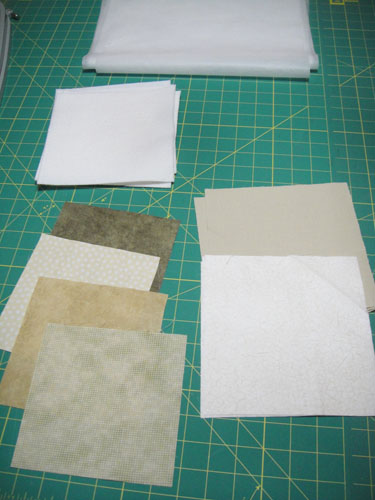
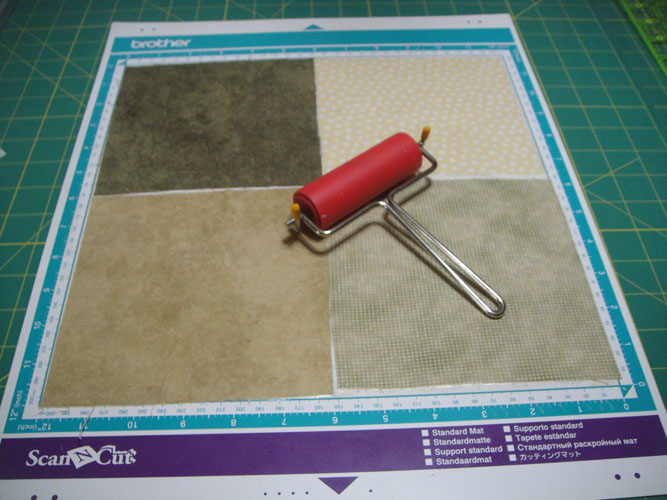
Cut 4 7” squares each of the backing fabric; the block front fabric; and Battilizer®
Cut a 6” square each of the applique fabrics in the mustard/gold, green mini check, dot and sage green; plus cut 1 addition 4” x 4” square of the mini check.
Step 2:
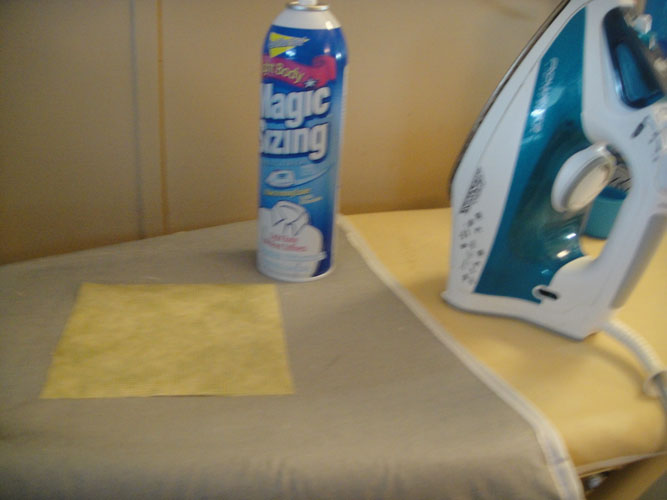
Iron each applique fabric 4 times with Magic Sizing or spray starch to make the fabrics crisp. This will reduce fraying when cutting the applique pieces.
(Click Image to Enlarge)
Step 3:
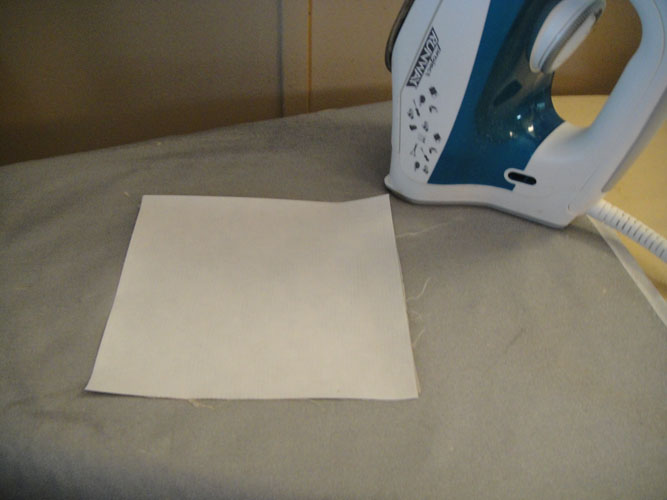
Following the manufacturer’s instructions fuse Heat N Bond Lite® to the back of each applique piece.
(Click Image to Enlarge)
Step 4:
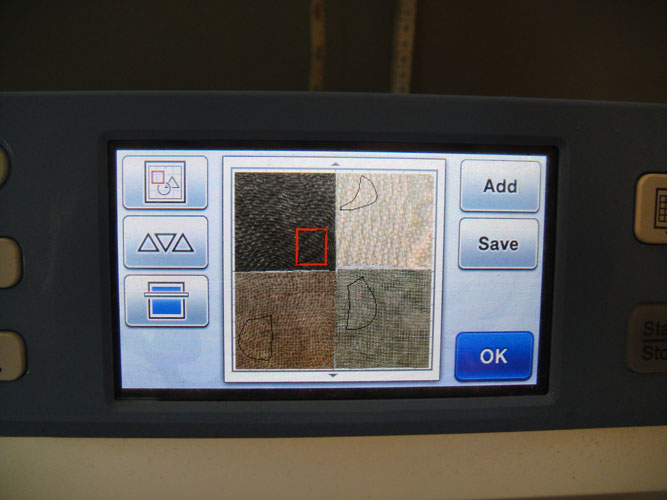
If cutting by hand, print out the pdf files placing the pattern piece on top of each fabric and cut just on the outside of the line of pattern piece. If using the scan and cut, place the fabrics on the standard mat fabric side up. I remove the paper backing from the fabrics first though some prefer to leave it on. The fcm, svg and pdf files have been slightly enlarged already so you do not have to enlarge them to cut the appliques. Use a brayer to secure the fabrics to the mat.
(Click Image to Enlarge)
Step 5:
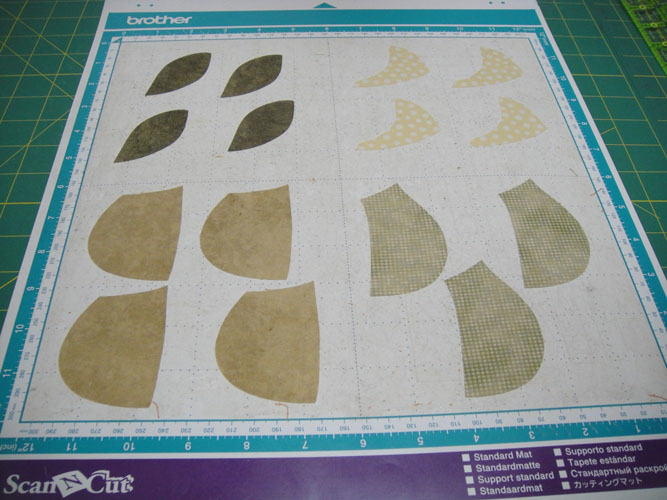
Load the fcm file into the Scan N Cut 4 times and arrange the applique pieces over the scanned in fabrics. The largest applique for the lower right side of the pear can only have three cut at one time. After you cut these pieces place one more 4” x 4” square of the mini green check on the mat and cut that last piece individually.
(Click Image to Enlarge)
Step 6:
Though settings can vary by machine and the age of your blade the settings used to cut these pieces was Cut Speed 4, Cut Pressure 3, and Blade Depth 4. Be sure to cut a test pattern first to make sure the settings are correct for your machine.
(Click Image to Enlarge)
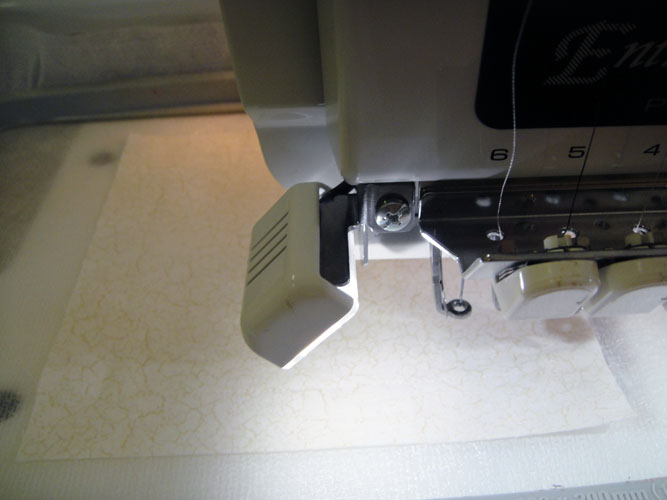
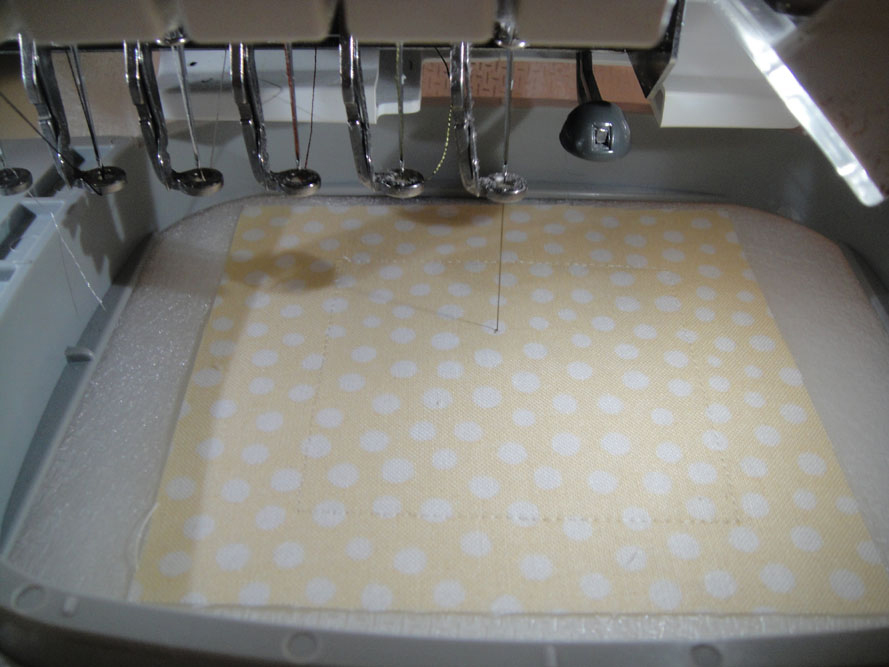
Step 7:
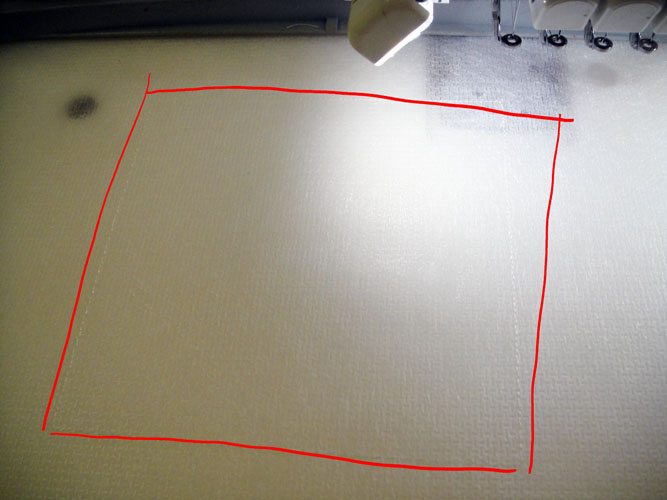
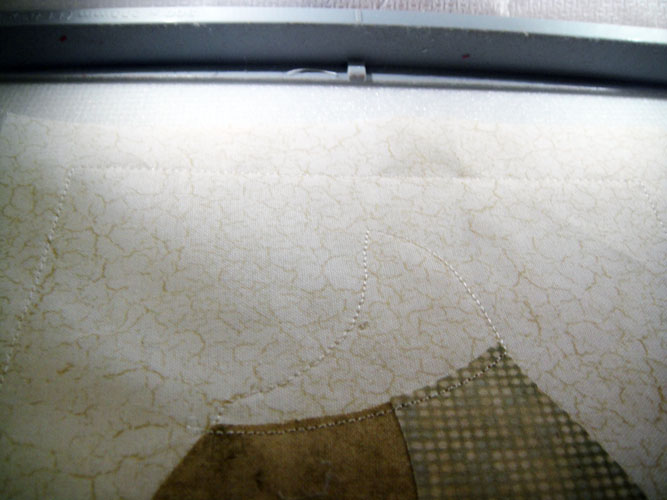
Hoop poly-mesh stabilizer in your 10” x 6” or 6” x 6” hoop or larger; run the first CS (color stop) in a neutral thread to stitch a placement line for the block front fabric.
(Click Image to Enlarge)
Step 8:
Spray adhesive on the back your block front fabric and place over the outlines making sure that the fabric exceeds the outline by ½” on all sides; stitch CS 2 in water soluble thread to tack down the fabric.
(Click Image to Enlarge)
Step 9:
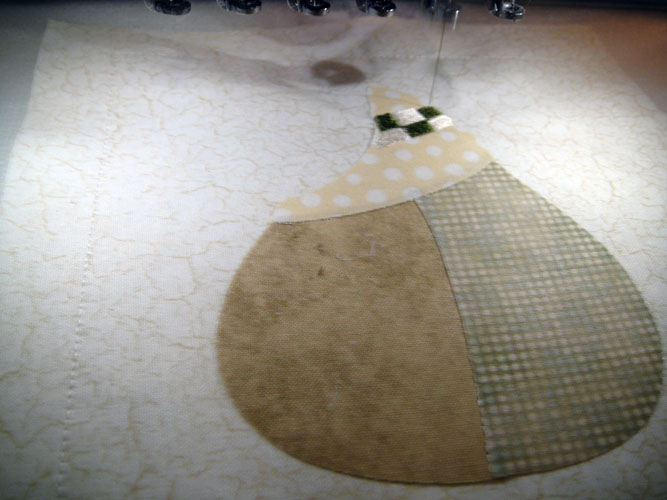
Switch to a top thread that matches your block fabric; stitch CS 3 for an outline for the 1st applique which is the left/bottom side of the pear.
(Click Image to Enlarge)
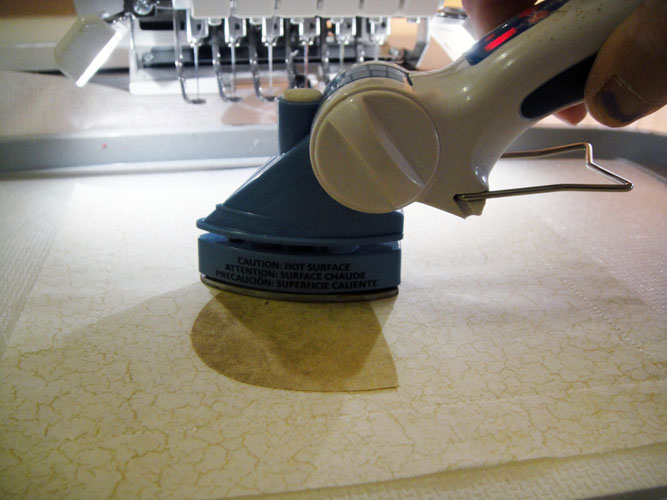
Step 10:
Carefully place the gold applique over the outlines; the applique will just cover the outline stitches; fuse in place with an applique iron. There are no tack down stitches as a blanket stitch (E-stitch) is used to hold the appliques in place.
(Click Image to Enlarge)
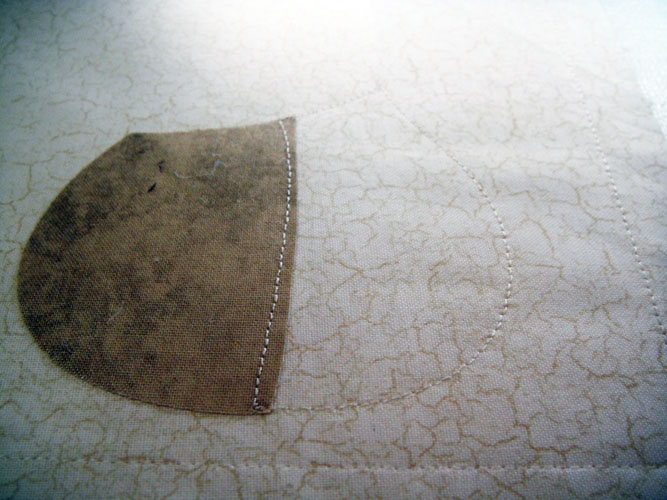
Step 11:
Run CS 4 in the same thread to stitch an outline for the second applique; fuse the 2nd applique, which slightly overlaps the first on the inside edge.
(Click Image to Enlarge)
Step 12:
Run CS 5 to stitch an outline for the 3rd applique; fuse the 3rd applique into place.
(Click Image to Enlarge)
Step 13:
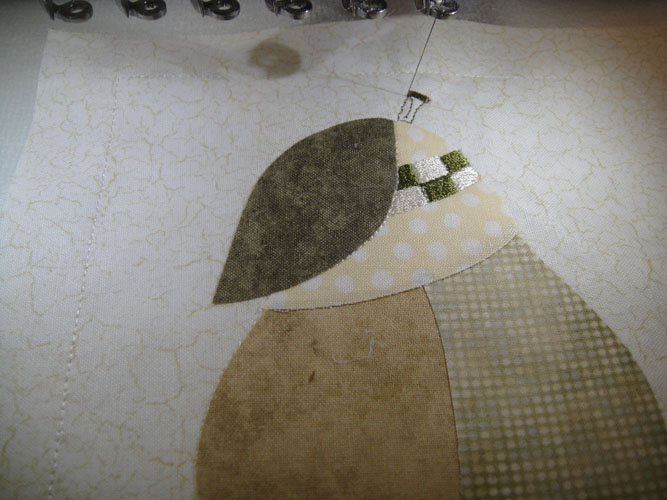
Run CS 6 in Coconut Cream (1072) and CS 7 in Marsh (1157) to stitch the checker board strip.
(Click Image to Enlarge)
Step 14:
Run CS 8 in the color to match your background fabric as an outline for the 4th applique; fuse the leave applique into place.
(Click Image to Enlarge)
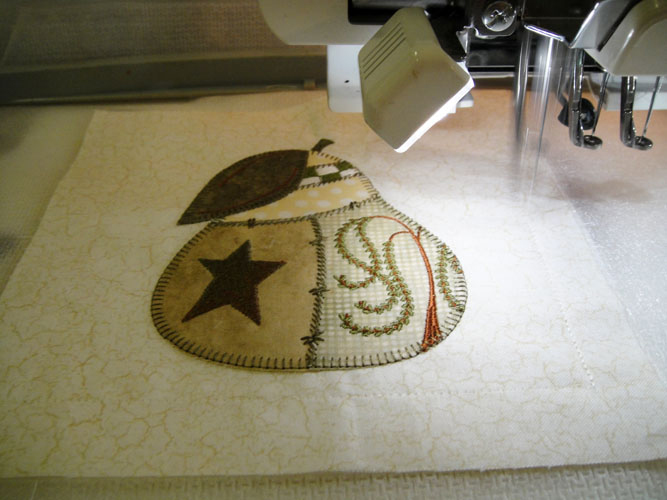
Step 15:
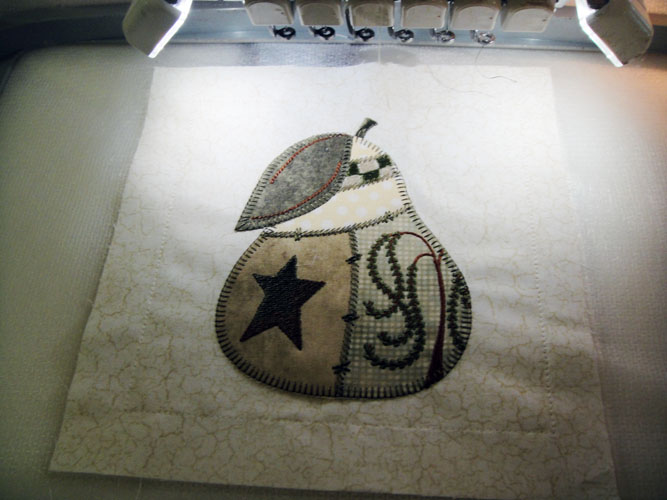
Run CS 9 in Marsh (1157); CS 10 in Grizzly Bear (1258); CS 11 in Olive Green (1156) and CS 12 in Marsh (1157) to complete the embroidery on the pear.
(Click Image to Enlarge)
Step 16:
Remove the hoop from the machine – do not unhoop - turn the hoop over; spray adhesive on the 7” Battilizer® square and place over the stitched outline on the back of the hoop making sure that the Battilizer® exceeds the outlines by ½” in all directions; spray your backing fabric and place over the Battilizer®.
(Click Image to Enlarge)
Step 17:
Return the hoop to the machine; run CS 13 with Water Soluble Thread to tack down the batting and block back.
(Click Image to Enlarge)
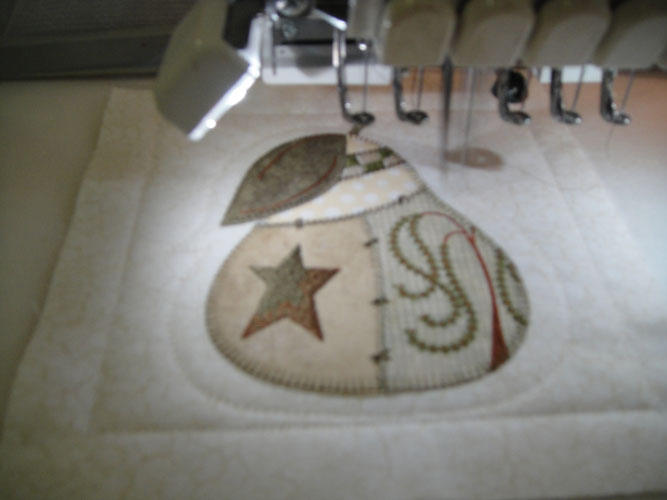
Step 18:
Run CS 14 in Coconut Cream (1072) to quilt around the pear.
(Click Image to Enlarge)
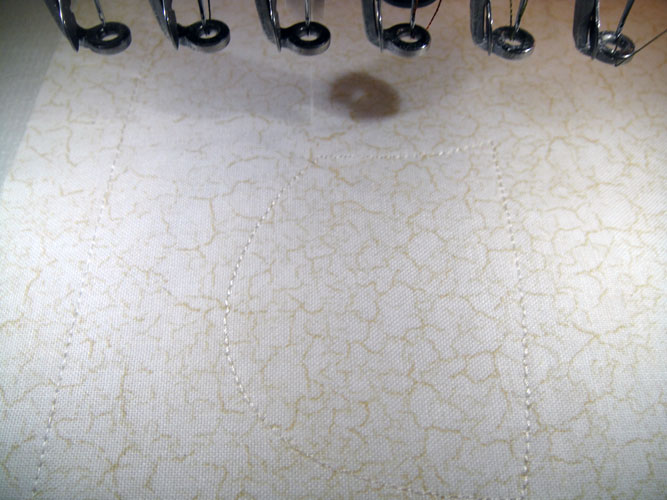
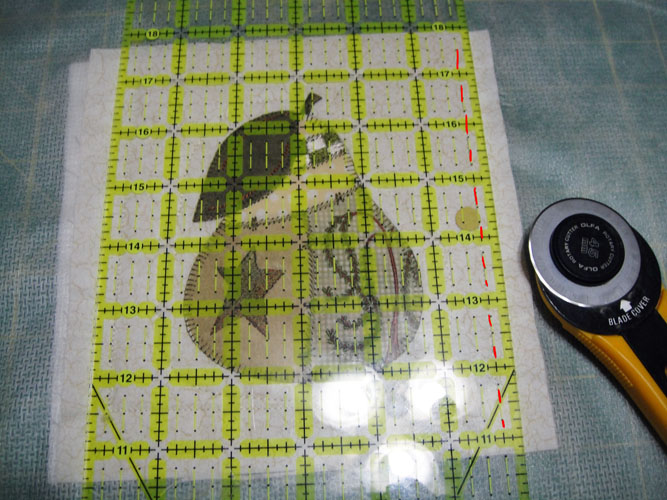
Step 19:
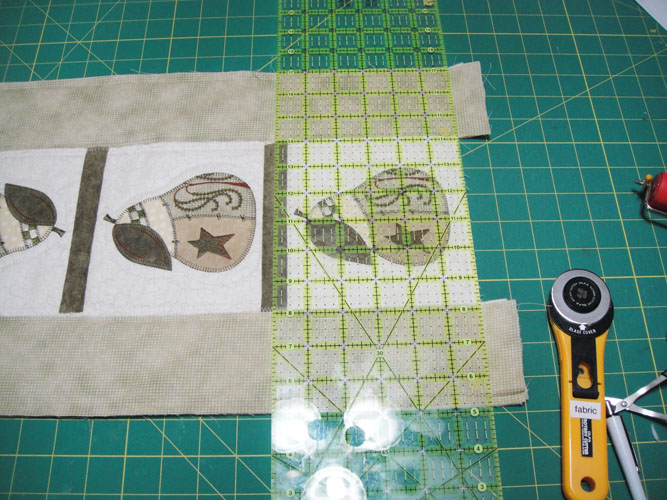
Remove the block from the hoop; line the ¼” marks on your ruler with the stitched block outline and trim all sides to ¼”. Repeat steps 7 through 18 three times to make a total of 4 blocks.
(Click Image to Enlarge)
Step 20:
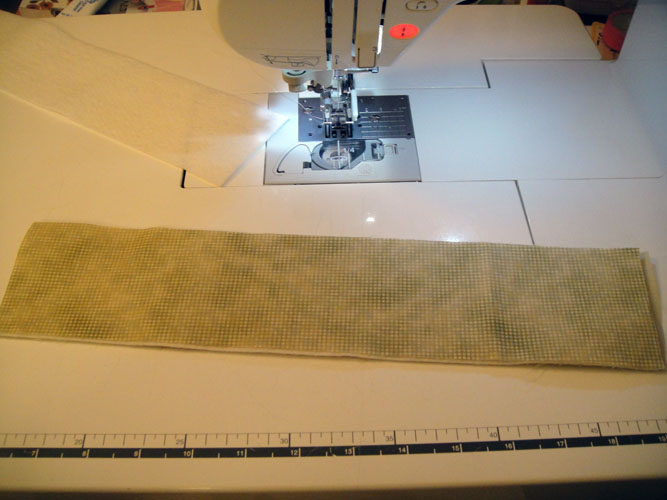
For the borders cut:
• Four 4” squares of corner fabric
• Cut two 3” strips of the mini check and sub-cut two 3” x 6” and two 3” x 25” strips from those.
• Cut four 4” squares of the quilt back fabric
• Cut two 3” strips of the quilt back fabric and sub-cut two 3” x 6” and two 3” x 25” strips from those.
• From the Olive Green cut three 1 ¼” strips the width of the material for back sashing
• From the Olive Green cut three 1 ½” strips the width of the material for front sashing
• From the Olive Green cut three strips 2” or 2.5” for the binding the width to be determined by your favorite method of applying binding.
Step 21:
Hoop poly mesh stabilizer in a 4” x 4” embroidery hoop and load PRTR02 into your machine; run CS1 in neutral thread for the block outline; spray and place the corner block fabric over the outlines as before; run CS 2 in water soluble thread to tack down the fabric.
(Click Image to Enlarge)
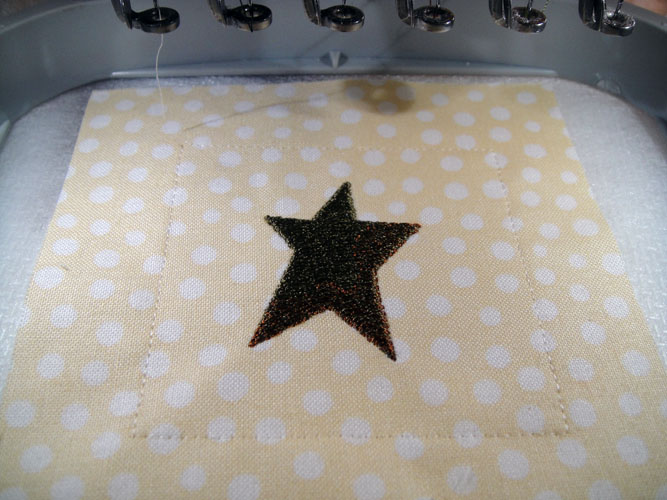
Step 22:
Run CS 3 in Marsh and CS 4 in Grizzly Bear to embroider the star.
(Click Image to Enlarge)
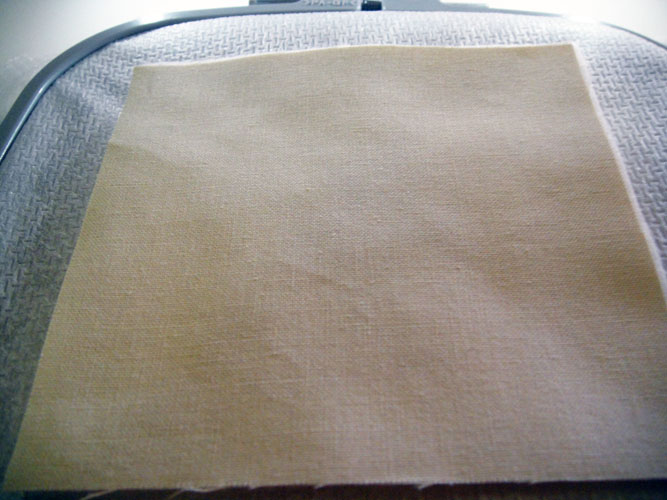
Step 23:
Remove the hoop from the machine and add the batting and back fabric as you did for the large blocks.
(Click Image to Enlarge)
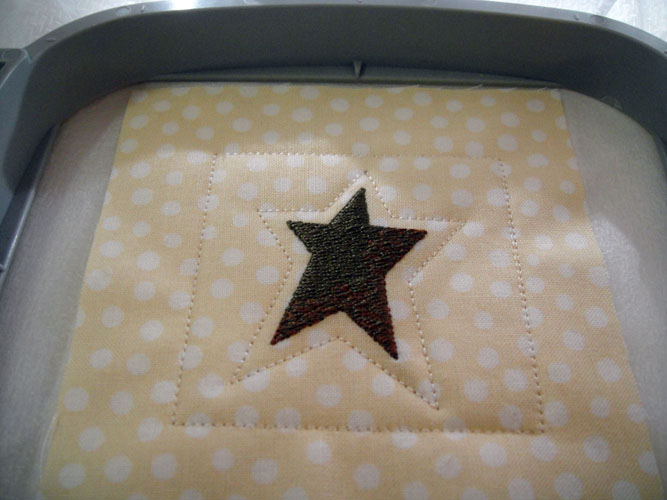
Step 24:
Return the hoop to the machine; run CS 5 in water soluble thread to tack down the batting and back fabric; run CS 6 in Coconut Cream (1072) to quilt around the star.
(Click Image to Enlarge)
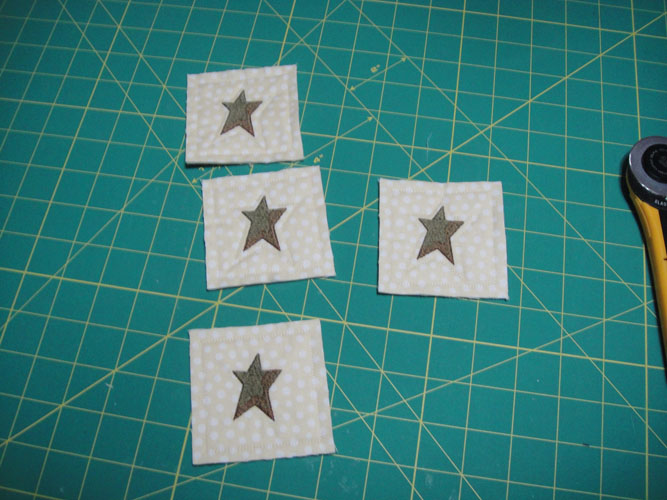
Step 25:
Make a total of 4 corner squares; trim all sides to ¼” from the water soluble thread tack down lines.
(Click Image to Enlarge)
Step 26:
The table runner will be assembled with your regular sewing machine; Load the water soluble thread in the top of your sewing machine; layer into a quilt sandwich the back fabric, the Battilizer® and the top fabric for each section of the border; with a long stitch baste down both sides of all for border sections ¼” from the edge.
(Click Image to Enlarge)
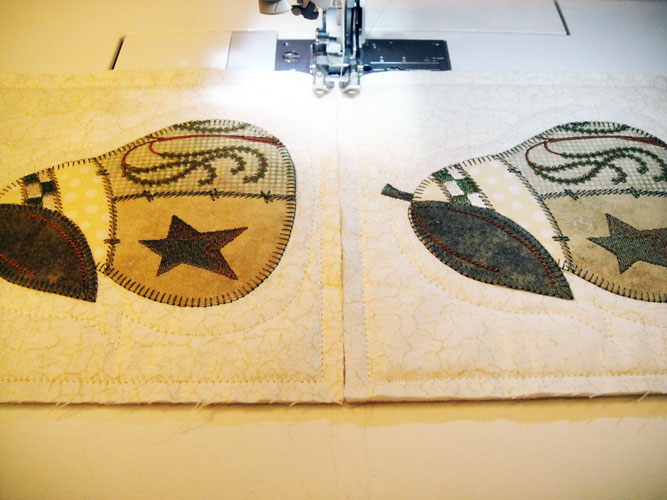
Step 27:
Put neutral thread in the top and bobbin of the sewing machine; butt the top of one pear block to the bottom of another – do not overlap just butt them together.
(Click Image to Enlarge)
Step 28:
(Click Image to Enlarge)
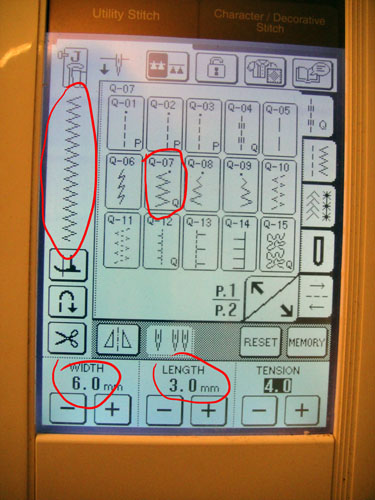
Select a wide zigzag stitch and stitch the two blocks together.
Step 29:
Join the remaining blocks together having two blocks facing to the right and two blocks facing to the left.
(Click Image to Enlarge)
Step 30:
(Click Image to Enlarge)
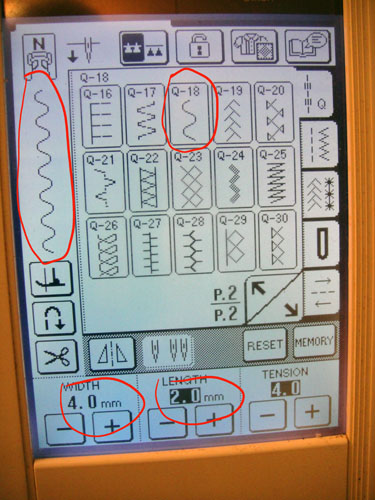
Put YLI invisible thread in both the top and bobbin of your machine; select a serpentine or other stitch that is not a straight stitch.
Step 31:
Prepare your 1 ¼” and 1 ½” sashing strips by folding the long sides to the center and pressing; keep the two stacks separate; the wider strips will be applied to the front of the table runner; the narrow strips will be applied to the back of the table runner. Always apply the back sashing strips first and then apply the corresponding front sashing strips as follows; center the narrow sashing strip over the back of the zigzag of two blocks; stitch down both sides of the sashing with the serpentine stitch.
(Click Image to Enlarge)
Step 32:
Apply the back sashing to the other two joins of the blocks.
(Click Image to Enlarge)
Step 33:
Turn the blocks over and apply the wider sashing over the three lines of zigzag stitches on the front.
(Click Image to Enlarge)
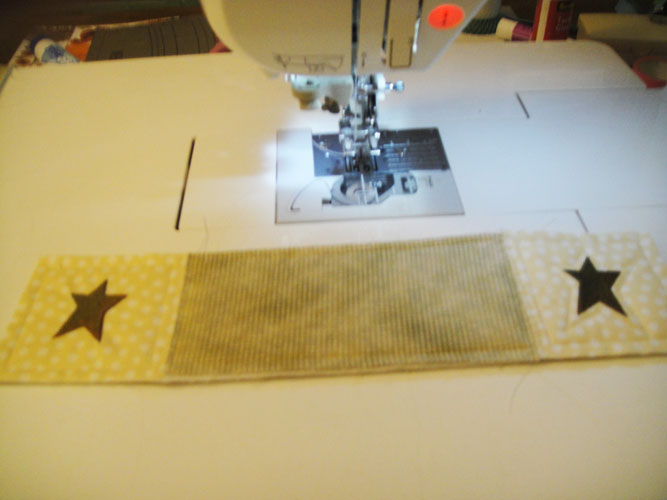
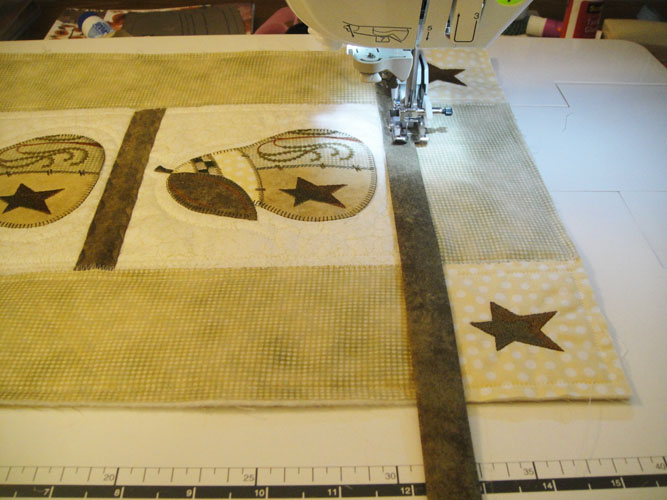
Step 34:
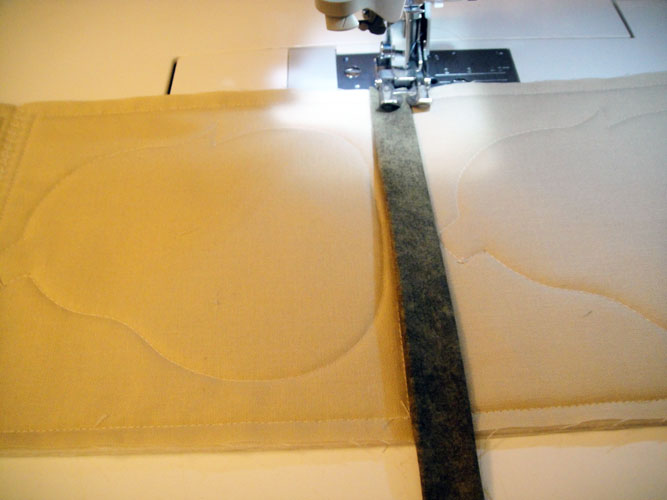
Butt the side border strips along the sides of the pear blocks and with neutral colored thread and zigzag them to the sides of the blocks. The sides are a little longer than the blocks, let them exceed the top and bottom of the blocks slightly.
(Click Image to Enlarge)
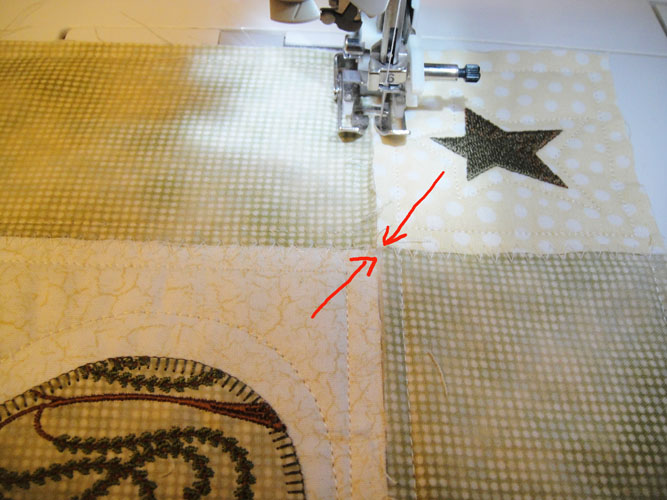
Step 35:
Align you ruler across the block and trim the excess ends from side strips.
(Click Image to Enlarge)
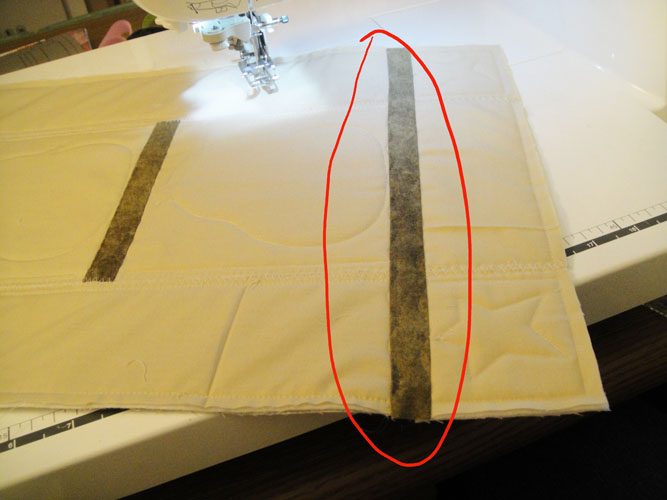
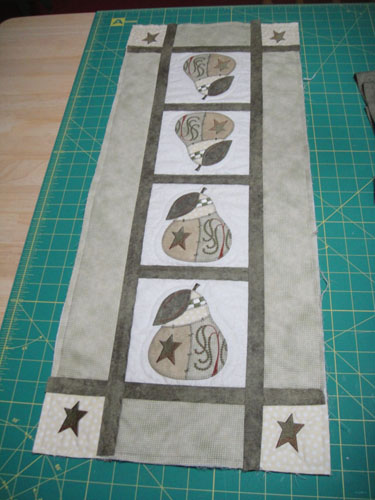
Step 36:
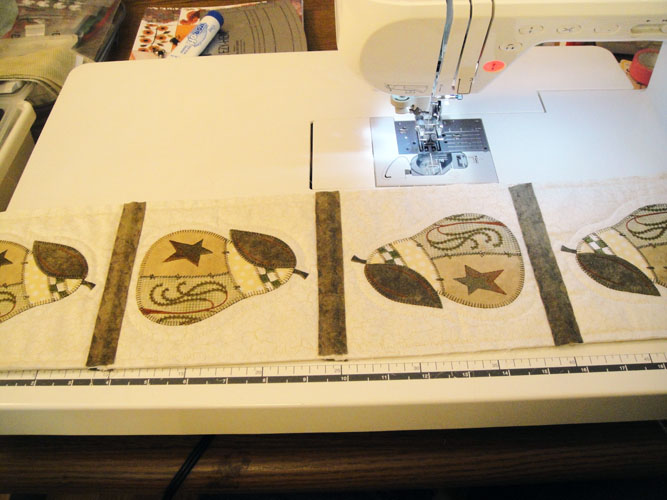
Trim the top and bottom border strips to 6” in length; butt two corner blocks to the ends of the 6” strips and zigzag in place; be sure the stars are pointing in the same direction on each strip end; the most heavily blended areas of the star should be pointing to the bottom of the borders.
(Click Image to Enlarge)
Step 37:
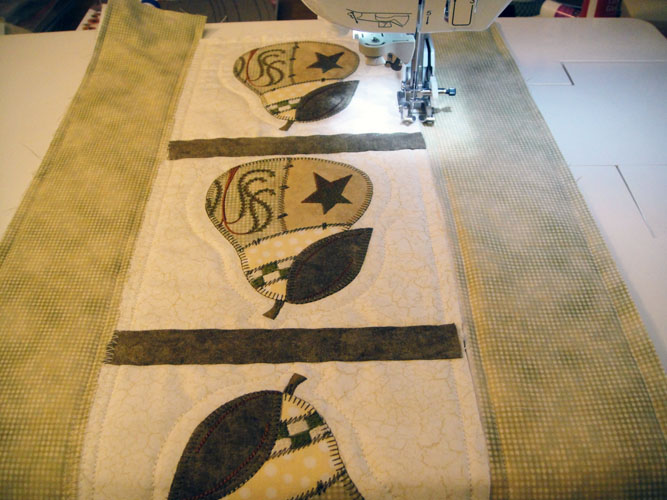
Align the top and bottom strips making sure the corner block seams match up with the center blocks seams and zigzag the top and bottom strips to the table runner. Position the strips so that the most heavily blended portion of the stars face the outside edges on both ends of the table runner.
(Click Image to Enlarge)
Step 38:
Put the invisible thread in the top and bobbin again; stitch the narrow sashing across the horizontal seam lines on the back of the table runner.
(Click Image to Enlarge)
Step 39:
Turn the table runner over and attach the wider sashing over the corresponding seams on the front.
(Click Image to Enlarge)
Step 40:
(Click Image to Enlarge)
Stitch the narrow sashing to the remaining vertical seam lines on the back of the quilt; stitch the wider sashing strips to the front.
Step 41:
Apply binding to the table runner edges using your preferred method. Congratulations your Prim Pear Table Runner is complete!
Award winning Digitizer, Embroidery Educator, Author and a Consultant to the Industry, Pat Williams has 30 years of experience in the embroidery industry. Pat has won multiple awards for her digitizing expertise including the 2007 Impressions Awards Grand Championship, Best of Show as well as the 1st and 2nd Place Awards. Pat’s love of digitizing has afforded her the opportunity to write numerous articles for Impressions magazine in the United States and Images Magazine in Europe. In 2001 Pat was named “Embroidery Educator of the Year.” For many years Pat taught digitizing seminars at the ISS Shows in Long Beach, CA and for Compucon software. She now resides in Tucson, AZ.