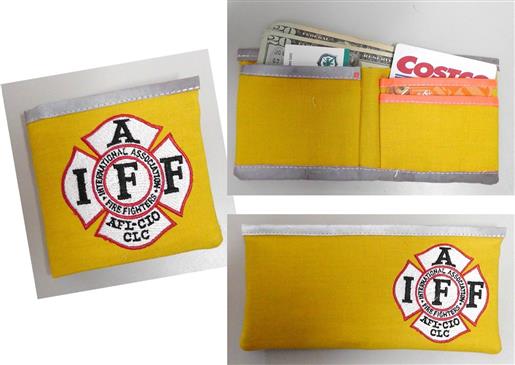
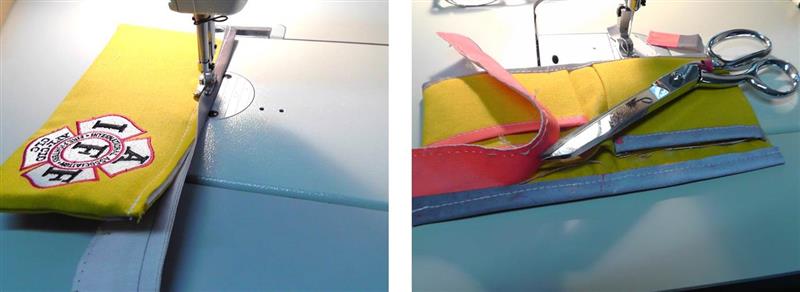
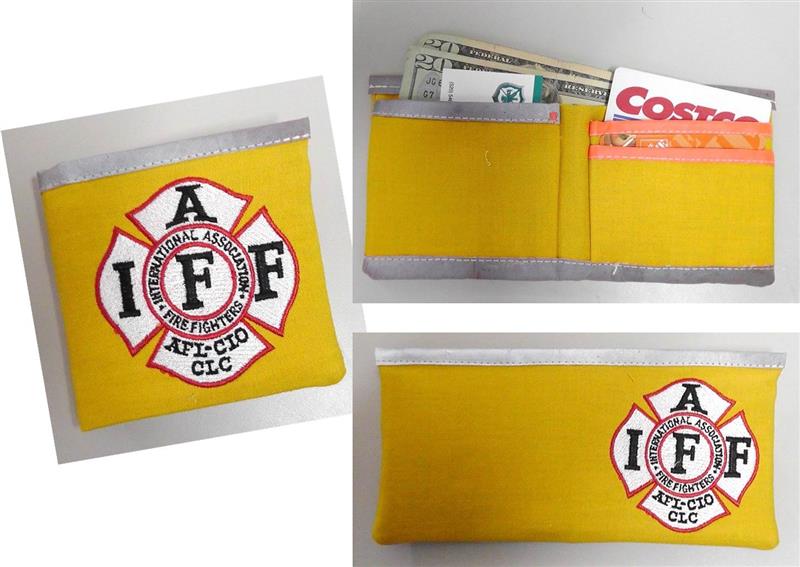
Old, retired firefighter bunker gear formed the basis for this project (ask at a fire department or look online for retired gear - or order new Nomex fabric online). The outside wallet piece is embroidered, edges of the credit card and inside wallet piece are bound and then the wallet is assembled. Parts and pieces of the gear can be used creatively to accent the wallet as desired. Use old scissors to cut the fabric and discard the needle after sewing the wallet together. Nomex fabric will dull scissors and needles quickly. Because of the thickness created when seaming Nomex fabric, adjustments may need to be made during the construction process to slightly re-cut pieces to make them fit better; assess this as you sew.
Step 1:
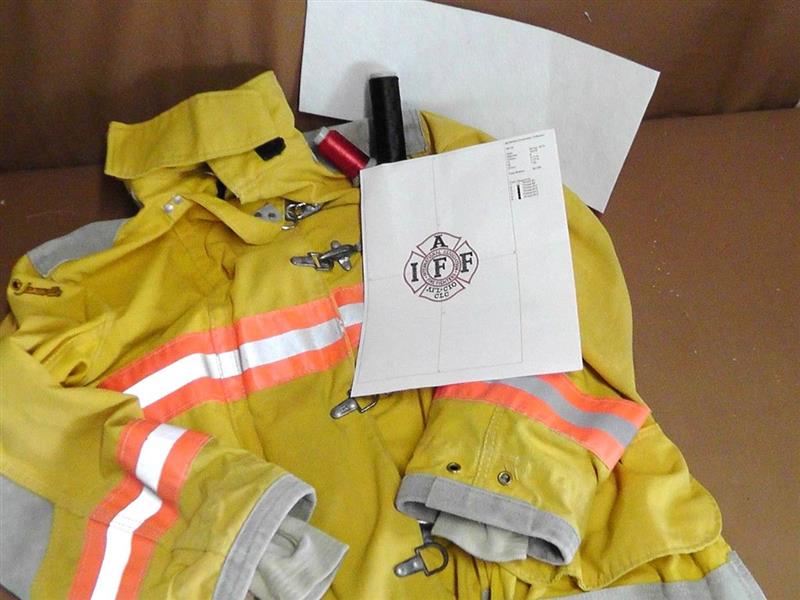
Gather the supplies and read through the instructions before beginning. Print a copy of the embroidery design.
(Click Image to Enlarge)
Step 2:
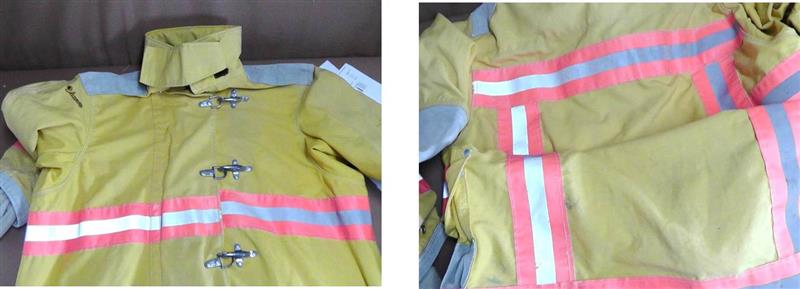
Firefighter gear will contain contaminates from use. Be sure the gear is thoroughly cleaned before cutting and sewing (ask at the fire department how to do this). Remove any lining pieces and set aside for another use. Analyze the clean gear fabric to see how it can be cut apart for use. There will be reflective pieces, buckles, leather patches, etc. that can be used to accent parts of the wallet. Sewing Nomex material will require a heavy duty machine needle such as one used to sew jeans. Use scraps of fabric to test stitch length and the needle size needed.
(Click Image to Enlarge)
Step 3:
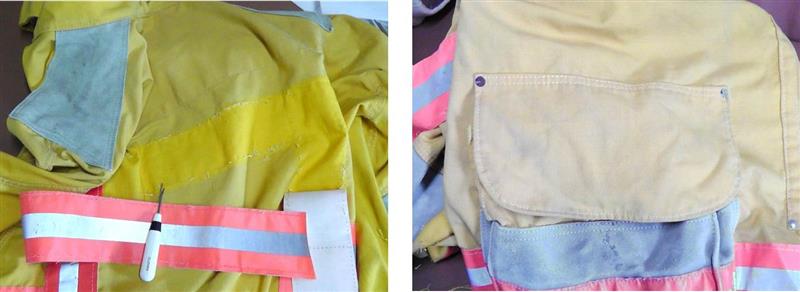
Use a seam ripper to remove the threads from the reflective strips. Even though the bunker coat for this project was just cleaned, notice the difference in color. The fabric under the reflective strips looks new. Assess all the fabric on the jacket or pants and make note of what can be used for pieces of the wallet.
(Click Image to Enlarge)
Step 4:
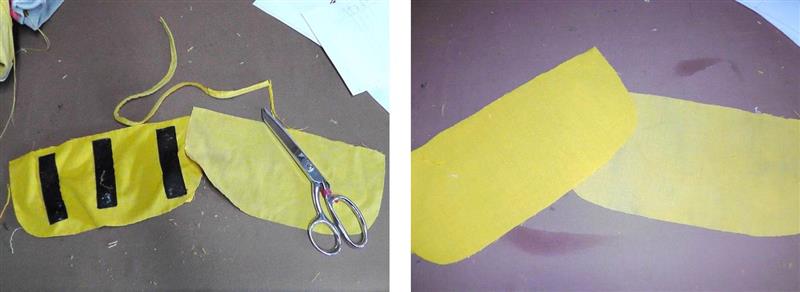
For instance, these pockets can be used for the smaller credit card sections.
(Click Image to Enlarge)
Step 5:
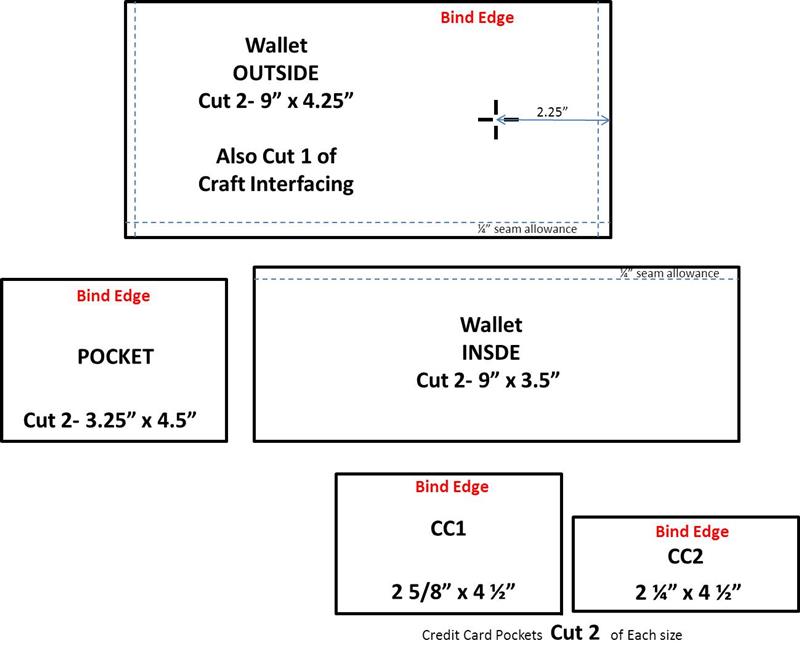
Use paper to create the pattern pieces. The dimensions given will fit the design selected. If you use a different design or a different pattern, adjust the measurements as needed.
(Click Image to Enlarge)
Step 6:
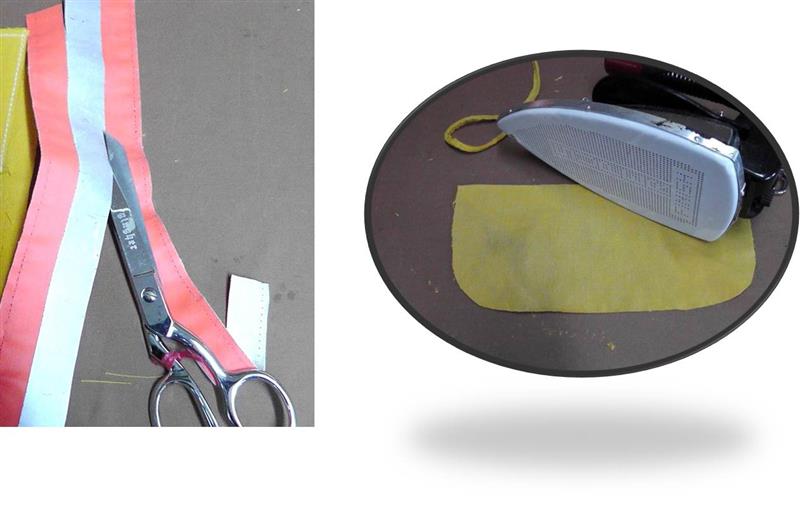
The reflective strips can be cut apart to create single strips of reflective and orange trims (edges will not ravel). Use a soleplate shoe or press cloth when pressing Nomex fabric and keep the iron away from the strips (direct heat from an iron may melt the reflective coating).
(Click Image to Enlarge)
Step 7:
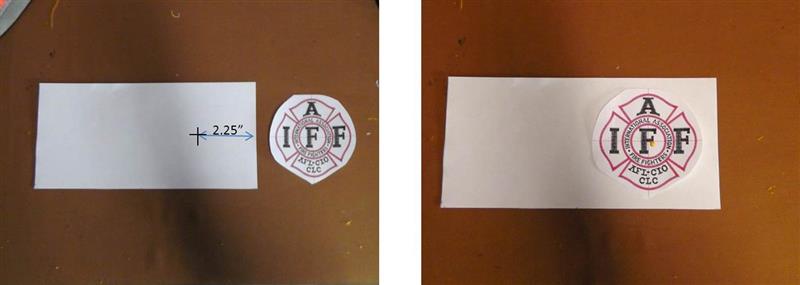
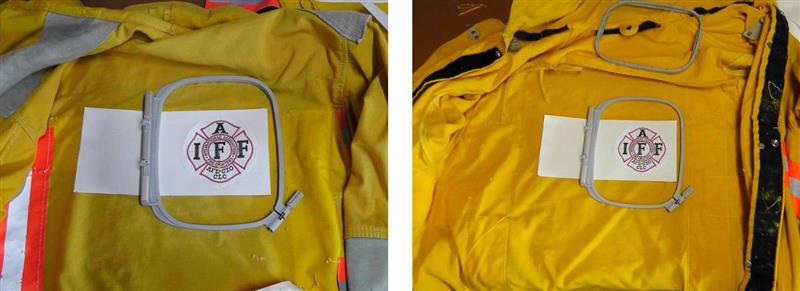
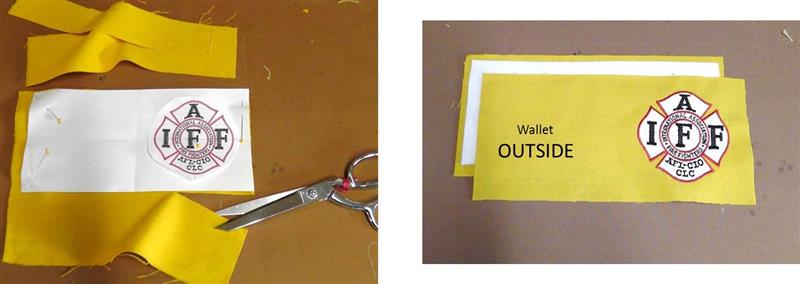
Cut out the paper pattern pieces. Mark the center crosshair 2 1/4" from the right side of the wallet OUTSIDE piece, centered. Align the center of the crosshair on the paper template to the mark on the wallet piece.
(Click Image to Enlarge)
Step 8:
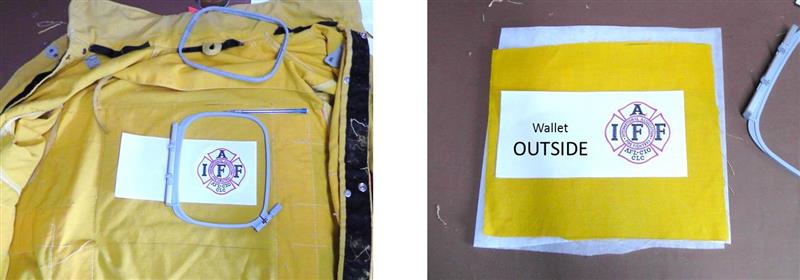
Take a look at the inside of the bunker coat or pants and note the fabric color; you may wish to use the inside as the “right” side of the fabric if you want the wallet fabric to look “newer”. For the project, the inside of the coat was used as the right side of the fabric. Place the hoop and pattern piece on the fabric and locate an area that can be cut large enough to hoop the fabric.
(Click Image to Enlarge)
Step 9:
For the wallet OUTSIDE, trace around the pattern piece but cut it out larger than needed so the fabric can be hooped for embroidery.
(Click Image to Enlarge)
Step 10:
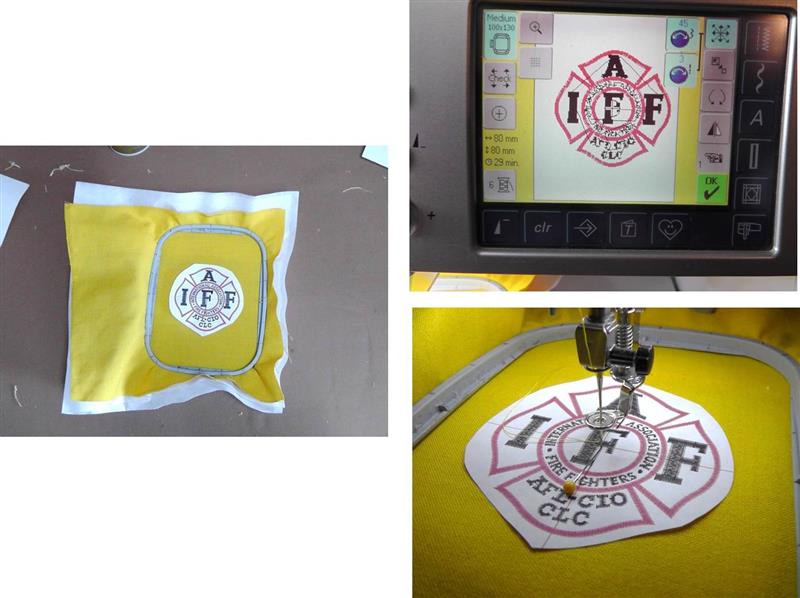
Hoop the fabric with two pieces of tearaway stabilizer. Load the “IAFF Crest” embroidery design on the machine. Place the hoop on the machine and align the needle to the center of the paper template. Remove the paper template.
(Click Image to Enlarge)
Step 11:
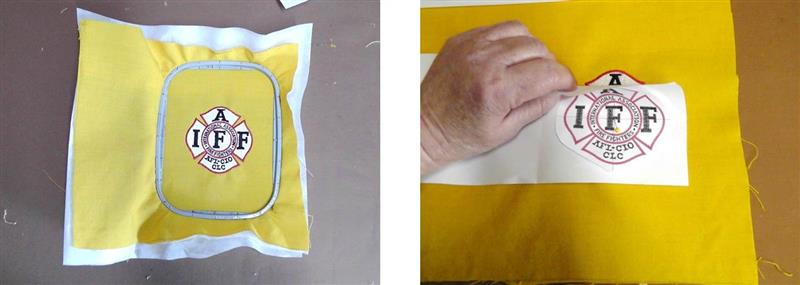
Stitch the design following the color sequence. Remove the fabric from the machine and remove the excess stabilizer. Align the pattern piece over the embroidered design and pin together.
(Click Image to Enlarge)
Step 12:
Cut the embroidered outside wallet piece along the marked lines. Also cut a second piece of fabric the same size and one piece of craft stabilizer ¼” smaller all the way around than the pattern piece.
(Click Image to Enlarge)
Step 13:
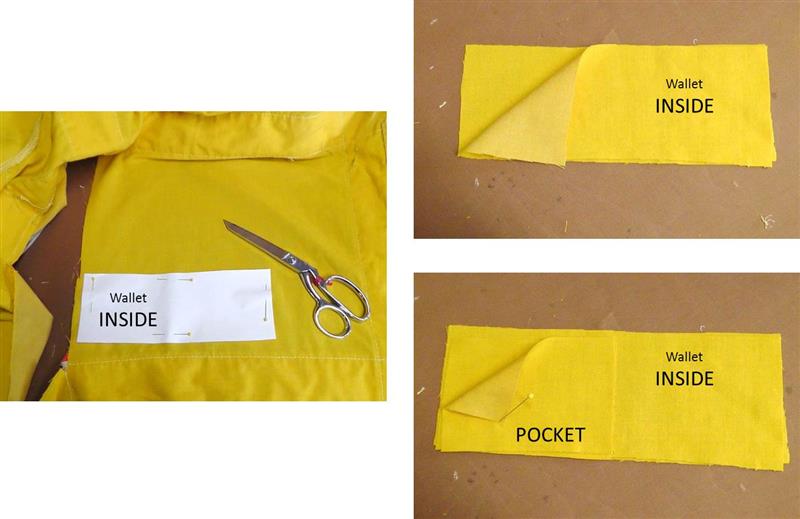
Next cut 2 of the wallet INSIDE pattern piece and the remaining pattern pieces.
(Click Image to Enlarge)
Step 14:
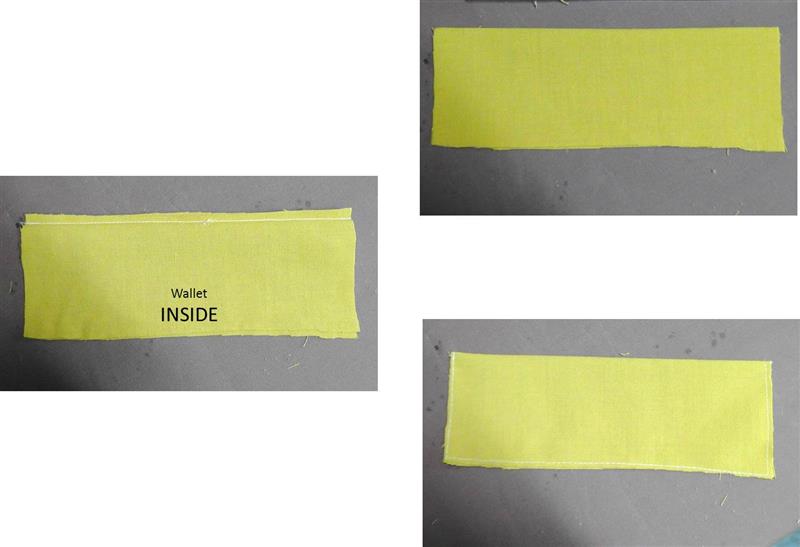
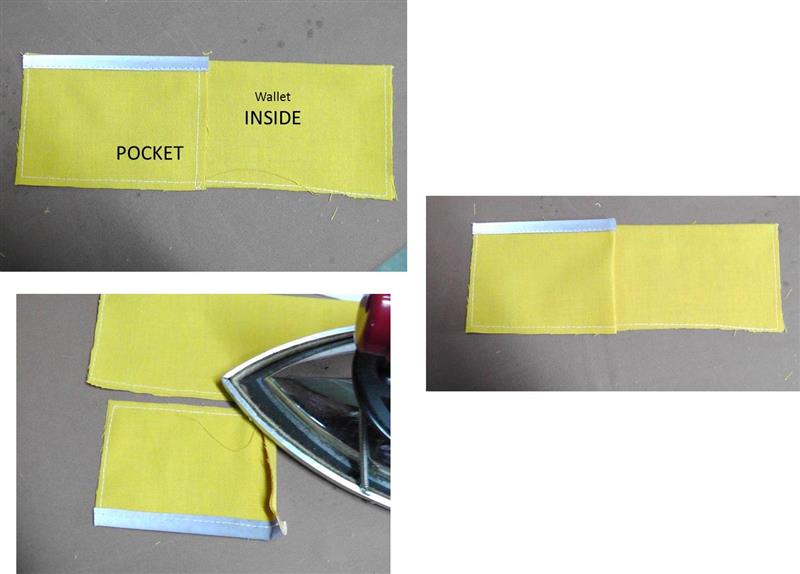
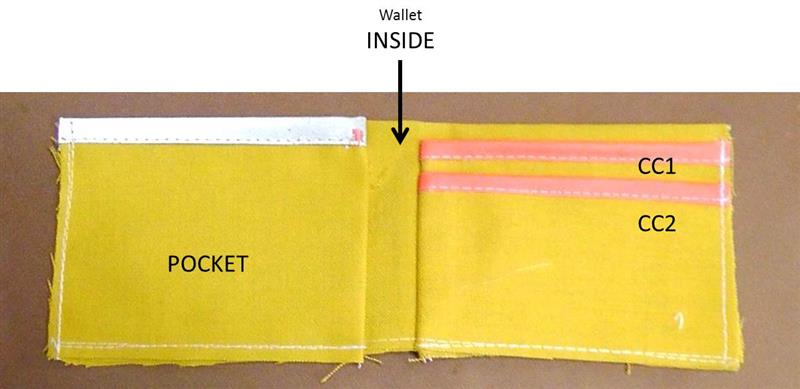
Now it is time to assemble the wallet. Sew the wallet INSIDE pieces together. Place right sides together and sew a ¼ seam at the top. Bring wrong sides together and press the top seam. Baste the three remaining edges together.
(Click Image to Enlarge)
Step 15:
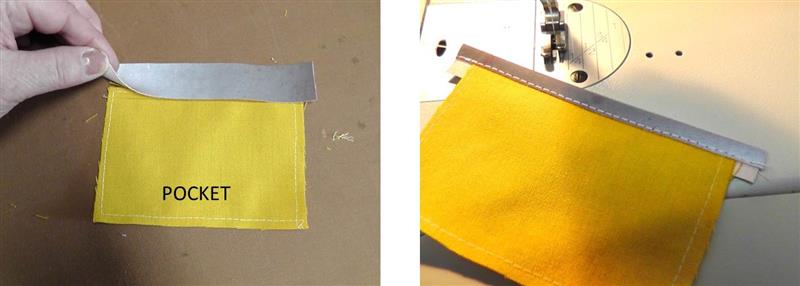
Follow the directions to fuse the two POCKET pieces wrong sides together. Bind the top edge of the POCKET piece. Use pieces of the bunker gear or grosgrain ribbon. Fold the binding over the top edge to be bound and stitch in place; cut off any excess at the ends.
(Click Image to Enlarge)
Step 16:
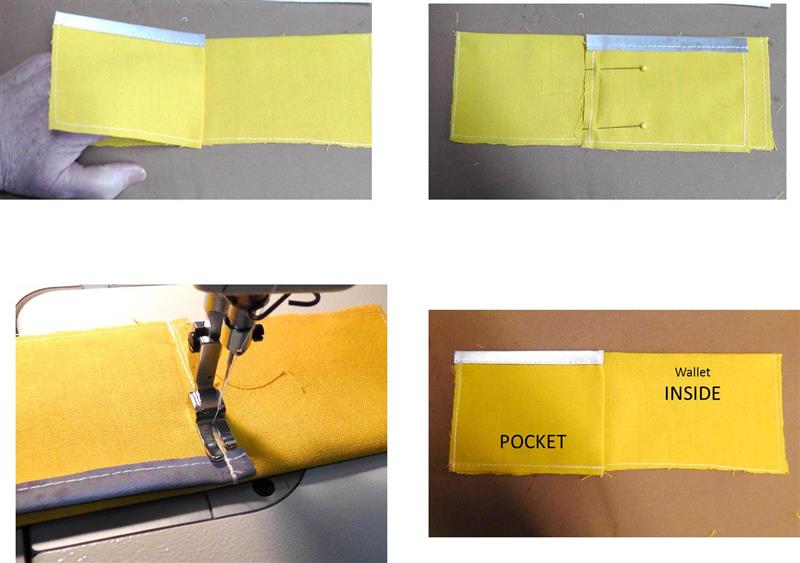
Baste the raw edges of the POCKET together. Press under ¼” on the pocket right side. Place the pocket into position onto the left side of the wallet INSIDE matching the cut edges at the left side and bottom.
(Click Image to Enlarge)
Step 17:
Place your fingers underneath the POCKET to hold the pressed seam allowance in place and flip the pocket to the right and pin the seam allowance in place. Baste then sew the pocket seam in place. Smooth the pocket back into position and baste it in place to the wallet along the left and bottom edges.
(Click Image to Enlarge)
Step 18:
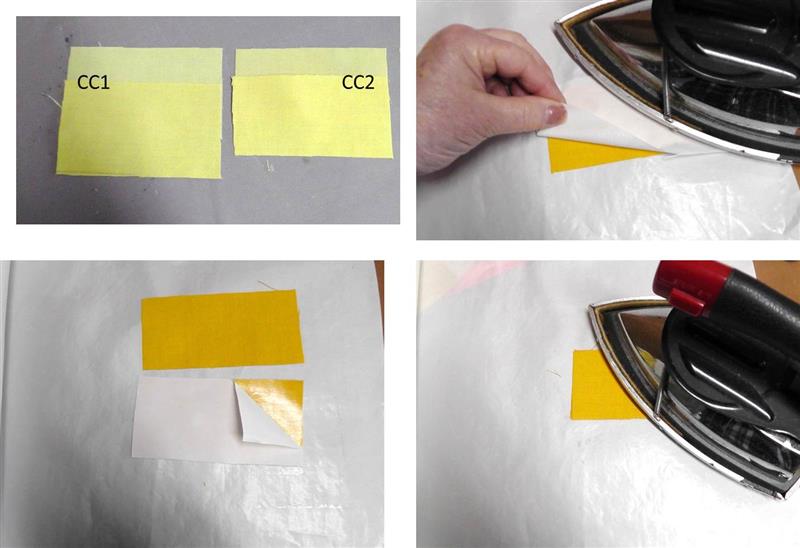
Cut two each of the credit card sections CC1 and CC2. Fuse the credit card pocket pieces, wrong sides together, with the Heat 'n Bond Lite.
(Click Image to Enlarge)
Step 19:
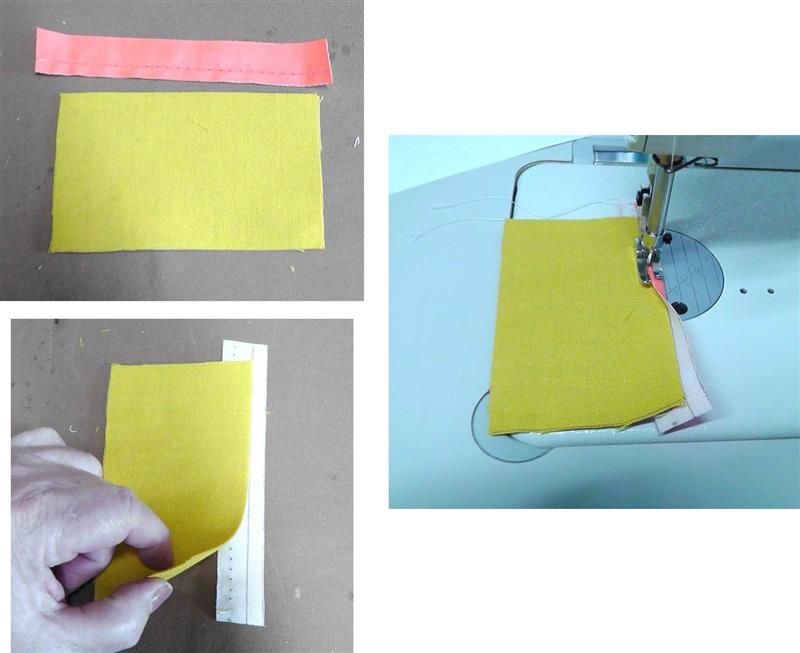
Bind the top edges of each of the credit card pockets with trim.
(Click Image to Enlarge)
Step 20:
Baste the credit card pockets together along the raw edges having the smaller one on top of the larger one. Fold under the left side of the basted credit card sections ¼”. Lay it on top of the right side of the wallet INSIDE matching cut edges at the right and bottom. Keeping the folded seam allowance in place, flip the credit card sections away like was done for the POCKET, and stitch the credit card sections to the wallet INSIDE. Smooth the credit card sections back into place and baste the right and bottom sides to wallet INSIDE.
(Click Image to Enlarge)
Step 21:
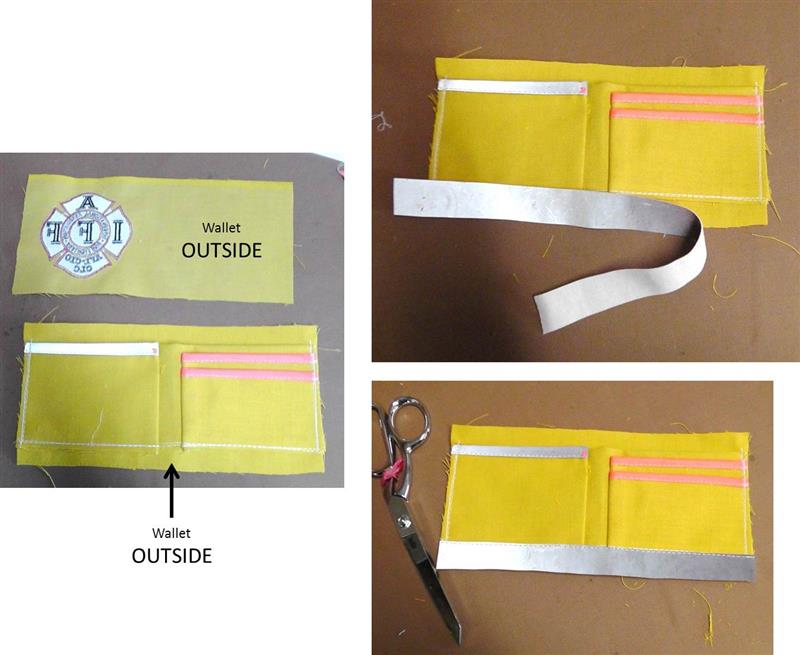
Lay the second piece of the wallet OUTSIDE (not embroidered) right side up on a flat surface. Vertically center the wallet INSIDE with the pockets on top meeting left and right cut edges. Baste along the lower edge of the pocket sections to secure it to the unembroidered wallet OUTSIDE piece. Measure and cut a length and width of reflective tape (or other trim) and place it over the basted lower edge of the pocket and even with the lower cut edge of the wallet OUTSIDE. Stitch the reflective along both edges of the trim sewing through all the layers at the pocket bottoms.
(Click Image to Enlarge)
Step 22:
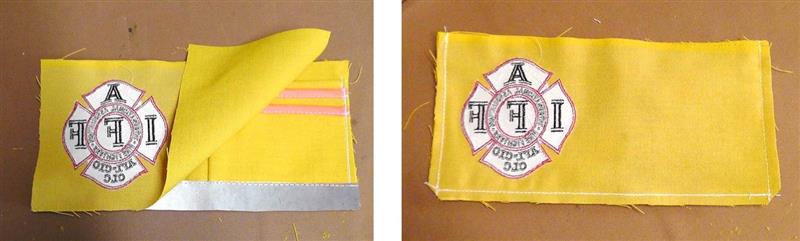
Place the right side of the embroidered wallet OUTSIDE over the wallet OUTSIDE/POCKETS and pin in place. Stitch along the bottom and both sides leaving the top unstitched.
(Click Image to Enlarge)
Step 23:
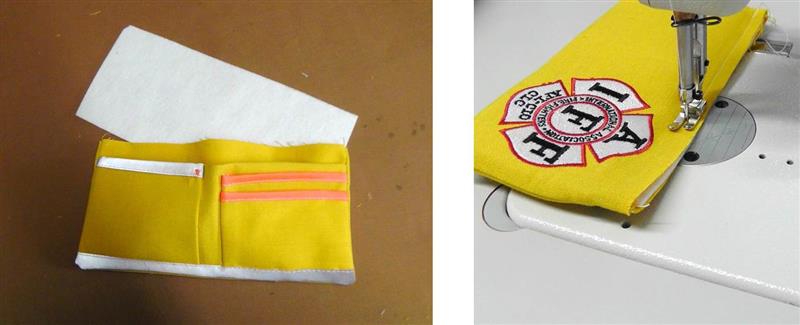
Turn the wallet right side out and slip the craft stabilizer piece inside the opening at the top of the wallet (it may need to be further trimmed to fit properly). Baste then sew the top of the wallet.
(Click Image to Enlarge)
Step 24:
Cut a piece of reflective trim the length of the wallet top plus 2”. Bind the top of the wallet with the reflective trim; cut away the excess at the sides and back.
(Click Image to Enlarge)
Step 25:
The “Firefighter’s Bunker Wallet” is ready to give to your favorite firefighter to enjoy.
Ramona Baird has been in the embroidery industry for over 23 years. She and her husband owned a commercial and retail embroidery store in Arizona for many years. She is an experienced digitizer having been mentored by award-winners Pat Williams and Lindee Goodall. Ramona is a contributor to “Creative Machine Embroidery” magazine having 5 covers to her credit. Ramona has worked for Wilcom America and served many years as Education Director for the American Sewing Guild. With a degree in fashion design, she is able to design and execute patterns which Pat Williams says are “out of the box” in creativity and application. Ramona likes to challenge the boundaries of embroidery and bring new and exciting designs, ideas, and projects to EmbroideryDesigns.com. She wants embroiderers of all levels to increase their skills and enjoyment in using their embroidery machine for gift-making and personal pleasure.