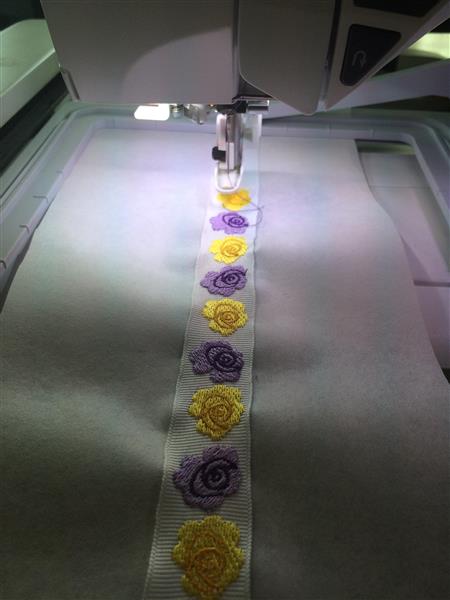
Did you every go shopping for decorative ribbon for a special occasion and not find anything that matches the colors or style you are looking for? I’m going to show you how you can create your own decorative ribbon using border embroidery designs.
When choosing designs for the ribbon, look for designs that are at least 1/4" smaller than the ribbon you are stitching them out on.
Step 1:
Create the continuous design using BuzzEdit software. If you decide to create the continuous design in a different software program, these instructions may not work and you should consult your manual on how to re-hoop using the marking stitches.
Step 2:
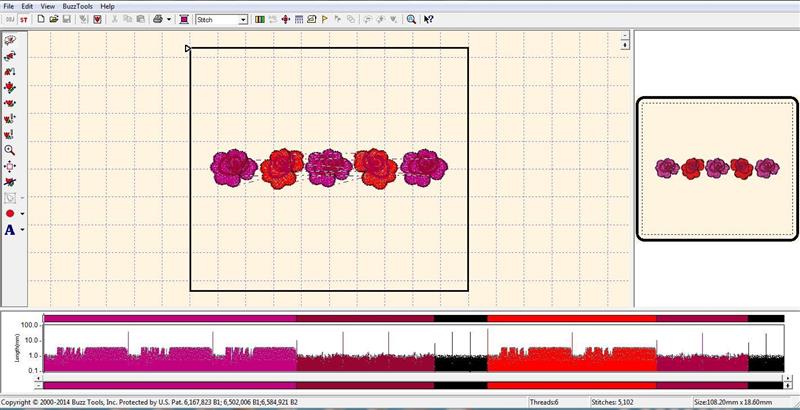
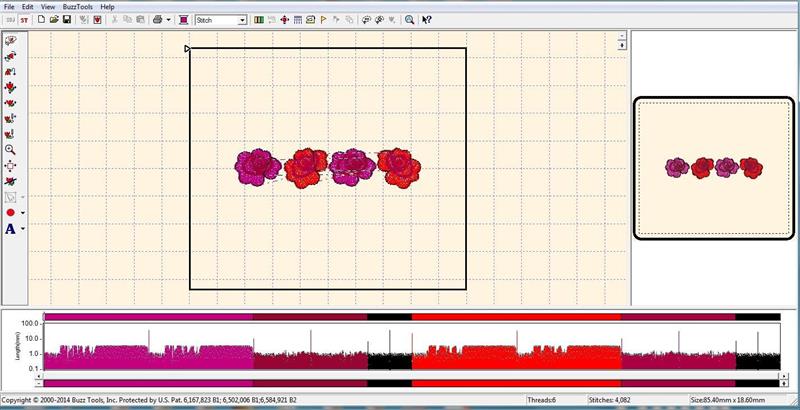
Open up the Flower Border design from Ann The Gran the BuzzEdit software.
(Click Image to Enlarge)
Step 3:
You will notice that the first and last flowers are the same color. When you create a continuous design it will duplicate the design right next to the original design. If you make this design continuous as it is, it will put 2 purple flowers together instead of red, purple, red, purple, etc. So you will need to edit this design to cut the last purple flower out of the design before you make it continuous.
Step 4:
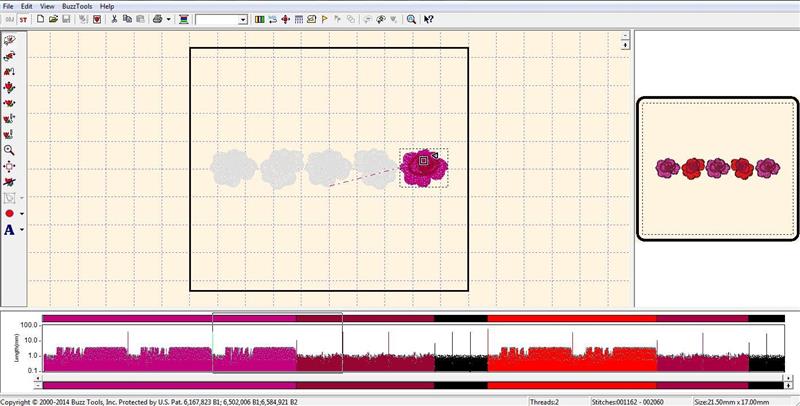
Make a circle with your mouse around the last flower so that it looks like the screen below. After you have selected the flower, click on the Delete key on your keyboard.
(Click Image to Enlarge)
Step 5:
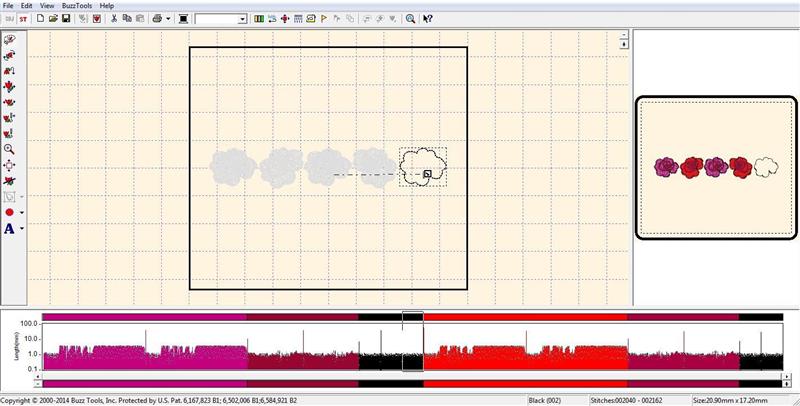
Do the same thing for the outline of the flower.
(Click Image to Enlarge)
Step 6:
The design should look like this now. Click on BuzzTools/Center/Both to center the design in the hoop.
(Click Image to Enlarge)
Step 7:
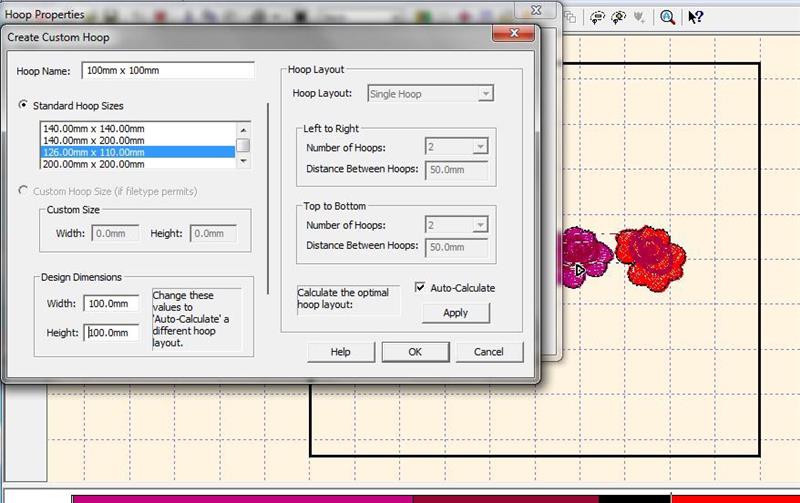
You will now have to select the correct hoop size. Click on View/Hoop Properties. Either select the hoop size 100mm x 100mm or click on Create Custom Hoop if you do not have that hoop size in the list of hoops.
(Click Image to Enlarge)
Step 8:
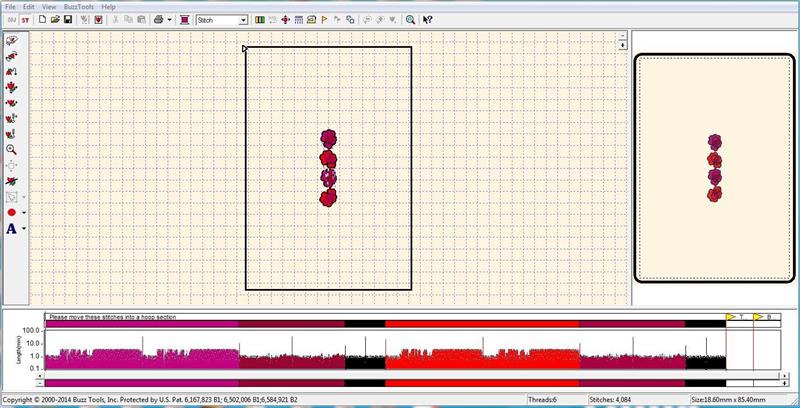
Click on BuzzTools/Rotate. Rotate the design 90 degrees and it will look like the picture below.
(Click Image to Enlarge)
Step 9:
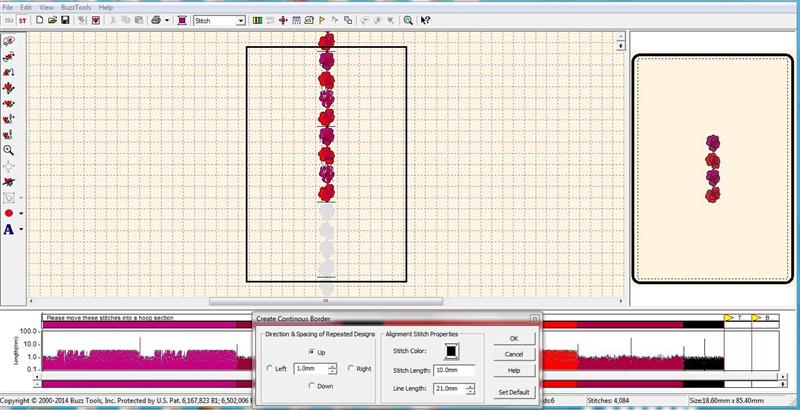
Click on BuzzTools/Create Continuous Border. Click on the Down radio button, key in 1.0mm in the spacing box and then key in 21.0mm in the line length box. Click on ok. You should now have a continuous design with markings at the beginning and end of the design.
(Click Image to Enlarge)
Step 10:
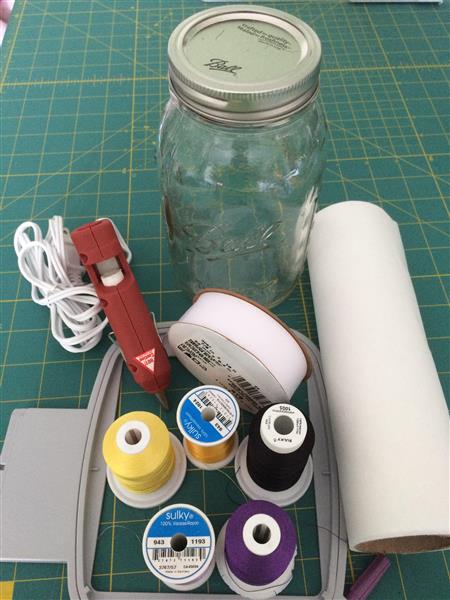
Gather your materials.
(Click Image to Enlarge)
Step 11:
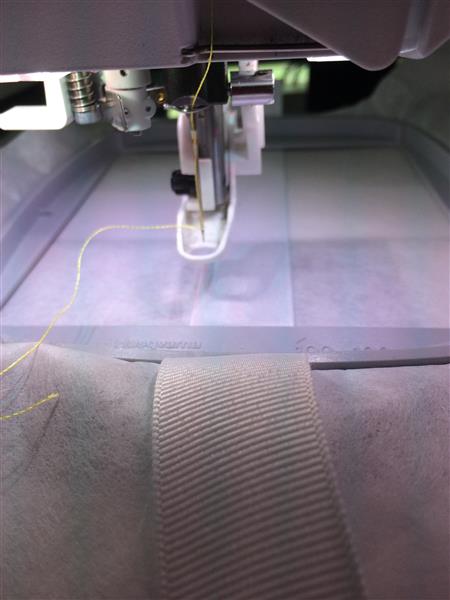
Hoop the stabilizer (do not cut it unless it is not on a roll) and then lay the ribbon on top centering it vertically. This design is 3.4” long, so you will need to stitch it out 4 times to fit around a quart mason jar.
(Click Image to Enlarge)
Step 12:
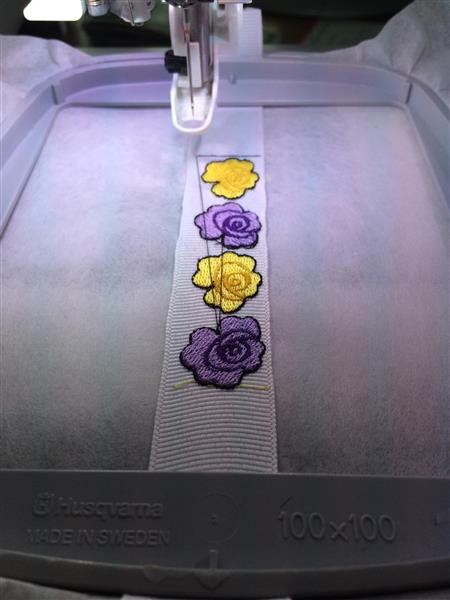
Remember that the first and last colors are the marking stitches, so you can stitch them out in whatever color you wish. Stitch out the design using the 5 colors that you picked out for flowers on the ribbon. Make sure that you cut the jump stitches in between color changes.
(Click Image to Enlarge)
Step 13:
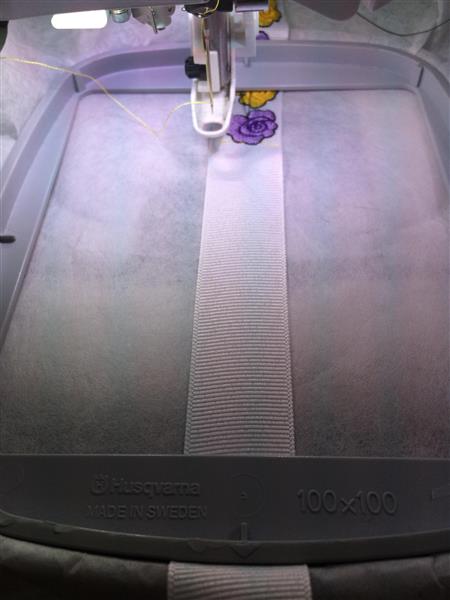
Un-hoop the ribbon and place the bottom part of the hoop back onto your machine. Move the stabilizer and ribbon away from you. Place the ribbon on top of the stabilizer and line up the right side of the marking line with the needle for stitch #1. Make sure the middle of the ribbon lines up with the middle of your hoop vertically. Tighten the hoop either on or off your machine.
(Click Image to Enlarge)
Step 14:
Stitch out the design and repeat 2 more times.
(Click Image to Enlarge)
Step 15:
Remove the stabilizer from the back and any stray threads. Glue the ribbon to the jar using the hot glue gun. Add your flowers and you are finished!
I've been sewing and making clothes from the age of 16 and started machine embroidering 8 years ago. I try to keep up with the latest embroidery trends by attending many classes at my local embroidery shop and just started learning how to quilt. I love to embroider on everything!