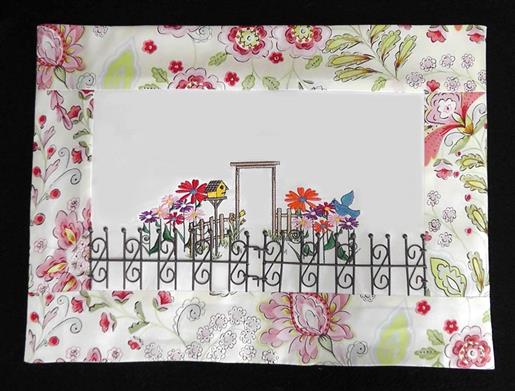
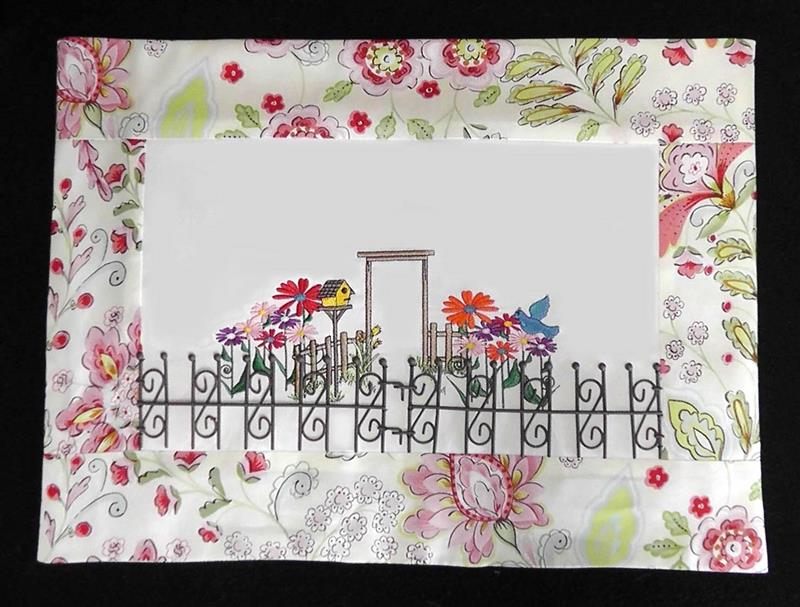
A charming wall hanging can be created using colorful “May Flowers” design combined with a “Fence and Birdhouse” embroidery design accented with a miniature faux iron fence.
The use of a “wrought iron” fence gave a genuine “Garden Gate” look to this project. General instructions will be given because the finished size of the project will depend upon the fence that is purchased. The fence should define the area for the embroidery and then borders added beyond that. Software was used to set up the designs so they could all be stitched in one hoop. If you don’t have software, just stitch the “May Flowers” on the left side behind the fence first, then the “Fence and Birdhouse” design centered, and the remaining “May Flowers” on the right side of the fence. For this project the “Fence and Birdhouse” design was enlarged. Scale the designs as needed for the hoop size available.
Step 1:
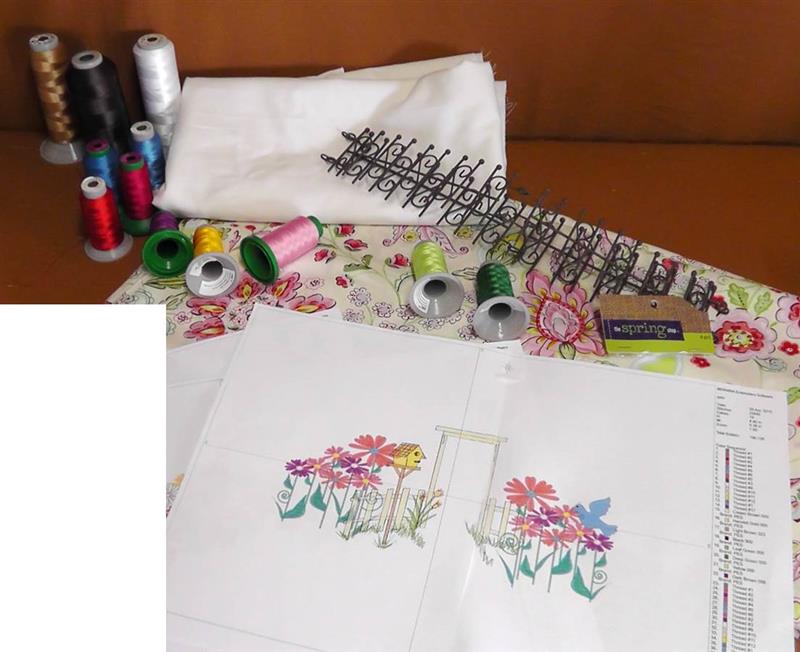
Gather the supplies and read through the instructions before beginning. The wrought iron fence is a fence that is normally used in miniature crafting. This particular fence has four sections to it; only two will be used. Choose thread colors to coordinate the flowers to be sewn with the colors that are in the floral fabric. The amount of fabric that needs to be purchased will depend upon the length of the fence to be used, the final size of the embroidery, and the size of the borders you choose to use.
(Click Image to Enlarge)
Step 2:
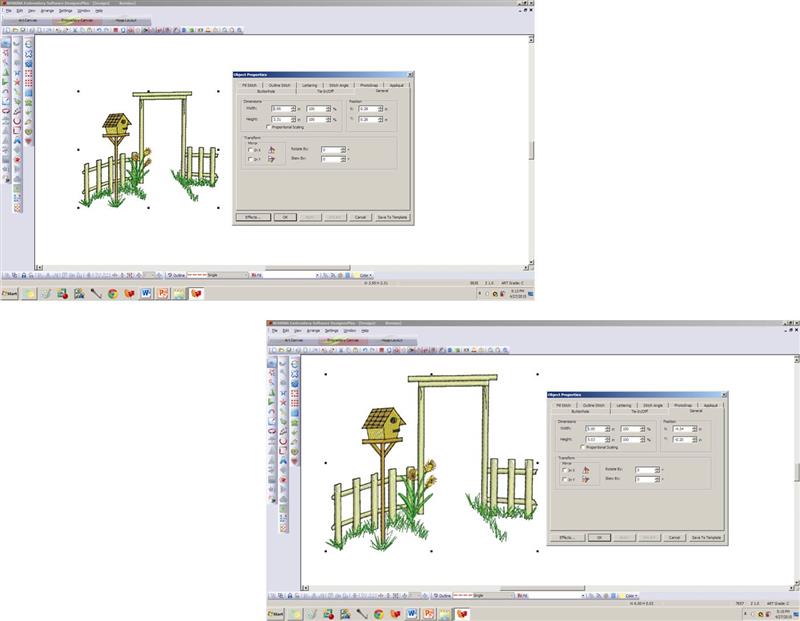
In software, import the design “Fence and Birdhouse”. Check the size. If your hoop will accommodate a larger design, increase the size of the design 25% and save as “Fence and Birdhouse Enlarged”. Test stitch the design.
(Click Image to Enlarge)
Step 3:
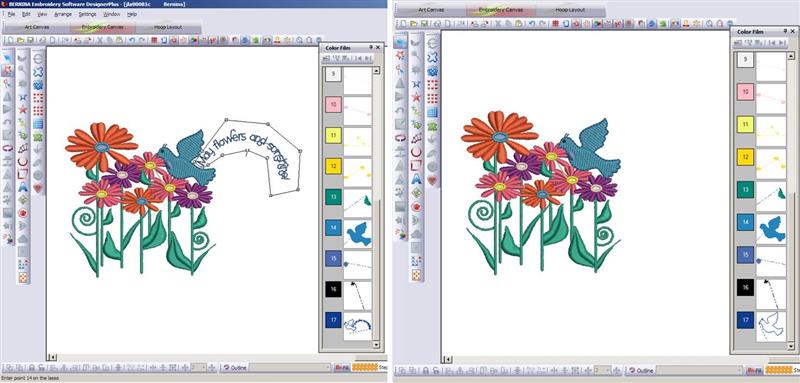
Start a new file. Import “May Flowers” design. Select the text and delete it. Save the file as “Flowers Right”.
(Click Image to Enlarge)
Step 4:
Start a new file. Select the bird and delete it. Save the file as “Flowers Left”.
(Click Image to Enlarge)
Step 5:
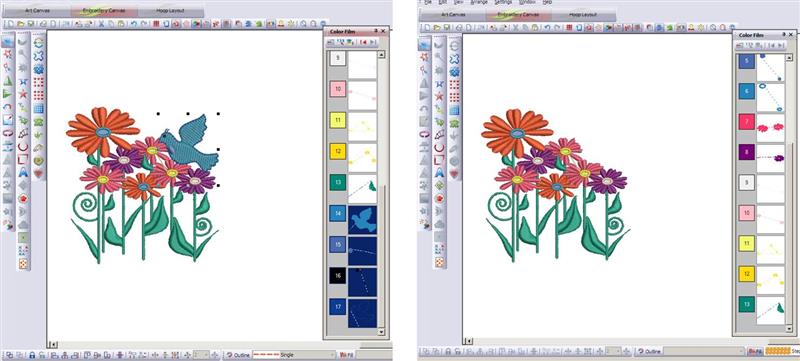
Now that the design files are set up it is time to set up the file for stitching. Start a new file. Import “Flowers Left”. With the design selected, mirror it horizontally. Import “Fence and Birdhouse Enlarged”. Position the design so that the end rail on the left is between two flower stems on the right of the flowers. The design should sit slightly down from the baseline of the flowers so it looks like the flowers sit behind the fence.
(Click Image to Enlarge)
Step 6:
Import “Flowers Right”. Position them to the right side of the fence and slightly downward as shown. Select and move the designs to fit within the hoop and so they are pleasing to you. Print a copy of the design template.
(Click Image to Enlarge)
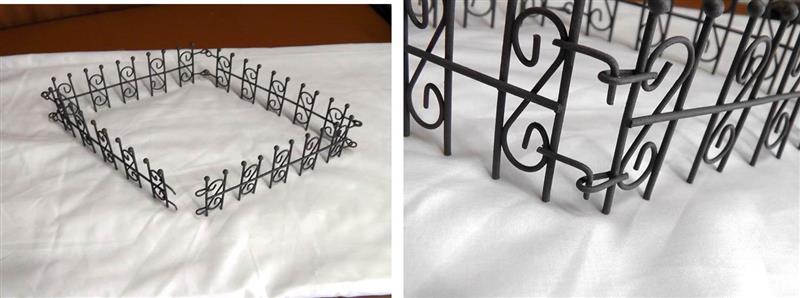
Step 7:
The miniature fence used for the project is in four sections and hooks together at one end which will be centered at the front of the embroidery aligned with the “Fence and Birdhouse” design.
(Click Image to Enlarge)
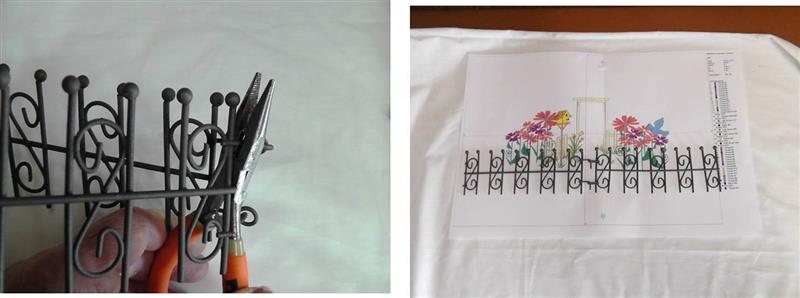
Step 8:
For the project, the two front sections were used. The remaining two sections were cut using the needle nose pliers, cutting next to the vertical piece. Lay the fence pieces to be used over the printed template. Adjust the design if necessary and then test sew it.
(Click Image to Enlarge)
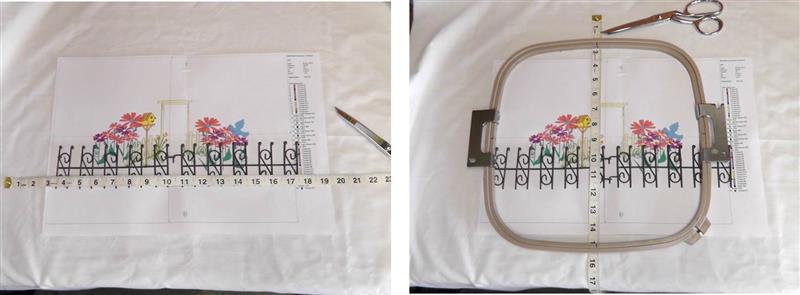
Step 9:
To cut the fabric, measure the width and length of the design/fence. Cut the fabric large enough so there are two inches all the way around the largest measurement.
(Click Image to Enlarge)
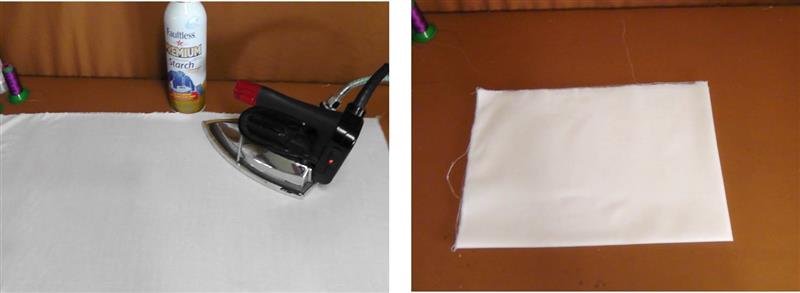
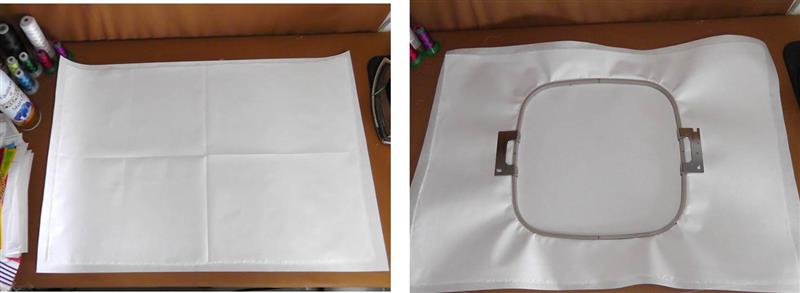
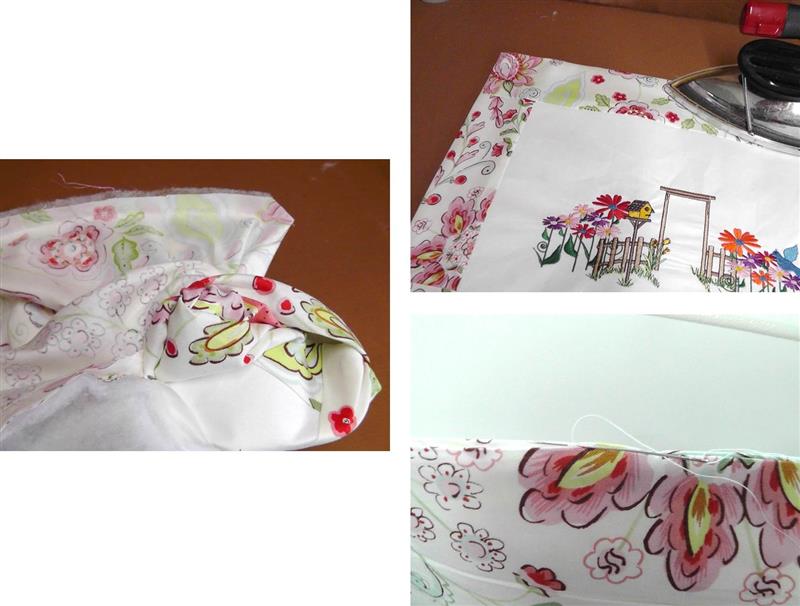
Step 10:
Starch and press the fabrics well. Quarter fold and lightly press the fabric to be embroidered to locate the center of the fabric. The fabric should be cut larger than needed for hooping and it will be cut down after the design is set up in the software and then embroidered.
(Click Image to Enlarge)
Step 11:
Hoop the pressed fabric with two layers of tearaway stabilizer.
(Click Image to Enlarge)
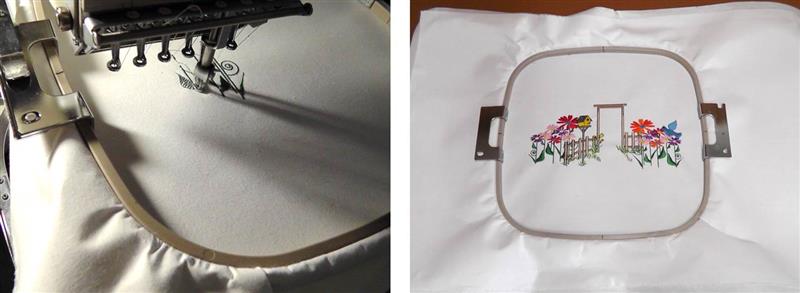
Step 12:
Load the design in the machine and stitch the design following the color sequence.
(Click Image to Enlarge)
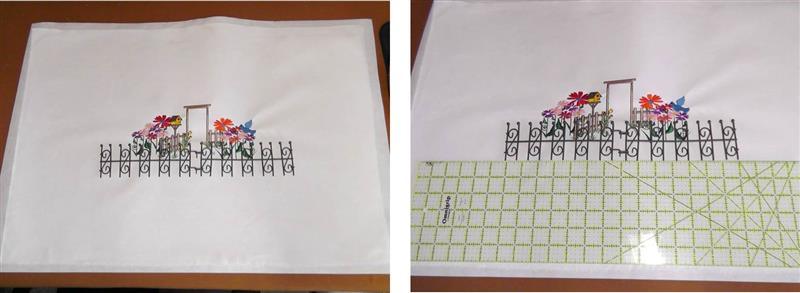
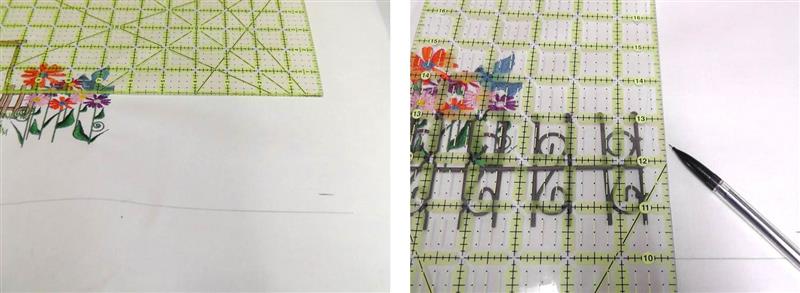
Step 13:
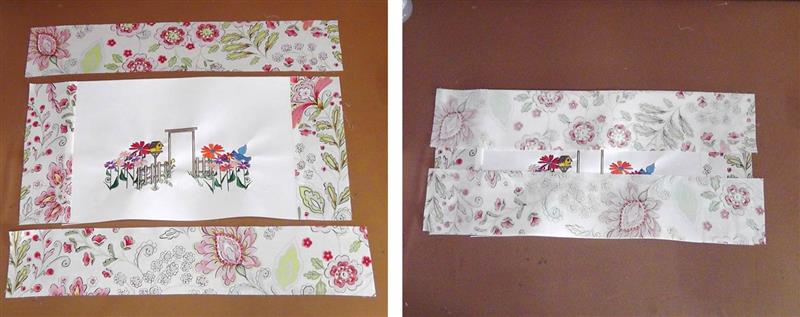
Remove the design from the hoop. Remove the excess stabilizer. Now it is time to cut down the fabric to the size needed. Use a long ruler to align the fence pieces in front of the embroidery to make it look like entry into a garden. For the project, the middle horizontal bar of the fence was aligned to the baseline of the flowers on the right, and the center of the fence pieces was aligned to the middle of the “Fence and Birdhouse” design as shown. Use your judgement and the type of fence you purchased to determine where it should be placed on your project.
(Click Image to Enlarge)
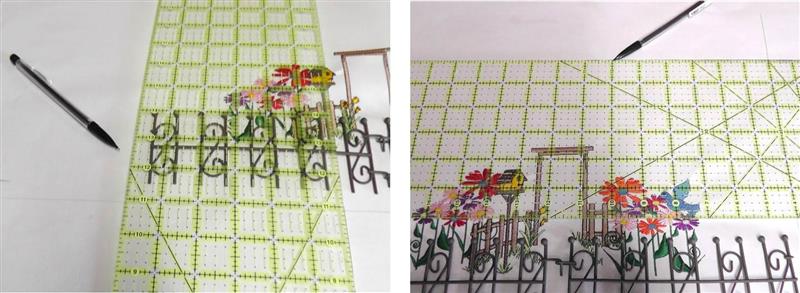
Step 14:
Draw a line ½” below the fence line - this will be the 1/2" seam allowance. Using the ruler, square up a line on the right side from the baseline drawn ½” outside of the righter most edge of the fence.
(Click Image to Enlarge)
Step 15:
Square a line from the baseline ½” outside of the outer most edge of the fence on the left side. For the top edge, square up a line 3 ½” beyond the upper most point of the embroidery.
(Click Image to Enlarge)
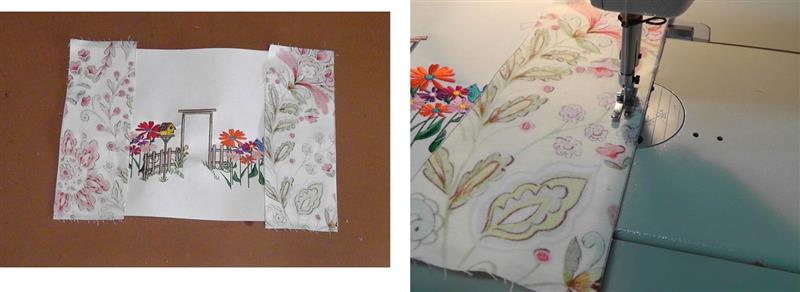
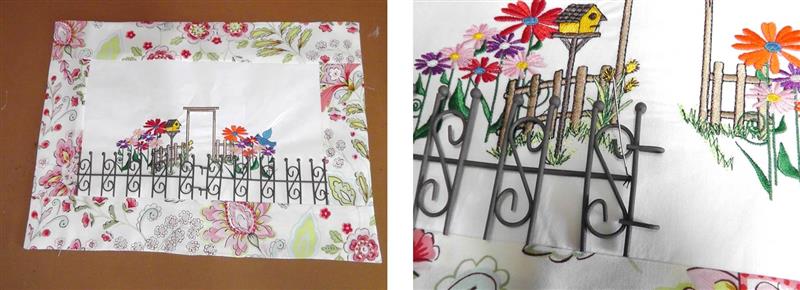
Step 16:
The squared lines should look like this. Cut along the drawn lines. Cut fabric for left and right borders. For the project, the borders were cut 3” wide, plus ½” seam allowances. For the project, the borders were cut longer than needed then cut down to fit after they were stitched on.
(Click Image to Enlarge)
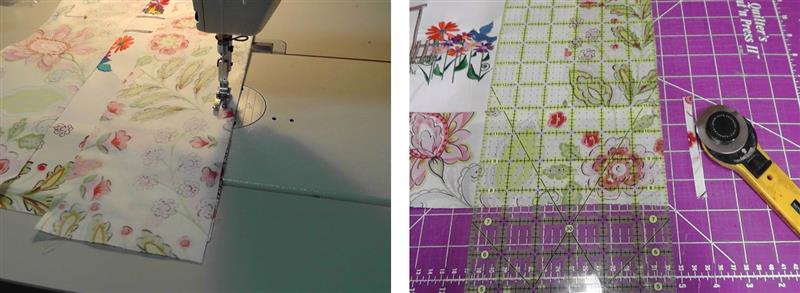
Step 17:
Place the left and right borders right sides together with the embroidery. Stitch the borders on using a ½” seam allowance.
(Click Image to Enlarge)
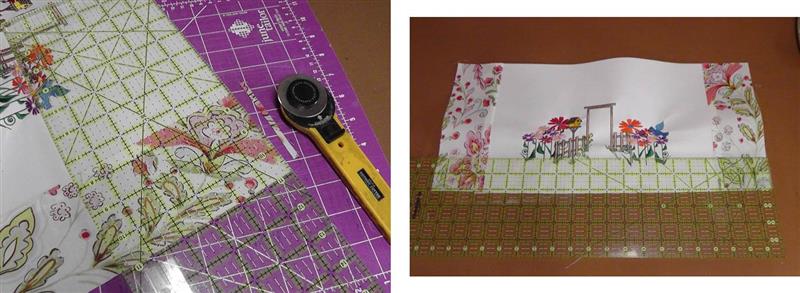
Step 18:
If needed, even the edge of the borders with the top and bottom of the embroidered fabric. Measure the width of the fabric needed for the top and bottom borders.
(Click Image to Enlarge)
Step 19:
Cut the fabric the length needed by the width plus ½” seam allowances all around. Place the top and bottom borders right sides together over the embroidered piece.
(Click Image to Enlarge)
Step 20:
Sew the top and bottom borders on using ½” seam allowances and then trim off any excess fabric.
(Click Image to Enlarge)
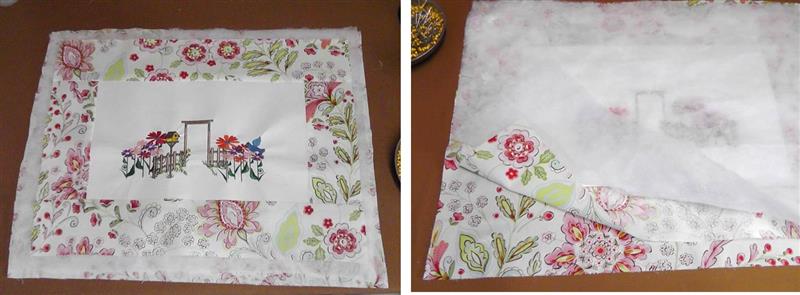
Step 21:
Press the borders in place. Cut a piece of backing fabric the same size as the top. Place the backing fabric right side up on a flat surface, then place the embroidered top right side down on top of the backing; place the batting on top.
(Click Image to Enlarge)
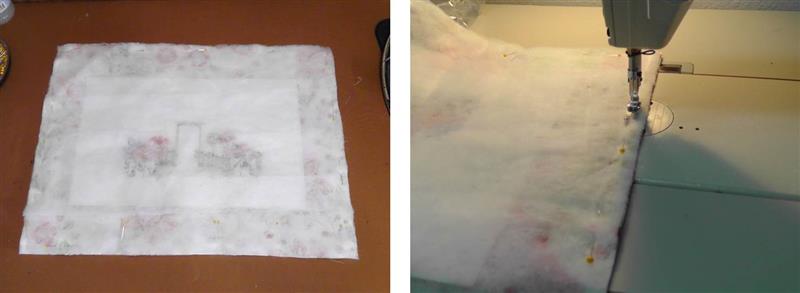
Step 22:
Pin the three layers together. Sew along all edges using a ½” seam allowance. Leave an opening at the bottom for turning.
(Click Image to Enlarge)
Step 23:
Turn the project right side out through the opening. Press the outside edges well. Fold in the seam allowances at the opening and hand stitch in place. Do any quilting desired. For the project, stitching in the ditch was done around the border.
(Click Image to Enlarge)
Step 24:
Align the fence piece in place. The bottom of the fence should be at the top of the lower border and the ends of the fence should meet the side borders. With matching thread, hand sew bar tacks at strategic points to hold the fence pieces in place. Use your favorite method of creating loops or a sleeve to hang the project on the wall.
(Click Image to Enlarge)
Step 25:
Congratulations on creating the “Garden Gate” wall hanging.
Ramona Baird has been in the embroidery industry for over 23 years. She and her husband owned a commercial and retail embroidery store in Arizona for many years. She is an experienced digitizer having been mentored by award-winners Pat Williams and Lindee Goodall. Ramona is a contributor to “Creative Machine Embroidery” magazine having 5 covers to her credit. Ramona has worked for Wilcom America and served many years as Education Director for the American Sewing Guild. With a degree in fashion design, she is able to design and execute patterns which Pat Williams says are “out of the box” in creativity and application. Ramona likes to challenge the boundaries of embroidery and bring new and exciting designs, ideas, and projects to EmbroideryDesigns.com. She wants embroiderers of all levels to increase their skills and enjoyment in using their embroidery machine for gift-making and personal pleasure.