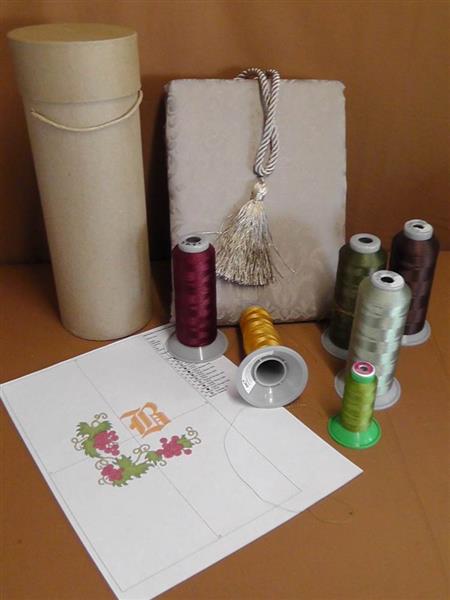
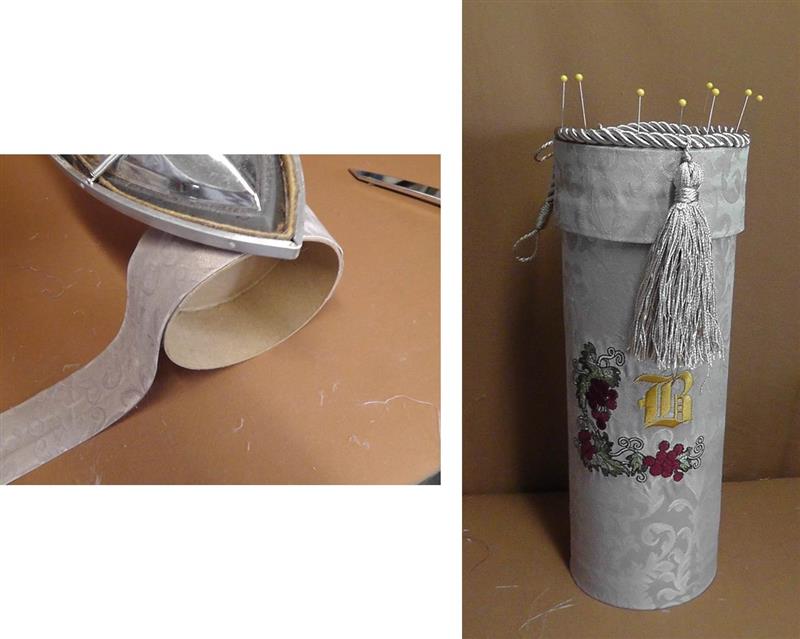
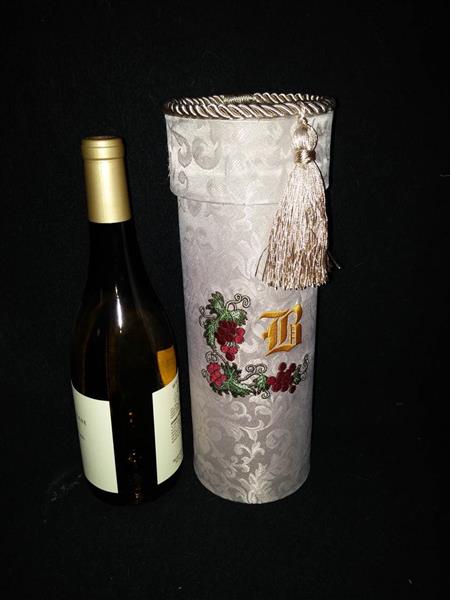
Damask fabric is cut to size and fused to a round wine box that has been monogrammed with an initial and “Grapevine Border” embroidery design. A matching tassel adorns the top ready to be placed on the bar or given with a good bottle of wine as a special hostess gift.
Step 1:
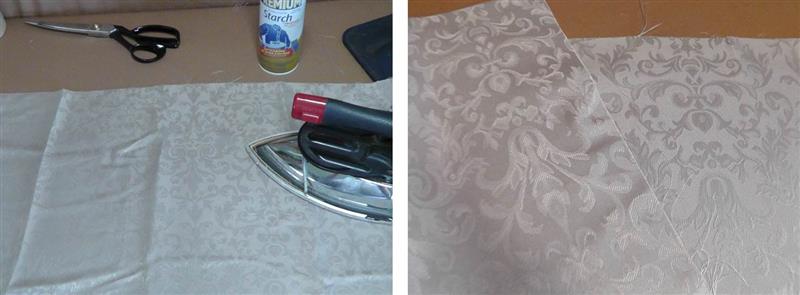
Gather the materials and read through the instructions before beginning. A drapery panel with a matching tassel was purchased as the fabric for this project. The round wine box may be purchased at a hobby and craft store such as Hobby Lobby or Michaels. Choose a thread color for the monogram that will accent the fabric and the “Grapevine Border” embroidery design.
(Click Image to Enlarge)
Step 2:
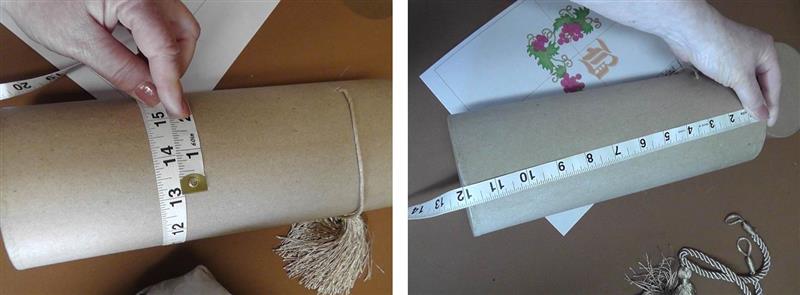
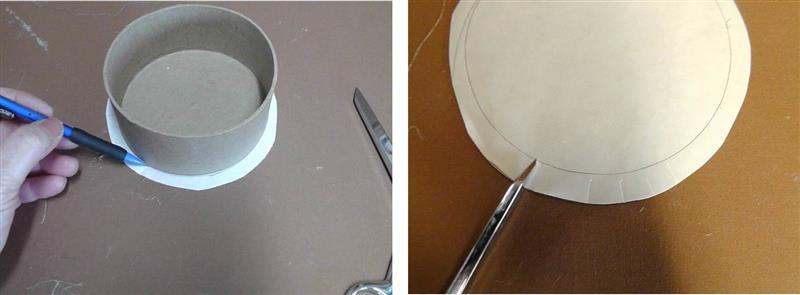
Measure the circumference and length of the bottom portion of the wine box to determine how large to cut the fabric to be embroidered.
(Click Image to Enlarge)
Step 3:
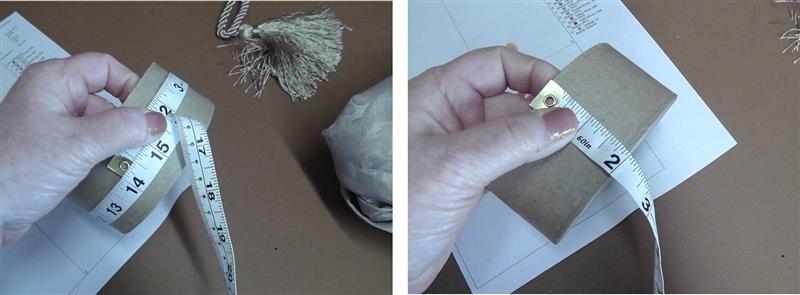
Measure the circumference and depth of the lid for the wine box.
(Click Image to Enlarge)
Step 4:
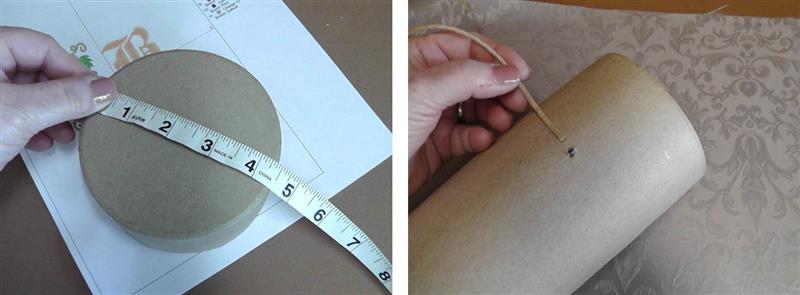
Measure the diameter of the wine box lid and remove the handle if there is one.
(Click Image to Enlarge)
Step 5:
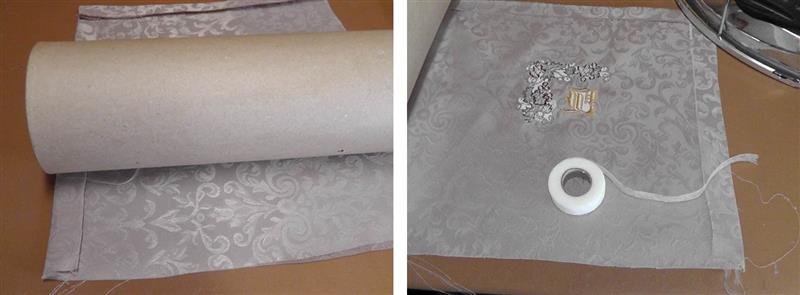
Use the measurements taken to cut the fabric for the bottom of the wine box. Allow 1” seam allowances all around and a generous overlap at the back (project fabric was cut 16” x 14”). If using damask fabric, determine which side is to be used as the outside of the fabric.
(Click Image to Enlarge)
Step 6:
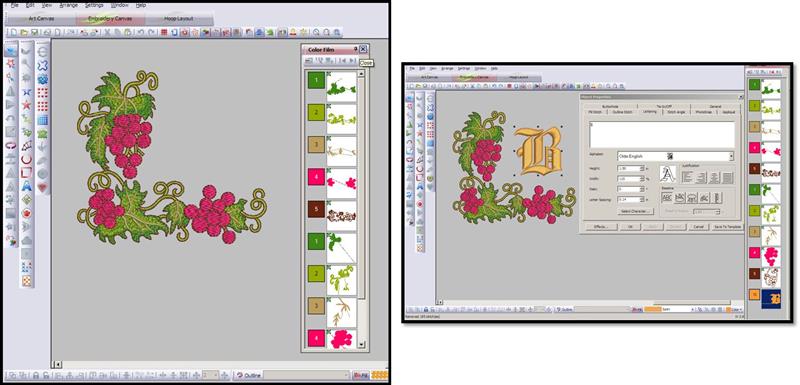
Option: use embroidery software to add an monogrammed initial in the “Grapevine Border” design. For the project, a 1.5” Old English monogrammed “B” was inserted into the design to be stitched last. In lieu of software, addition of the monogram may be done at the machine if desired. Print out a template of the entire embroidery design.
(Click Image to Enlarge)
Step 7:
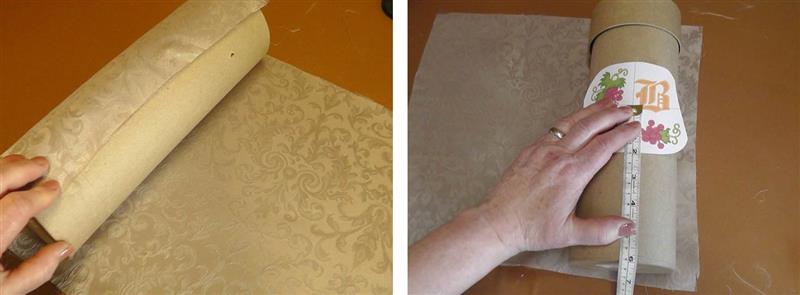
To determine placement of the embroidery design, generally wrap the fabric around the bottom of the wine box, allowing for the top and bottom seam allowances, then place the paper template at the position you think looks best for the box you purchased. For this project the design will be centered 6” up from the bottom of the wine box.
(Click Image to Enlarge)
Step 8:
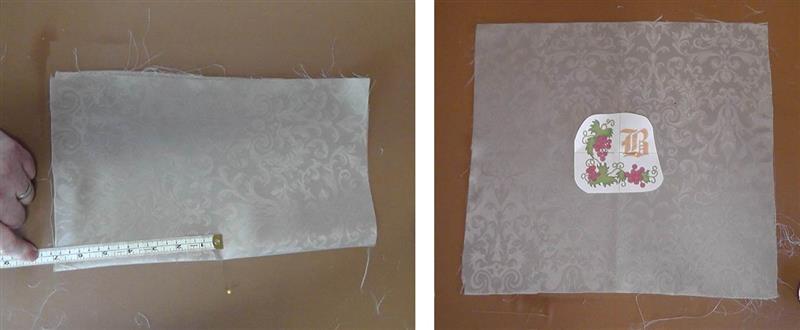
Fold the fabric in half along the height and measure up the distance desired plus the seam allowance (7” for the project); place a pin to mark the spot. Open the fabric and pin the paper template in place, centering it along the crease that marked the fold line
(Click Image to Enlarge)
Step 9:
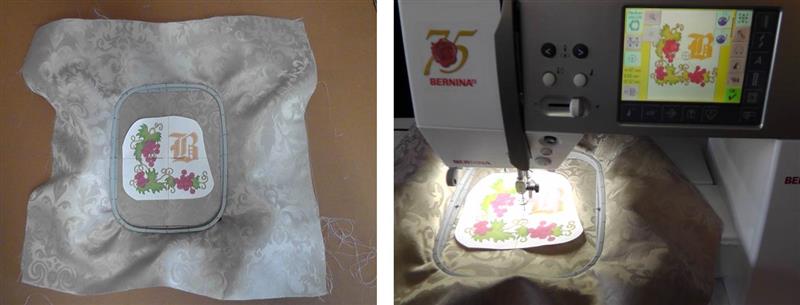
Hoop the fabric with one layer of tearaway stabilizer. Load the embroidery design on the machine and align the needle to the center of the design template.
(Click Image to Enlarge)
Step 10:
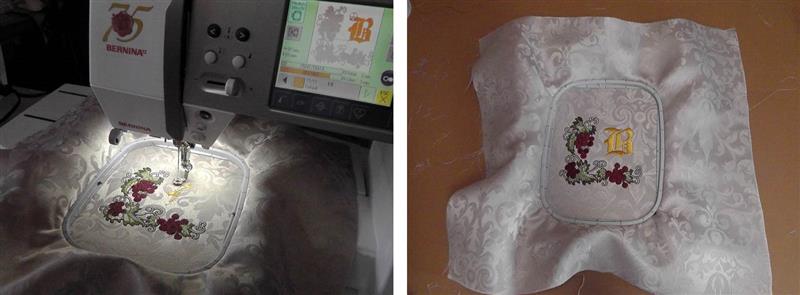
Stitch the design following the color sequence.
(Click Image to Enlarge)
Step 11:
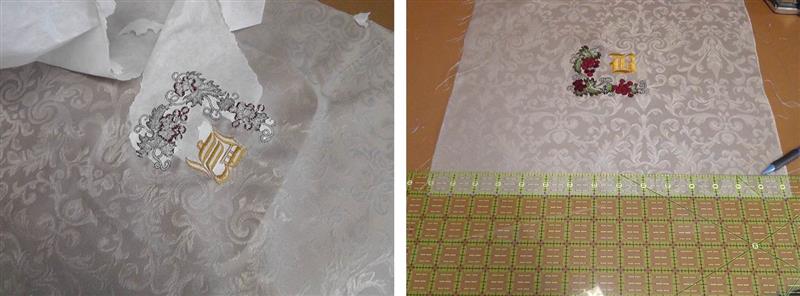
Remove the fabric from the hoop and remove the excess stabilizer. Mark along the bottom the 1” seam allowance.
(Click Image to Enlarge)
Step 12:
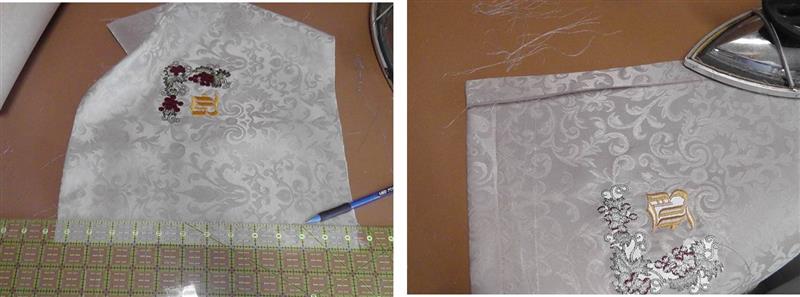
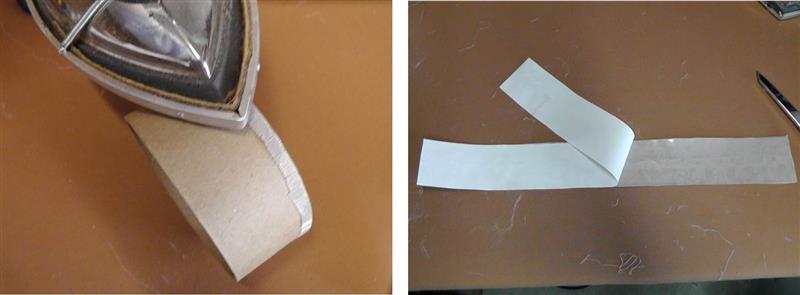
Repeat for the side to be folded at the back. Press both hems along the marked lines.
(Click Image to Enlarge)
Step 13:
Check the fabric to be sure it is accurate. To secure the hems, press the hems using fusible webbing. Just measure the amount needed, place under each hem, and press in place.
(Click Image to Enlarge)
Step 14:
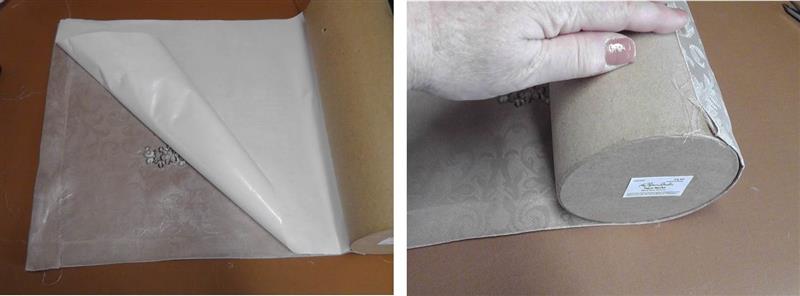
Now cut a piece of Heat ‘n Bond Lite the size of the fabric. Follow the manufacturer’s directions for pressing the product onto the back of the fabric. Let the product cool and then remove the protective paper.
(Click Image to Enlarge)
Step 15:
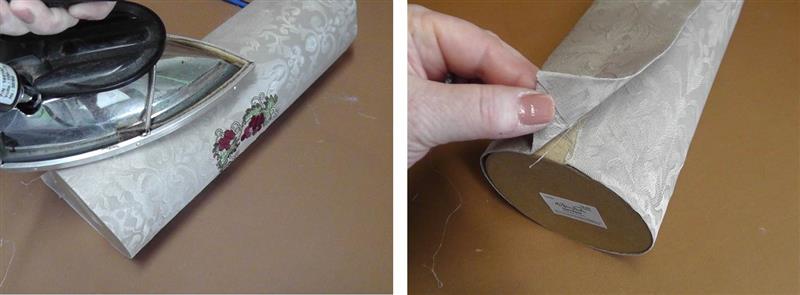
Carefully roll the fabric around the bottom of the wine box. The underlap will be the raw edge of the fabric and the bottom hem pressed up will be along the bottom edge of the box. Work from the embroidery design outward, pressing the fabric to adhere it to the wine box. Overlap the back hem edge over the raw edge and press in place clipping and mitering the bottom edge to eliminate excess bulk.
(Click Image to Enlarge)
Step 16:
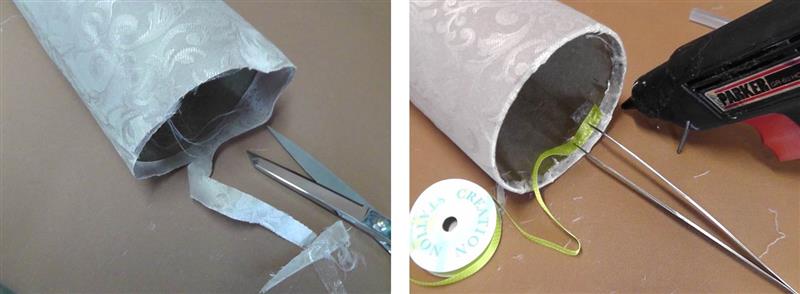
At the top, trim off the excess fabric to approximately 3/8”. Fold the raw edge over the top of the box toward the inside and hot glue in place. Hot glue the ribbon over the raw edge of the fabric. Tuck under the end to make it neat and secure in place with the hot glue.
(Click Image to Enlarge)
Step 17:
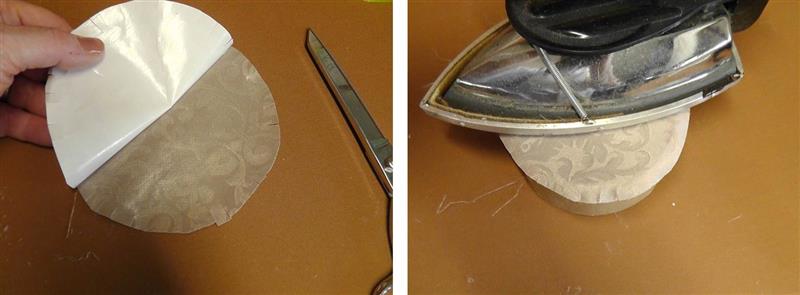
To cover the top of the wine box, cut a piece of fabric larger than the diameter of the box. Fuse the fabric with the Heat ‘n Bond. Do not remove the paper. Center the lid over the paper side of the Heat ‘n Bond. Draw around the lid with a pencil. Clip the fabric to the drawn line.
(Click Image to Enlarge)
Step 18:
Remove the paper from the fabric and center the fabric over the top of the lid and press in place.
(Click Image to Enlarge)
Step 19:
Wrap the clipped edges over the side and press in place. Cut a piece of fabric the width of the box lid plus seam allowances; fold and press the seam allowances to the inside.. Fuse the fabric with Heat ‘n bond. Press under one short raw edge about 1”.
(Click Image to Enlarge)
Step 20:
Beginning with the short raw edge, press and fuse the band around the side of the box lid. Be sure to keep the edges of the fabric aligned with the lid. The folded edge will cover the raw edge. Place the lid on the box aligning the folded fabric edges at the back. Determine the placement of the tassel and pin in place. Using the hot glue gun, remove pins one at a time and carefully glue the tassel to the lid. Allow the glue to cool and set up.
(Click Image to Enlarge)
Step 21:
Congratulations on completing the wine box. Place a good wine inside to enjoy with family or friends.
Ramona Baird has been in the embroidery industry for over 23 years. She and her husband owned a commercial and retail embroidery store in Arizona for many years. She is an experienced digitizer having been mentored by award-winners Pat Williams and Lindee Goodall. Ramona is a contributor to “Creative Machine Embroidery” magazine having 5 covers to her credit. Ramona has worked for Wilcom America and served many years as Education Director for the American Sewing Guild. With a degree in fashion design, she is able to design and execute patterns which Pat Williams says are “out of the box” in creativity and application. Ramona likes to challenge the boundaries of embroidery and bring new and exciting designs, ideas, and projects to EmbroideryDesigns.com. She wants embroiderers of all levels to increase their skills and enjoyment in using their embroidery machine for gift-making and personal pleasure.