Begin with a purchased table cloth and an embroidery thread color to match; stitch the designs and you will have a beautiful table cloth with the classic look of Damask.
Embroidery thread that closely matches table cloth color to create a tone-on-tone look when embroidered
Stabilizer appropriate for the fabric (two layers of tearaway were used for the center design and two layers of washaway tearaway were used for each single design)
Though this project is simple to stitch, it does take quite a bit of planning and time at the machine. The embroidery design in the center was set up in software and stitched in a large hoop. After the center design was stitched, the table cloth fabric was hooped in a small hoop at random locations rotating each single design and mirroring it every now and again. The placement could be exactly planned if you wish, but for this project everything was done randomly.
Step 1:
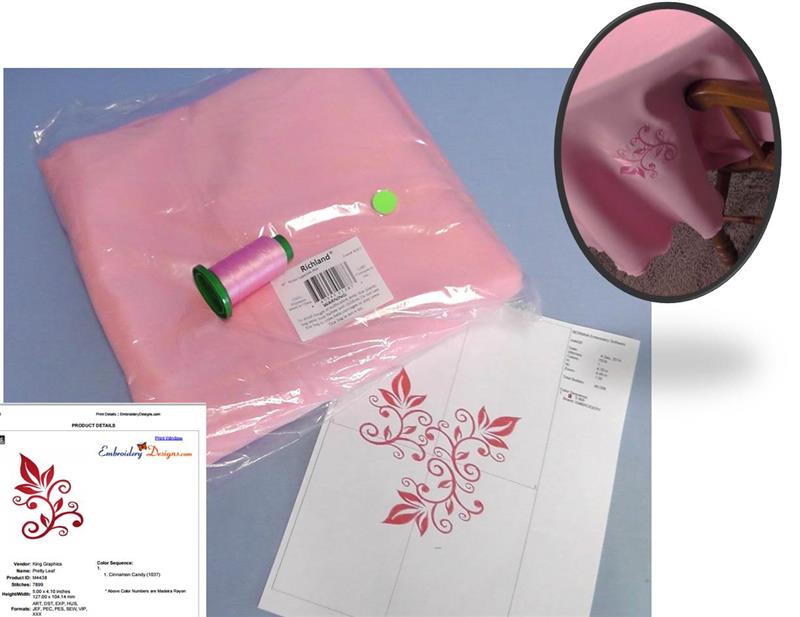
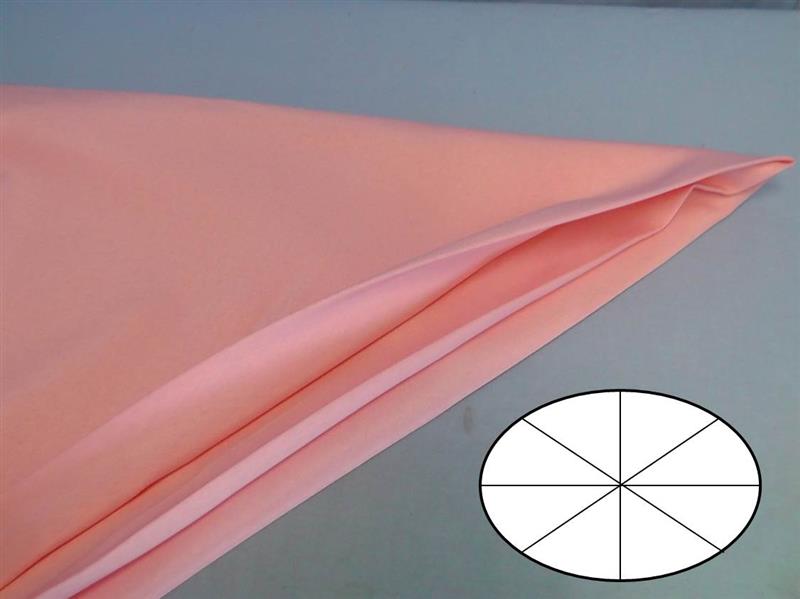
Gather the supplies and read through the instructions before beginning. Press the table cloth well with spray starch. Print out the paper templates of the designs. Choose a thread color that is close to the actual table cloth color so that when the designs are stitched they give a tone-on-tone look as shown in the inset photo.
(Click Image to Enlarge)
Step 2:
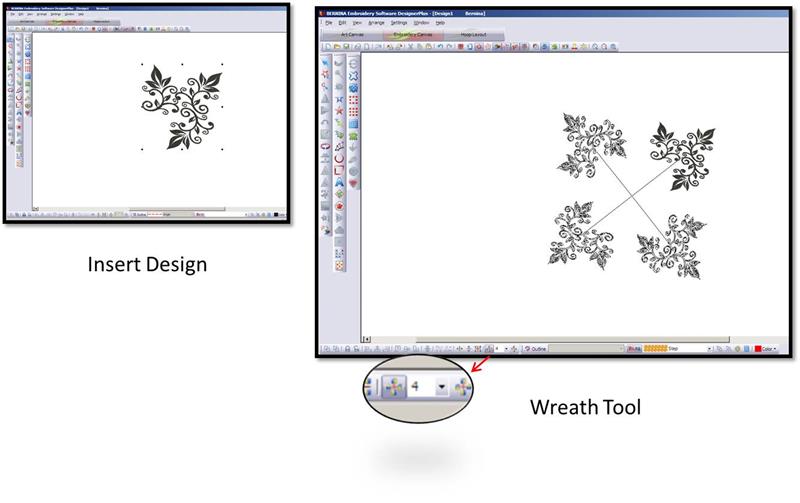
Open the embroidery software. Insert the “Pretty Leaves” embroidery design. Use the wreathing tool with a four count to display four of the “Pretty Leaves” designs on the screen.
(Click Image to Enlarge)
Step 3:
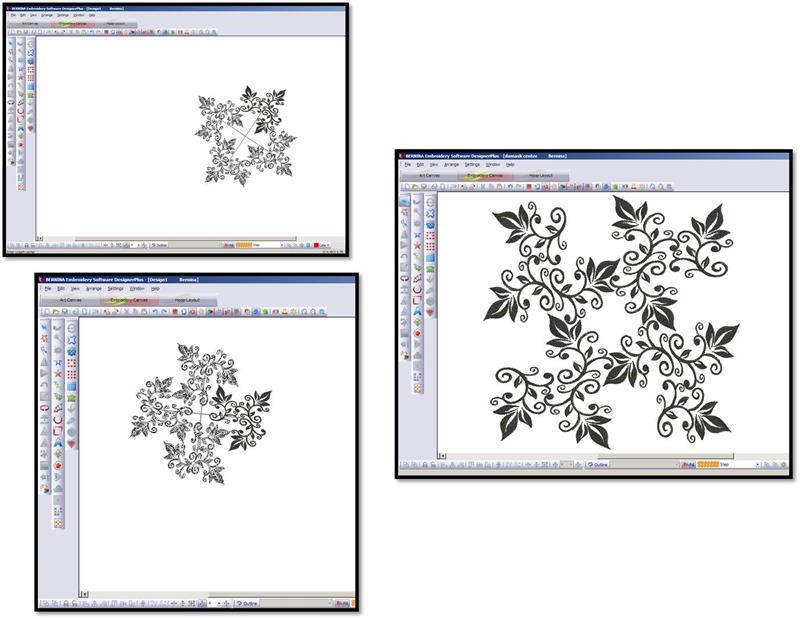
Use the mouse to move the designs around, in and out, and create a wreathed medallion as you’d like. It really is fun to play with these tools to see what kinds of designs may be created. The photo on the right was the final design. It does have a large stitch count. Check the design size to make sure it will fit within the largest hoop for the machine. This design ended up measuring 9.50” in height.
(Click Image to Enlarge)
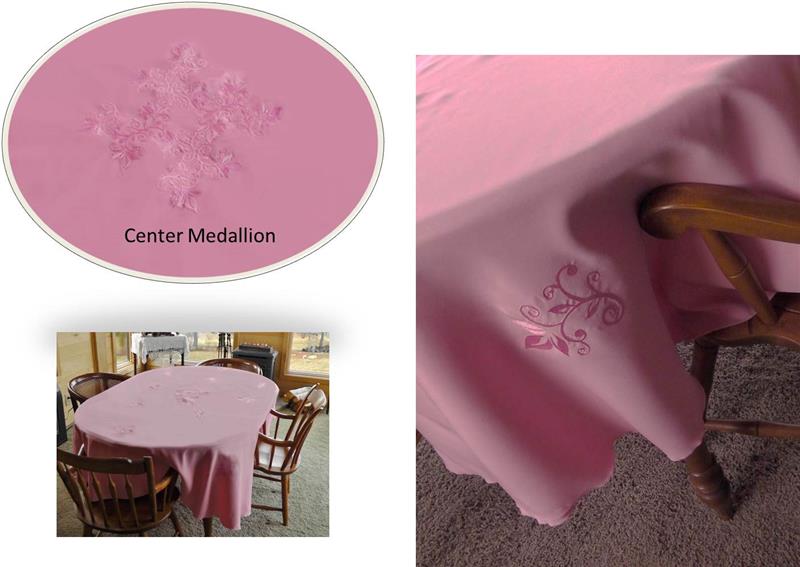
Step 4:
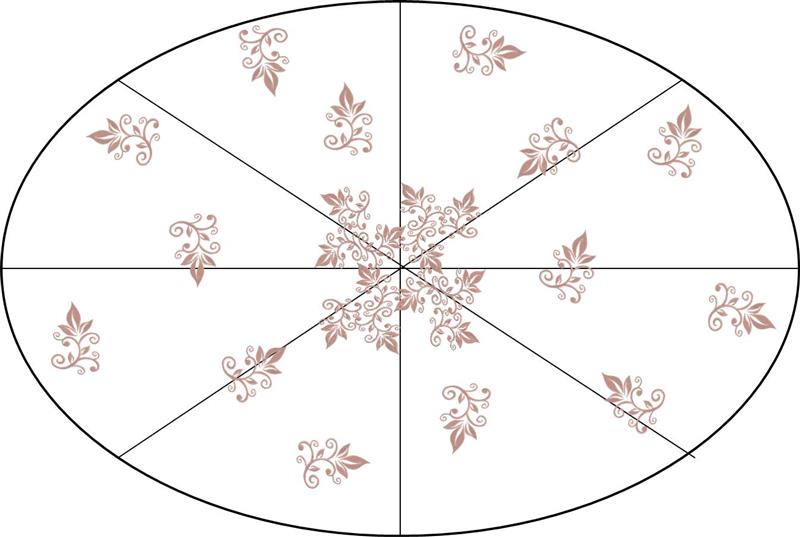
Here is a general layout of the designs. The tablecloth is a 90” oval for the project. Lines will be pressed in the fabric to aid in placement of the designs. When pressing, begin by folding lengthwise, then crosswise, then folding again to create the remaining lines. How you place the single designs is up to you. It can be done very randomly as was done for the project, or it can be planned so designs are mirrored in quadrants. It depends upon how much time you have and how fussy you’d like to get with the project.
(Click Image to Enlarge)
Step 5:
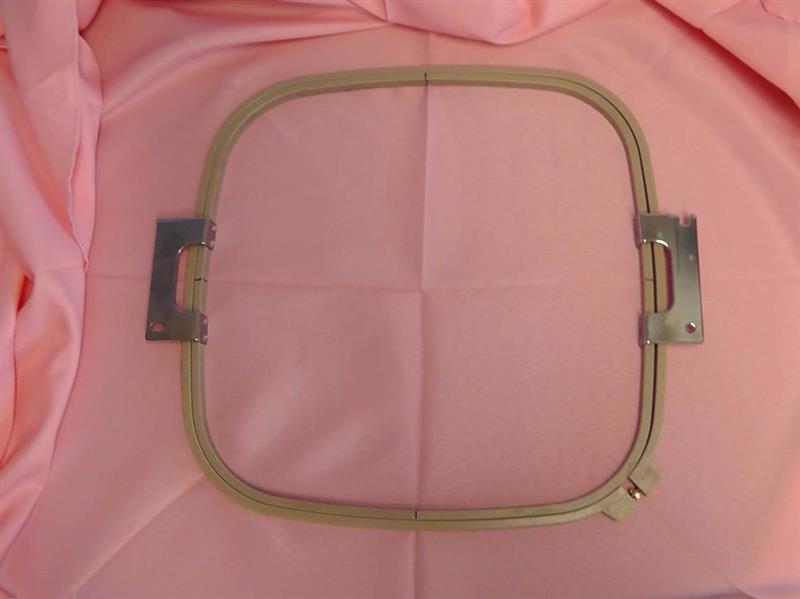
As was stated in Step 4, fold the tablecloth lengthwise, crosswise, and then into quadrants and press creases to aid in centering and aligning the designs.
(Click Image to Enlarge)
Step 6:
Begin by stitching the center medallion design created in the software. The center medallion will be hooped to align with the vertical and horizontal fold lines in the center of the tablecloth.
(Click Image to Enlarge)
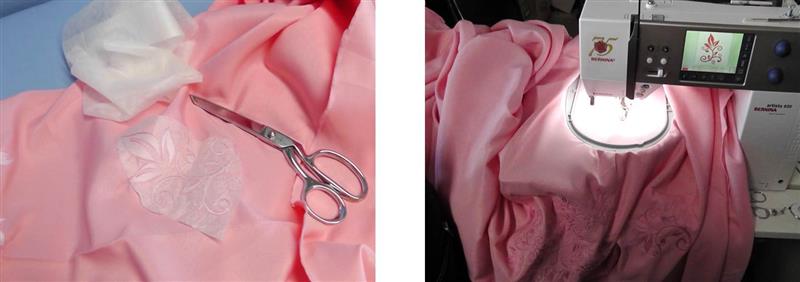
Step 7:
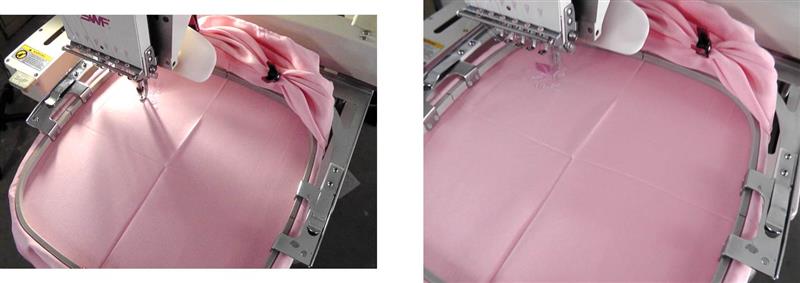
Take a rag and clean all around the machine before placing the fabric on the machine. You don’t want any oil or dirt getting onto the tablecloth from the machine. Hoop the fabric with the chosen stabilizer. For the project, two layers of tearaway stabilizer were used for the center medallion. Be sure to do a trace to make sure the design fits well within the hoop area. Also be sure to keep the excess fabric out of the way of the stitching field.
(Click Image to Enlarge)
Step 8:
Stitch the design. It is one color. I found slowing the machine way down for stitching helped prevent any excess pulling on the fabric. Remove the fabric from the hoop and remove as much of the stabilizer as possible.
(Click Image to Enlarge)
Step 9:
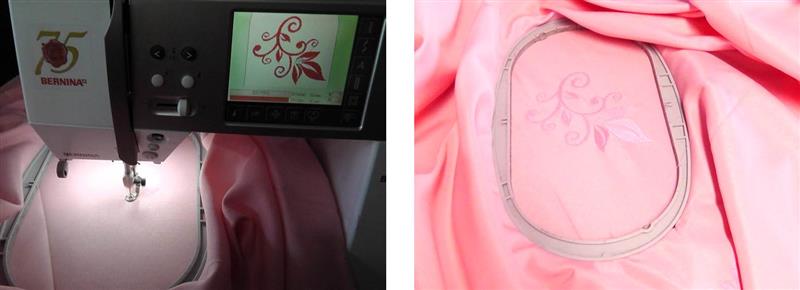
For the remaining stitching, the single “Pretty Leaf” design was used (again, the machine was slowed down due to the nature of the table cloth fabric). Measure and mark the placement as was planned in the beginning. Don’t forget to rotate and mirror the designs as they were planned.
(Click Image to Enlarge)
Step 10:
Hoop the fabric and stitch the designs. For the project, all the rotating and mirroring was done at the machine. Each design was hooped with two layers of a washaway tearaway type stabilizer. You should choose what is best for the fabric in your table cloth. Be very careful about the placement of the excess fabric around the arm of the embroidery module. Take your time and check to be sure there is no fabric underneath the hoop and that the fabric will not be caught anywhere around the arm of the module.
(Click Image to Enlarge)
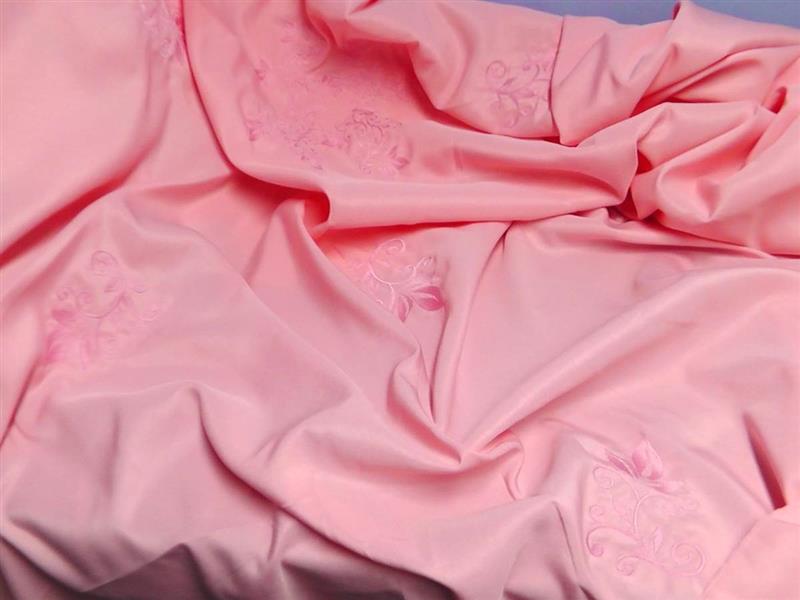
Step 11:
After each design is stitched, cut away the excess stabilizer; be careful not to clip into the table cloth fabric. Hoop the location of the next design to be stitched. Repeat the steps of hooping, mirroring, rotating, stitching and removing the excess stabilizer for each single design as it was planned in the layout.
(Click Image to Enlarge)
Step 12:
Double check to be sure all the locations have been stitched. Also at this point check to see if there are any areas on the fabric that may need pre-treating with a laundry product due to oil or any soil that may have accidently gotten on the tablecloth while working.
(Click Image to Enlarge)
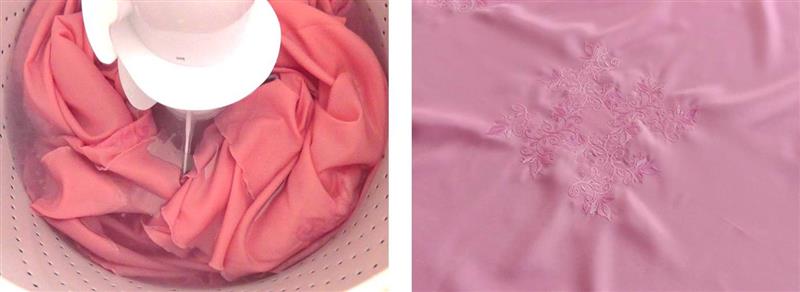
Step 13:
Pre-treat any soiled areas then gently wash the tablecloth to remove the remaining washaway tearaway stabilizer. Follow the manufacturer’s directions for washing and drying the table cloth. You may find that the cloth wrinkles around the designs and may need pressing after drying. Use spray sizing or spray starch and press as directed on the care instructions for the cloth.
(Click Image to Enlarge)
Step 14:
Congratulations on creating a “Damask”-like table cloth. Create several in different colors with matching threads for every season. These types of designs give a classic look to any table.
Ramona Baird has been in the embroidery industry for over 23 years. She and her husband owned a commercial and retail embroidery store in Arizona for many years. She is an experienced digitizer having been mentored by award-winners Pat Williams and Lindee Goodall. Ramona is a contributor to “Creative Machine Embroidery” magazine having 5 covers to her credit. Ramona has worked for Wilcom America and served many years as Education Director for the American Sewing Guild. With a degree in fashion design, she is able to design and execute patterns which Pat Williams says are “out of the box” in creativity and application. Ramona likes to challenge the boundaries of embroidery and bring new and exciting designs, ideas, and projects to EmbroideryDesigns.com. She wants embroiderers of all levels to increase their skills and enjoyment in using their embroidery machine for gift-making and personal pleasure.