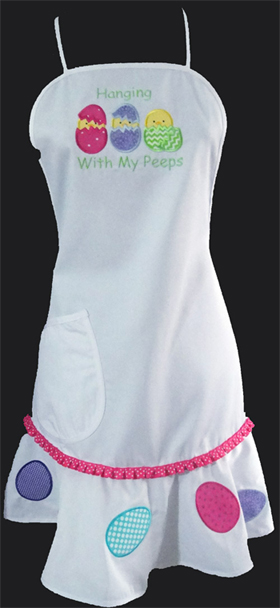
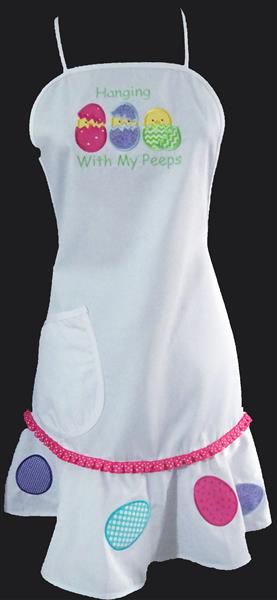
A cute apron for an informal Easter gathering is easy to stitch up with either pre-cut appliques or use the stitch and trim method. SVG, .FCM and .PDF cutting patterns are available for down load with these designs.
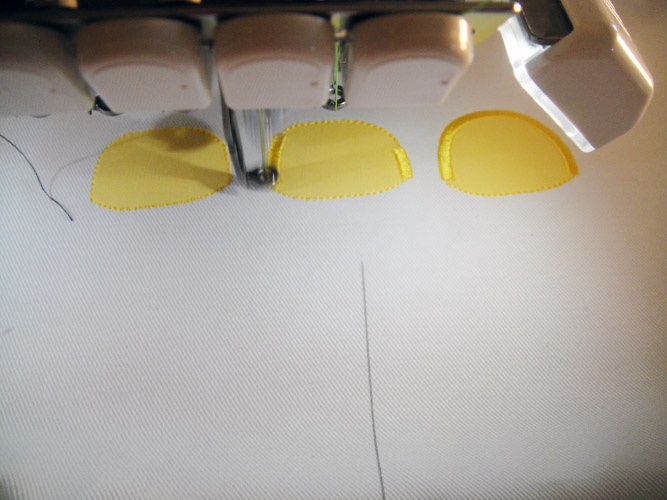
There are 9 appliques in the chest design of this apron. Therefore, the color chart lists numerous color changes. But do not let that deter you as the outlines, tack-downs and borders will all use the same color threads for each section. Each egg on the bottom flounce will only need one color too.
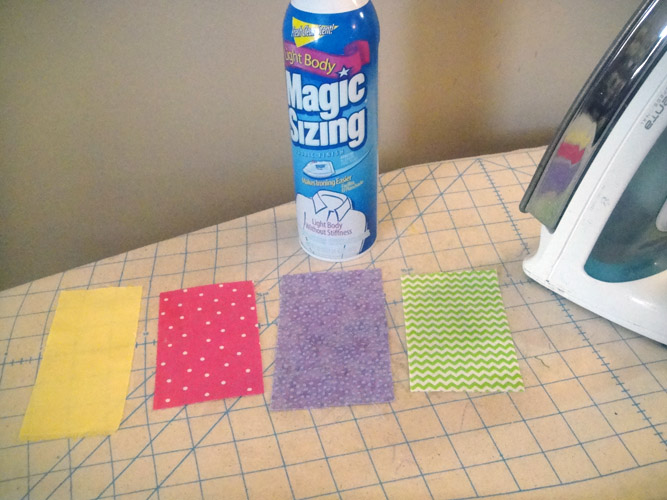
Step 1:
Spray and iron all fabrics with Magic Sizing or Best Press 4 times to make them extra crisp.
(Click Image to Enlarge)
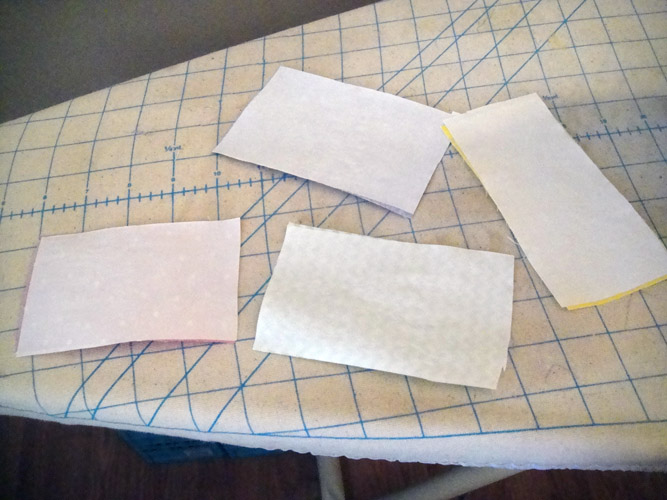
Step 2:
Cut pieces of Heat N Bond Lite to fit the back of each fabric and press to the back of the fabrics following the manufacturer’s instructions. If using the stitch and trim method skip to instruction Step 6.
(Click Image to Enlarge)
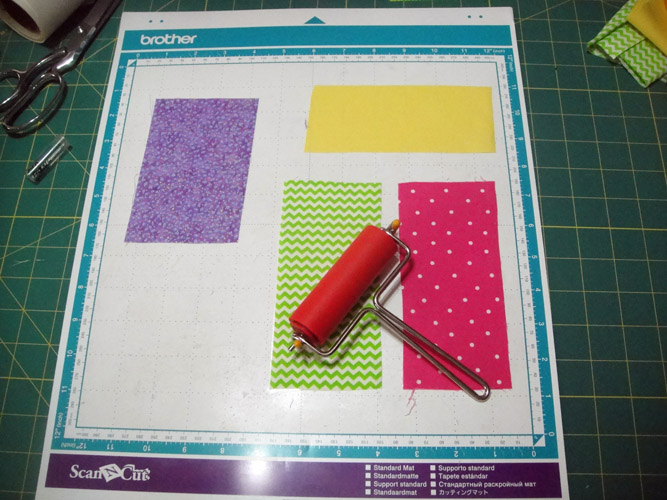
Step 3:
If using a Scan N Cut to precut the appliques; remove the paper backing from the soft yellow fabric 2 1/2” x 6” and the 3 assorted prints that are 3.4” x 4.5”; place the fabrics web side down on a standard mat. Roll each fabric with the brayer.
(Click Image to Enlarge)
Step 4:
If using the Scan N Cut load the ESAP01.SVG file onto your Scan N Cut. Scan in your fabrics and move the cutting outlines over each fabric.
(Click Image to Enlarge)
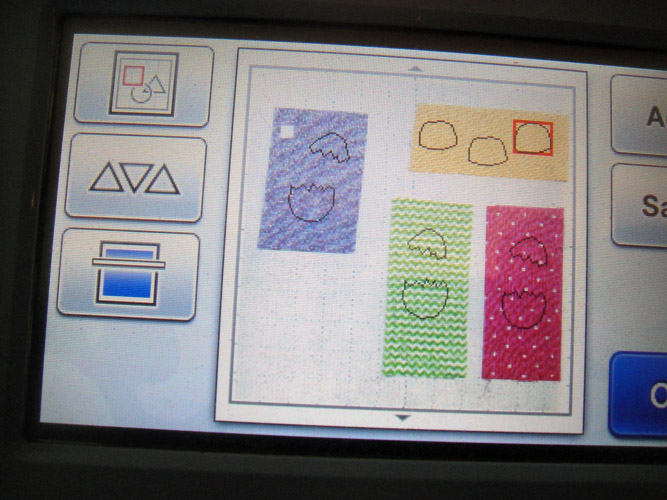
Step 5:
Your settings may vary depending on the age or your blade and the thickness of your fabrics. Settings of Speed 4, Pressure 4 and blade 4.5 were used in this project. Cut your pieces for the top appliques
(Click Image to Enlarge)
Step 6:
Load file ESAP02.SVG into your Scan N Cut, enter 6 repeats into the machine; load six fabrics that are 4” x 5” and cut six eggs. You will need a total of 7 eggs for the flounce, so repeat this step with one more fabric.
(Click Image to Enlarge)
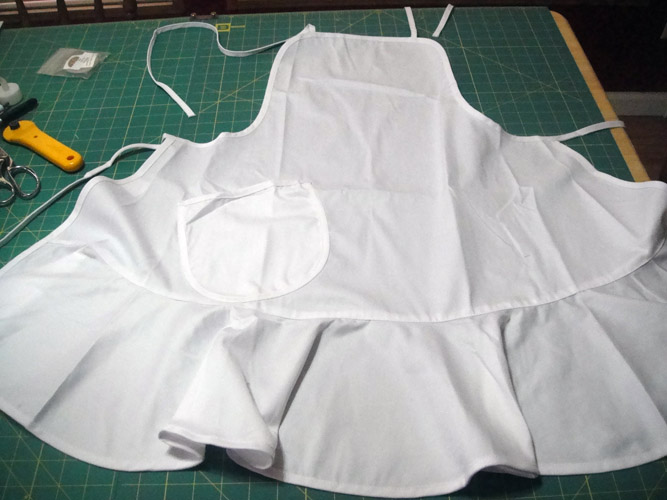
Step 7:
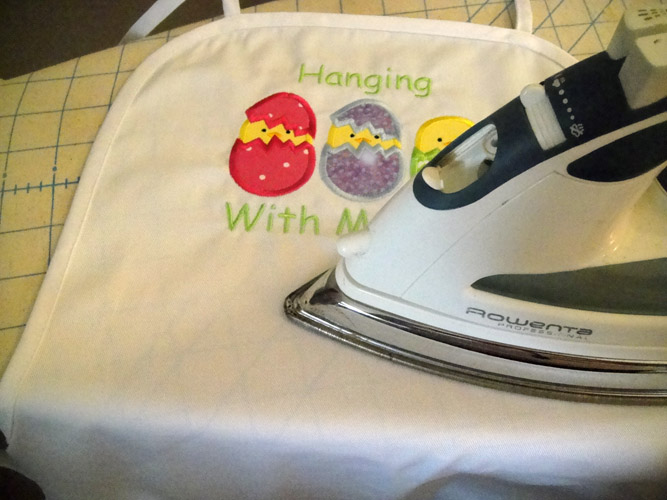
The apron is quite wrinkled when unwrapped from the package, iron the apron.
(Click Image to Enlarge)
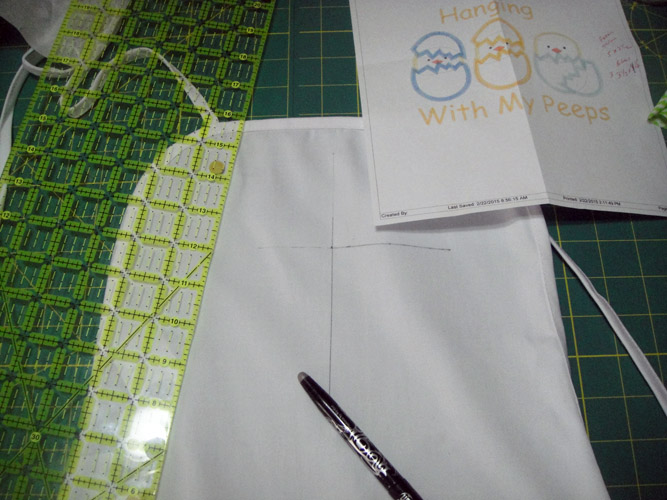
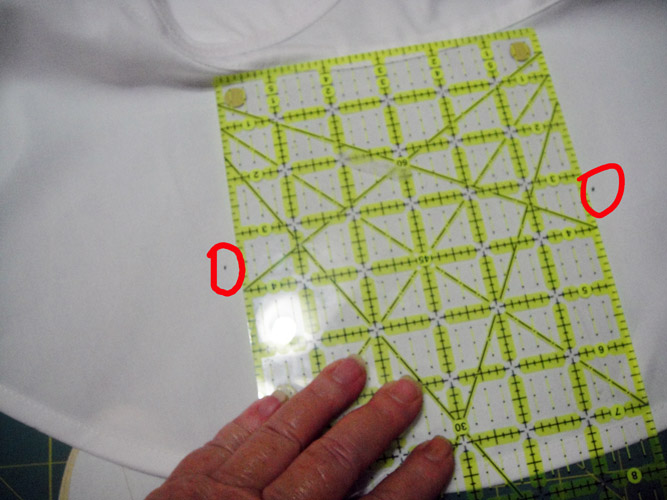
Step 8:
Mark a horizontal line about 4” from the top of the apron. Find the center of the apron vertically and mark with the Frixion heat removable pen.
(Click Image to Enlarge)
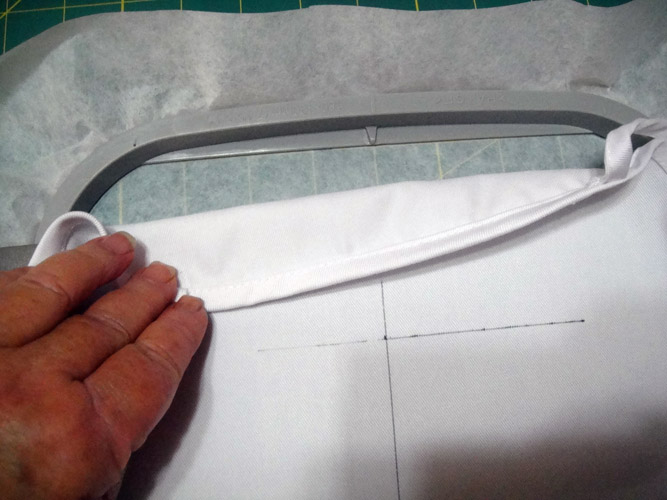
Step 9:
In a 5” x 7” hoop, hoop Wet n Stick stabilizer or hoop tear away stabilizer and spray the back of the apron with adhesive spray and place over the stabilizer aligning your horizontal and vertical marks with the mark on the hoop.
(Click Image to Enlarge)
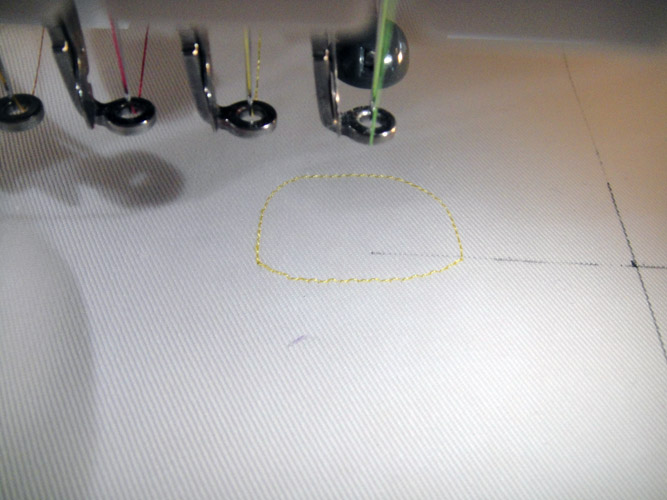
Step 10:
Load Lemon Yellow (1023) embroidery thread and use for the first 7 color stops. The first color stop will be an outline for the first chick’s head.
(Click Image to Enlarge)
Step 11:
If you have pre-cut your applique pieces, place the applique over the outline and press in place with an applique iron. Note: Two of the chicks heads are not as rounded on top the right hand chick’s head is rounded. Make sure you use the correct chick’s head. If you are using the stitch and trim method place the a 2 1/2 “ x 2” yellow fabric over the outline.
(Click Image to Enlarge)
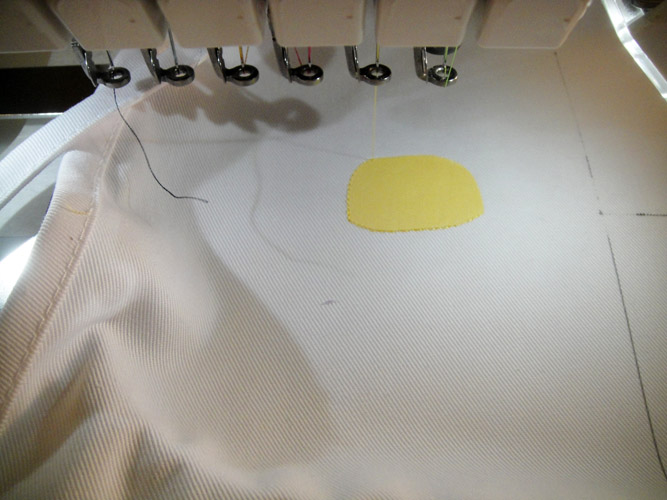
Step 12:
Color stop 2 is a tack down stitch. If you are using pre-cut appliques this should just skim the outside edge of your applique. If using stitch and trim, this is the tack down line; stitch and trim the applique shape.
(Click Image to Enlarge)
Step 13:
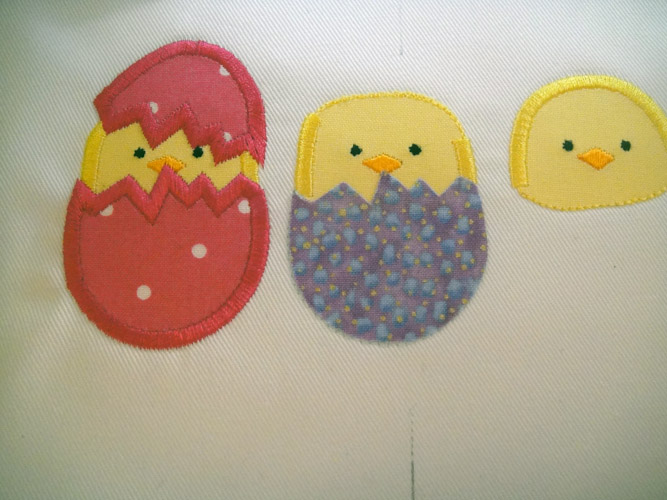
Color stop 3 and 4 are the outline and tack down for the second chick; color stop 5 and 6 are the outline and tack down for the 3rd chick. Apply all three appliques. Color stop 7 will stitch the borders on all three heads.
(Click Image to Enlarge)
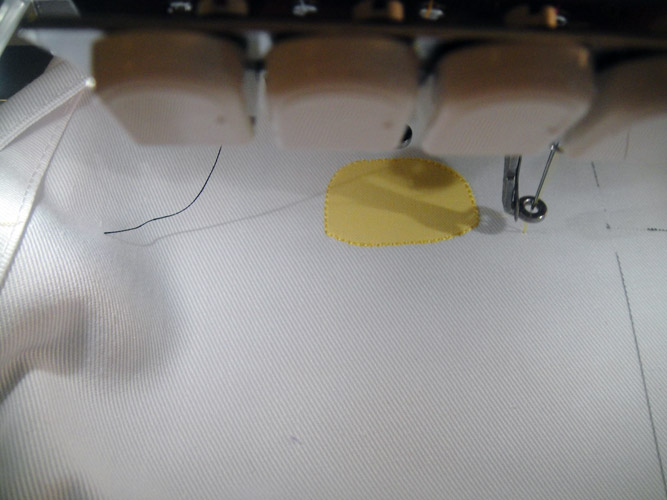
Step 14:
Stitch color stop 8 in Citrus Burst for the beaks and color stop 9 in black for the eyes.
(Click Image to Enlarge)
Step 15:
Stitch color stops 10 through 15 in a color thread to match the first egg; Fuchsia (1110) was used on the sample. Color stop 10 will stitch the outline for the first egg.
(Click Image to Enlarge)
Step 16:
Place the precut applique and press in place or place your egg fabric if using the stitch and trim method. Stitch color stop 11 to tack down the applique. Trim the applique of using the stitch and trim method.
(Click Image to Enlarge)
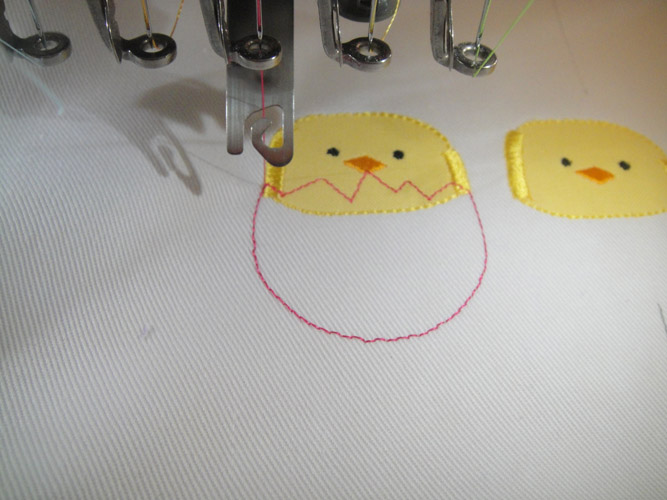
Step 17:
Color stop 12 will border the egg.
(Click Image to Enlarge)
Step 18:
Use color stops 13 through 15 to complete the applique of the top of the first shell
(Click Image to Enlarge)
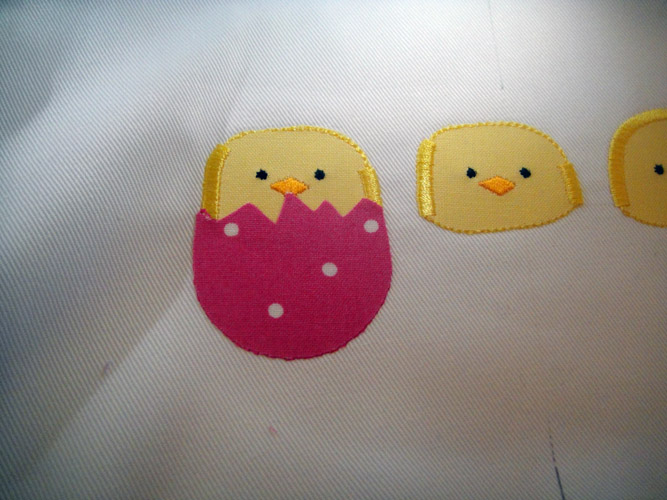
Step 19:
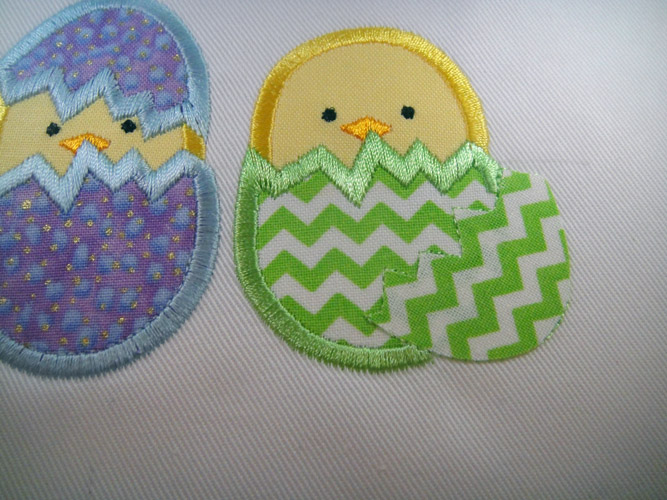
Use the same methods for color stops 16 through 21 using an embroidery thread to match your second egg; Summer Sky (1092) was used in the sample.
(Click Image to Enlarge)
Step 20:
Change the thread to a color to match the 3rd egg for colors stops 22 through 27 to applique the 3rd egg. Margarita Lime (1248) was used in the sample.
(Click Image to Enlarge)
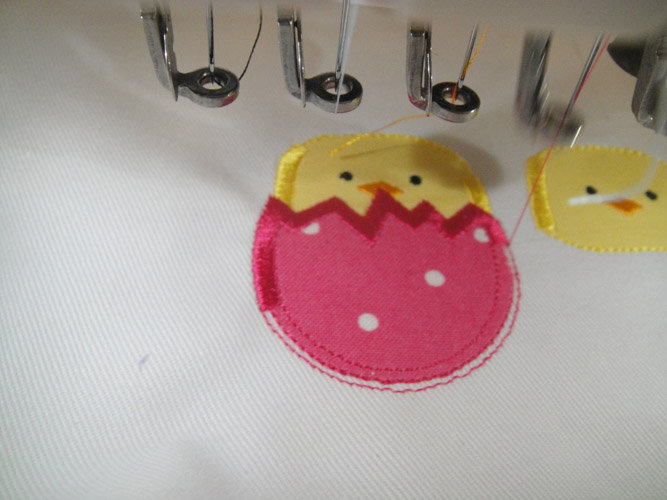
Step 21:
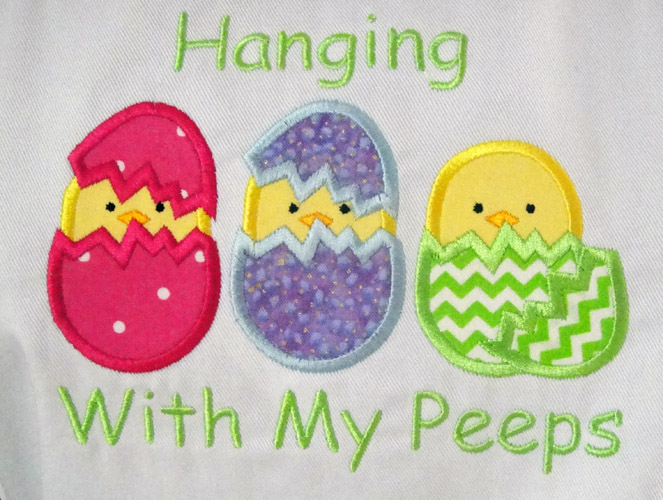
The final color stop #28 was also stitched in Margarita Lime (1248) to stitch the lettering but you may use any color you wish for the lettering.
(Click Image to Enlarge)
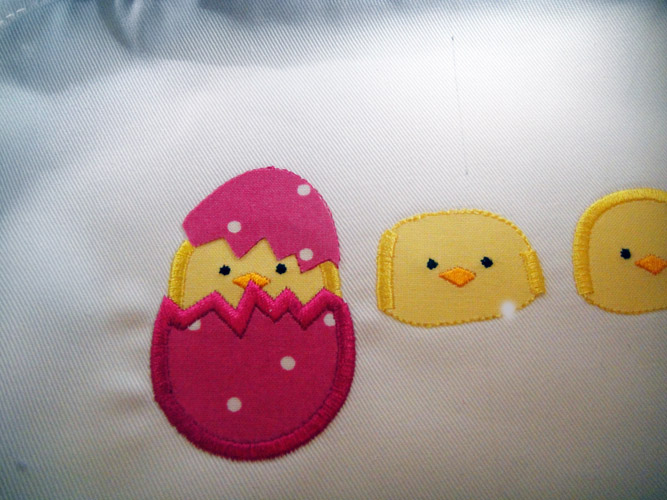
Step 22:
If using the stitch and trim method press the appliques to permanently fuse them to the apron.
(Click Image to Enlarge)
Step 23:
Measure and mark a dot in the center of the flounce; make 3 dots spaced 6” on each side of the center dot for the placement of the eggs on the apron.
(Click Image to Enlarge)
Step 24:
Audition your egg appliques over each dot placing each at a different angle.
(Click Image to Enlarge)
Step 25:
Place target stickers over each dot indicating with the arrow the direction you would like that egg to take.
(Click Image to Enlarge)
Step 26:
Hoop tear away backing and the apron flounce in a 4” x 4” hoop centering one of the target stickers.
(Click Image to Enlarge)
Step 27:
Load design ESAP02 into your embroidery machine; use the rotate functions of your machine to have the top of the egg point in the desired direction.
(Click Image to Enlarge)
Step 28:
Stitch all three color stops for applying the egg applique in one color to match the egg. Color stop one is an outline of the egg.
(Click Image to Enlarge)
Step 29:
If using precut appliques iron the applique fabric over the outline. If using the stitch and trim method spray your applique fabric with adhesive and place over the outline.
(Click Image to Enlarge)
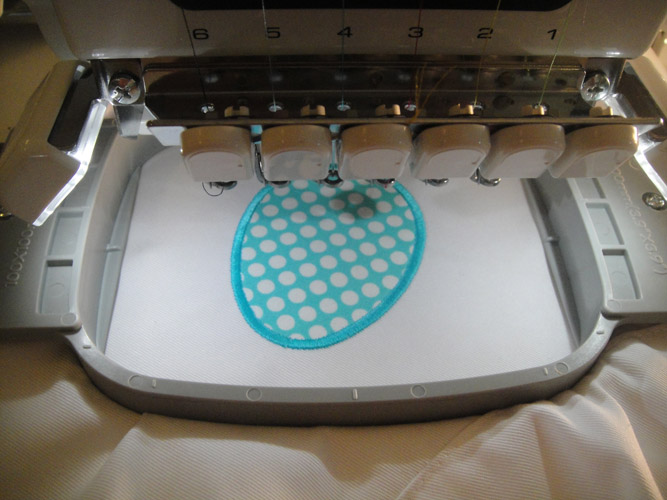
Step 30:
Color stop 2 is the tack down for the applique. If using the stitch and trim method trim the applique after the tack down stitch is sewn.
Step 31:
The 3rd color stop will complete the Easter egg. Repeat Steps 28 through 30 6 times to complete the eggs on the flounce.
(Click Image to Enlarge)
Step 32:
Remove the tear away backing from the backs of all the appliques.
Step 33:
(Click Image to Enlarge)
Stitch your ribbon trim on with a matching thread along the flounce seam line and your Hanging with My Peeps apron is complete!
Award winning Digitizer, Embroidery Educator, Author and a Consultant to the Industry, Pat Williams has 30 years of experience in the embroidery industry. Pat has won multiple awards for her digitizing expertise including the 2007 Impressions Awards Grand Championship, Best of Show as well as the 1st and 2nd Place Awards. Pat’s love of digitizing has afforded her the opportunity to write numerous articles for Impressions magazine in the United States and Images Magazine in Europe. In 2001 Pat was named “Embroidery Educator of the Year.” For many years Pat taught digitizing seminars at the ISS Shows in Long Beach, CA and for Compucon software. She now resides in Tucson, AZ.